But remember I said real world camera can use these view transforms as well? There are cases where you need to imporrt camera generated EXR and composit with rendered data as well.
Yeah stay away from luts I’d say. It’s so easy to colour grade and colour correct, that you’re doing your work a great disservice by relying on these automatic methods such as luts and filmic. All you do is bring down the levels until it’s all in range, adjust the gamma, add some contrast, bit of colour correction and effects and jobs a good one  ps, always rely on the scopes, it’s much easier than trying to find issues with the actual pixels.
1 Like
I advice checking out TCAMv2. They offer a neutral look by default along with chroma attenuation like Filmic and AgX, it sometimes require additional adjustment to look good as it is targeted towards pro colorists. Just feel the creative freedom, and you won’t want to go back to the “Standard” anymore.
Yes I dont like LUTS too , its better to stick to mathemetical conversions instead of pixel based LUTS so I usually use LUMETRI (without adding LUTS) to make my filmic render to look similar to SRGB and I find a middle way to have the asethetical benefits of both. But I still wish there are some LOOKS ( that are not pixel based or maybe by using OCIO functions or maybe LUTS that are not agressive and unnatural) to use in blender as alternative to those high contrast or very high contrast ones, because they are not enough.
Yes, I agree with that, TCAMv2 really looks more natural also feels like better whites, more differentiated details and dark values are darker if the comparasions in BA are right so it feels contrasty and details look better .
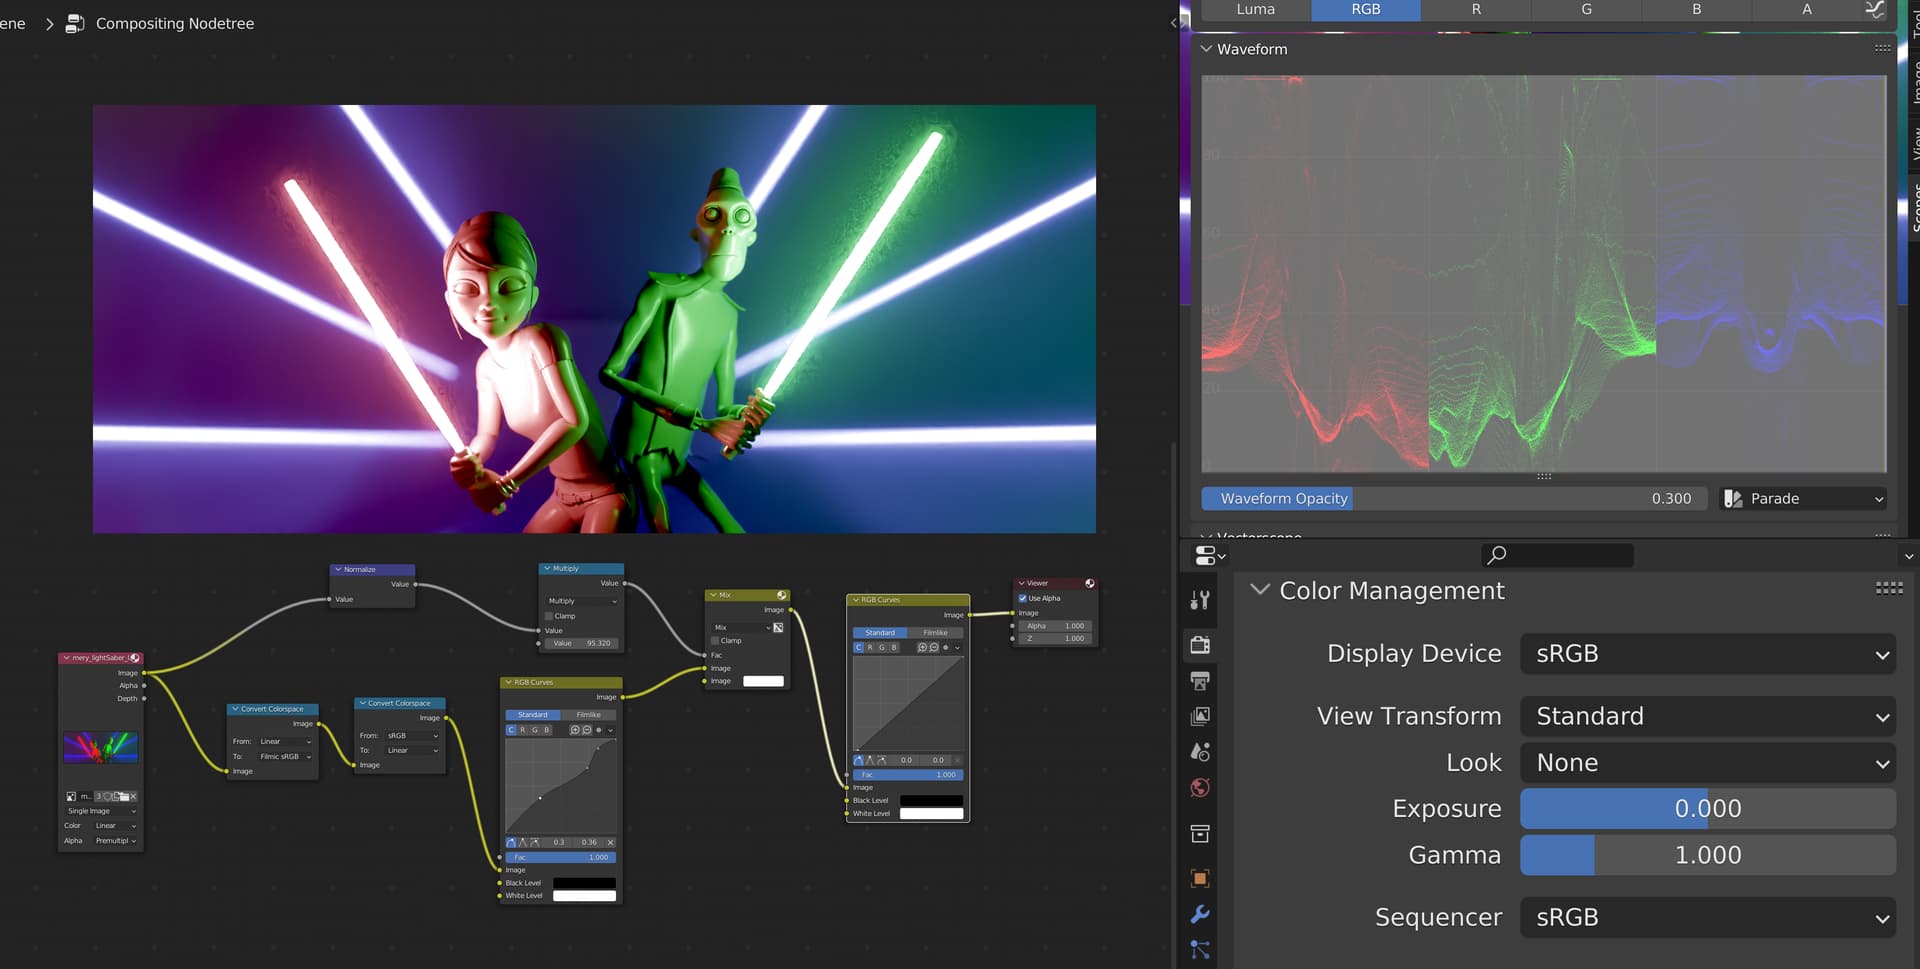
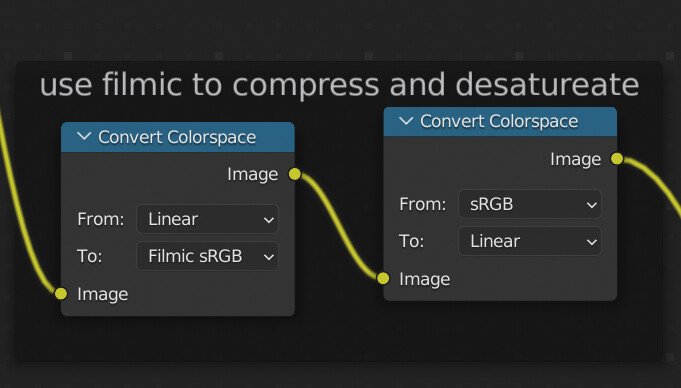
PS, if you really must use filmic to compress the dynamic range down, then at least leave the render panels colour management as Standard and then transform to filmic in the compositor and then back to linear. This will mean that after the compression, you’ll then be able to colour grade/correct without filmic constantly overwriting your intentional changes and forcing a bland look. Plus an alternative method of reducing saturation in bright areas:
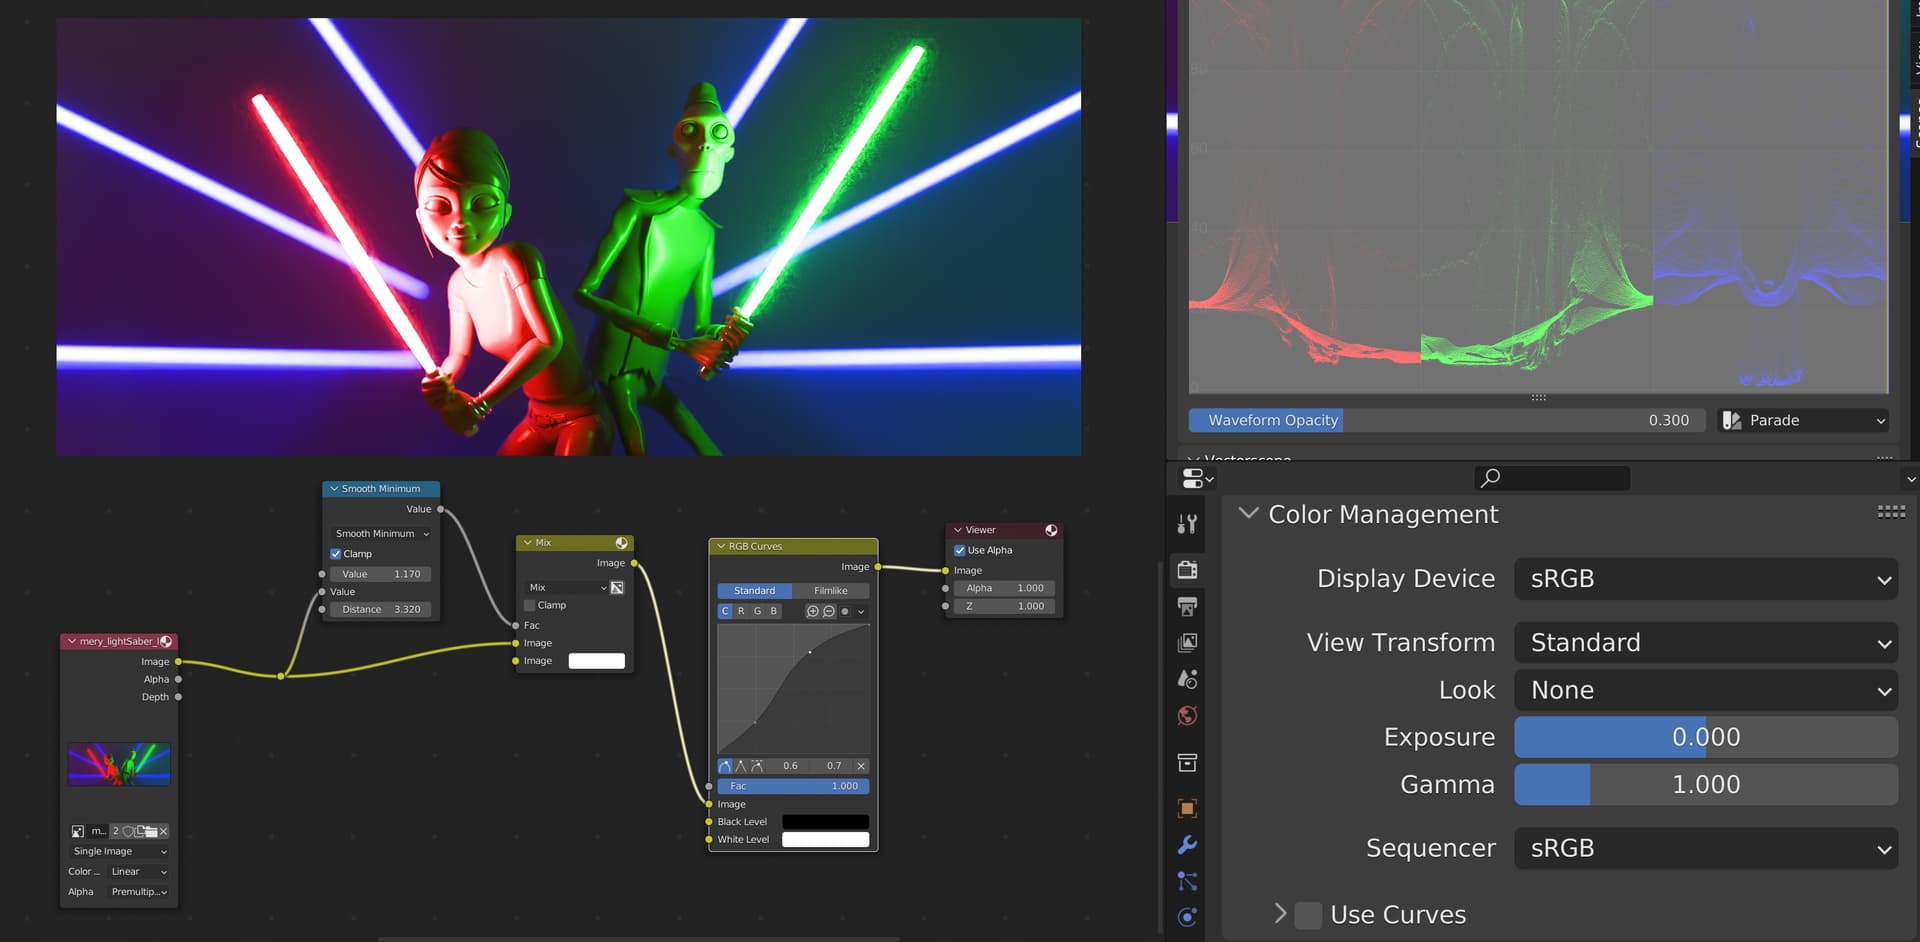
I forgot to mention earlier as well that cycles automatically reduces the saturation of bright areas unless saturation is set to 1, so no need for these hacks really, even at .99 the saturation would behave realistically in bright areas, so the fact those sabers were not white with standard mode was because standard mode was faithfully representing the actual data in the exr, whereas filmic’s algorithm automatically reduces saturation the higher the value of the pixel.

You can see from the scopes below that in the EXR the light sabres have 100% red and 100% green, so not having filmic enabled means this is accurately represented.

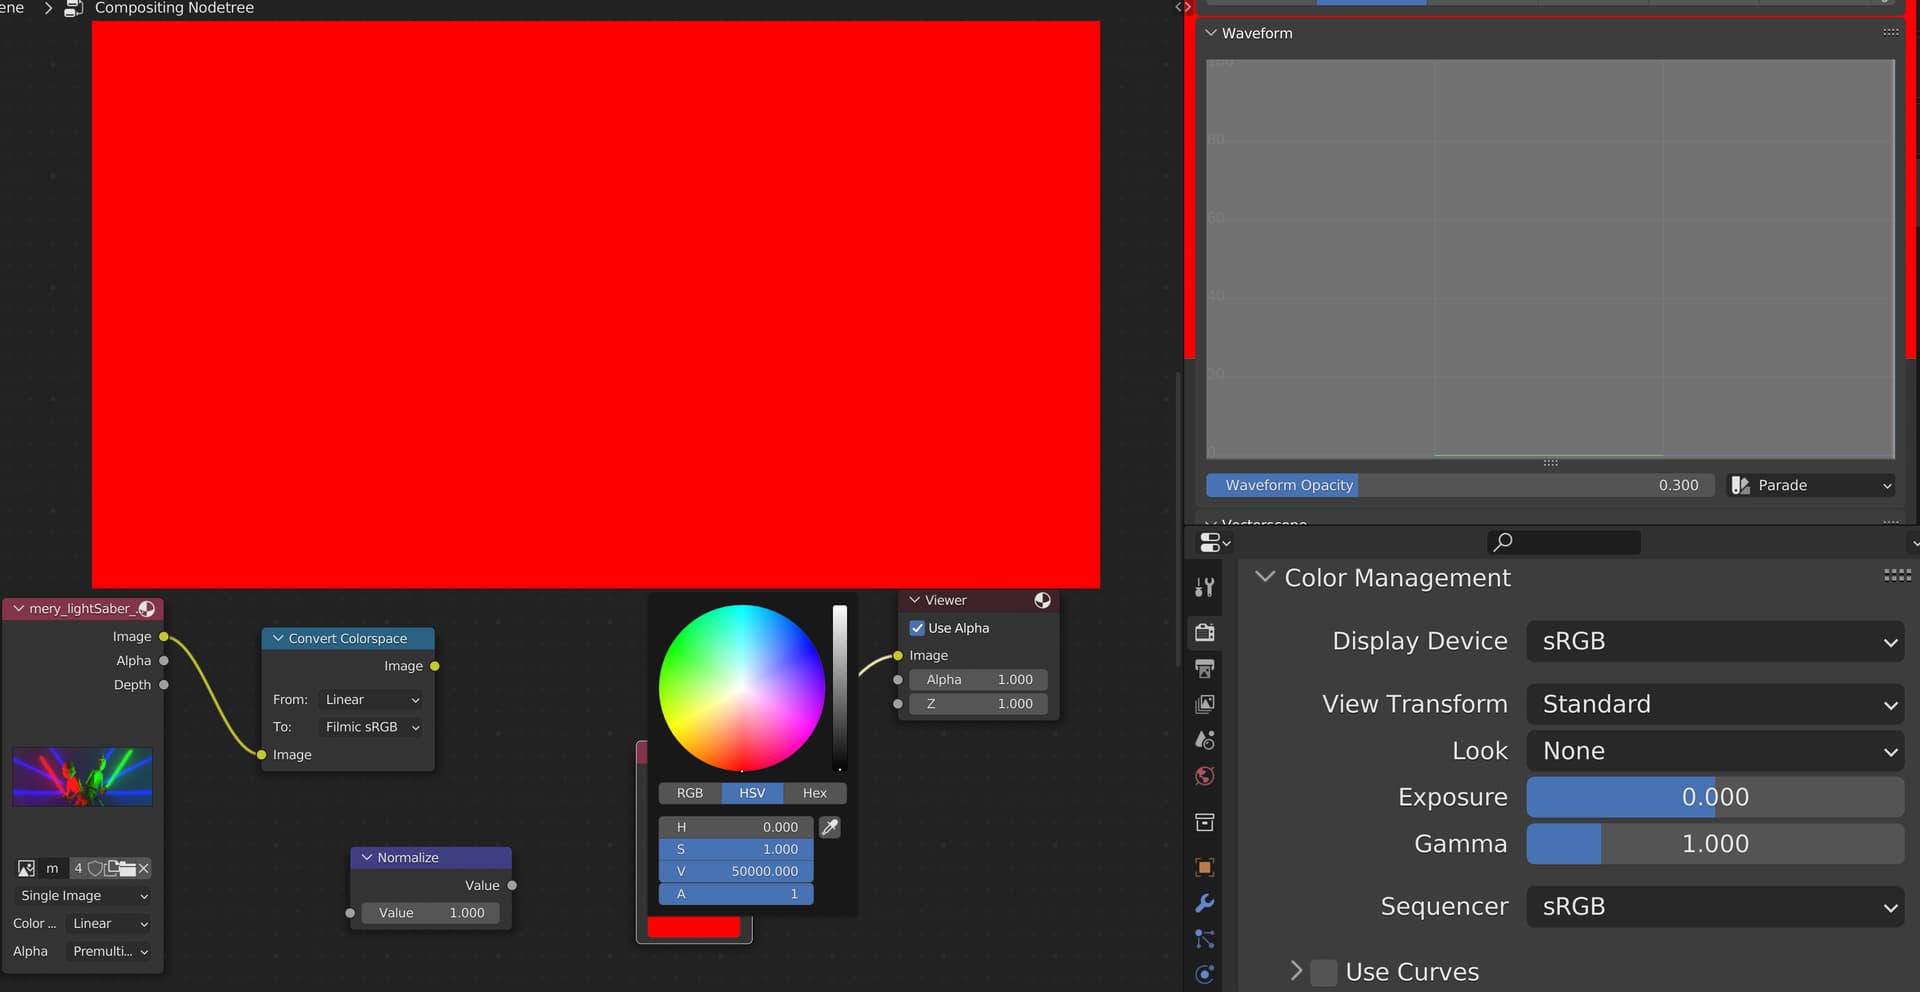
This is how a fully saturated red (no green or blue data) would look at 50000 value in standard:
This is filmic, which is better, but the render engine should never produce this issue if used properly. It’s also better to have control of this saturation to brightness ratio yourself for more artistic freedom:

And finally, you mentioned data is lost when compositing if in standard mode. The compositor is in linear and the view transform takes place at the end. So the data is never lost. You can check this by normalising the data. For example here’s your light saber image normalised.


It’s nice to see you are getting similar result as Filmic. However, still cannot escape the notorious six.

Notorious Six still there.
BTW this is no longer about “standard” itself, as majority of the people are not expected to use “Standard” this way. You are building your own image formation protocols now in the compositor.
(filmic also allows you to have scenes with massive brightness differences such as interior to exterior transitions.
simply setup every light to physical values and then animate the exposure)
That’s one of the problems for me: Filmic as default is hurting the experience for people - #131 by 3di
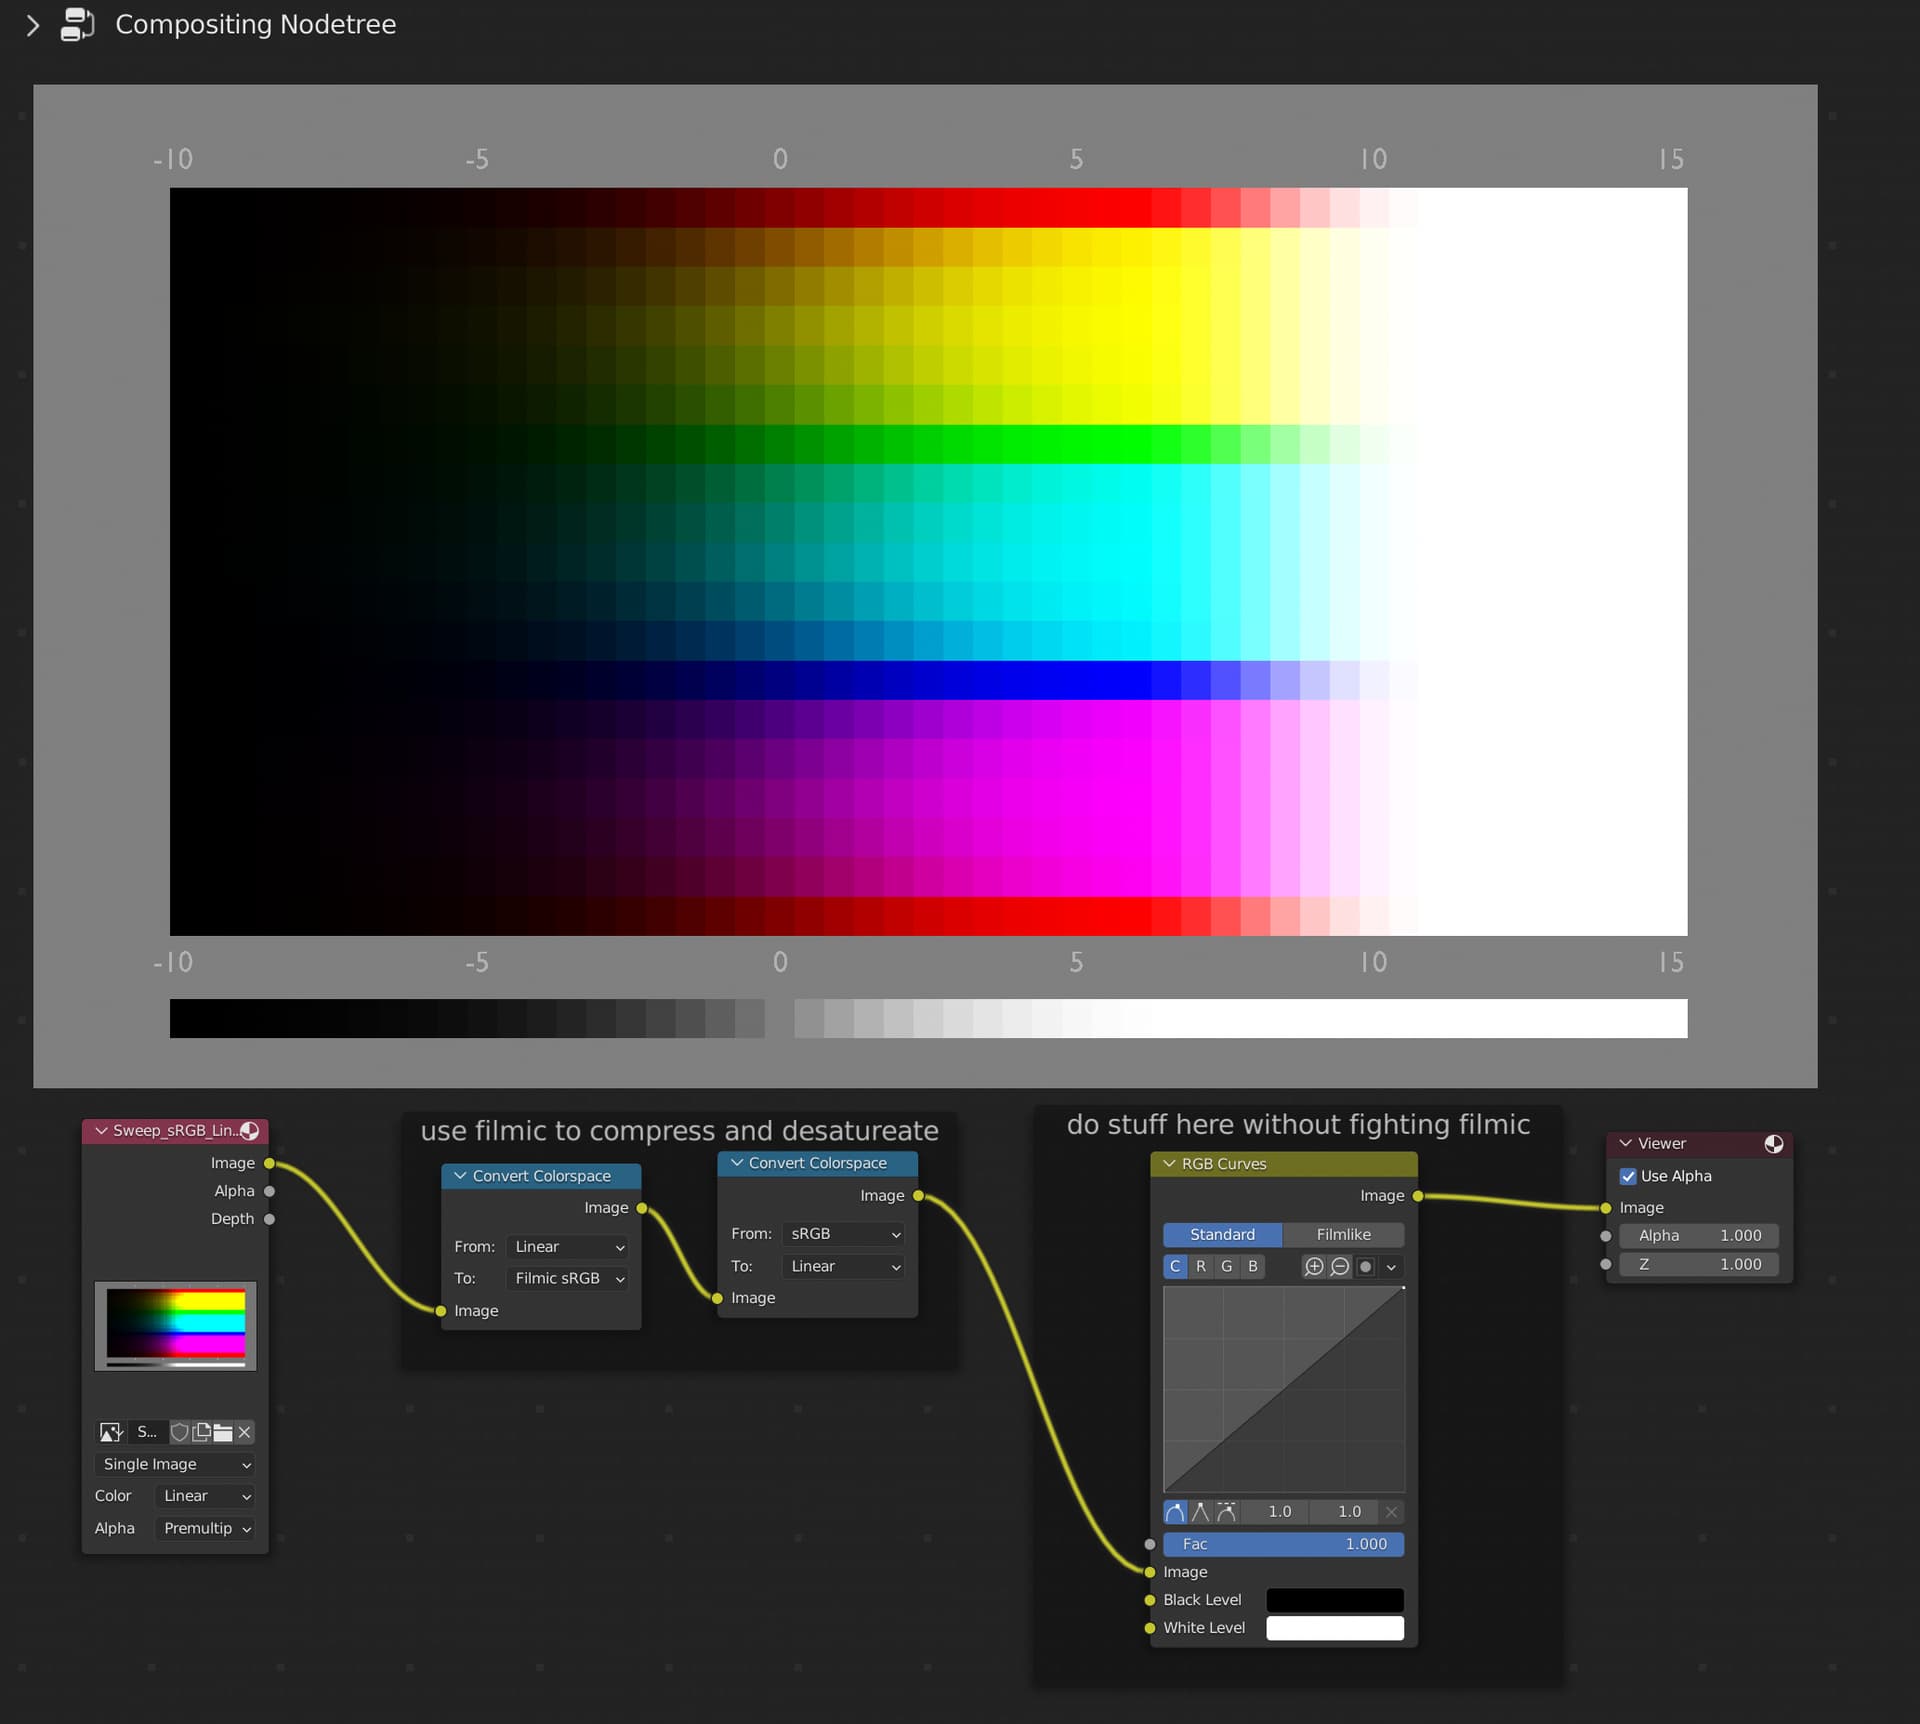
But anyway, my main point here was, the main view transform should always be set to standard, and if you need help compressing the dynamic range down, then you should use the convert colorspace nodes in the compositor to use filmic that way, because this means you can continue on to grade however you like without being forced into the filmic look (add more pop etc).
2 Likes
I don’t think the need to deal with values higher than 1.0 is a minority, I think it’s quite the opposite, it’s the majoirty.
And yes the recently added convert colorspace node allows you to do so much more, you can build your own image formation protocols with both pre and post formation manipulations! But you can’t expect the majority of the users to build the setup in compositor everytime they open Blender. It just doesn’t make sense.
2 Likes
ur basically arguing against filmic while proposing your own homebrew filmic that only works under arbitrary restrictions
W
Why, it’s two nodes and allows for much more better results, whilst not hiding in the viewport potential issues that lead to longer render times (like nuclear level lighbulbs or light sabers that increase render times dramatically). Takes less than 10 seconds to drop down, and now the compositor’s output can affect the viewport the user can just enable or disable the compositor option in the render settings to check between standard and whatever they’ve done in the compositor (whether that be using one of the colourspaces, or manually doing it with curves etc)
1 Like
You are just moving the view transform to the compositor here. Again this is great because you can now do post-formation manipulation. But expect users to do this every time they open Blender is non-sense.
I am waiting for your improved version BTW. I am a bit curious whether you can discover the AgX approach in the compositor.
colour grading/correction yourself works under all situations, there are no restrictions. filmic etc are just automatic methods to do stuff that you can do yourself with more control, and without the image being forced to have a filmic quality to it, which in my opinion looks drab and miserable.
But anyway, I’m not against using filmic, I’m just against using it in the render panel because it changes the result of your intentional grading, and also hides issues with albedo and lighting that lead to longer render times.
To be fair, both “Standard” and “Filmic” does it. Quite frankly, every image formation protocols would change things. It’s just a matter of which one is more sane. Both “Standard” and “Filmic” have orange above 1.0 shifting to yellow, you have never actually used a bright orange lighting in Blender, because every time you use it, it becomes yellow. The notorious six. That’s why a while back in another thread I said:
Anyway, this escalated  I’m going to leave it there…for now!
  :eyeglasses: