@JohnDow Since you’re benchmarking, the audio thread tends to wake up every millisecond, does adding -noaudio to a CLI render have a measurable impact?
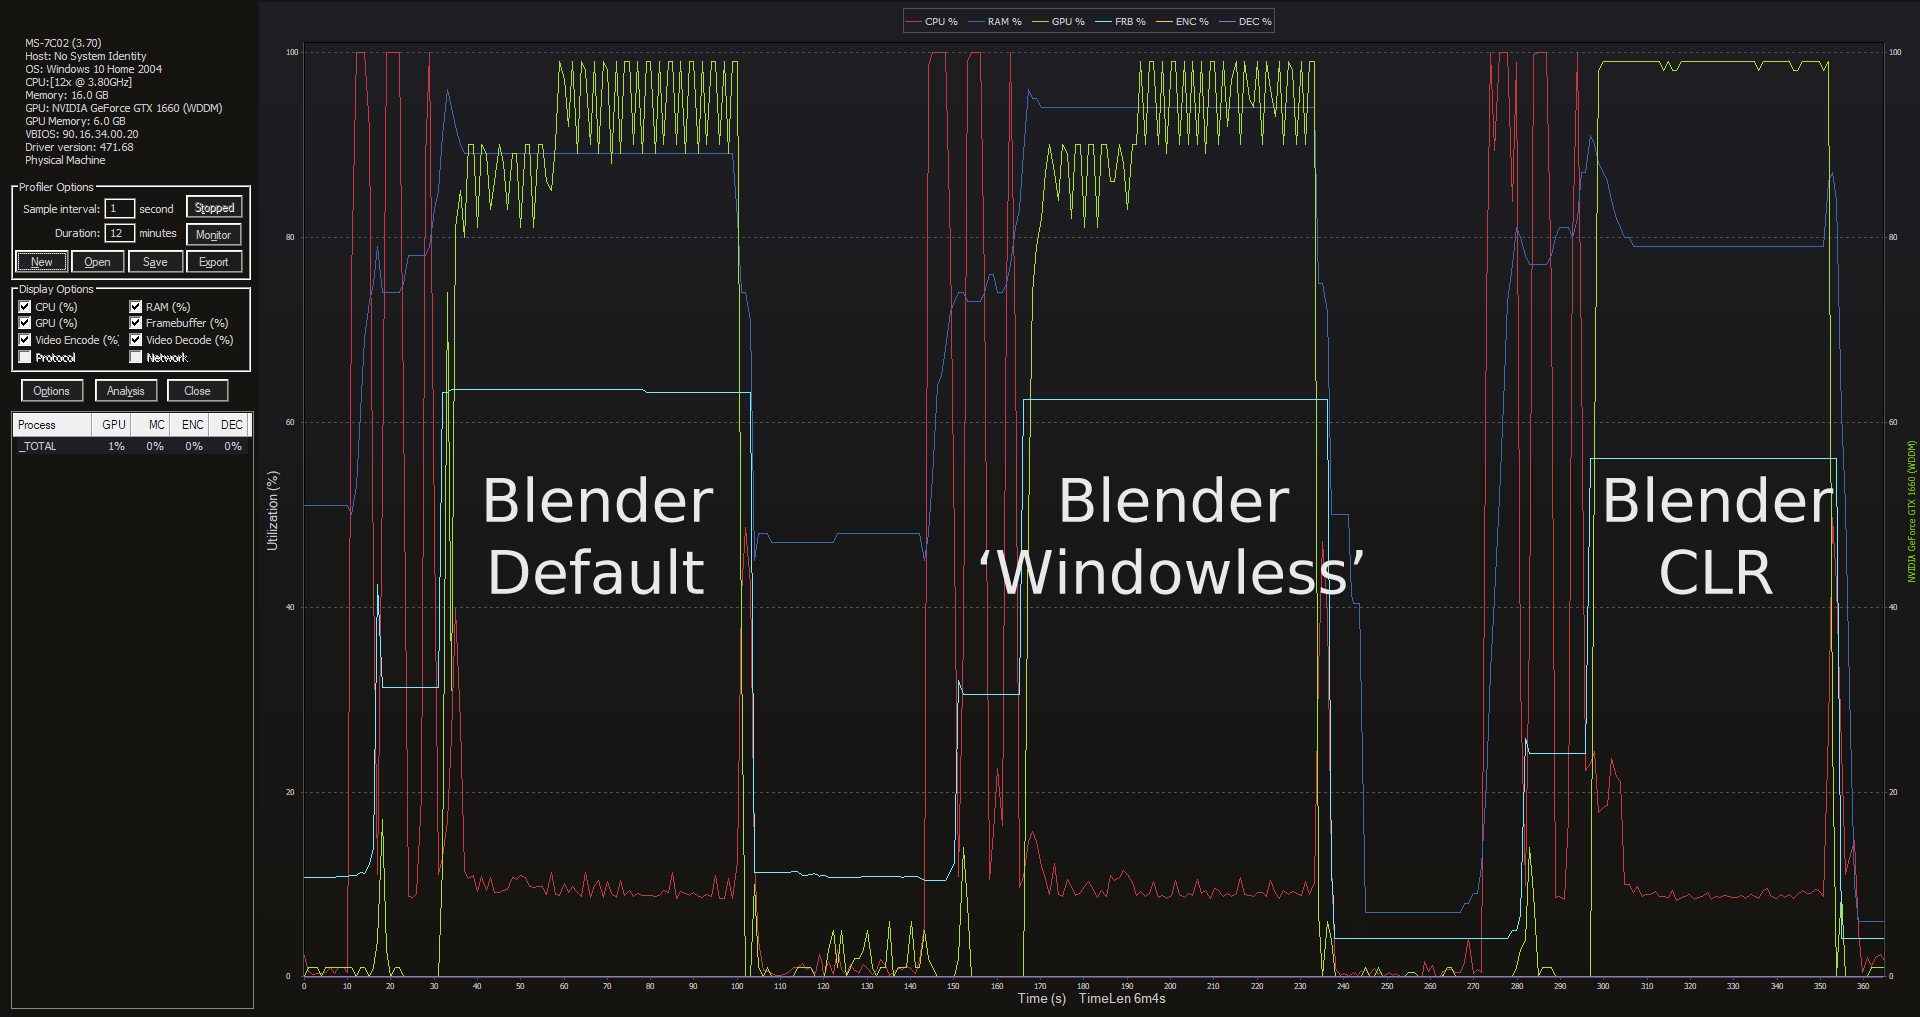
It seems to me a logical result if you are using the same GPU to render and handle the display.
I suppose that if you use a different GPU only to handle the display and another GPU to render, then the result with open Blender or render from the terminal would be quite similar.
Edit:
Except that in one of the experiments that you are doing with a single GPU you keep the scene open in a Blender instance and then at the same time when rendering from the terminal (without closing the Blender instance) you keep getting a better render time from the terminal/Command Line. So there I would not have explanations of why this happens.
I believe LazyDodo meant you launch Blender, as in the GUI version of Blender, from the command prompt and use the -noaudio option to stop Blender from producing Audio. You then go to the scene you want to render and press render/F12. And then maybe run that test a few times. One with normal settings, one with suggestions by lsscpp (keep user interface, lock user interface, that sort of stuff).
Or maybe I’m didn’t understand your original comment.
Excuse me @JohnDow but I’m still stuck somewhere between the posts above from the last days, and I quite didn’t get one thing.
In your tests you get ~equal rendertime when you render your files from regular command line, and when you render then from command line with ALSO your file opened in a full UI Blender instance.
Am I right so far?
So, my very question is: why? What is the benefit? Why bother opening blender?
Because to my understanding, the two “command line” part are the reason why you get the same rendertime. In the latter case Blender just happens to be opened, that’s all. It doesn’t seem to be an obstacle for performance, unless your memory explodes due to heavy scenes.
I work like this everyday: more than one Blender instance opened, maybe one of them rendering. Maybe another one doing realtime viewport cycles duties.
I don’t see any new discovery in those numbers. But I’m probably missing the point, so this is what I meant when I said I’m confused, and it’s why I am asking.
I believe it’s more of a thing where you can open Blender, do work on your scene, then when you want to get a “final preview render” to see how things have turned out then modify the scene to correct small issues. You can do this “render” part via two different ways. Have the Blender interface open and press F12 or you can render the scene with the command line. Rendering it with the command line means the scene is rendered quicker. And you can render from command line, getting fast renders, while having Blender open so you can quickly go back to modifying your scene.
I think it’s more of an investigation than an actual use case for Blender? Not sure. I’m not @JohnDow and thus don’t know exactly why this investigation has been done.
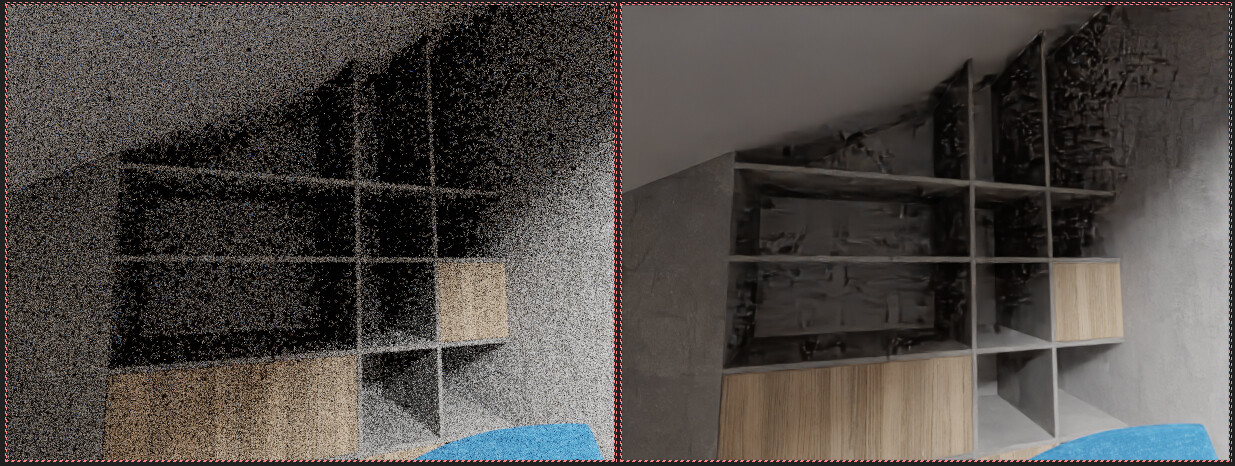
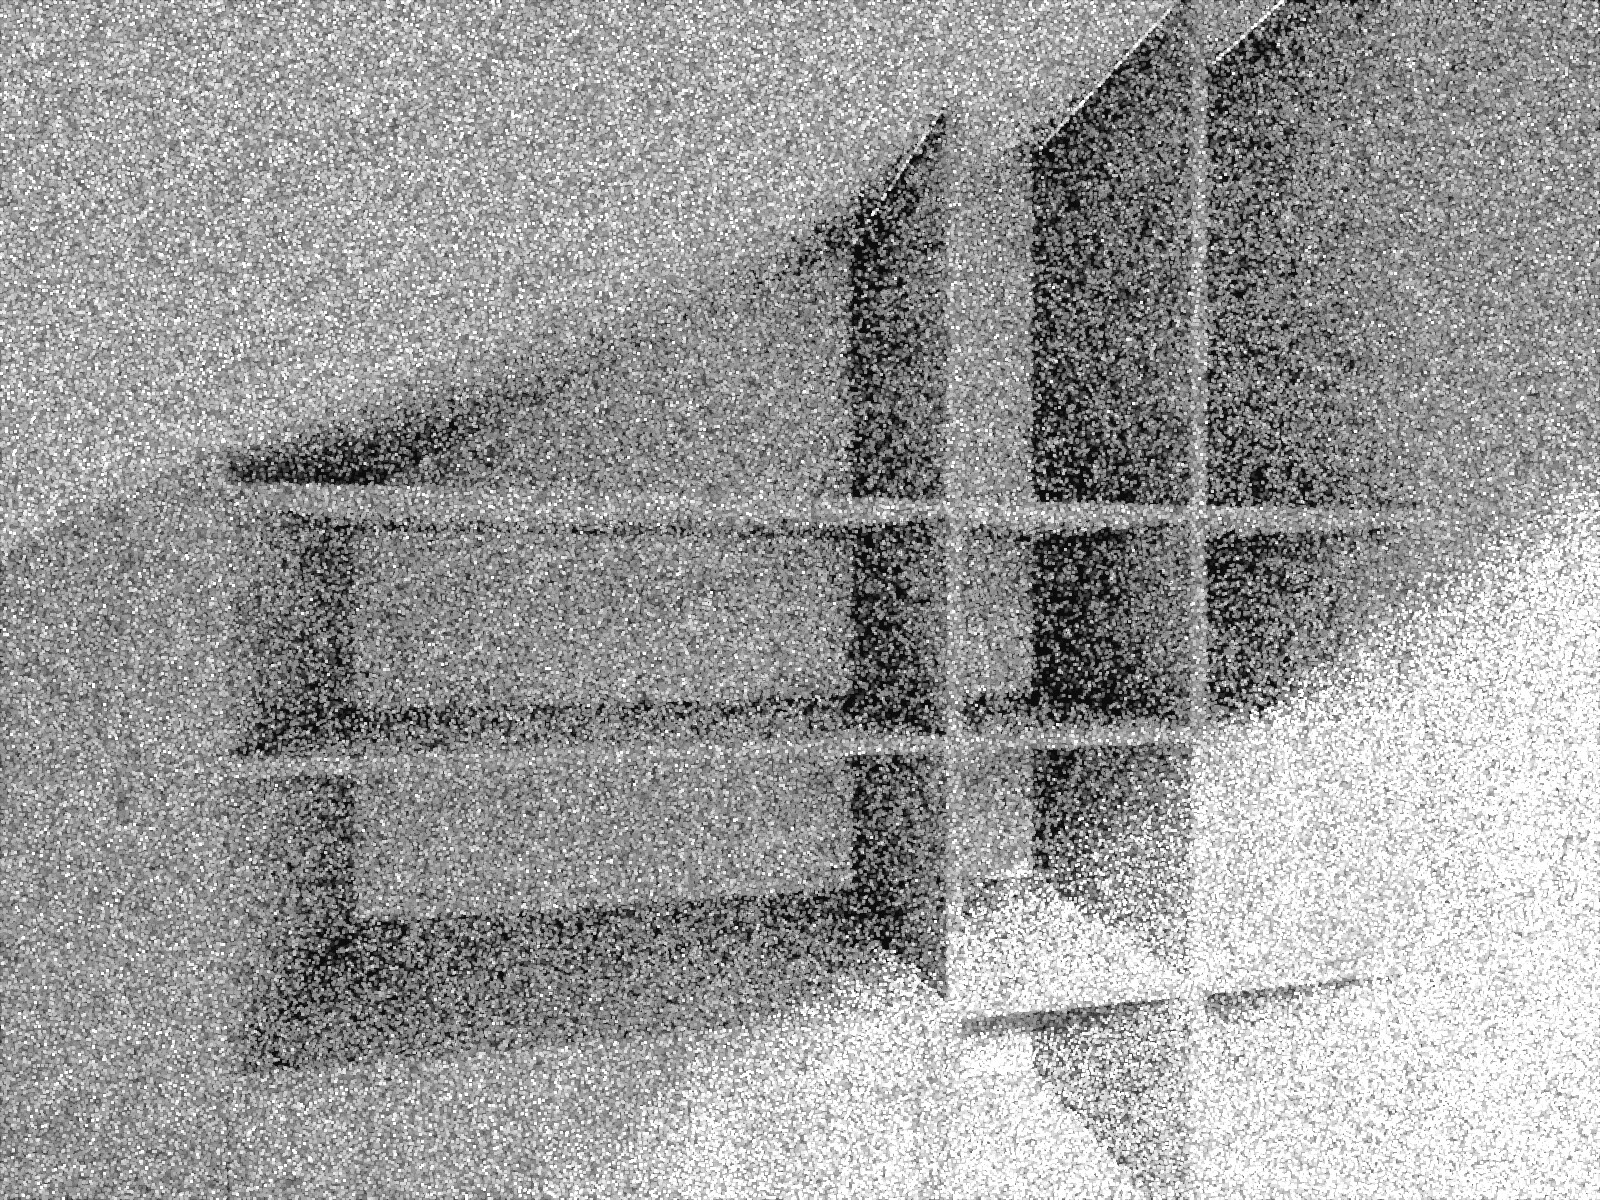
I noticed that there’s an issue with adaptive sampling and denoising in the viewport. Basically adaptivity leaves too much noise in the darker areas of the image and the noise pattern is not uniform, which doesn’t play well with AI denoisers. In this example large areas don’t get any samples at all, so they’re left black, and denoiser sees it as real details, creating black artefacts.
I left adaptive sampling setting at default because noise threshold doesn’t change anything and min samples have to be raised close to the total samples to reduce the noise. But that defeats the point of using adaptive sampling.
However the noise pattern is much better in the final renders and can be used with denoising, so it seems that there’s something wrong with adaptive sampling for viewport specifically. Is this a known issue?
Maybe it would be better to disable adaptive sampling in the viewport when denoising is used?
Adaptive sampling is just not working well in that case, regardless if using denoising or not. An example .blend file would be useful to investigate it.
Note that the default viewport settings are:
Noise Threshold: 0.1
Max Samples: 1024
Min Samples: 0 (automatically set as 32 based on the noise threshold)
Regarding foreground vs. background rendering performance. Sergey just today committed the change that makes final render display use the same system as viewport render, which may help improve performance.
Do you mean 0.01? I did some more testing and 0.01 produces the same result as 0 (default value), while 0.1 is much more noisy. Also it seems that 0.01 is a hardcoded minimum threshold for viewport rendering as going lower doesn’t change anything. Can you confirm if that’s the case?
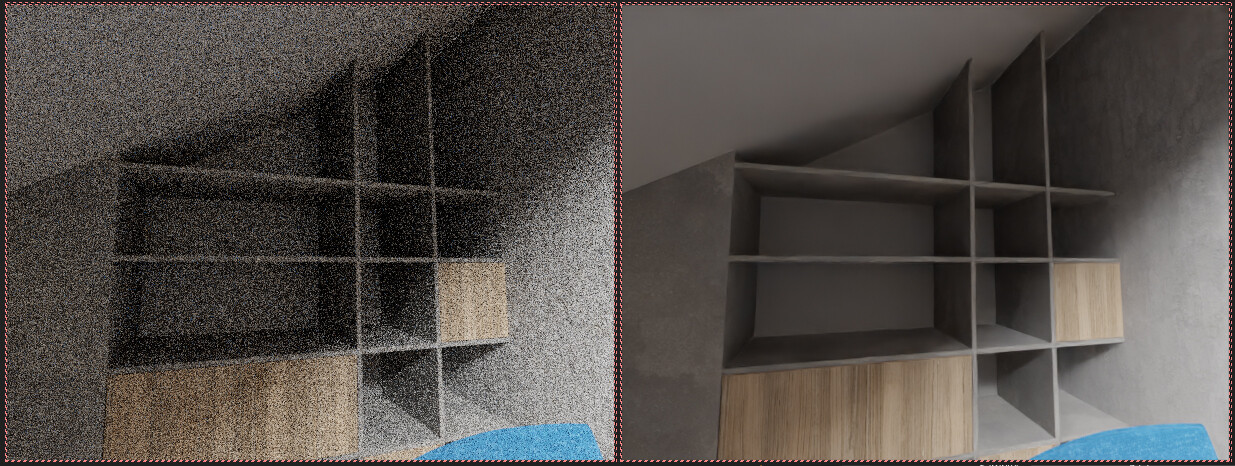
And speaking generally, why is adaptive sampling leaving so much noise in darker, more complicated areas? I though the point of adaptivity is to give more samples to difficult parts of the image to produce a more uniform noise level overall. But in my example it seems to do the opposite, as seen in the sample count pass:
You might not be using the very latest cycles-x version with the adaptive sampling changes. If you have a .blend file that works poorly with that version, we can investigate it.
Maybe a stupid question, but does Cycles-X already include support for the ray-based nodes, such as Bevel and AO? I’ll finally have the time to try it soon.
Ok, I tried a new build and it’s much better with separate settings for viewport and final render. And noise threshold can go below 0.01 now.
But the issue with insufficient sampling in dark areas still remain. I will clean up the scene and send it to you later