or even worse… maybe you don’t want to save because you changed your mind and end up hitting save
I hope the devs are still reading this topic… here goes nothing.
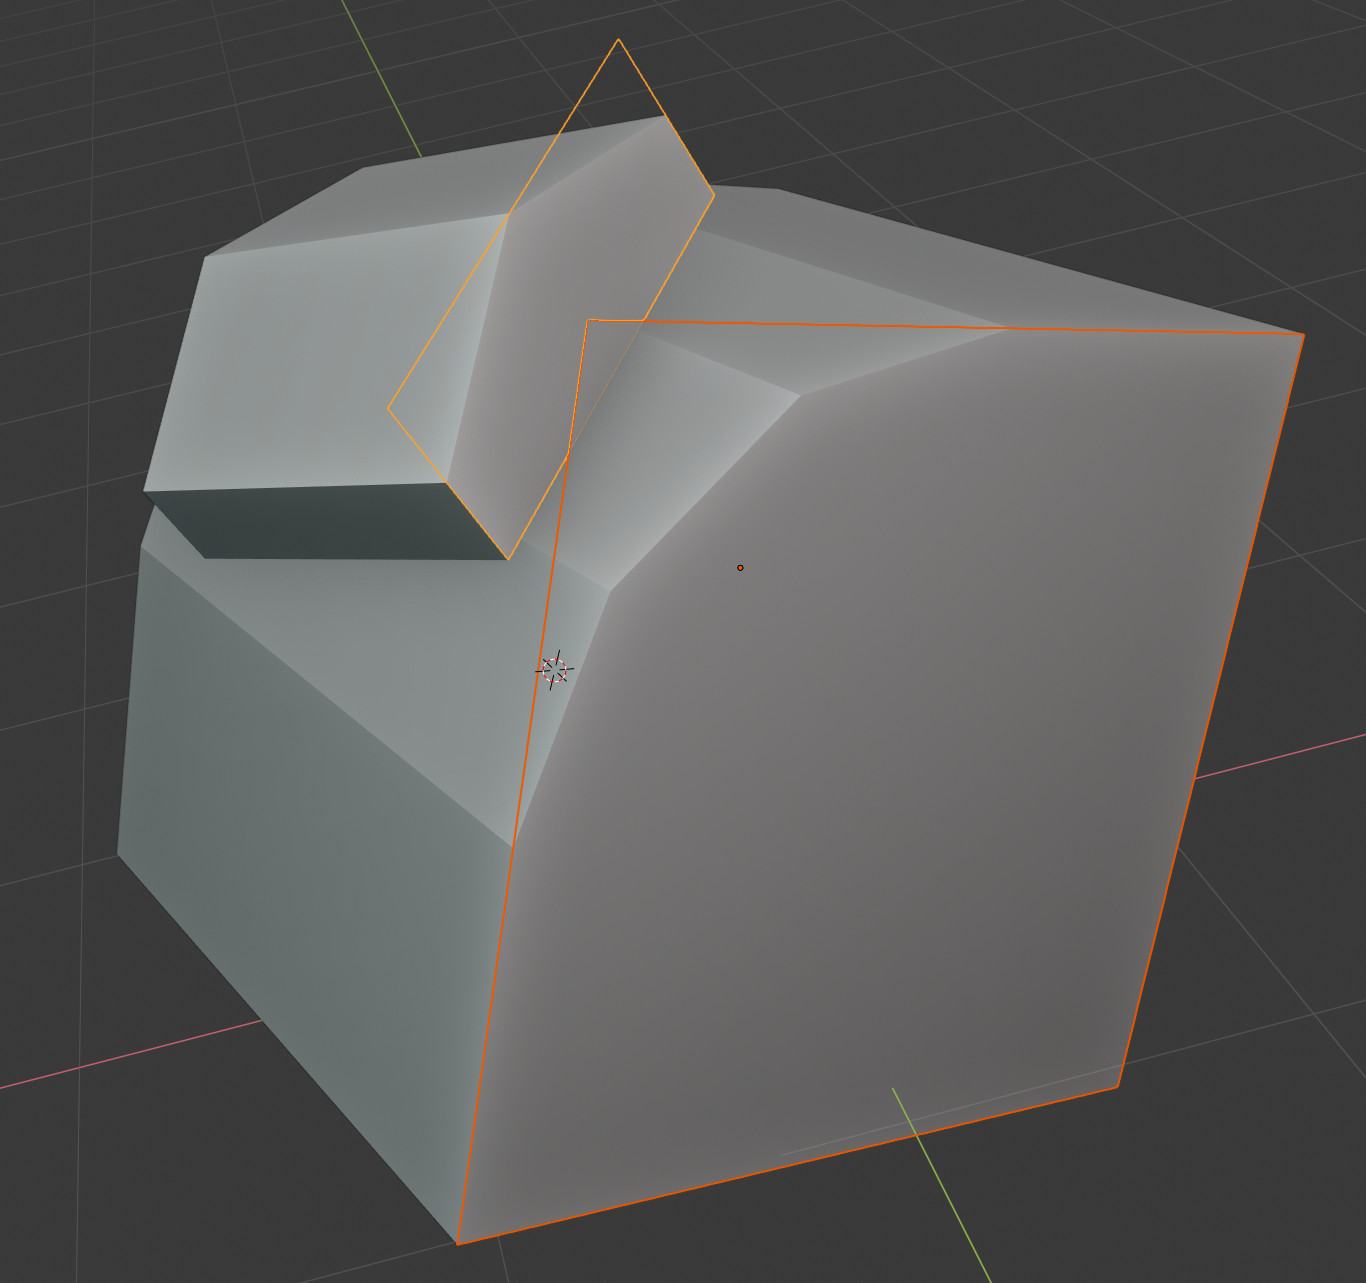
Currently, the wireframe overlay of an active/selected object in Workbench takes on the color of the outline and looks like this:
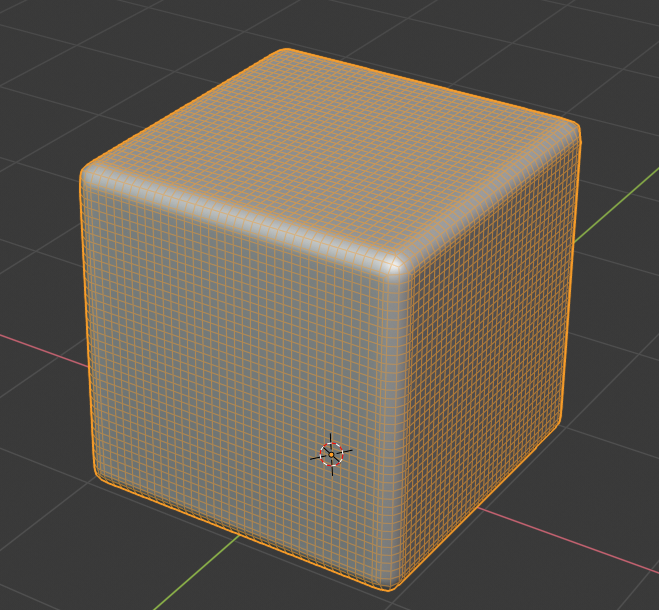
As you can see, it’s rather difficult to see the yellow wires on the grey surface because the values of the colors almost match. This is unfortunate, as the wireframe overlay is mostly useful for checking the topology after modifiers and such, and this is most often done on the active object.
In the theme settings, can we have separate color settings for the thick yellow outline around an object and the wireframe overlay?
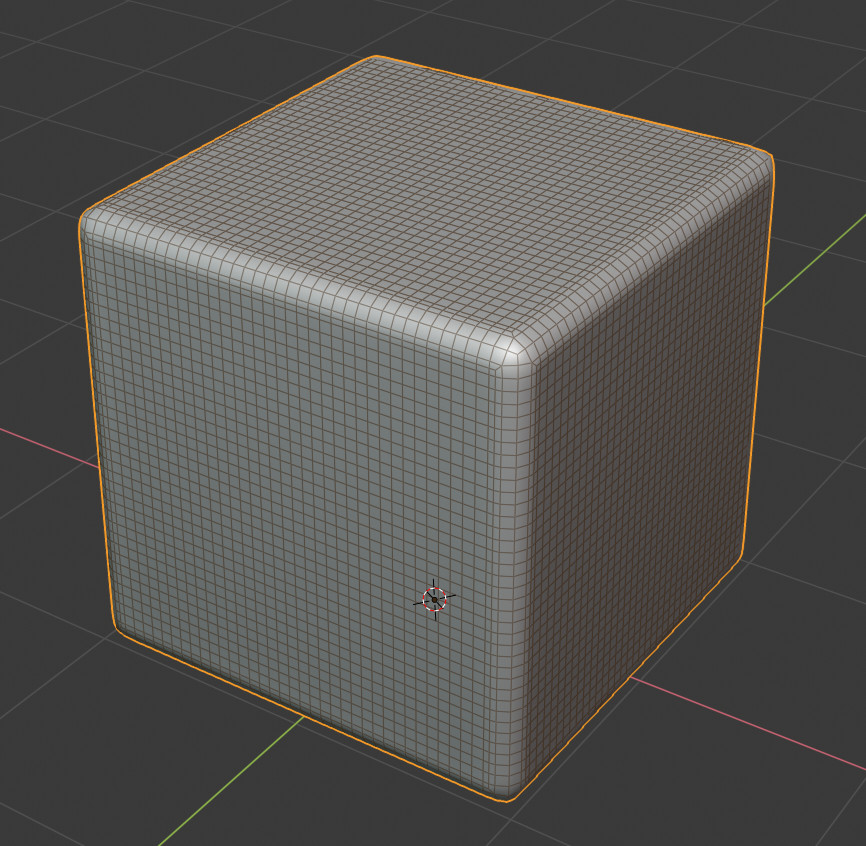
Photoshop mockup:
11 Likes
I’m not a fan of not-obviously-related settings, especially those placed in different parts of the UI, affecting each other without any kind of user feedback. So I’d definitely say no to AutoSmooth being enabled automatically.
I mean, there would be no issue as long as the user understands what is happening and why. But unless you’ve been using Blender while, this is unlikely.
An alert in the modifier stack or the status bar that AutoSmooth needs to be on for the modifier to work like we have now is much better. Maybe you could even just click the alert to fix the issue. But just having it done automatically could be very confusing.
I’m also ambivalent about having AutoSmooth on by default for new objects. The common use case of direct mesh modelling demands it to be on, while the other very common use case of SubSurf modelling demands it to be off. Now that you can just add AutoSmooth to your quick favorites, it’s much less of a hassle to turn it on manually than it was in 2.79.
I was never talking about this. There can be feedback in form of a warning: ‘WARNING: Auto Smooth has been turned on for this modifier to work.’
Precisely the discussion I was trying to avoid. That is completely another argument. Enabling Auto Smooth automatically after Weighted Normal modifier is added is another matter and should be considered separately from Auto Smooth on on everything by default. Dismissing one should not dismiss the other.
I do not understand your point of view here - when you add a modifier you always want it to work, don’t you? How do you use Weighted Normal modifier then? You can only add it and then you have to go to another tab, enable Auto Smooth and then come back to whatever you where doing with the modifiers. These are extra steps that you always have to do - there is no use case where you don’t do that for adding Weighted Normal modifier. What are your thoughts on this then? There should be no extra steps, the addition of the modifier is the action user takes to indicate they want it to work - that should be sufficient.
I also think you still need to code an operator for enabling Auto Smooth if you wish to assign a shortcut to it or add it to quick favorites. It’s not complicated at all, but still, not that easy. Or am I missing something here? Can you add setting object data’s property to quick favorites menu in 2.80? How?
Edit: Oh, yes, you can add this to quick favorites - that’s really cool! Thanks for pointing this out.
You lost me there. What ‘other’?
OK so we have two arguments here:
-
Should Auto Smooth be enabled by default
-
When adding Weighted Normal modifier it need s to be enabled. I think the action of adding the modifier should enable it automatically.
1 Like
Consider this scenario:
- user adds modifier. it works.
- user turns off autosmooth (what is this? why do I need this?)
- user is confused why his modifier no longer works.
Instead, it would be preferable to just present a “fix” button next to the alert in the modifier. This is both quick and reinforces the connection between the two things.
1 Like
It’s a valid scenario. However, let me ask you - how often does it happen and in what context? I would argue, that a learning user may do that 2-3 times maybe. I think it is reasonable to assume one will learn it after 2-3, maybe 5 times. There can also be some help - a clear warning on the modifier. Scenario number 2 involves a professionally working user with deadlines and efficiency in mind. He has to do extra steps wasting time indefinitely as opposed to 2-3 times, how many times is that? 200 - 300 per year? It’s one unfair situation the way I see it…
But I think a ‘fix’ button on the modifier would definitely be better than nothing.
I submit that you can only optimize for speed so much before the UI gets arcane, confusing and difficult to learn. We don’t really want Blender to be another Vim, do we?
Well, we have presented our viewpoints and I believe we understand each other’s positions. I don’t think further reiteration would be of value, so I’m bowing out of this discussion at this point.
I don’t have a better answer right now, but these things are placed too far away from each other:
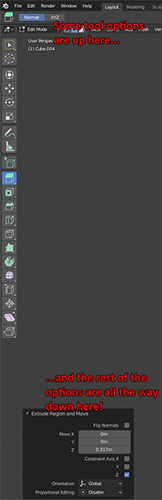
Even worse that the black floating options thing seems to be minimized by default?
(I think it should perhaps pop out of the floating menu, next to the activated tool, but perhaps that’s just me?)
2 Likes
Is there a toggle to have the actual tool gizmos show up when you use a shortcut? Right now, if I’m in selection mode and press G, I don’t get the transform gizmo. Same with scale. It seems shortcuts don’t actually change the selected tool in the toolbar, so there must be an option I’m missing.
Similarly, if you are using the shortcuts to, for example, rotate, you can press R Y 90 and it rotates 90 along the Y axis, but if you use the toolbar and gizmo and start to rotate, you can’t then immediately type 90. You have to first highlight the Angle input box in the small black tool option popup.
Finally, G Z Z no longer shifts through transform orientations like in 2.79. You HAVE to click on the transform orientation toolbar and enable normal orientation to get it. Am I again missing a change in shortcut options here? This was one of the most useful 2.79 behaviors.
Overall, shortcut handling in 2.8 feels a bit disconnected and inconsistent still.
5 Likes
Tangent to what I said above, is there a toggle to NOT mess up my current selection when I press the shortcut to unhide everything (Alt H)?
1 Like
So I personally prefer how the hotkeys currently work. I do not want to have to select and drag a gizmo handle. The component snapping to my cursor is a huge part of how I work quickly. However, if you prefer the Gizmo:
Preferences → Keymap → 3D View → 3D View (Global) → Add New
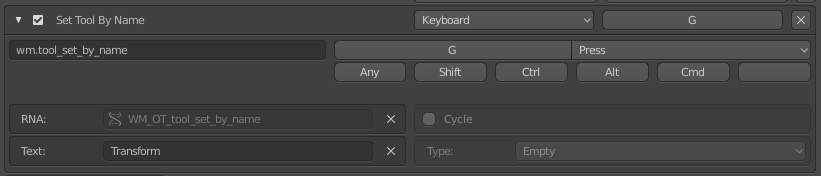
But be sure to search the keymap by key-binding for G to disable the default Move tool, that way you can be sure only the Gizmo is what activates.
You’re right about typing in the rotation values, hopefully they fix it for how you’re wanting to work.
I believe a few updates ago they made a change where whatever Transform Orientation you’re in, that’s what it will stay it unless you change it. I’m not happy about that either, maybe it can be a Preferences setting in the future?
1 Like
I think we could have an option for Blender to work this way, where the shortcuts activate the active tools, rather than the blocking modal operator.
In any case, the Industry Compatible keymap will work this way, albeit with different hotkeys, similar to Maya, Unity etc.
3 Likes
Now that we have 3D Cursor orientation, is there any reason whatsoever to have the default left click still place it in the “View” orientation?
I can see no practical use for using this particular orientation with the 3d cursor - the “Geometry” orientation is much more practical for use with the “Cursor” transform orientation.
But of course, I may just be biased by my own workflow.
If nobody objects, I suggest changing the left click default (in the RCS keymap) to set the cursor orientation to “Geometry” be default.
Also, another, related papercut: while in “Cursor” transform orientation mode, the Transform tool gizmo doesn’t change orientation immediately upon placing the cursor, but only when the selection is updated.
And another one: Placing the 3d Cursor on an N-gon makes the orientation world-aligned. Instead, it would probably be more practical to align it to the smallest face-normal-aligned bounding box as shown here:
And another one: Snapping the 3d Cursor to an element fails to change its orientation.
1 Like
I searched for hours and i can’t find a way to make the collections panel to focus (expand, scroll to) on the currently selected object in the viewport. (scene with 1.300 objects).
In Grease Pencil when we reset brushe’s curves using “Reset Curve” from the menu (Sensivity, Strenght or Jitter), it sets out the curves inverted. I mean, it reset the curve but with inverted values.
1 Like
It is Numpad period (Or rightclick and select Show Active) just like in any other area of Blender.
ohh thanks!
I was expecting to find an option in the object context menu, just like “move to collection”… “show in collection”.
I suggest Middle Double click for Show Active, it is very intuitive, people naturally stumble upon it, and not everyone has a numpad.