Oh, great! thank you  deleting the post
Paper cut, it’s hard to tell when proportional editing is turned on. For reference, it’s easy with the snap magnet since the button turns blue. I understand that Proportional editing is not a toggle, but a popover, but it would be nice for it to turn blue, or for the icons, except “disabled”, to be blue
![]()
23 Likes
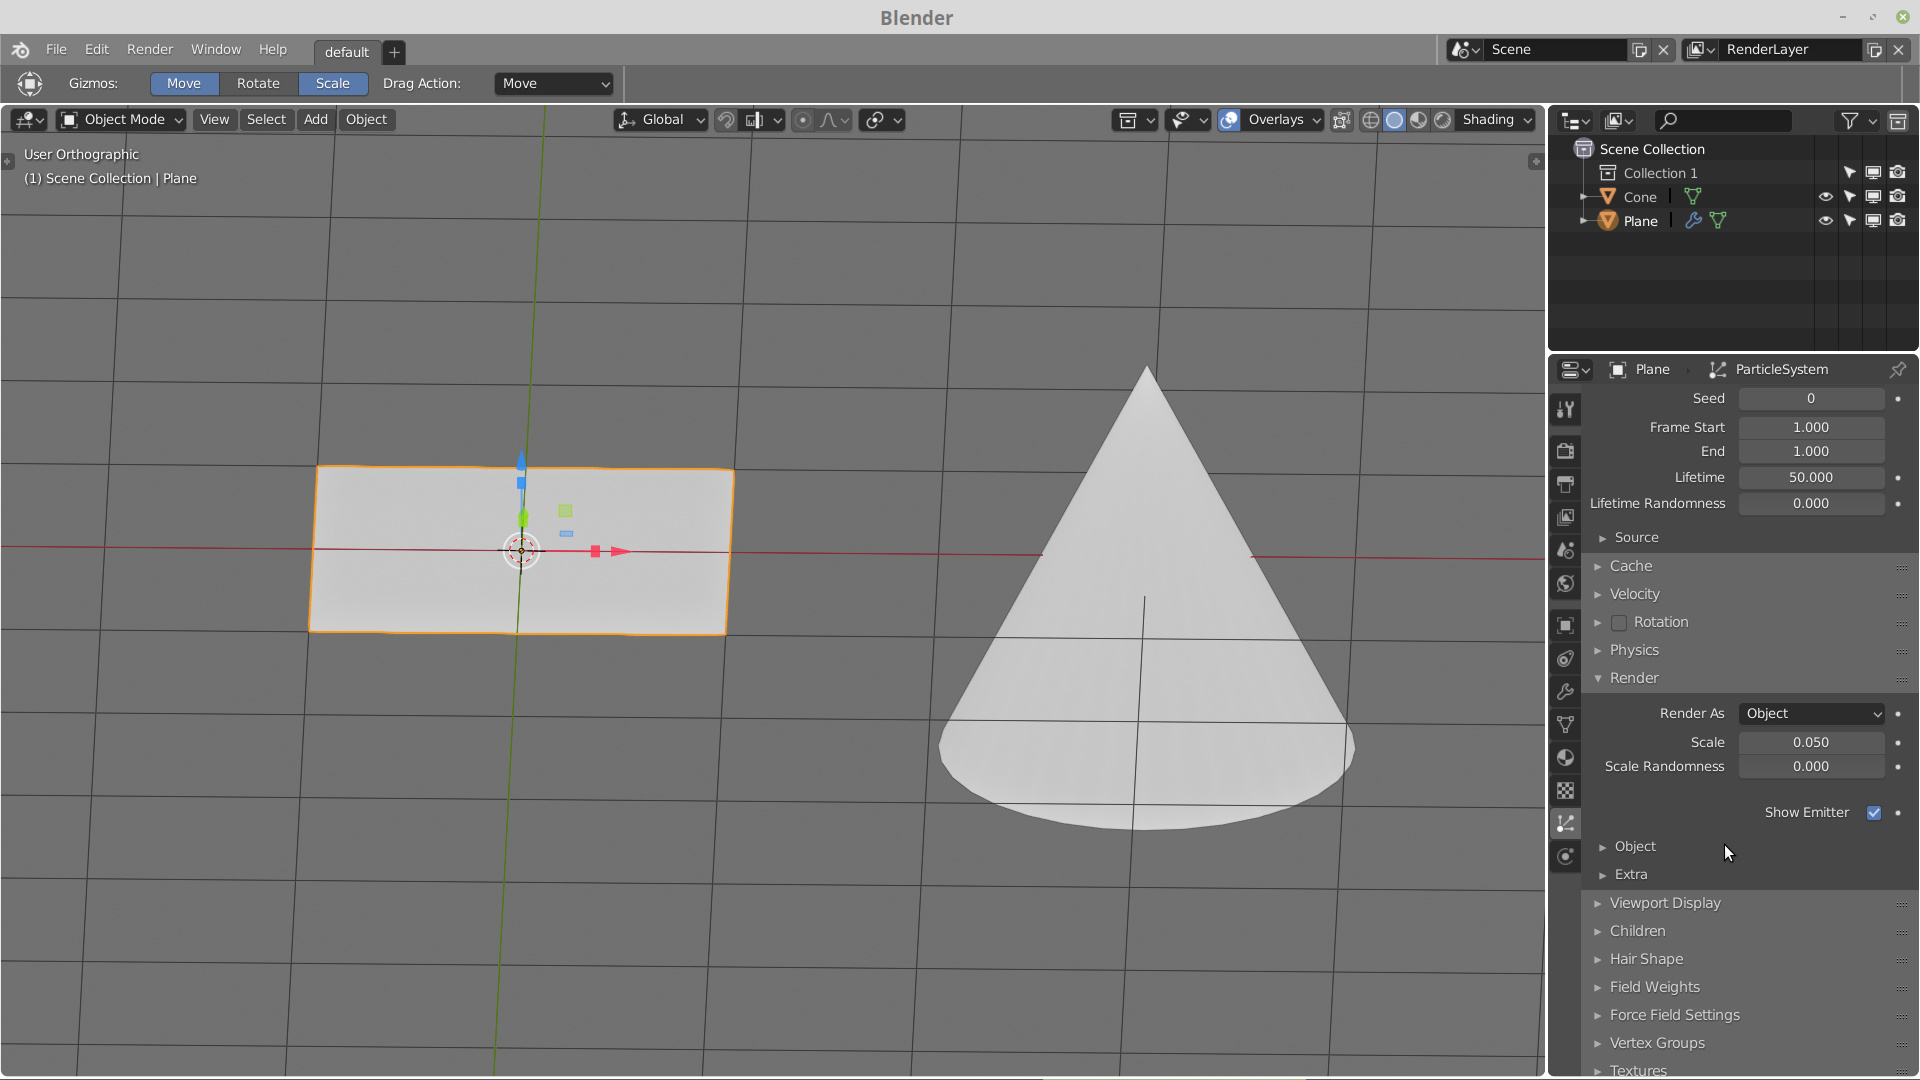
This area, as well as the all the other list-areas (shape keys, materials, textures, vertex colors, face maps, particles), are needing a major revamp, just like the Outliner with the Collections.
Which in the case of the Vertex Weights (Groups) field should maybe include:
-ability to filter by name, bone group, locked or unlocked, weight limit (ex: less than X), etc.
-ability to shift+click to select a whole range or ctrl+click to select multiple individuals
-ability to reorganize the list by drag and release instead of arrows
-ability to create groups for nesting and categorizing the weights (and to filter by these group’s names)
The same could be said for filtering, organizing (grouping) and rearranging the shape keys list, materials list and all the other stuff that I mentioned.
Edit: In fact I cannot wait for them to implement the same Collections interface/behavior to Armature bone layers as well. It sucks being limited to 32 bone layers, without proper name categorization, nesting, etc. I asked Dalai on the Collections dev page if/when he planned to do it, but he never responded.
3 Likes
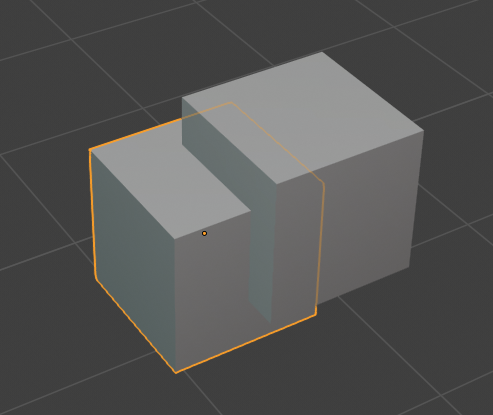
One papercut that I really didn’t like about 2.8 new wireframe selecting behavior:
Let’s say I’m on Wireframe mode, X-ray on, but at value=0. Nothing is selected.
I want to select this monkey, just like I would on 2.79, by clicking on it’s edges/wires:
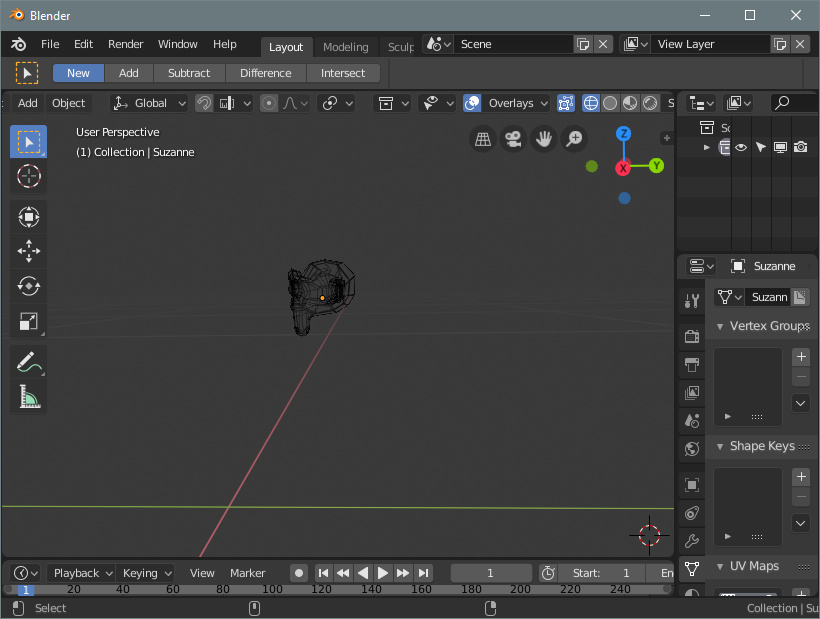
Can I? No…at least not on the first click.
Why? Because I’m actually looking through a Cube:
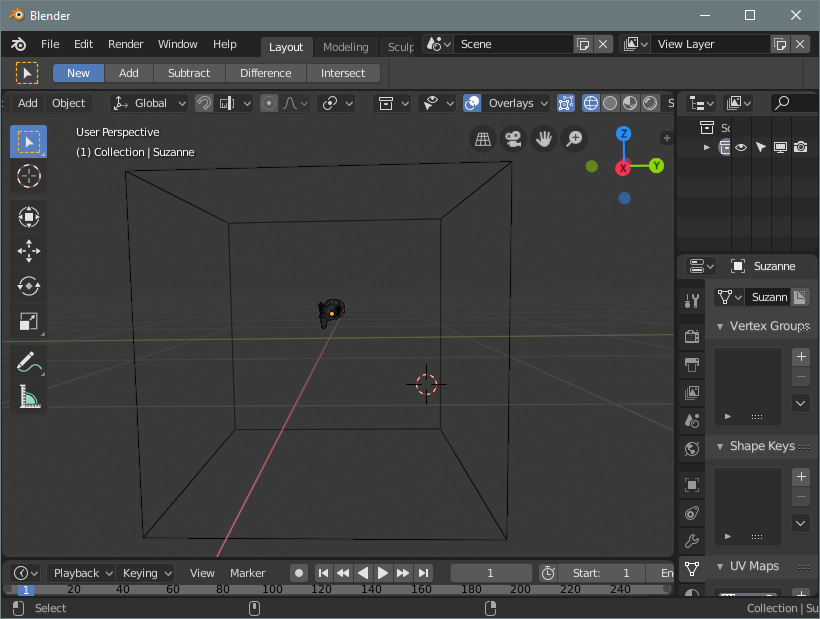
and 2.8 thinks that even though I’m clicking on the monkey, I wanted to click on the invisible cube face that it’s in front of it, even though sometimes I can’t tell that there’s something in front of it because I’m on Wireframe mode, which is exactly so I can see through (and select?) things through other things.
So 2.8 first selects the object which it’s face is closest to the camera (even though it may be invisible to the user’s eyes), then you have to click another time to select what your mouse is actually on top of, which may be further.
Edit: I just noticed that the selection behavior also depends on which object is the (last) active one, which in my example case is the monkey as you can see by the orange dot of it’s center. Since the monkey was the last selected, 2.80 thinks now I want to select the cube instead. Which makes no sense since I’m clicking on the monkeys edges…
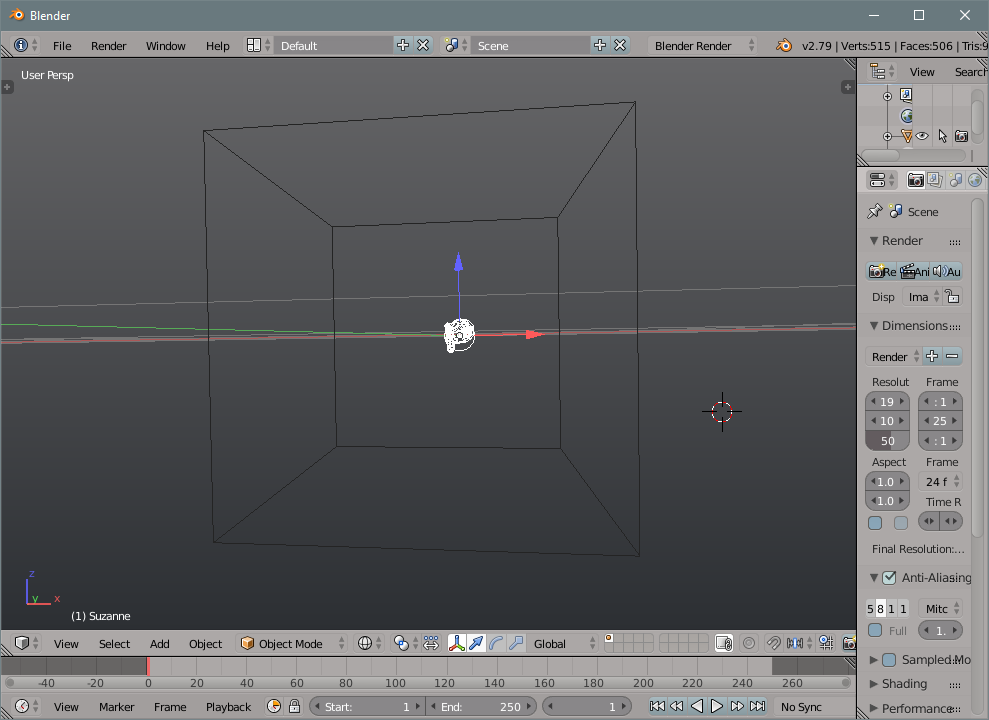
While on 2.79 I could easily select anything through anything on the first click, completely ignoring all faces, and only considering the object’s edges.
At least a couple of other people on the Wireframe feedback thread responded that they agree that they find this annoying… but maybe we are a minority and people prefer the new behavior instead of the old one.
13 Likes
here is my paper cut : Consistence while selecting objects: in sculpt mode, selecting another object is done by alt+left click, while in weight paint mode this is done by ctrl+left click. Also, shouldn’t be Ctrl+left click for subtracting in weight paint?
6 Likes
The outliner search seems very far from filters, yet I feel they do the same thing, and I’d like a command search visible on the screen for those who haven’t (or have) it mapped to the spacebar:
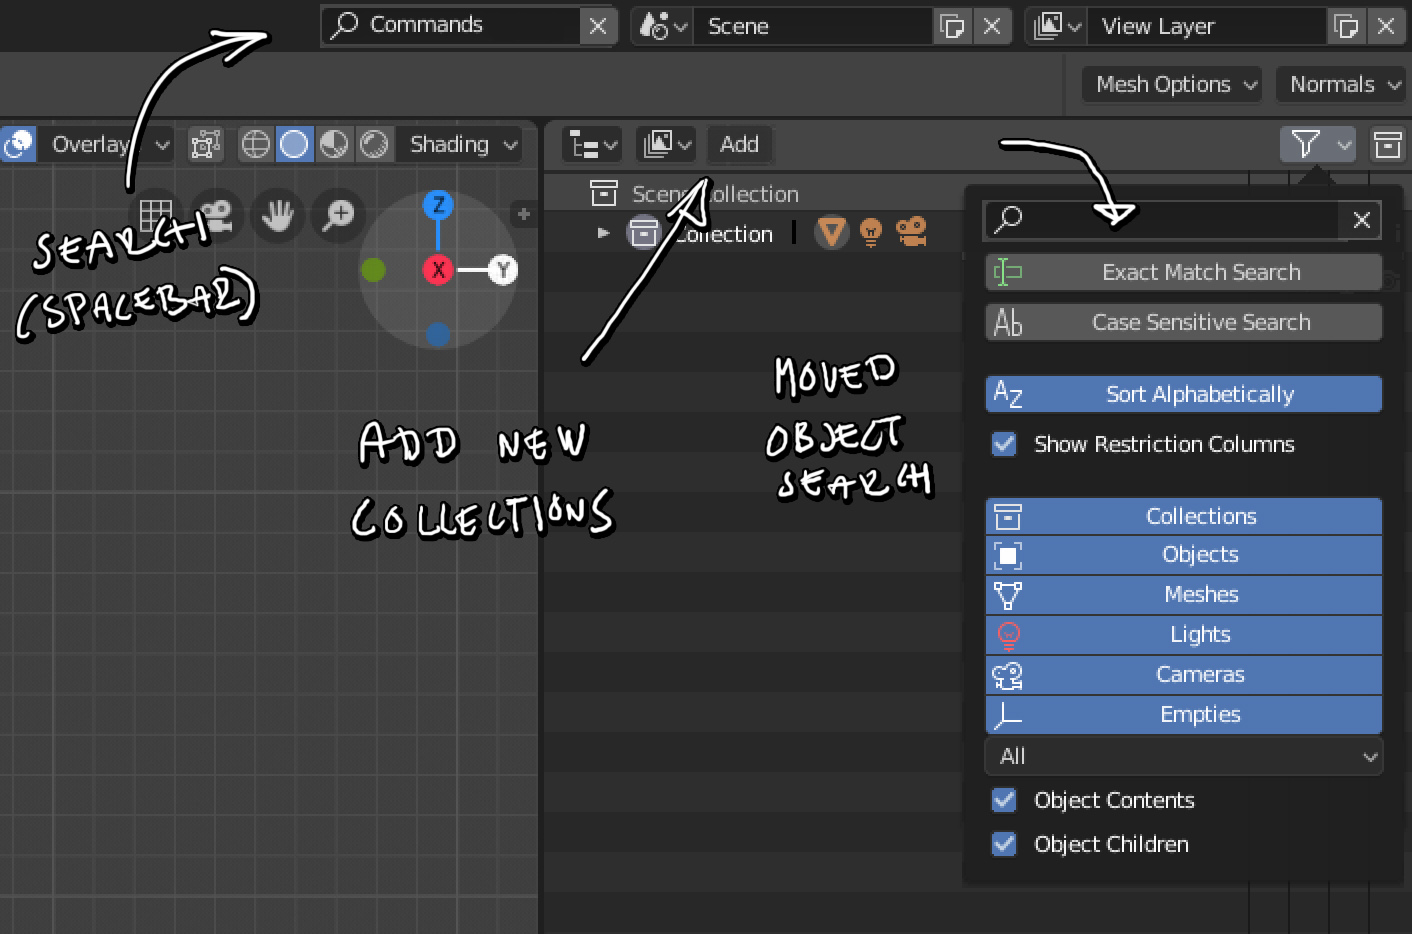
Plus as I mentioned previously, there really should be an “Add” button to add new collections etc in the outliner, since the 3D view has an add button.
(Common commands accessible from shortcuts only is very bad for discovery.)
There’s already a button to add collections on the right side of the header. As for putting the search inside the popover, that means you’d have to open it every time you would want to search, which seems annoying.
Why can’t you just use the search field that’s already there?
The Selected Object Outline seems to not be responsive to the thickness set in the Preferences, and it is too thick by default, even if is it set at 1px, it looks thicker than that.
Additionally, it would be a improvement to have the “xray” behaviour as an option and not a default. It can become visually distracting, and is not always a necessary visual information.
Thanks
Noooo, that’s a deep cut, man! That button is placed above/next to the filtering icons, it doesn’t read as an “add” button at all.
And the 3D view ALSO uses the same symbol as visual filtering.
Plus, the 3D view has a button which literally says “add”, and it’s placed on the left side and not the right side.
Inconsistency on so many levels! 
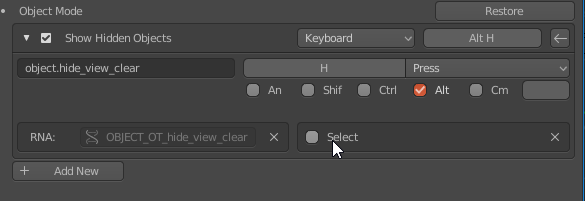
Show Hidden Objects within Visible Collections
- Previously we were able to hide/unhide selected objects of chosen layers without displaying the other layer’s content.
- Current behavious makes alt-h in object mode nearly useless since most of the time working with big scenes I (and imaginary user) don’t need to see other layers aka collections most of the time. In 2.8 Show Hidden Objects works like “View Layers for Render” from 2.79.
- Current workaround is to usie a local views, yet it doesn’t allow to unhide the hidden objects. Another approach is to manually uncheck “disable collections in viewport” which is also seems unnecessary.
- Visually it could be implemented by adding an additional toggle to object.hide_view_clear within a visible collections
or by adding another atribute to object.hide_collection so it will automatically isolate other Collections from being revealed.
Example of how it works now and how it was in 2.79 Imgur: The magic of the Internet
4 Likes
In addition.
Reveal Hidden and Show Hidden Objects by default shouldn’t select other objects and elements it’s rather inconvenient illogical behaviour especially with a large objects count. It annoyed me and other users migrated from other softwares in 2.79 till it was fixed by separate addon and patch.
2 Likes
That feature is incredibly useful for isolating a bunch of objects you want to select. Select each one in turn and hide it, unhide and you have them all selected.
The option is there, if you really don’t want to use the option, then invert selection before unhiding something when you really need to keep your current selection, but unhide things. Then invert again.
4 Likes
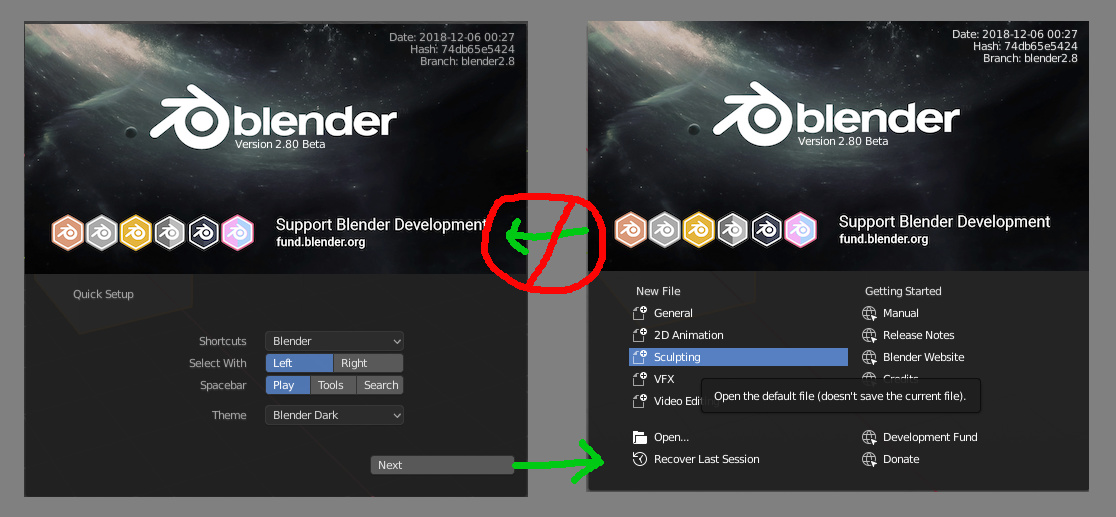
Okay, you open 2.8 for the first time, you’re presented with the Quick Setup splash with Left/Right and Spacebar useage choices. You make your choices and click on Next.
And next time you start 2.8, you bypass the Quick Setup splash and go straight to that Next screen.
Short of deleting the Blender Foundation folder in AppData\Roaming, how do I navigate back to the Quick Setup screen?
And yeah, I could do these things in Preferences, but I’m talking about getting back to that initial view of the Splash. Is it possible? Is this on someone’s to-do list?
15 Likes

In Linux the config files are at home/.config/blender/2.80/config. Grab both blendfiles (startup + userpref) and pull them temporarily on your desktop (or elsewhere). Start Blender. Push both folders back to config folder if needed. Done.
Thanks for the response, @Grinsegold, but you missed my point. (if you reread my post, you’ll see what I mean)
I’m looking for a way to get back there using the UI.
I got your point, but i still don’t see the need. Have you some arguments for that extra knob? Who would benefit from it? Yeah, you. I know. Well, it’s not me you have to convince, right? ![]()
THIS! I know someone complained it would be a bad thing (for whatever reason). But if it was a toggle, both camps would be happy.
Otherwise “Make sure you click save preferences” will be the new one “Here’s how to switch to LMB select”
2 Likes
Sure - but that is a) on a different window, and b) searches all objects across all visible collections.
If you put a filter on the vertex group, then it’s only on the object that I am currently painting.