Blender - Organizer (VCStudio) ( organization of the projects )

Script Editor Alpha

Now you can start type in your story into the scenes you created in the story-editor. And enjoy reading them. It’s still in a very early alpha tho. So be prepared to tons and tons of bugs. Since I’m writting the whole text editor system from scrach.

Ctrl - D ( Add Dialogue )

You can also try to add a Dialogue using Ctrl - D.

Causion

This is far from perfect. And please do not try to use it for something important. Maybe in future releases it will be more mature and you could use it. Even if I will not make a full set of features.

Also keep in mind. In order to preserve my test files I didn’t make it save anything yet. But if you click in the story editor it will save on click. Not in the script editor.

When it’s going to be finished I will make it save automatically each time you type something. Like in modern office suits.

Maybe you should consider the .fountain screenwriting format, which will make screenwriting and analysing scrips much simpler. Here’s a project doing it in the Blender Text Editor: https://github.com/tin2tin/Blender_Screenwriter

If you’re coding in python, I think there are a few screenwriting projects which supports fountain, you could team up with, or be inspired from ex. Trelby. VS code and Emacs IDEs also have .fountain modes for screenwriting. Storyboarder also supports fountain import.

1 Like

It looks like a cool way of making a script. Maybe I will make it export to .fountain in the end. In the previous Blender-Organizer I had an exporter to ODT. ( Libre Office Document ) I will do it too. Maybe an import from .fountain could be cool. Or even from ODT. But how exactly ?

All of it will be done after I finish with current one. The point here is that the script is more then simply a text document that is formatted like a script. Marking up shots will give you access to create the blend files for those shots. Marking up characters will create assets for those characters. So the script should be more of a database type. And that’s exactly how I do it with mine.

I can enter the assets. And see their scenes from the assets. This is the kind of stuff that I want to have. Full interlinking of everything. So I would not need to memorize what folder is for what.

Marking shot is colorful. Looks lovely. If you hate the colors there is theme.data file you can edit.

Only yesterday I wanted to completely give up on the whole project. Because how hard it was to make something resembling a working editor. It’s still very buggy. But it’s so cool to be able to simply do that.

1 Like

Neonspeedster is driving through the underwater.

Like this is so cool. The Blender-Organizer is almost on a working stage. Almost can use it in production. So exciting.

1 Like

Script Editor is Almost Fully Functional

Missing features:

  • Clipboard. I think I will implement a basic clipboard thing soon. It is working in any single line entry. So I don’t thing it’s going to take a long time to implement. But there is a problem. This would not be able to copy and paste parts of text that are formatted as formatted yet. Because it’s not really a simple thing to do. I think in the end I’m going to use an old format from Blender-Organizer legacy for clipboard. Which was a text markup code. Rather then a database of now. But I’m not sure about it. I need to think about it.
  • Delete. Backspace works fine. Delete should work but it’s broken. Also there is no backspace or delete on inserted images. But you can select an image and then delete it.
  • Un-Mark Text. There is currently no way to restore text from being marked. So there is this.
  • Ctrl-Z. Proabably simple. I think Story Editor also needs one.
  • Export. In the Blender - Organizer legacy I had a way to export the script into ODT. It’s in plans for this one. But it’s probably not soon.

Shots

An alpha version of shot preview is there too. It’s on the left on the picture. It’s currently able to edit names of shots ( unless their folders exist ), colors of mark, and you can see the renders if they exist.

Missing features:

  • Blend Files. Probably the first thing I’m going to implement next. There is no blend files anything.
  • Linking. Linking to the blend files is not there yet.
  • Rendering. I gonna probably design a whole system around rendering because of how I want to able to work in the end. In the multiuser idea that is going to be developed next. I want to be able to set up one computer as a kind of server and send rendering tasks to it. So rendering has to be able to be done in such a way that everything works.
  • Checklist Creation. If a shot already has a checklist (shot.progress) then it will be shown at the right side. But there is no way to generate one yet.
  • Scene Checklist. I was thinking about making a checklist for each scene as well in general. Like so while writting you could have a list of stuff you want to make sure to write about. Or something. But I’m not sure how to implement it properly yet. Since it’s going to create a folder.

I guess play arround with it. Try to find things that do not work right. And tell me. I gonna have something to break my head with.


Either I’m bored or this Program is build for CREATIVITY

This is EPIC

Think about it. You write your script. And you can just on the fly from the same program just to add a blend file and start animating.

Script almost ready

Now you can have blend-files in your shots. Meaning that you are almost there to start using the software for actuall production. Tho some stuff still does not work.

You can see in the bottom of the Blend-File there are 2 icons that now do nothing. Those will be:

  • Linking. Linking assets into the animation files to start animating. Probably the next thing I’m working on. It’s working fine in Blender-Organizer. But Blender is moving away from prroxies into library overwrites. So I think I gonna see how I can implement that instead of the old proxies.
  • Rendering. This will launch renderings of your animation files. Of course you could always render them with in Blender it self. And it’s fine. But for me personally it’s not robust enought and you don’t get any analytics data from it. So I will make some kind of a system. It’s yet to be designed. But for the user it will be similar to one in Blender-Organizer.

Also if you want to add a new Blend-File or copy one from a different shot. Just type it in a search.

I think it’s going to be a standard practice from now on.

Shot checklists

For the past couple of releases the right side in the script editor was empty. But I introduced checklists generator now.

You can see the cheklists themselves here. Look for ones with shot in the name.

Basically in assets it creates one automatically as you create the asset. But here I can’t do that because I don’t really know what type of shot is it. I’d had the same problem if all assets were in the same folder. But for some reason early on in the Organizer’s core design I decided to make Characters, Vehicles, Locations and Objects. With shots tho. Their parent directory is the directory of the scene. Each scene is similar to a category like “Characters” and every shot inside that scene is similar to every asset inside “Characters”. And other scene is like other category.

If you get what I mean. I can’t know before hand what type of a shot is a given shot. Is it a live action shot? Is it an animation shot? Is it a VFX shot? What checklists should I create?

Therefor I have an option of 3 checklists to choose from ( this number is extendable ).

Scene checklist

I also introduced something quite wild. But could be in use for somebody. Why could not there be simple a scene checklist. For example while you write the scene. But keep in mind that generating a checklist will create a folder for that scene or that shot. And it will block you from editing the name of that given scene or shot.

By the way this is the default scene checklist. Your thoughts?

Take a moment to see what’s going on in this picture. Look at it. It’s a dialog with in dialog. OMG.

Library Overrides still Broken !!!

I’m working on a Linking system for VCStudio. Similar to one in Blender Organizer. You choose what assets you want to have in a scene and a little script prepares it for you. I thought. Let’s do the new library overrides. And I’ve got an issue.

Most rigs work just fine. But one rig. RedKiss doesn’t want to link properly for some reason.

Linking

This is RedKiss when I just link it.

As you can see everything is fine. It’s just a simple model being there as a instance.

Proxy

This is RedKiss when I do proxy.

As you can see the rig is there. And it’s okay. Just like it has to be.

Library Overrides

This is Red Kiss when I do Library Overrides.

As you can see. The rest of the rigs are okay. But Red Kiss is broken. Some of the wheels are failed to be recognized. And they stayed in the center of the file. Because they are still not overridden.

For now

At the moment. I decided to add 3 types of linking in the linker window. Linking only, Overrides and Proxy. Maybe I will able to fix the issue and then I will remove the proxy. Or maybe I will not.

Code

For those interested this is the BPY code that links the assets:

# THIS FILE IS A PART OF VCStudio
# PYTHON 3
# BPY ( WITH IN BLENDER )

#################################################################

# This file is running with in Blender to link assets from their
# AST files into the animation files. And make library overrides.

# NOTE: It's using BPY module which is not available outside of
# blender. So in order to test any changes to it. You have to
# run it with in Blender. Or Using blender -P <your_script>.
# See blender --help for details.

#################################################################

import bpy
import os

# The main problem with running from with in blender is that we
# have no access to all the outside modules. And this script
# will be there on it's own. So it need a way of knowing where
# are the assets.

blendpath =  bpy.data.filepath              # Animation file path
folder = blendpath[:blendpath.rfind("/")]   # Animation shot folder
pf = folder[:folder.rfind("/rnd/")]         # Project's folder

# In order for VCStudio or Blender-Organizer to know what is going
# on I use print(). It's not going to be outputted into terminal.
# since we are piping everything directly into VCStudio. Which is
# going to parts those lines to give the user some graphical feed
# back.

print("BLENDPATH : ", blendpath)
print("FOLDER : ", folder)
print("PROJECT FOLDER : ", pf)

# Now we are going to abort the process if there is no file in the
# shot folder that has the info about the linked data. autolink.data

if os.path.exists(folder+"/extra/autolink.data"):
    print("FOUND AUTOLINK.DATA YEY :)")
    
    
    # Now let's parse the extra/autolink.data file
    
    df = open(folder+"/extra/autolink.data" , "r")
    df = df.read()
    
    # These 2 values will be our location in the blender space since
    # I don't think any user wants all of their assets to be in the
    # same exact spot.
    
    movey = 0
    movex = 0
    
    # We need to get our mode first. Because the user might want to
    # just link. Or make the old proxy.
    mode = "link"
    for num, line in enumerate(df.split("\n")):
        if line.startswith("Mode : "):
            mode = line[7:]
    
    
    # Let's see if there any lines that say what we want to link.
    
    for num, line in enumerate(df.split("\n")):
        if line.startswith("Link : "):
            
            # So here is out item. ( asset ). NOTE: THe item in 
            # autolink.data will have /dev/ added to the begining
            # like all links in Blender-Organizer. 
            
            item = line[7:]
            print("\nLINKING ITEM : "+item)
            
            # Now let's see if the asset also has an autolink.data
            # configured. Because if not. Script would not know what
            # to link.
            
            itemsdf = pf+item+"/autolink.data"

            if os.path.exists(itemsdf):
                print("FOUND "+item+"'S AUTOLINK.DATA :)")
                
                # Now let's parse the autolink.data of the asset.
                
                idf = open(itemsdf, "r")
                idf = idf.read()
                
                # We need to find 2 types of data. What collections
                # to link. Since not all of them are nessesary. And
                # whether to do library-overrides. 
                
                # At the time of Blender-Organizer library-overrides
                # was still a very unstable thing. So I was going
                # proxies. Now I don't want to break backward compati-
                # bility with Blender-Organizer. So we are going to
                # read the full list of Proxies. And if they exist
                # we are going to use library override instead. So
                # keep in mind. They called proxies in the script. But
                # they are library-overrides.
                
                linkdata = [] # Lits of colletions to link
                proxydata = [] # Lits of "Proxies" so to speak.
                
                for iline in idf.split("\n"):
                    if iline.startswith("Link : "):
                        linkdata.append(iline[7:])
                    elif iline.startswith("Proxy : "):
                        proxydata.append(iline[8:])
                
                print("LINKDATA ", linkdata)
                print("PROXYDATA ", proxydata)
                
                # Okay. Now we got both lists. Let's see if there is
                # an asset blend file. Because for any reason it might
                # not exists.
                
                astblend = pf+"/ast/"+item[5:]+".blend"
                print("AST BLEND : "+astblend)
                
                
                if os.path.exists(astblend):
                    print("YAY FOUND THE BLENDFILE :)")
                
                    # We found our asset blend file. So now let's do 
                    # the linking.
                    
                    for collection in linkdata:


                        print("ATTEMPTING TO LINK : "+collection)
                        
                        # Now let's try actually doing it.
                        
                        try:
                            with bpy.data.libraries.load(astblend, link=True) as (data_from, data_to):
                                data_to.collections = [c for c in data_from.collections if c == collection]
                            
                            for num2, new_coll in enumerate(data_to.collections):
                                
                                print("TRYING LINKING ", new_coll.name)
                                
                                try:
                                    if new_coll.name:
                                        instance = bpy.data.objects.new(new_coll.name, None)
                                        instance.instance_type = 'COLLECTION'
                                        instance.instance_collection = new_coll
                                        bpy.context.scene.collection.objects.link(instance)
                                        if not item[5:].startswith("loc"):
                                            bpy.data.objects[collection].location[1] = movey
                                            bpy.data.objects[collection].location[0] = movex
                                        
                                        # So here we already linked our data. And placed the
                                        # objects. Next we want to do library-overrides.

                                        if proxydata and mode == "override":
                                            
                                            # With library overrides there is one little problem.
                                            # It nullifies the location. Because the location is
                                            # now also overriden.
                                            
                                            bpy.data.objects[collection].select_set(True)
                                            bpy.context.view_layer.objects.active = bpy.data.objects[collection]
                                            bpy.ops.object.make_override_library()
                                            
                                            
                                            # So after we do the override we need to change the
                                            # location again.
                                            
                                            if not item[5:].startswith("loc"):
                                                bpy.data.objects[proxydata[0]].location[1] = movey
                                                bpy.data.objects[proxydata[0]].location[0] = movex
                                            
                                            # And while we are on it. In the Blender-Organizer
                                            # linker there was one inconvinience that you had
                                            # to hide the rig from viewport since if not you will
                                            # have both linked and proxy rig drawn on screen at
                                            # the same time. So let's unhide it.
                                            
                                            bpy.data.objects[proxydata[0]].hide_viewport = False
                                            
                                            # Also while we are here. Let's use the size of the
                                            # rig to offset it's location instead of 5. If the
                                            # rig exists.


                                            movey = movey + bpy.data.objects[proxydata[0]].dimensions.y+1
                                            if movey > 25:
                                                movey = 0
                                                movex = movex + 5
                                        
                                        elif proxydata and mode == "proxy":
                                            
                                            # Now the used could select to do it the old way.
                                            # using a proxy. Then this is the way.
                                            for proxymake in proxydata:
                                                print("TRYING PROXING ", proxymake)
                                                
                                                try:
                                                    
                                                    ob = bpy.context.scene.objects[new_coll.name]
                                                    ob.select_set(True)
                                                    bpy.context.view_layer.objects.active = ob
                                                    bpy.ops.object.proxy_make(object=proxymake)
                                                except Exception as e:
                                                    print("PROXY FAILED ", proxymake)
                                                    print(e, "ERROR IN PROXY")
                                                
                                            movey = movey + 5
                                            if movey > 25:
                                                movey = 0
                                                movex = movex + 5
                                            
                                        else:
                                            
                                            # If ther is no library - override enabled. The instance
                                            # empty has a size of 0. So this same dimension thing
                                            # would not work here. :(. I might come up with something
                                            # later.
                                            
                                            movey = movey + 5
                                            if movey > 25:
                                                movey = 0
                                                movex = movex + 5
                                        
                                        # Now I want to save the file. BUT. In the old way of
                                        # doing it I made a mistake to save without checking
                                        # that all paths should be RELATIVE. And so copying the
                                        # project to another computer bloke all the files.
                                        
                                        bpy.ops.file.make_paths_relative()
                                        bpy.ops.wm.save_mainfile()
                                        
                                        # So ther is 2 line now when saving.
                                        
                                        # Now I'd like to print out the current fraction of
                                        # the linking progress done. So I could make a progress
                                        # bar in the VCStudio.
                                        
                                        print("FRACTION:", (num+1)/len(df.split("\n")))
                                        
                                except Exception as e:
                                    print(e, "ERROR IN LINING")
                        except Exception as e:
                            print(e, "ERROR IN GENERAL")
                                
                                
                else:
                    print("NO BLENDFILE DOEN'T EXIST :(")
            
            
            else:
                print("NO "+item+"'S AUTOLINK.DATA :(")


else:
    print("NO AUTOLINK.DATA SORRY :(")  

print("FINISHED")

Linking assets.

So here you have your scene written. Assets created and ready to animate. You create a shot. You add a blend file into the shot. Now what? How will you get your assets into the shot?

You can see under the blend file there are 2 icons. One of them is to link assets from the script into the file.
So let’s press it.

It will automatically load those assets that were marked inside the shot in the scene text. And if you want edit the selection you can do it from here. To add them back from those in the scene you have the little icon on the top there.

Because Library - Overrides in blender still kind of broken. I made 3 modes of linking. You can see them in the top, right corner of the window.

  • Linking. It will just make instances of the assets in the blend file.
  • Library Overrides. It will make Library Overrides to each asset you link.
  • Proxy. It will make the legacy proxy to the rigs of the assets.

Configure assets

But sometimes you will encounter this type of situation. It means that either /ast/ blend file of the asset is missing or there is no file with linking instruction for this asset. ( autolink.data )

What you can do about this. Is to configure the asset. There is a new button for that above the main progress bar in the asset manager.

The configuration is broken up to 3 steps.

Make the asset.

Of course before the asset is able to go to production it has to be finished first. So the configuartion window will check the checklist of the asset and see whether you are done or not.

Copy the ast blend file

There is a specific folder for final blend files. /ast/ folder. And the linker will refer to it when linking. Actually if you place the blend file there manually. You can bypass the Making the asset step. If there is a file the progress becomes 100% by default.

Choosing Collections and a Rig

When I make rigs there is usually hell of a lot of not needed collections. Stuff like rig elements. Trash objects that used to build the asset. This is not a part of the rig. So in this window you can select your collections that you would like to be linked.

And since we are doing proxies / library overrides we want to know what objects to proxy. Or which one is your rig. Either proxy or library overrides. The script needs to know which one is the rig. So here you go.

Actually I made so if you call the collection exactly as the asset. Then it’s selected by default.
With the rig it selects every Armature object by default.

Working on a Rendering UI. I guess this is a simplified version of the clustered mess that was the UI in Blender-Organizer.


Look at this disaster. ( I know I’m using IceWM at the moment so it’s not as pretty as Gnome would look like. But still. )

You can see I cut some functions like CPU / GPU split which is no longer needed since Blender does it now for you. Also I never found using more then 1 render list at any given time. So I have one by default now. And all the setting happen kind of inside it. And Just Save button is no longer needed because I wave setting as you change them.

I will add a tutorial button later. When most of the stuff will be done and I will make tutorials about all the stuff.

Rendering

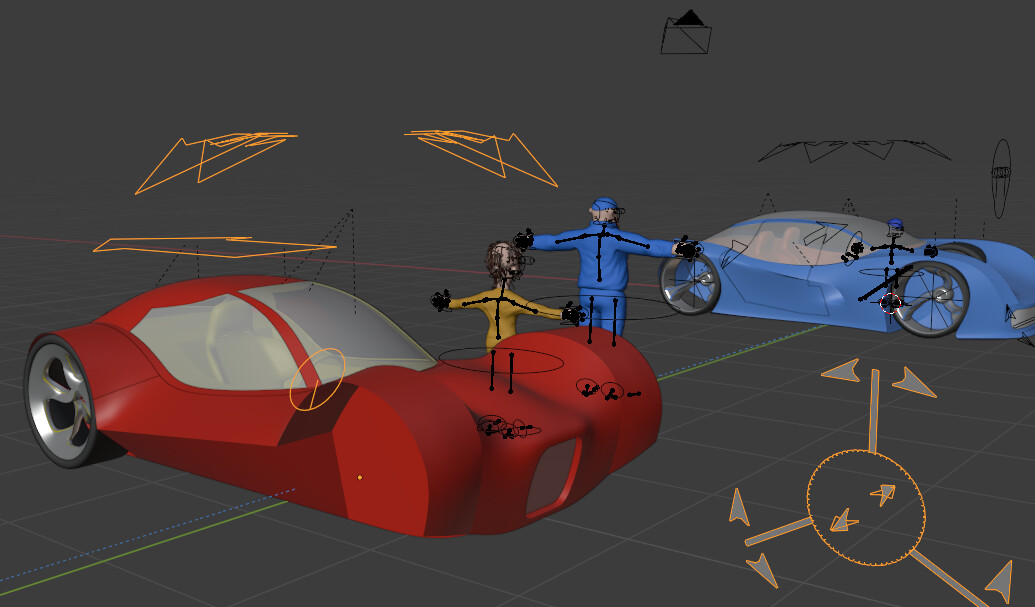
So you have your blend file in the shot fully animated and you want to render it.

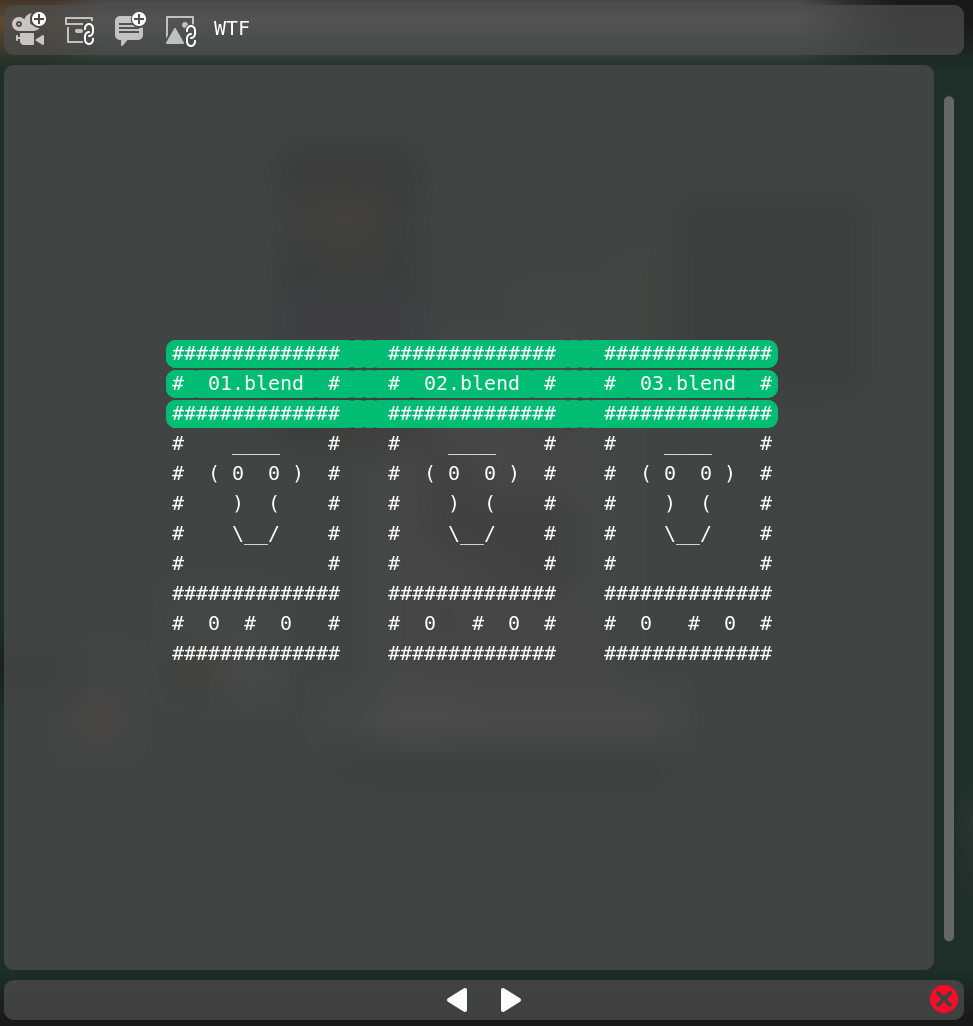
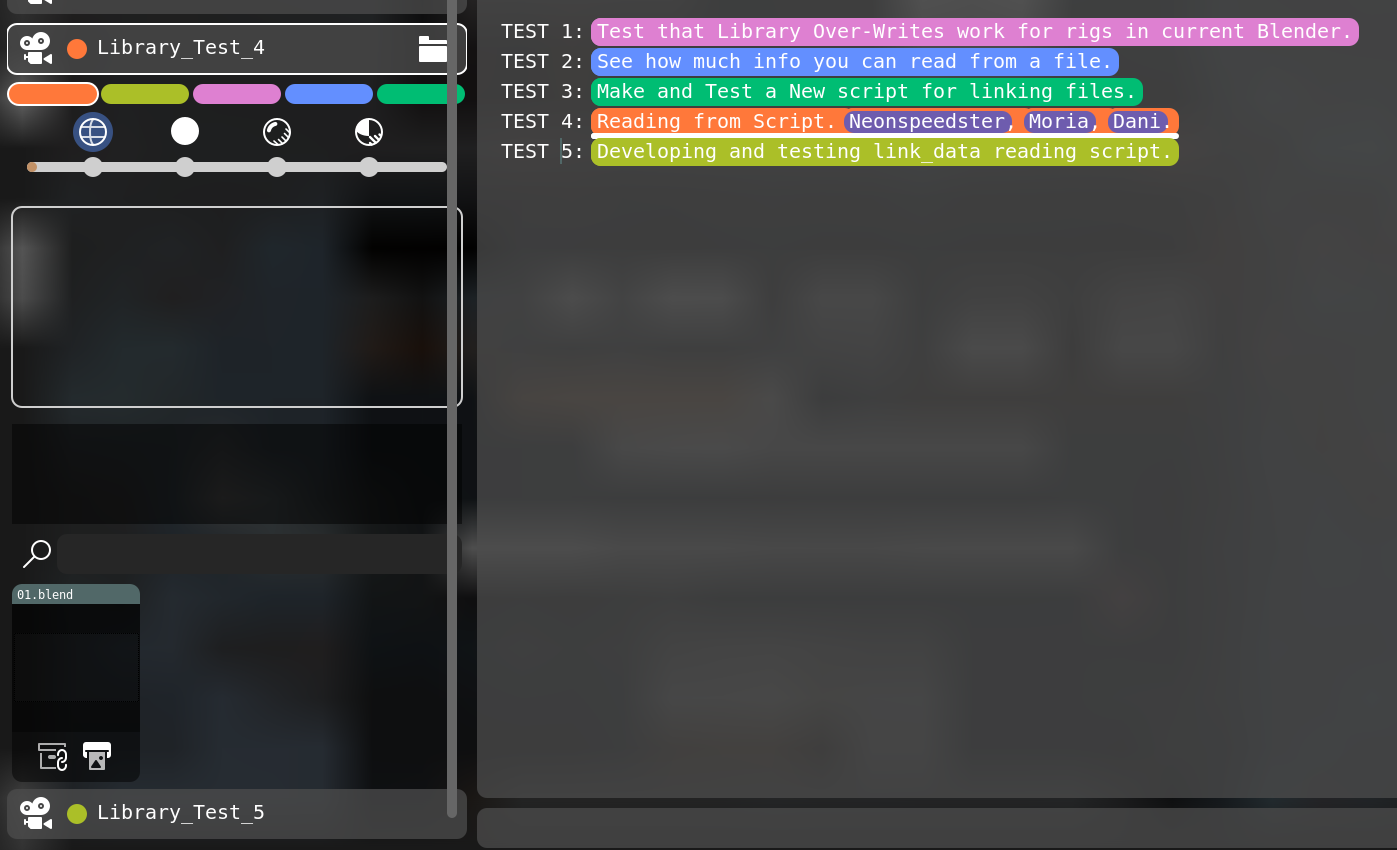
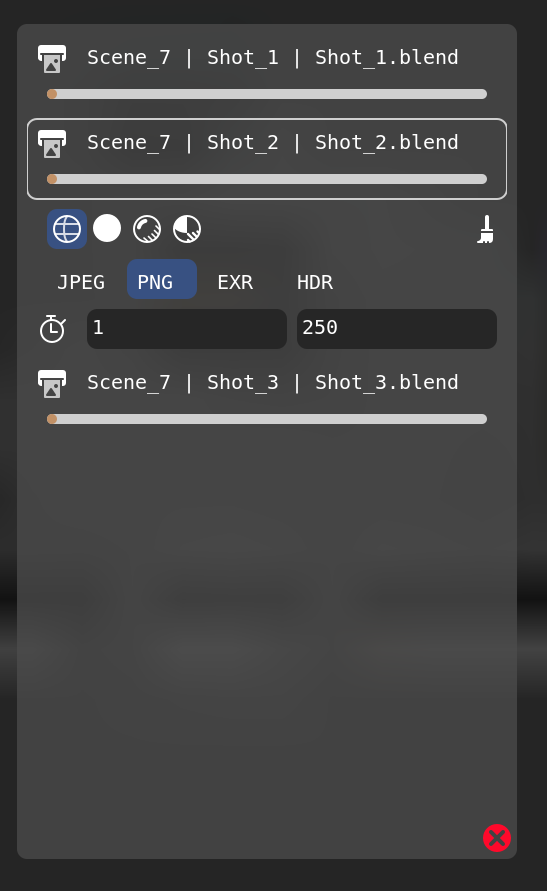
So you click on the render button and you get this window.

Let’s go over all the settings in this window.

Folder

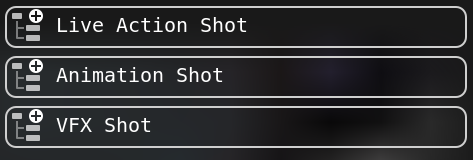
First you need to select the folder to which you render. It’s either:

  • storyboard
  • opengl
  • test_rnd
  • rendered

But the user doesn’t nessesarily know about their existance. Untill the editing stange.
The names were chosen long time ago in like 2016. To make it backward compatible with older projects I’m keeping the names. But the icons I chose illustrate everything more clearly.

On the side from the folder you have a little clean icon. If it’s selected, renderer will delete all files from the folder before rendering. Else it will start from the first missing file in the folder.
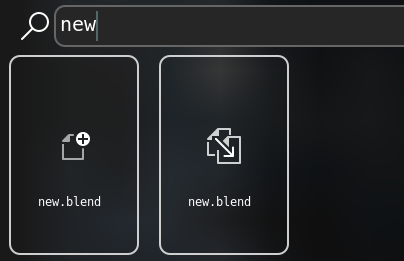
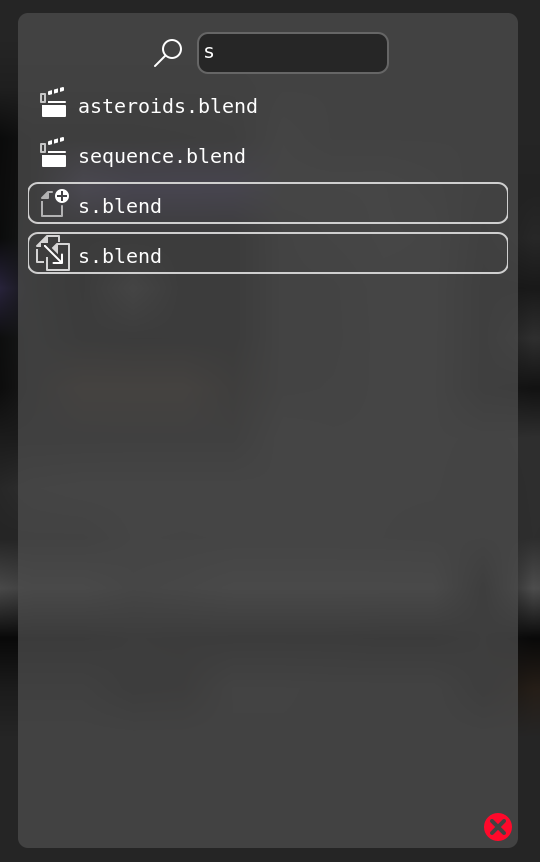
Format

I’m not giving too much options here. Well one thing is that algorithm of the renderer is frame based and does not support video. Tho this is extendable.

Start and End frame

It should take those from the blend file automatically. But if you want to set them up manually. You can do that.
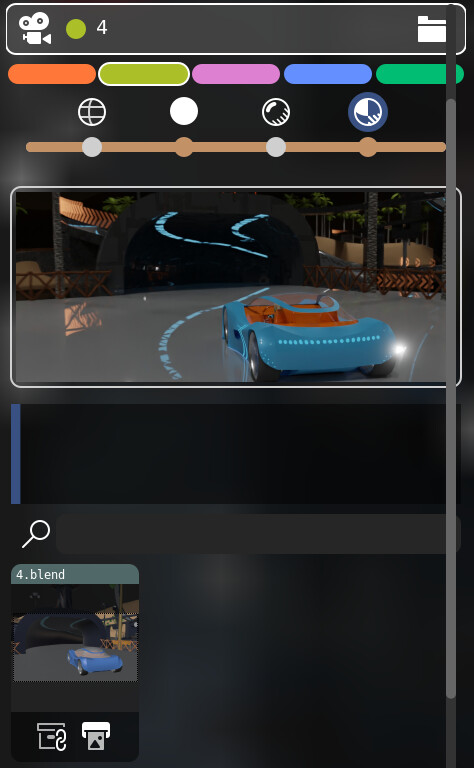
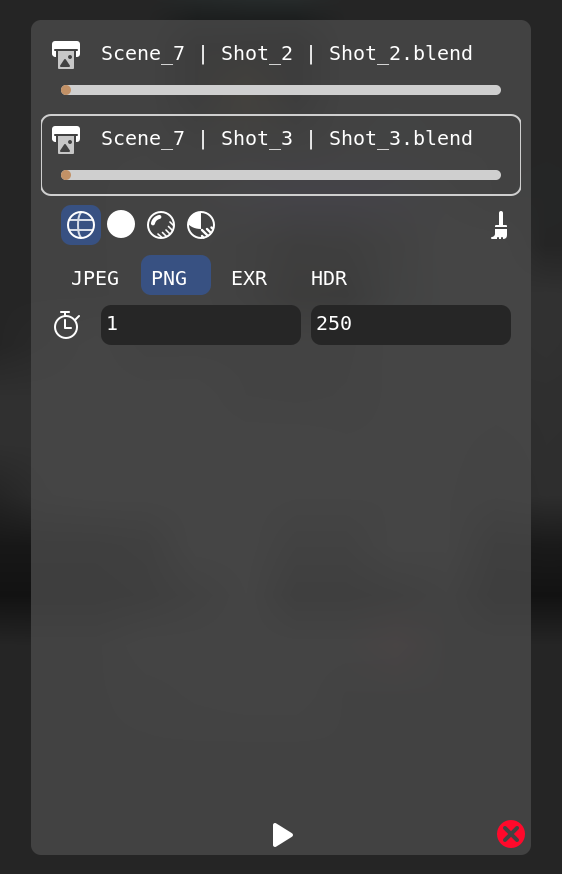
Multiple renders

Now if you will click on render on multiple files. They will be all added to a list. And rendered one after the other. In future with multiuser I want to allocate files to different machines. This is going to be it’s own headache.
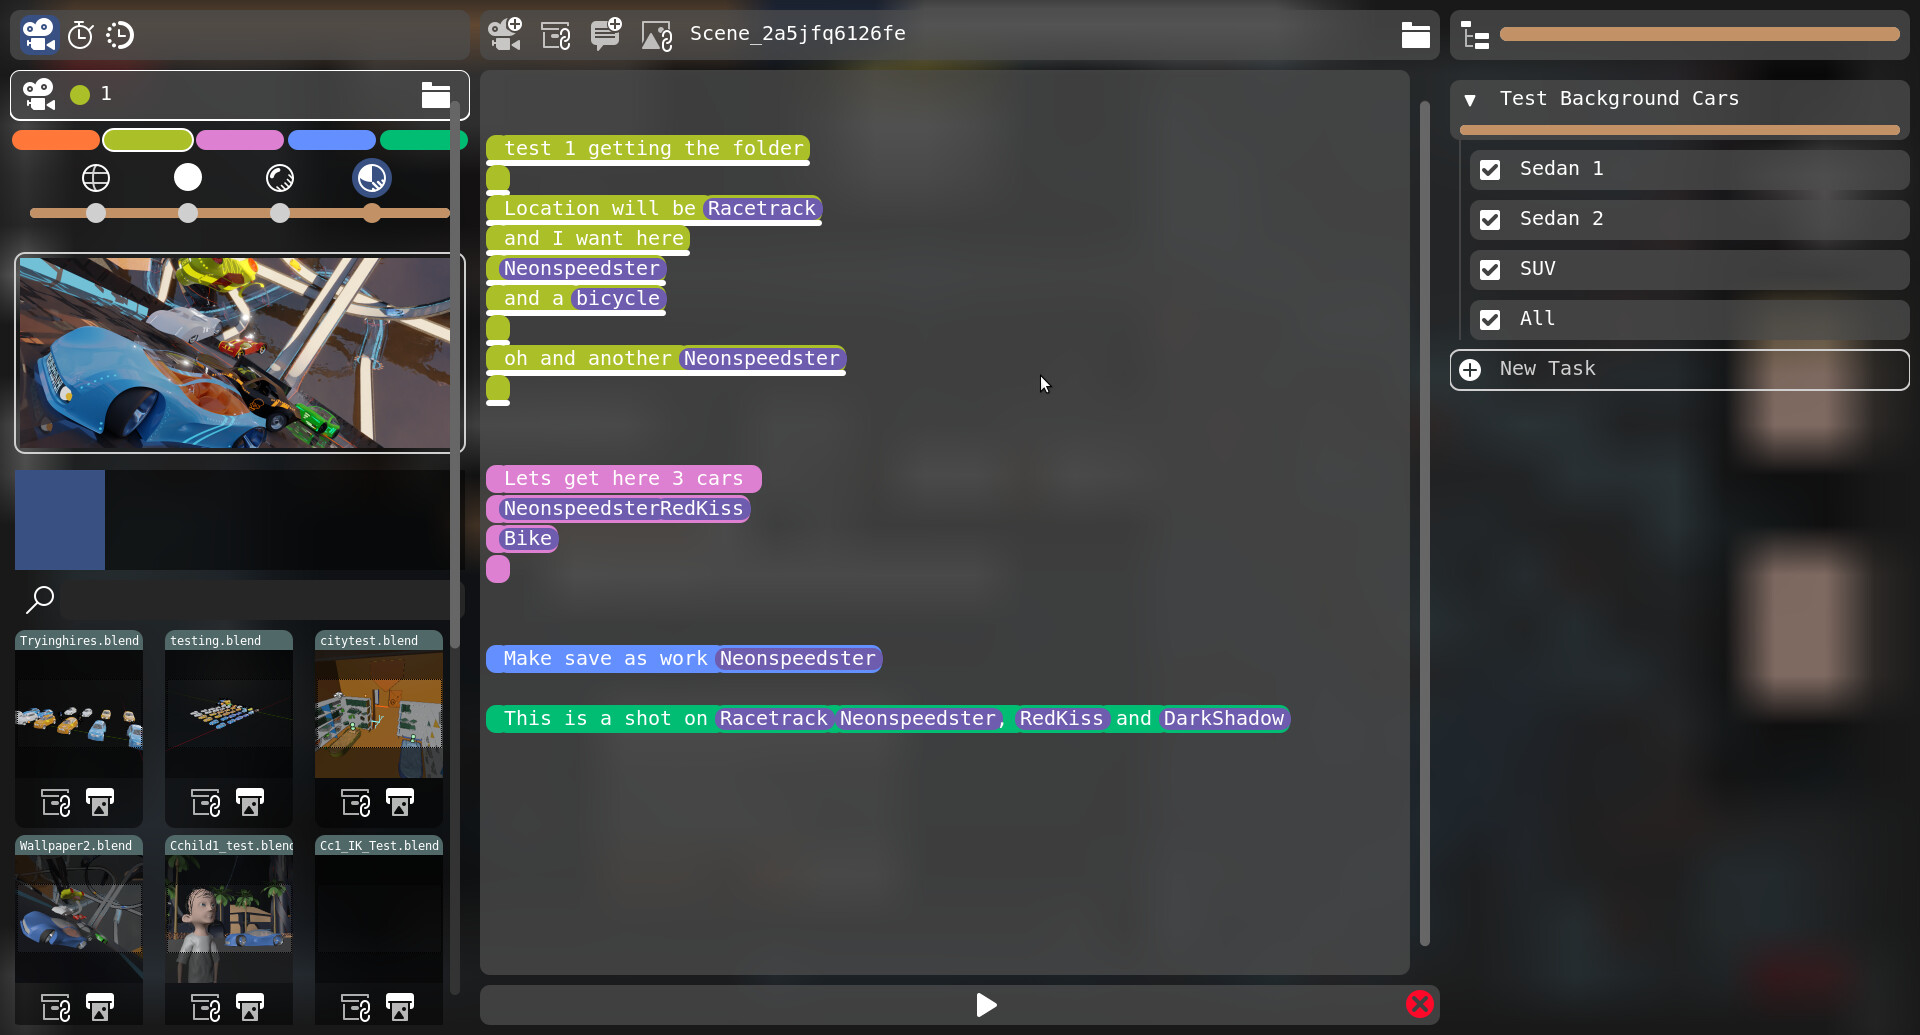
Current Renders

You can always access the render list from the main window. In the panel on the left you have this render icon. Which is just giving you access to all currently setup renders.
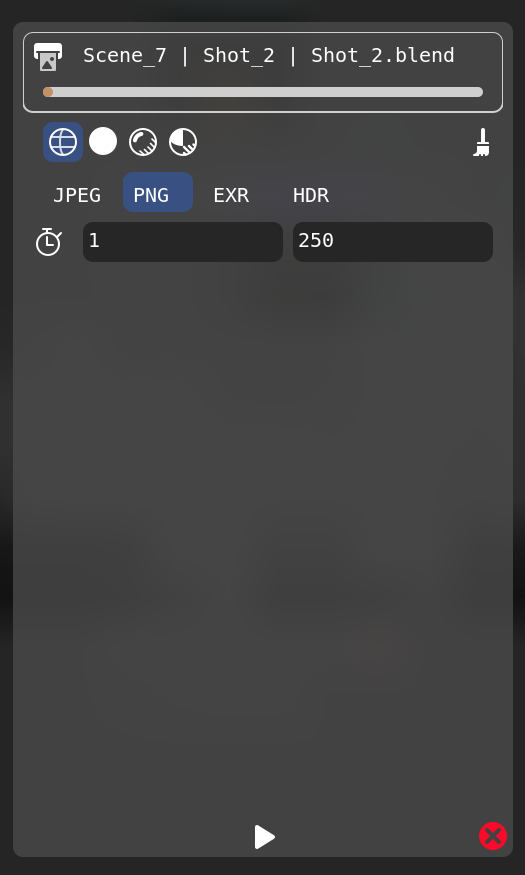
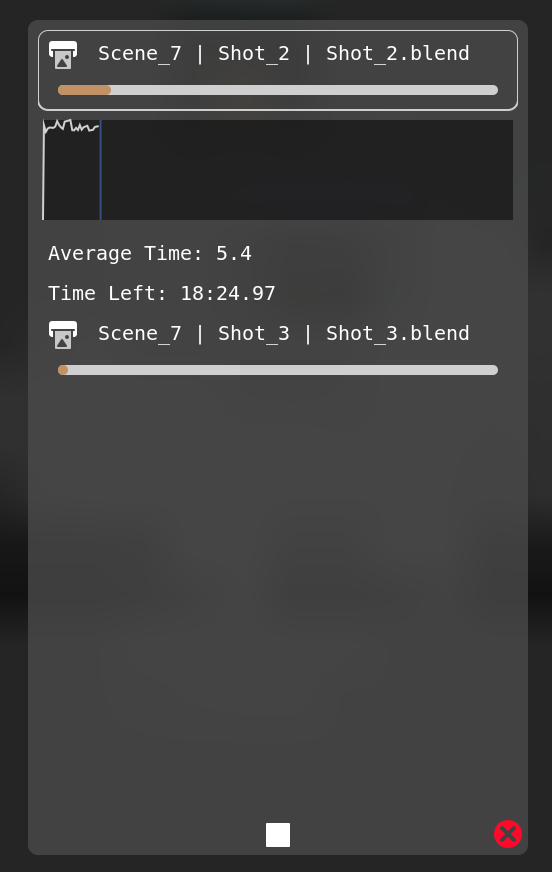
During Rendering

If you click the launch button in the bottom. Currently rendering file will not show you the settings, but rather, will show you the graph and some analytics data about the render.

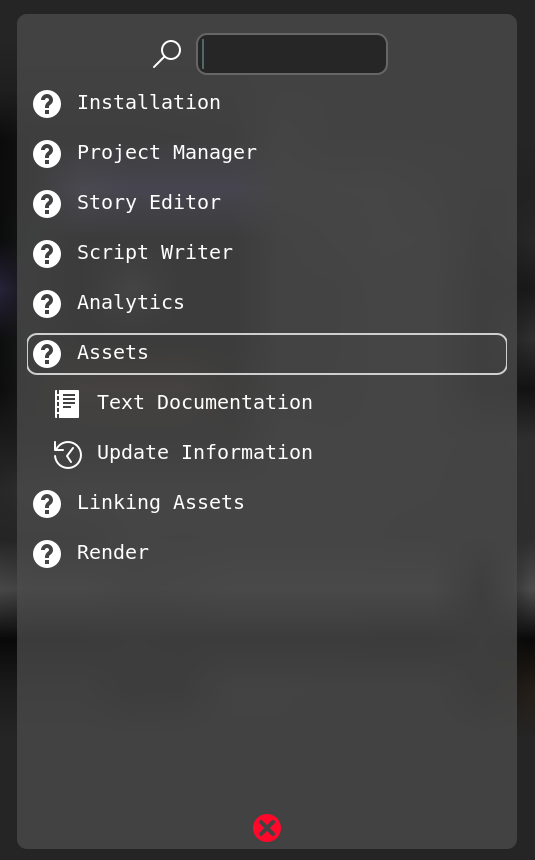
How the renderer works.

Short answer. Read this.

Long answer. Renderer is a complitelly separate process from the VCStudio. That means you can close VCStudio and it will not close the render. Basically it’s a python script that launches blender -b on each frame. And communicates with VCStudio using UDP network protocol. Now you might ask… What? Internet?. No. No internet is needed for this to work. It communicates using 127.0.0.1 which is basically telling the computer to send messages to himself. You can even listen to 127.0.0.1:54545 to see what communications are happening between those 2.

Also this is why stopping render is a bit buggy. It sends an abort message that not always is catched by the renderer script.

How the renderer chooses frames. So basically it’s a re-imlementation of the render script from Blender-Organizer. It looks if any renders are now setup and selects the first one on the list. Then it checks if any frame between start_frame and end_frame is missing from a set folder. And renders the first one that’s missing.

This way even if it crashes mid way through the frame. It will just do this same frame again. Untill it actually appears in the folder. And also if user deletes a frame somewhere in the middle, it will find this missing frame and render it first. When all frames exist inside the folder it will remove current setup from the render list and start rendering the next one. Or quit if nothing is there to render.

In order to work on the render script you will need a way of sending messages to it and reading messages it sends.

Undo

This update introduces some very needed function of the undo. It works in both Story Editor and Script Writer. So now you can make mistakes.

  • Undo. Ctrl - Z
  • Redo. Ctrl - Y

VSE

Under the render icon in the Story Editor you can find the VSE icon. For editing of the movie. If you didn’t know, Blender is a good Video Editor too.

Unlike in Blender-Organizer with only one VSE file per project. Here you can make as many as you like.

Documentation

Now in various places in the VCStudio you will see a question icon. Clicking it will give you a little documenation dialog.

This is a hub of general infomation. In future releases I will add more entries there and add links to video tutorials as well.

VCStudio is ready for production.

At this moment there is only one function missing. The multiuser. Which I gonna develop next. But other then that VCStudio is on the part with Blender-Organizer. So be free to use it.

Now since it’s a relativally new software some bugs might still accur. So please report them.

To add to a wishlist, being able to render using a network (e.g. using CrowdRender) would be very welcome. CrowdRender splits frames to render, and works with cloud resources as well as local machines, which has made me very happy. It’s a darn sight more straightforward and painless compared to Flamenco, from my point of view.

This is from their site. which means that they are not yet open source. And probably will have some trouble integrating this. Because well. VCStudio is on GPL license.

Also I don’t know how will this work. Because VCStudio is more link based system. And how do upload the file online while all the assets are linked? Do you need to upload the entire project? I never used a render farm myself so I have no idea how they work.

When we were making both I’m Not Even Human and The Package, The Car and The Time is Running Out movies. We used our own machines. Stuff that we have access too. And that made rendering kind of straight forward.

I don’t trust render-farms very much. Maybe I just don’t understand how they work.

Can you explain?

Also one thing throws me off with Crowd Render. Their site has 40 something scripts blocked by LibreJS. They do not care about Free Software.