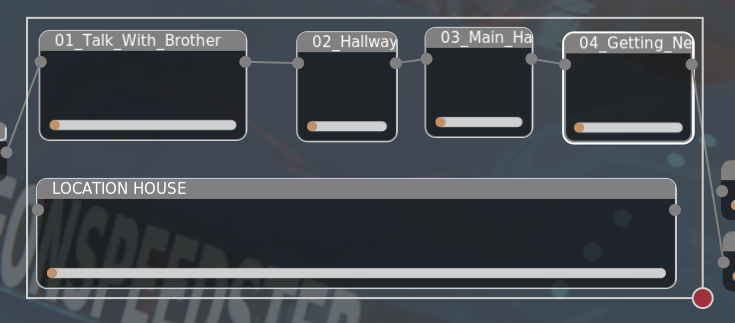
Look at the containers. These are generated when more then one scene was in the same event. The idea is quite similar. But events could be separate to scenes in VCStudio. You can think of the new event as of the blender’s frame.
Story Editor
This is perhaps the most important part of the VCStudio. Other stuff is too simple to even care about. Maybe only analytics has some challange to it. But the story editor is an extremely hard project to make. And even harder to REMAKE. Because there is a version of it working in the Legacy Blender-Organizer.
Changes are:
- Multi-object select
- Active objects
- Progress bars for scene comletion
- Complete re-imagining of the even concept. (Very buggy at the moment)
If you wan to try. See previous version for instructions.

VCStudio and Blender-Organizer are free-software packages for organizing animated projecst. Primarily to work with Blender3D. It’s written in python and distributed as a set of scripts. So in theory with little work you can make it run on any OS. It’s licensed with a GNU GPLv2 license. Primarily developer of the project (2018 - 2020) is J.Y.Amihud (also known as Blender Dumbass). Some projects done with this software may include I’m Not Even Human, The Package, The Car & The Time Is Running Out and Moria’s Race.
It’s approaching the functionality of Blender_Organizer. And I did it was faster.
For example the connection of linked files and Seeing the progress bars of the assets. And it’s fun to play with them with using multi-select that I introduced yesterday.
This is a small update to the story editor developing.
As you proabably already know, story editor is the most important and the biggest past of the developing.
In this version changes are:
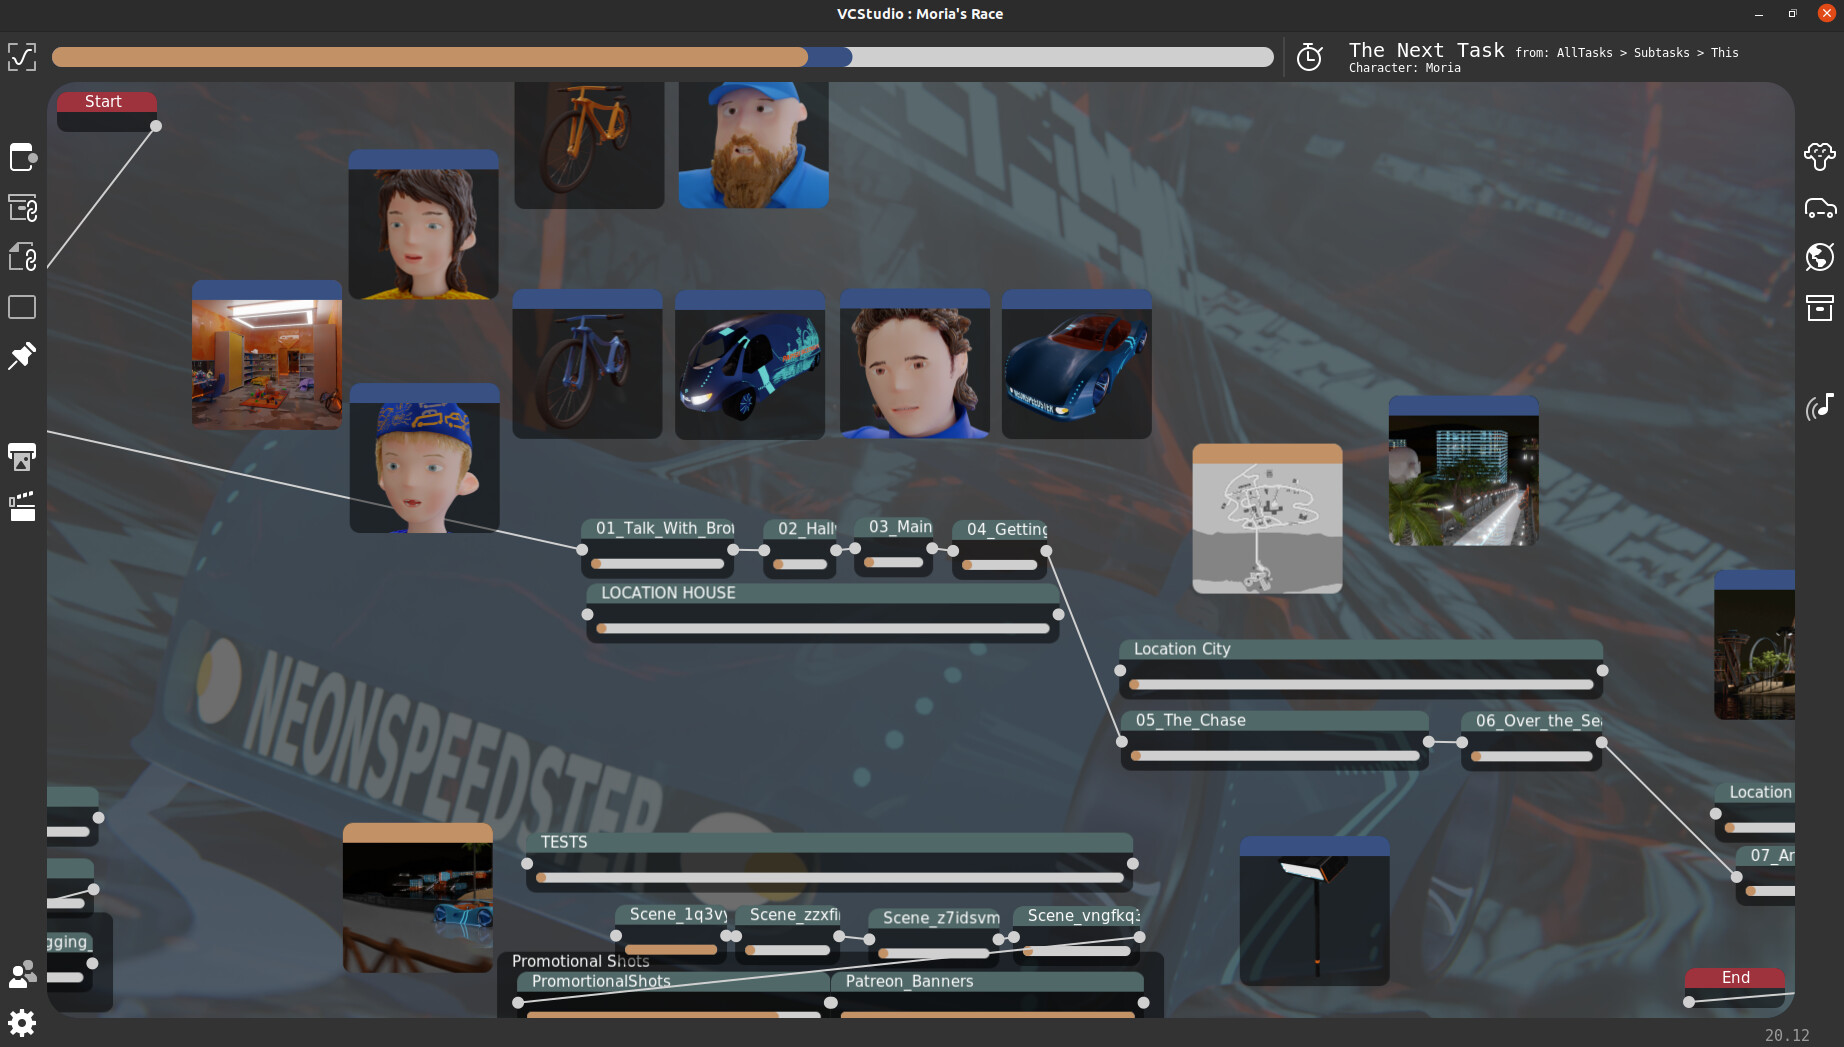
- Optimized draw by excluding scenes and links outside of the frame.
- Added the linking of images. (Only result)
- Made links selectable. (Selectable together with scenes.)
- Changed colors of links to those in Blender-Organizer. (There will be more then 1 theme at launch. When VCStudio will finally reach it’s first fully working release)
- Filled up the language packs with missing data.
So yeah. Try it. I get 30 FPS on a hard part. It was going as low as 10 before the optimization of today.
(im on a laptop)
So here are a few updates to VCStudio
Scaling
So in previous versions you could select and move multiple things at ones.
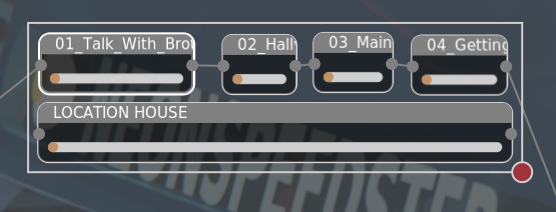
Now you can see the new RED CIRCLE at the bottom, right corner. This is the scaler. You can drag this thing to do scaling to all the selected elements at ones.
Of course it works with single objects as well. (On on links. They stay constant size.)
Connecting nodes
Now you can connect the scene nodes. Similarly to Blender-Organizer. ( I ended up using some of the code from the old Blender-Organizer ). The only difference is that this new system work more similar to Blender’s nodes then to the old Blender-Organizer’s nodes.
The difference is that you drawh the points together. In the old Blender-Organizer you had a dedicated tool. Which I thought wasn’t elegant enought.
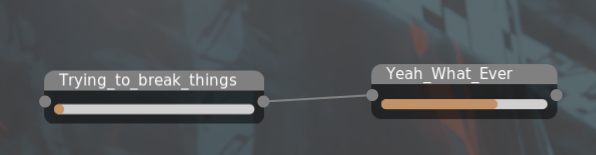
At the moment only connecting scenes work.
Adding scenes
Now you can add scenes to the story editor.
Adding file links
Now you can add links to files to the story editor.
Which is a part of the other point.
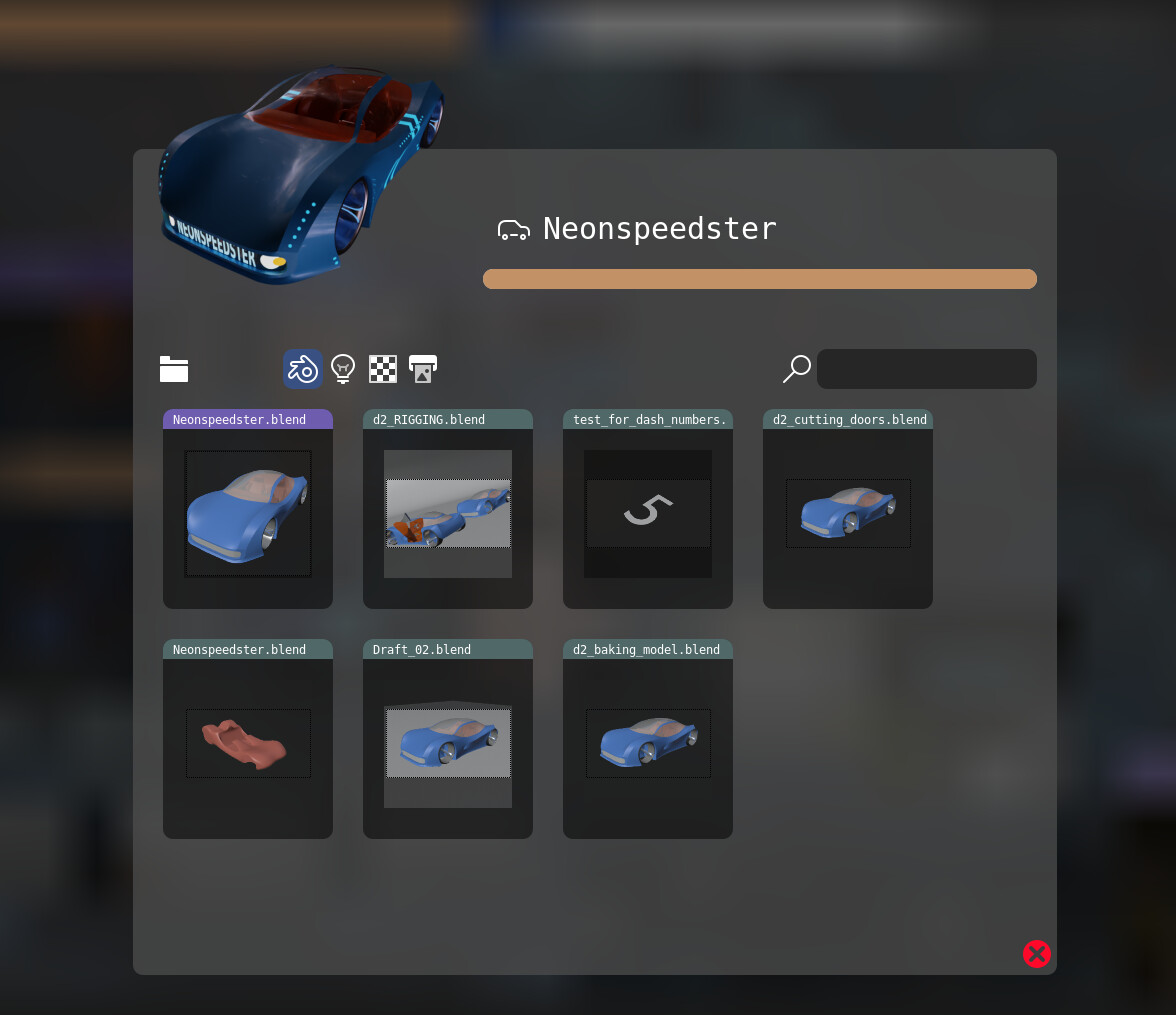
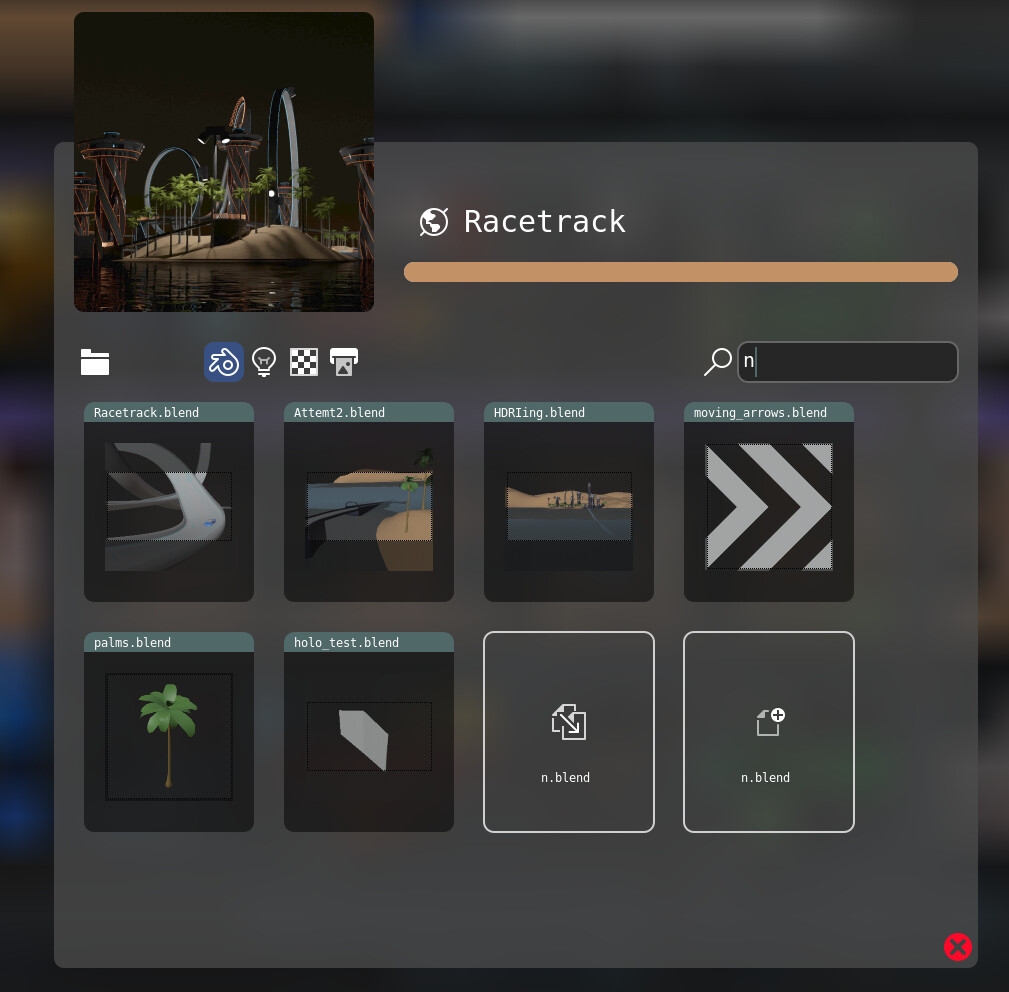
File Searcher
The file searchers
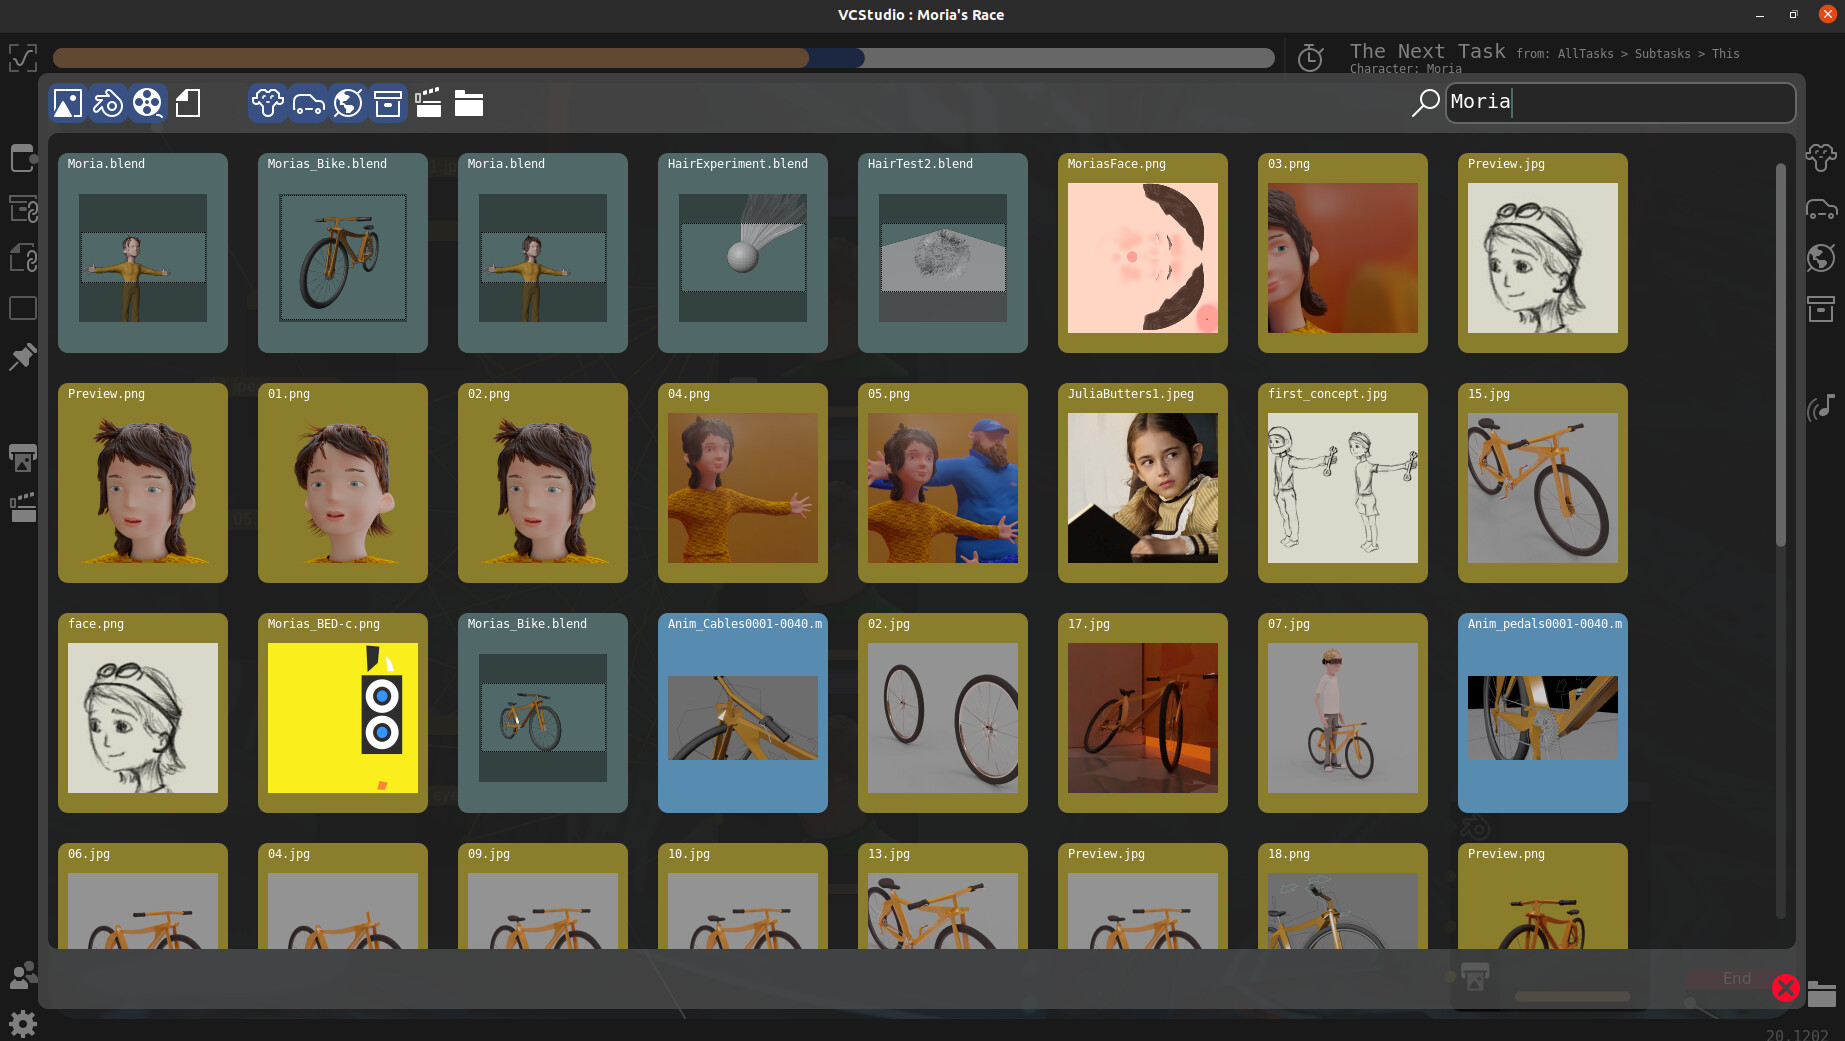
With the new file searcher, similarly as to image searcher in Blender-Organizer. You can now look through all the files in the project. By categories or by search. And select what you need.
Missing feature is selecting files outside the project. But it’s an easy thing to do.
Technical
For the technical people who cares about how the program works. I made some drastic changes to the way I handle Layers. Specially important to notice that now the background layer ( the story-editor ) does not draw when a window is above it. It’s keeping the image from the previous drawing.
Also there is a whole new system of function like dialogs. See studio/studio_dialogs.py for more detailed explanation.
Multi-threading
Since the last verion the loading of images is now done in multiple threads. Which speeds up both the UI as a whole and loading of the images them selves. Try image selector before you install this version. And try after.
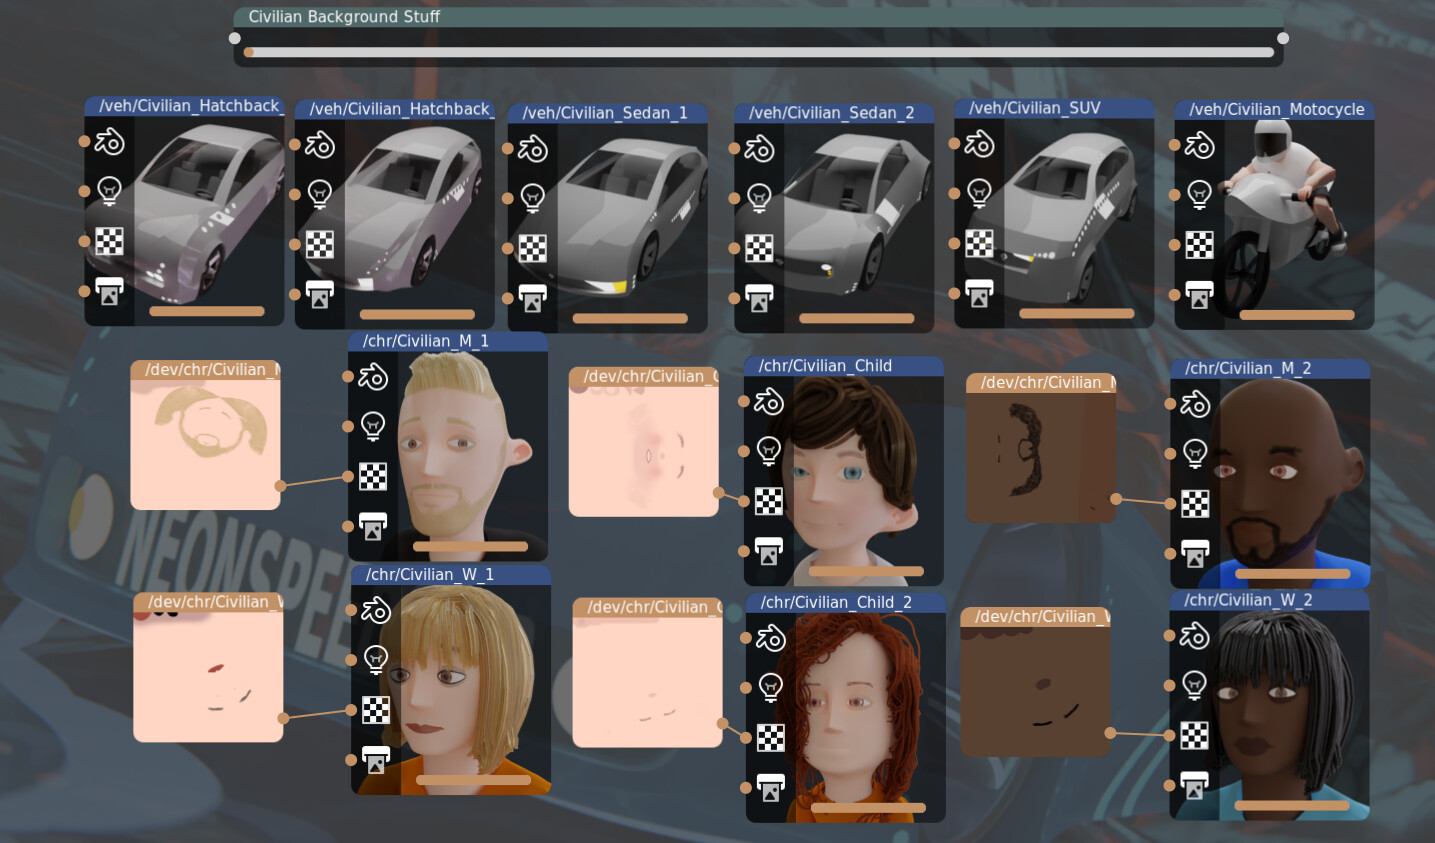
Assets
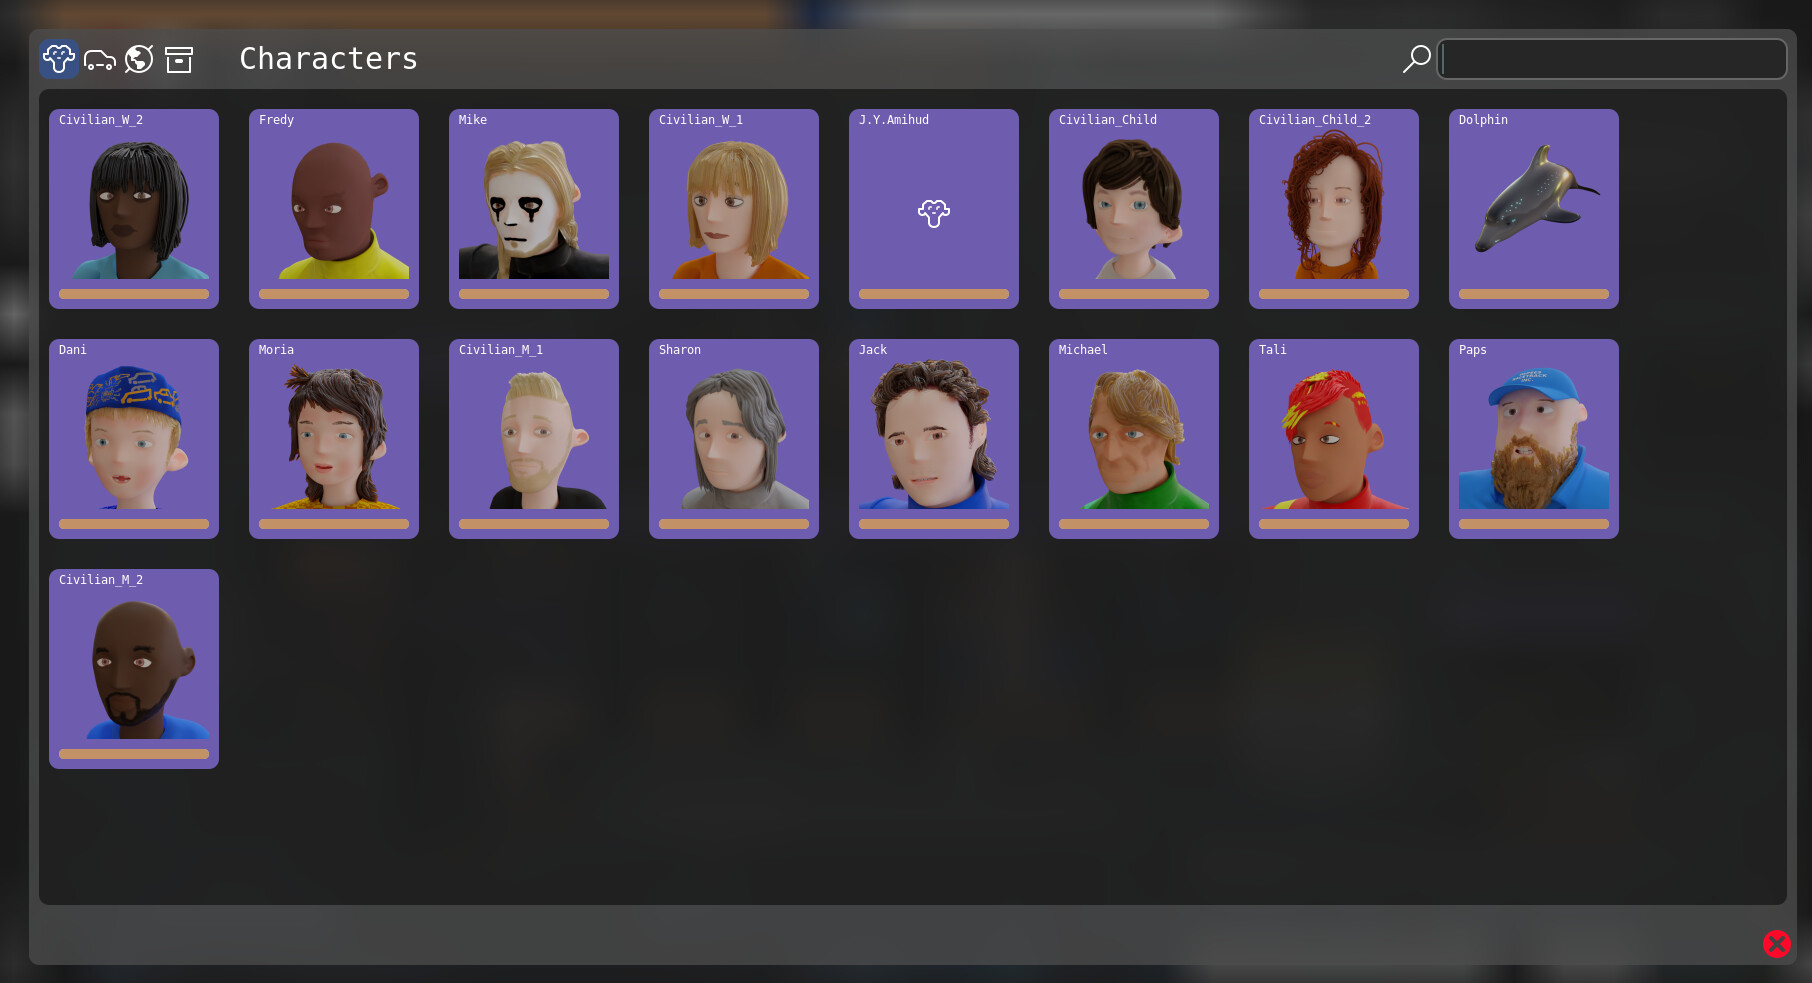
The new Asset selector window is added. It’s quite similar to the file selector. But it for selecting assets. Also this same window will be used to access the assets them self. Not like having 2 different dialogs in the legacy Blender-Organizer.
It’s still missing the option to create new assets. I think it will based on the search. If asset you search for doesn’t exist it will ask you if you want to create.
Markers
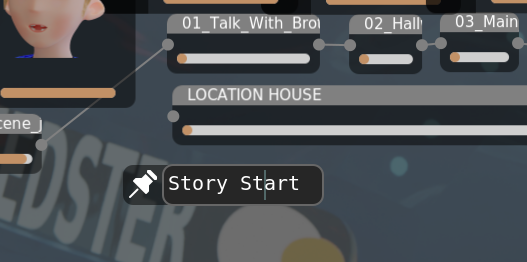
In the old Blender-Organizer I made vertical line markers. Like in Timeline in Blender. I thought it was clever. But you could not actually get horisontal markings. And if your script was largly horrizontal, it wasn’t a bit help.
These are redesigned markers. They are staying in the space. But they are never actually going off the screen.
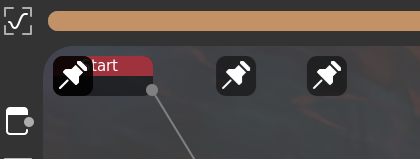
They just kind of colapse when they are not on the screen. And you can click it to be transfered to where they are.
Other things
Other changes in this update will include:
- Shortcuts G and S like in Blender now do moving and scaling of selected items.
- N, L, I are now also available to place scenes, Links or Assets.
- Ctrl now restricts the movement on one axis. For anything where mouse is used. It’s global for the whole VCStudio.
- When placing Links it moves automatically, like with scenes. Same with Assets.
- When entering either fileselector or assetsselector the search bar is actiated by default.
- oscalls.py now introduced for easier cross platforming. Tho it’s not really implemented fully yet. And since I work only on GNU / Linux there is no way I can test it.
- Now Story-Editor recognizes a lot more filetypes. And excludes connecting dots from those that are not images, videos or blends.
1 Like
99% of the story editor is functional.
Also I already did the conversion. ( used JSON because it looks the same exactly as dictionaries in Python apart from maybe a couple things like False != Null )
The story editor saves itself automatically. So I can already setup the new way it’s going to look.
Also now it gives you to create new assets. I made it so simple. Basically it you search for it and it’s not found. You can make it right on the spot.
Project Conversion
I was thinking a lot about file formats for these projects. And finally I thought that saving a string of the python dictionary. Or in other words using JSON is not a terrible idea. I mean it’s quite popular and it has mostly the same syntax as python’s own dictionary. So it’s going to be easy to see what’s going on. And people could implement their own parsers easier.
Project conversion is now done. Basically it’s taking the old data read using get_legacy functions in story and analytics. And writes this raw data into JSON files, saving them in /set/ folder. This is how I know whether the project is new or Legacy. By the /set/ folder. I might change it tho. See pm_project.py for more details.
The story is also a JSON file. Only the difference is that it’s named story.vcss (VCStuio Story). So people could exchenge them and knowing that it’s infect the story part.
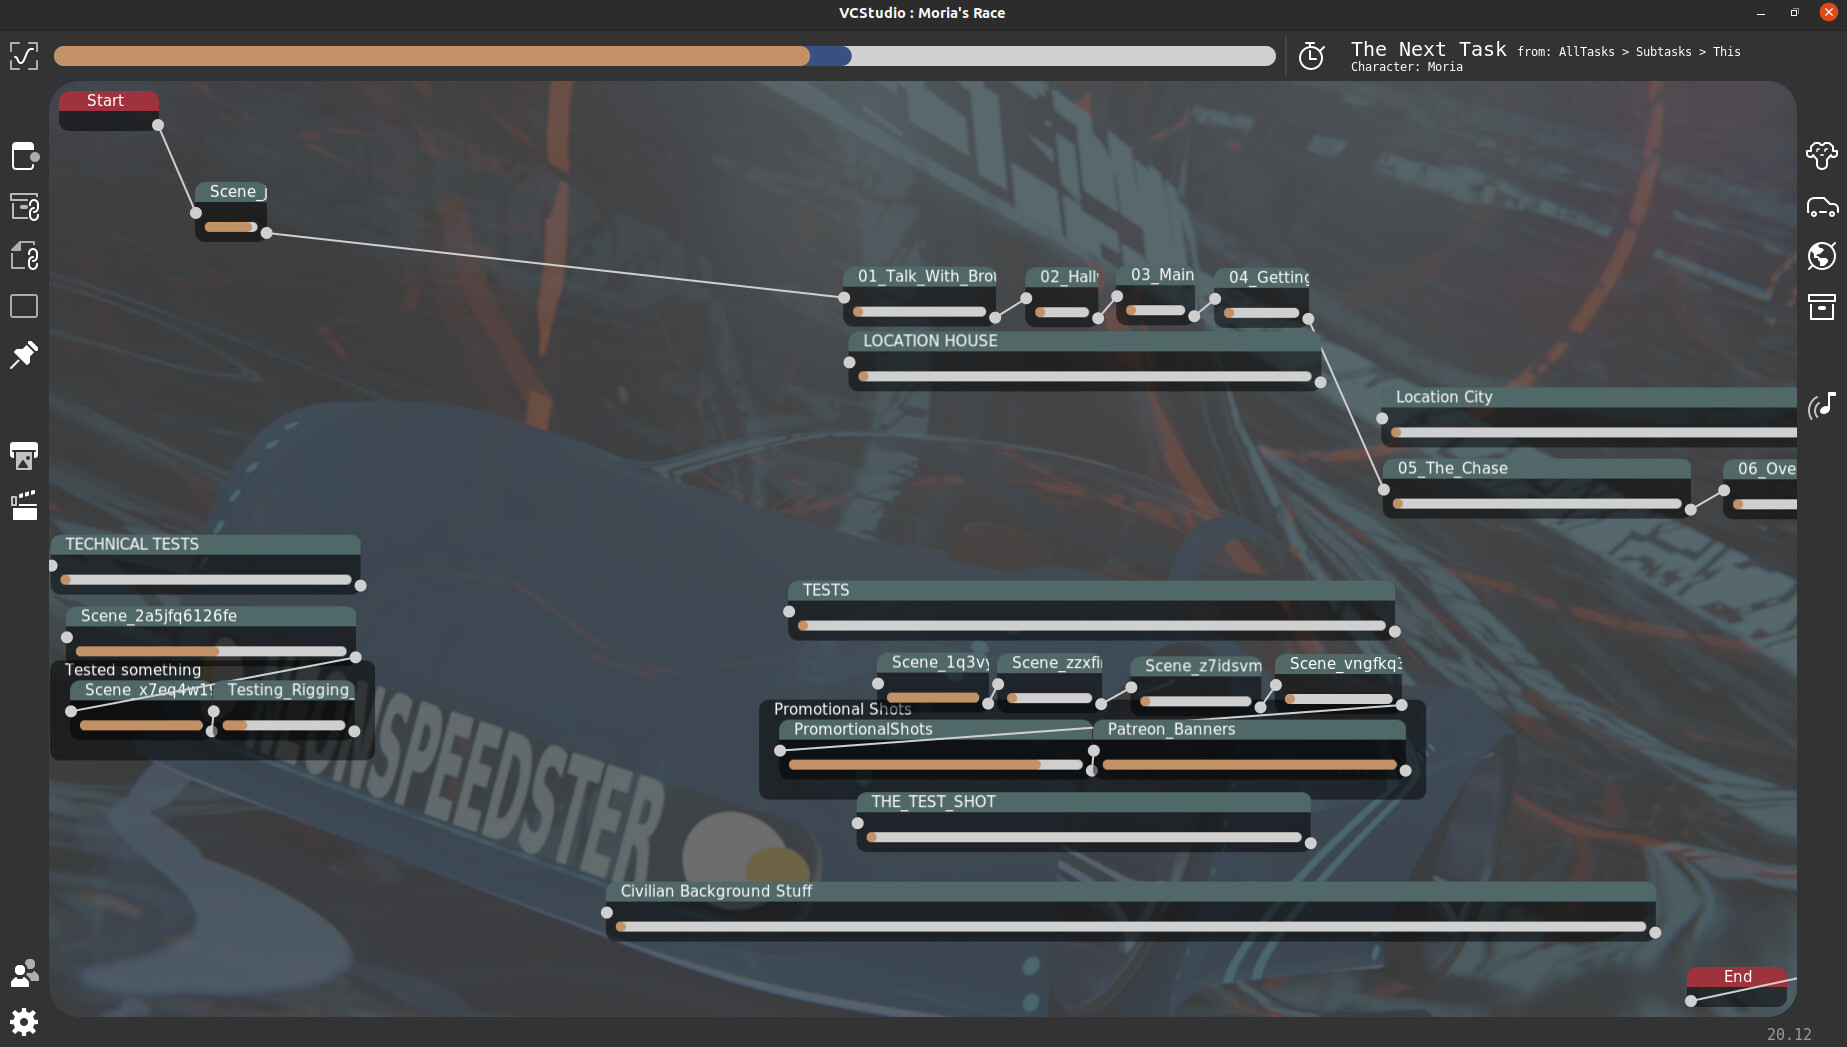
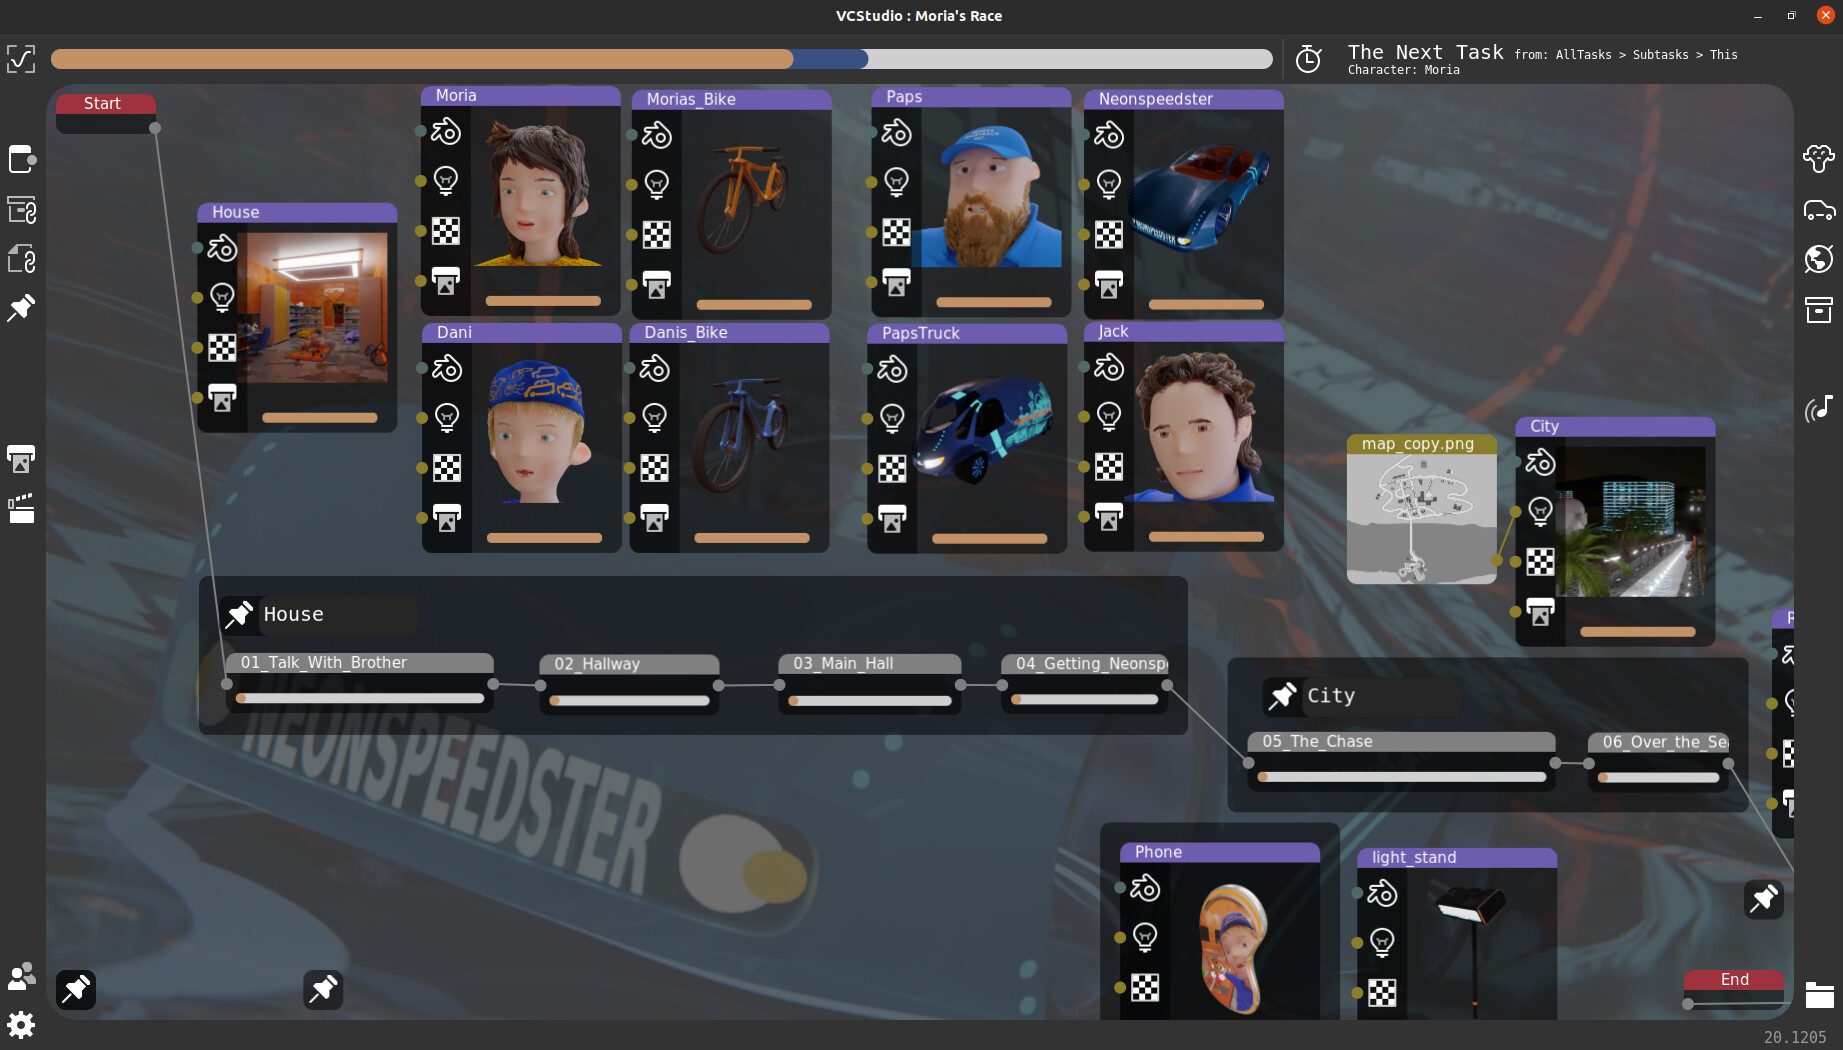
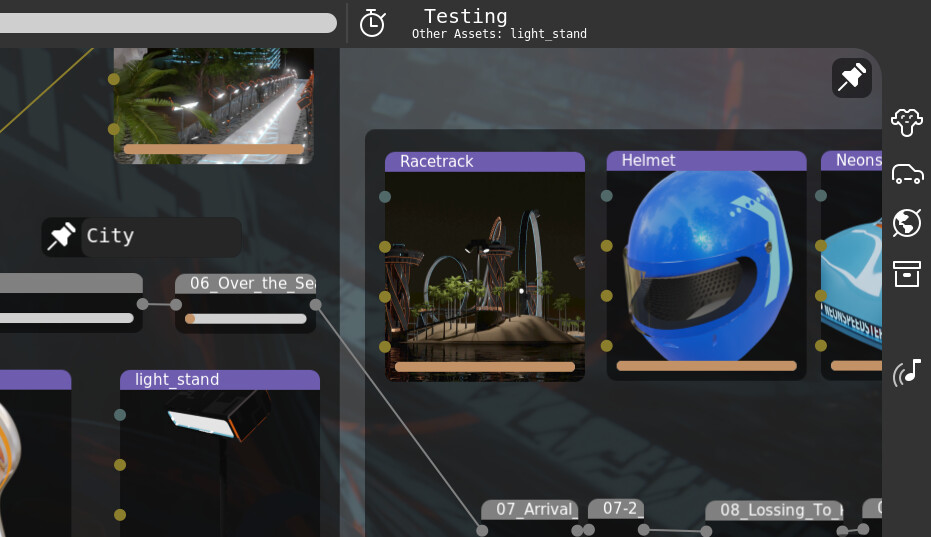
Story Editor
The story editor is almost finished. (Not including the text writting part. It will be it’s own huge project.)
- Events working. If you move an object into an event (the dark rectangle) then the object becomes a child of that event. Similar to Frames in Blender. To get object out of the event you hold Shift while moving it.
- To create events you either press E or use the little icon in the pannel on the left. You have to have something selected.
- To delete event you make so nothing is left inside. Just select all the stuff inside and hold shift while moving. And the event will dissapear.
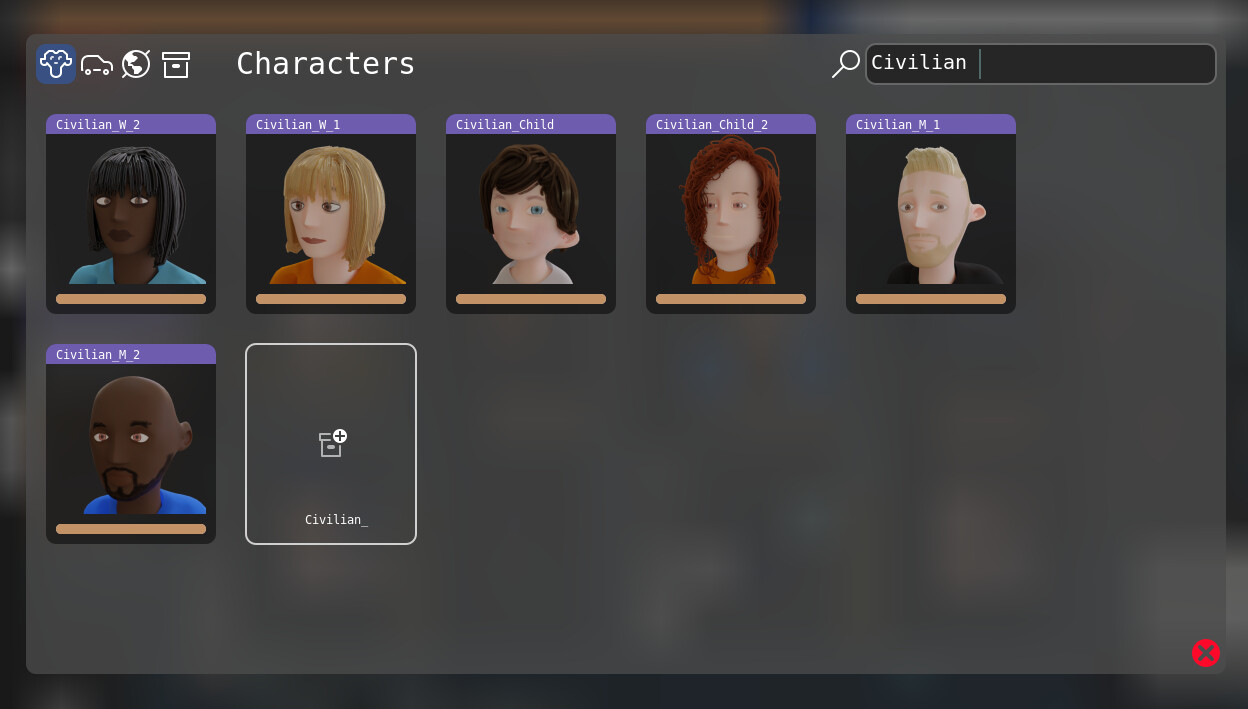
- I’ve changed the look of the FileSelector and AssetSelector. So each element looks like a node rather then colorfull, ugly rectrangle.
- I’ve added ability to link files outside the project’s folder. There is a little folder icon besides the cancel icon.
- In Asset Selector you can now create new assets by typing the name of the new asset in the search. If it will not find the name on the list it will give you an option to create an asset with this name. The new asset will be automatically selected. So when you need to plan what assets you need, you can quickly add them.
- Checklists files are now recognized. And their progress bar is visible in both story editor and File Selector.
- I’ve tweaked the rendering of text editor entries. To remove the line if you are not currently editing. It looked ugly on Markers.
I think that’s it for now. Next things I will do assets and checklists and then IDK either script writting first or analytics first. IDK.
Assets
The code for this is not release at the moment. But hope soon, today. Like in a few hours. ![]()
This is gonna be so much more straight forward then the old organizer. First of all I’m not going to separate the place to 4 rows. Like in the old one. Having the tabs is good enough. Also adding files will be done similarly as adding assets. You have to search for one.
You might be asking yourself why is this so small… Why not full screen?
This is because it’s not everything that’s going to be in the frame. On the left side there will be list of scenes and maybe a tab for scheduled tasks.
On the right side there will be the checklist. In the Blender-Organizer I made a mistake to make the checklist button very small. So people didn’t even know about it’s existence. Now I’m fixing it. And making checklist a part of the frame at all times. Taking 4th of the width.
If you need to copy a blendfile using python anywhere. Don’t do it. There are ton of linked stuff in the blend file. And changing the directory might screw everything.
Or if you really want. Use this.
        os.system("blender"\
        +" -b "\
        +from_path.replace(" ", "\ ")\
        +" --python-expr import\ bpy\;\ bpy.ops.wm.save_as_mainfile\(filepath=\\\""\
+to_path.replace(" ", "\ ")+"\\\"\)")Asset Manager
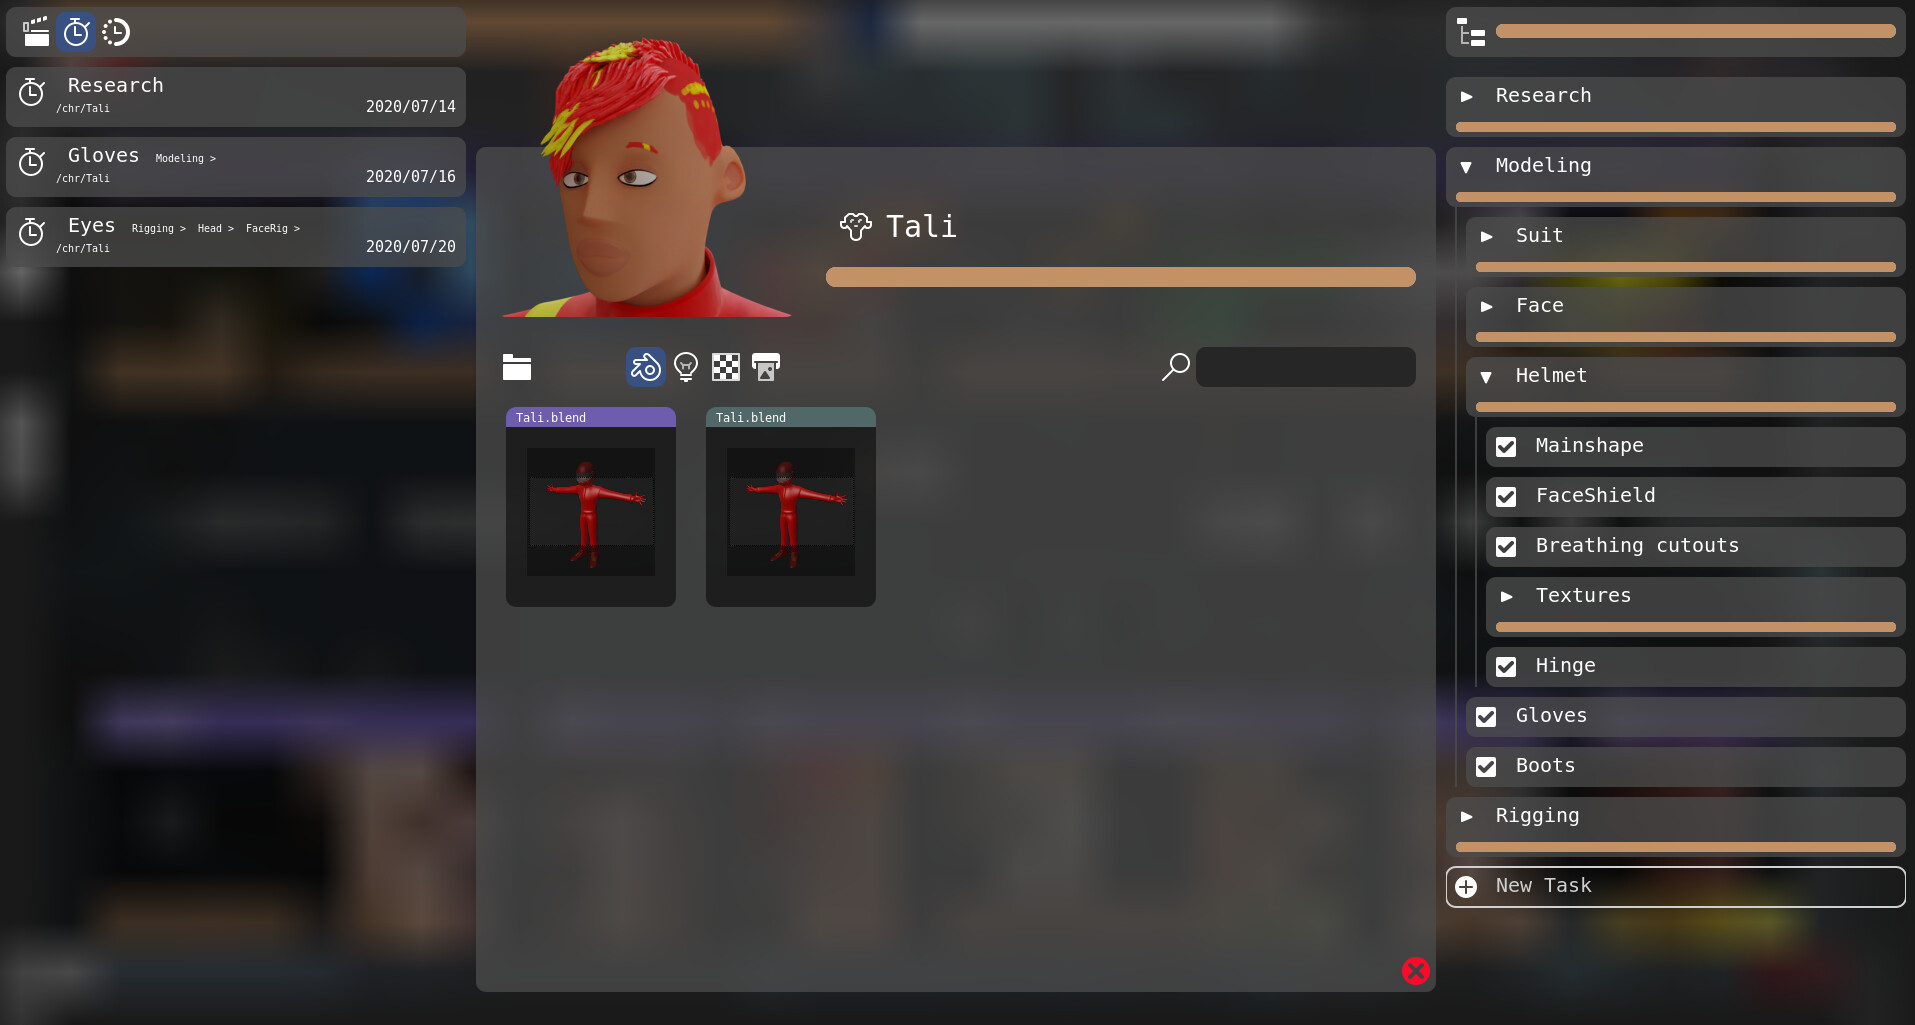
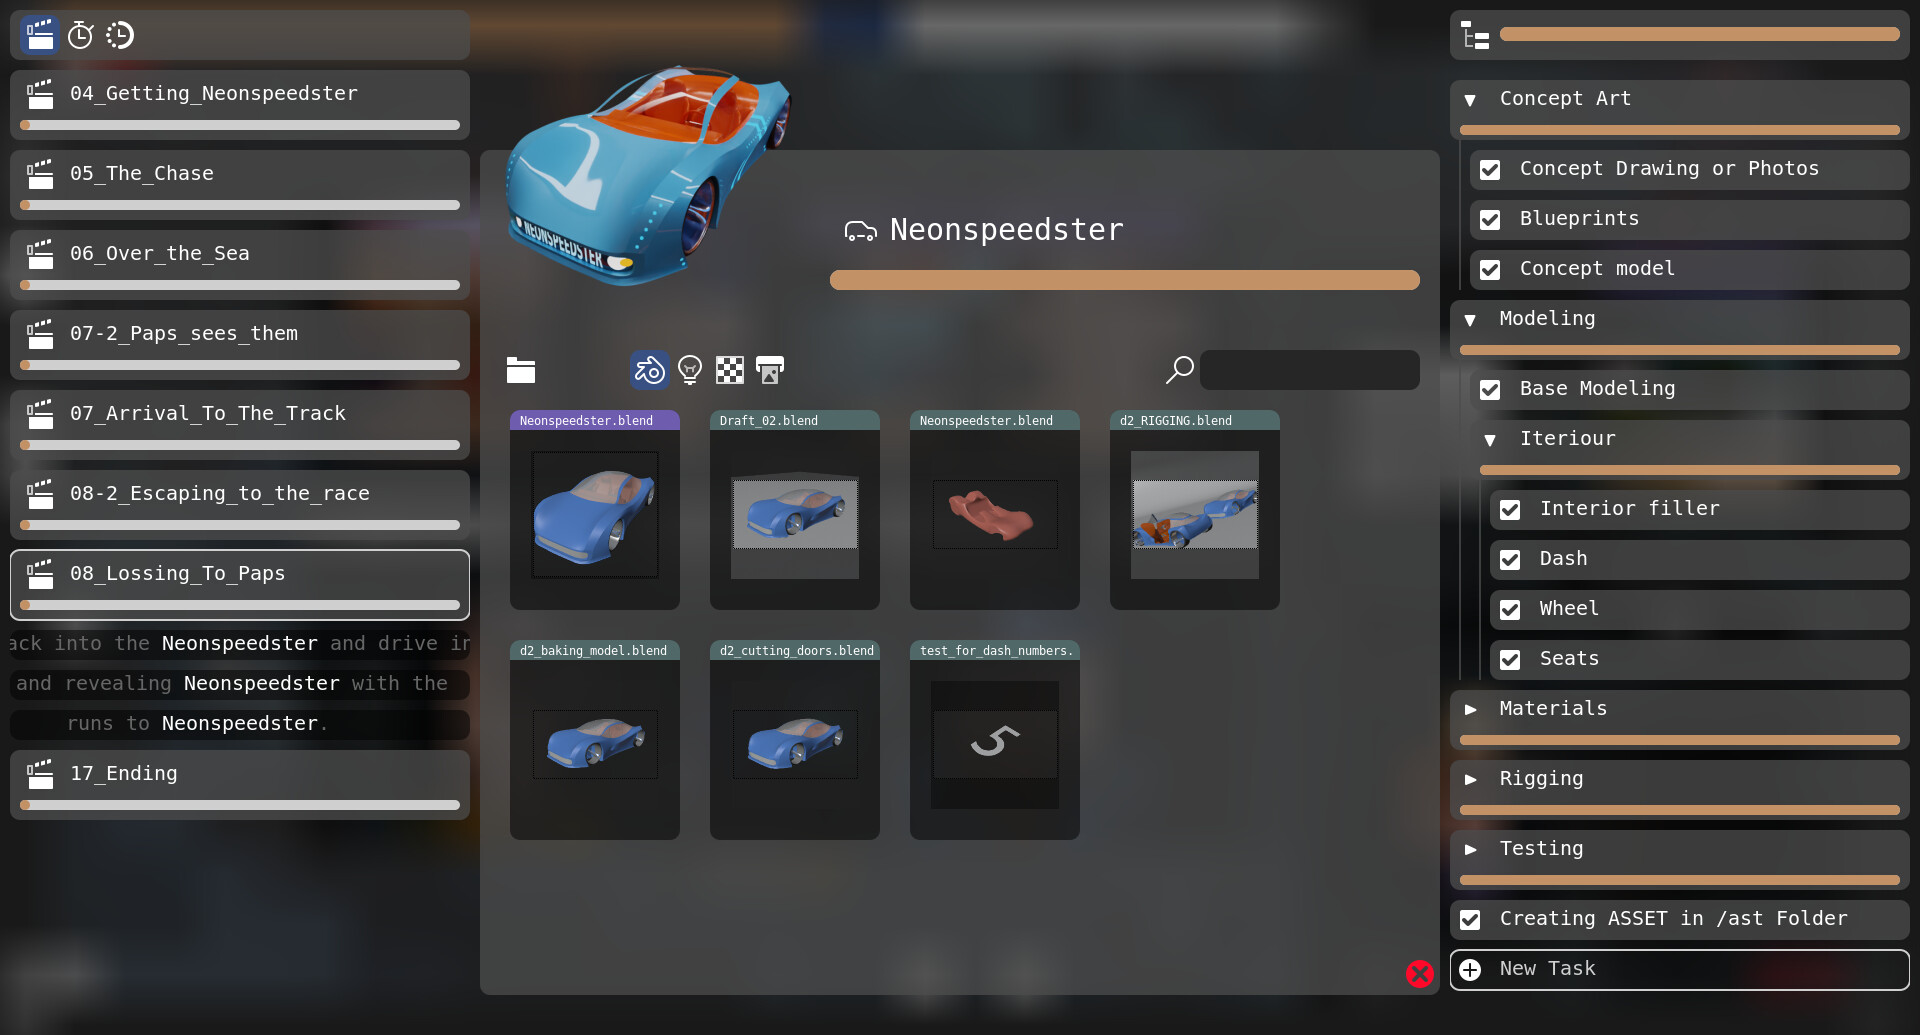
What Blender-Organizer is without an Asset Manager? This was the first thing coded for the original organizer back in 2016. It was one of the first things coded for legacy Blender-Organizer is 2018. And it’s now also implemented in VCStudio in late 2020.
Am I going to re-do the whole thing every 2 years?
Here is a little preview of the new Asset Manager. I see you probably asking yourself “Why did he put it in a center, and made it so small?”. Well… It’s not all of it. It’s just the core part.
For VCStudio the design of some parts will be devided in 3 parts.
- The core element. In the center. It’s where most of the work, or most of the information is. It’s the largest of them.
- The checklist. In the right. This is your list of tasks.
- And the secondary. In the left. It’s scheduling, history, shot’s blend files, asset’s scenes and other secondary but handy stuff.
For now for the assets I developed only the core. The middle part.
Project’s Settings
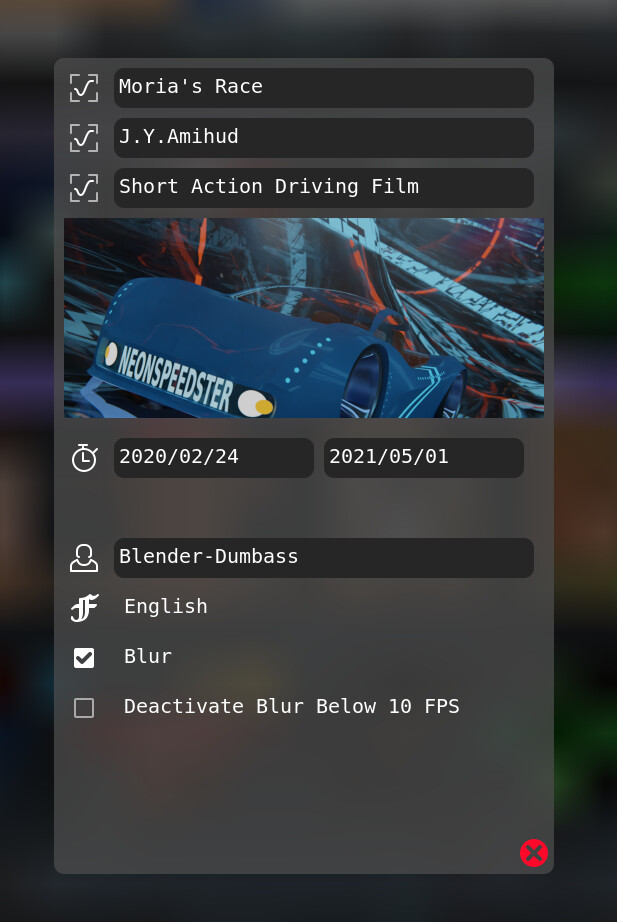
Unlike the Project-Manager settings. Project’s settings are a bit fuller.
At the moment you already can set:
- Project’s name
- Project’s director
- Project’s comment / status
- Background Image
- Start Date
- Deadline
In future releases I want to add stuff like:
- Calculation Bias. It’s a setting currently available in Blender-Organizer legacy. And is implemented on the background in VCStudio. But you need to edit the settings files manually. What it does? It’s basically a setting strength of a given category on the overall percenage of the project. Like let’s say you want scenes to count 4 times while characters and other assets each only 1 time.
- Blender Version Manager. In Blender-Organzer legacy there is an option to choose a blender executable from a specific folder and the entire project will use this one blender. In VCStudio I want to extend the functionality by making installations of new Blenders possible. And stuff like notifications when a new version is available. I’m not sure yet how to do it. But I guess I can reference this page.
Default Blend Files
When creating an Asset you need to be able to create a blend file too. But I’m not smart enought to make a real Blendfile using code. So I just made a couple of them and they are sitting in this folder. The idea is that you will have access to them and could change them to change what startup files you get while making new assets.
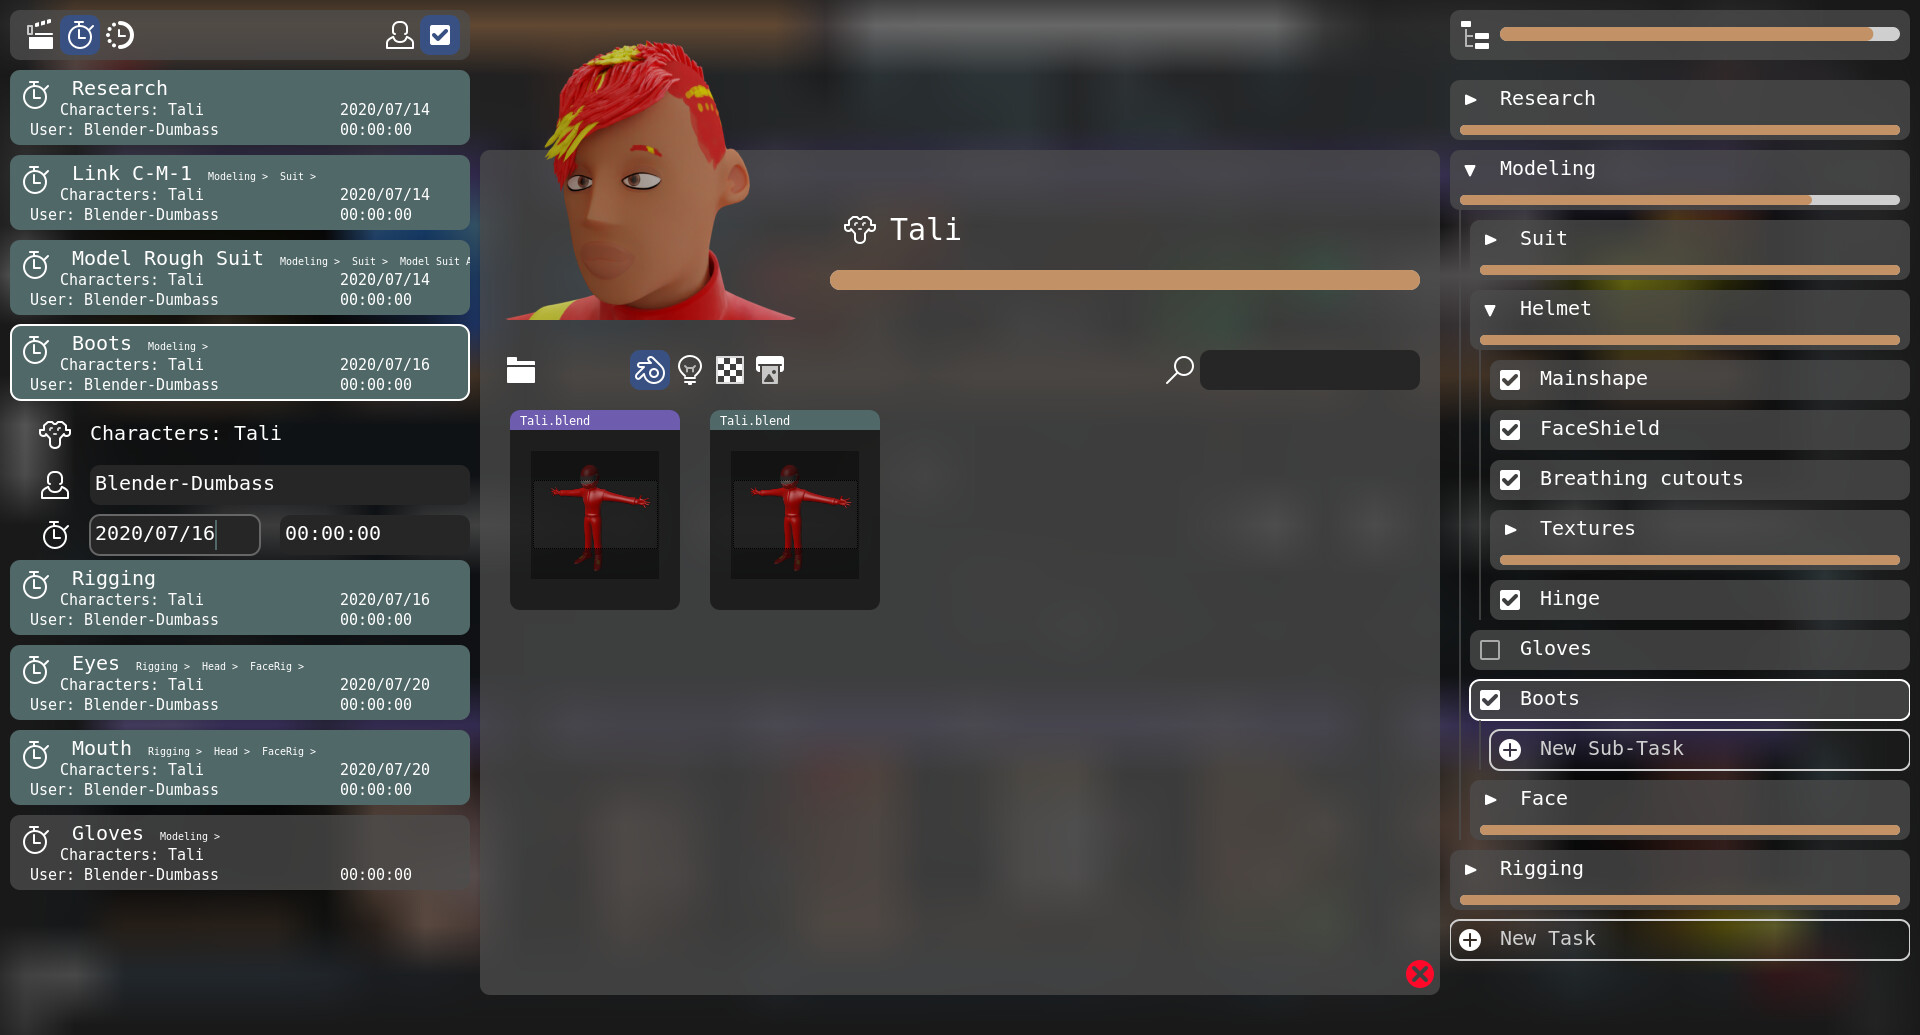
Checklists
This was a small but challenging update. Challenging because checklists in Blender-Organizer since the legacy version are no longer just lists of tasks. They are recursive nests of tasks. And all of it has to be calculated and stuff.
The reading (opening file) of it I did already a few weeks ago. Now we needed the rest of the checklists.
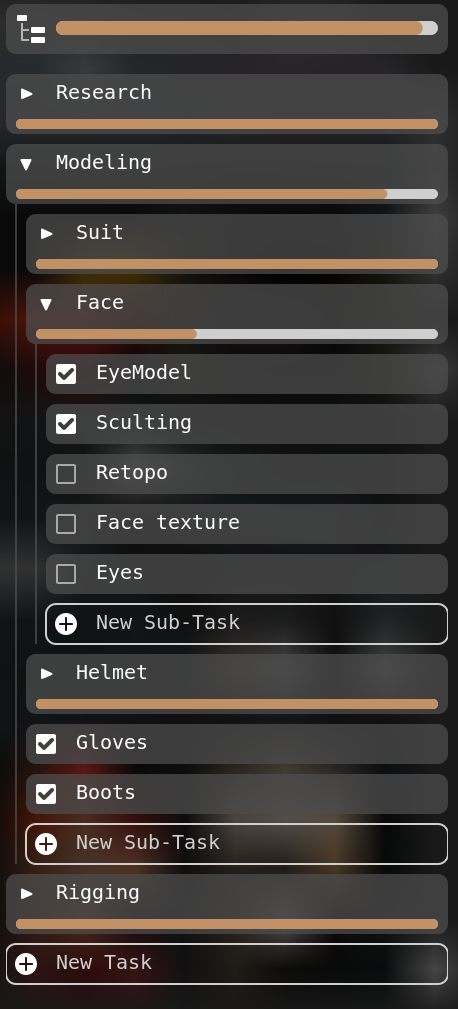
Now we can see that all the checklists if almost fully implemented.
Missing features:
- Scheduling. There is no scheduling yet implemented. There is an epic idea tho that I will develop as soon as I have analytics.
- History. Also while you check and uncheck things. There is no recording of anything to history.
New features:
Those that didn’t exist in Blender-Organizer
- Editing in line. In the old Blender-Organizer I had this ugly GTK based window that pops up when you want to edit any text value. This time I have an entry written for the project. Meaning that I can plug it in any place in the window. Including inside the line. So you edit where you see it.
- Tab. In this version pressing tab while editing the task will confirm the current task and add another one which will be automatically in the editing. This way you can quickly do a lot of tasks that used to take a lot of time in the Blender-Organizer.
- Integrated. In the old Blender-Organizer checklists always were a separate window. And you needed to click a tiny icon to get to one. This time it’s a part of the main screen.
It’s to early to make an update. But it starting to look good. And quite full. I just need to sleep on the ways to filter the scheduling.
Confusion
In the old Blender-Organizer all the schedules are deleted as soon as the task is filled, or deleted, simply not found. I simply kept a record of all of the tasks as a history of what was scheduled. And I think it’s handy to keep. But then the question is HOW do I show it? What is the UI?
I need to sleep on the UI. Maybe all the schedules that are not found with in the checklists are going to be deleted. Maybe a checkbox of completed task could be there. Unchecked by default. Or something. IDK.
More stuff.
No release yet
Now you can see some of the stuff is working. For example you can select a given task in the scheduling and it will open and auto select the same task in the checklist.
Also a few settings are present. They are not easy to do. This is some complex recursive stuff.
Soon I will release the code. For now enjoy the screenshot.
Scheduling
At the moment there is no way to schedule anything new. Just view and edit already scheduled things, converted from the Blender-Organizer legacy.
So the scheduler is nearly there. I’ve spent exterme amount of sweat and tears to make it work. And it probably will require a lot more sweat and tears tomorrow. As I will do the final implementation.
What’s missing?
-
Drag & Drop Scheduling. The whole idea of this scheduling system is that the user doesn’t really need to think much about what is going on. You just drag the task from the checklists into the center of the screen and drop it into one of the days in the analytics. THAT’S IT. I fingured out that it’s not a trivial thing to make. Since it will require significant amount of parsing and filtering of the data every time such task is made.
Today for example I made a little text-based widget for editing the Date a given schedule is due. And simply applying the change was an extreme case. There was a lot and lot of very weird code. I have no idea how I survived all this parsing. At one point the analytics.json file became 19 MB. Because I was appending a task into date too many times. Anyway I pushed through it and the file ( For Moria’s Race ) is steady 600 something KB. So it’s okay.
-
Multiuser Support For Directors. I was thinking the other day what is Blender-Organizer missing. And I figured it out. It was making the movie in a group of people. Not just by yourself. And for this I slowly introduced a USER system. That’s currently pretty pointless. Every task you do will be recorded onto a given user. And every Schedule could be scheduled to a user. I already did a text based user input thingy. But it’s not practical at all. What if you make 1 character mistake? Nobody will ever know about it’s existance. So a system of selecting between assigned user should exists. But what it’s going to look like I have no idea.
-
Preview / Notification. I made an ability to input a specific time of the schedule. The idea is to introduce an allarm clock kind a thing. And when the time comes it Notifies the user. It could be that a director puts for a specific animator, or modeler a specific task. And so this animator or modeler will recieve a notification of when is to do something.
Analytics
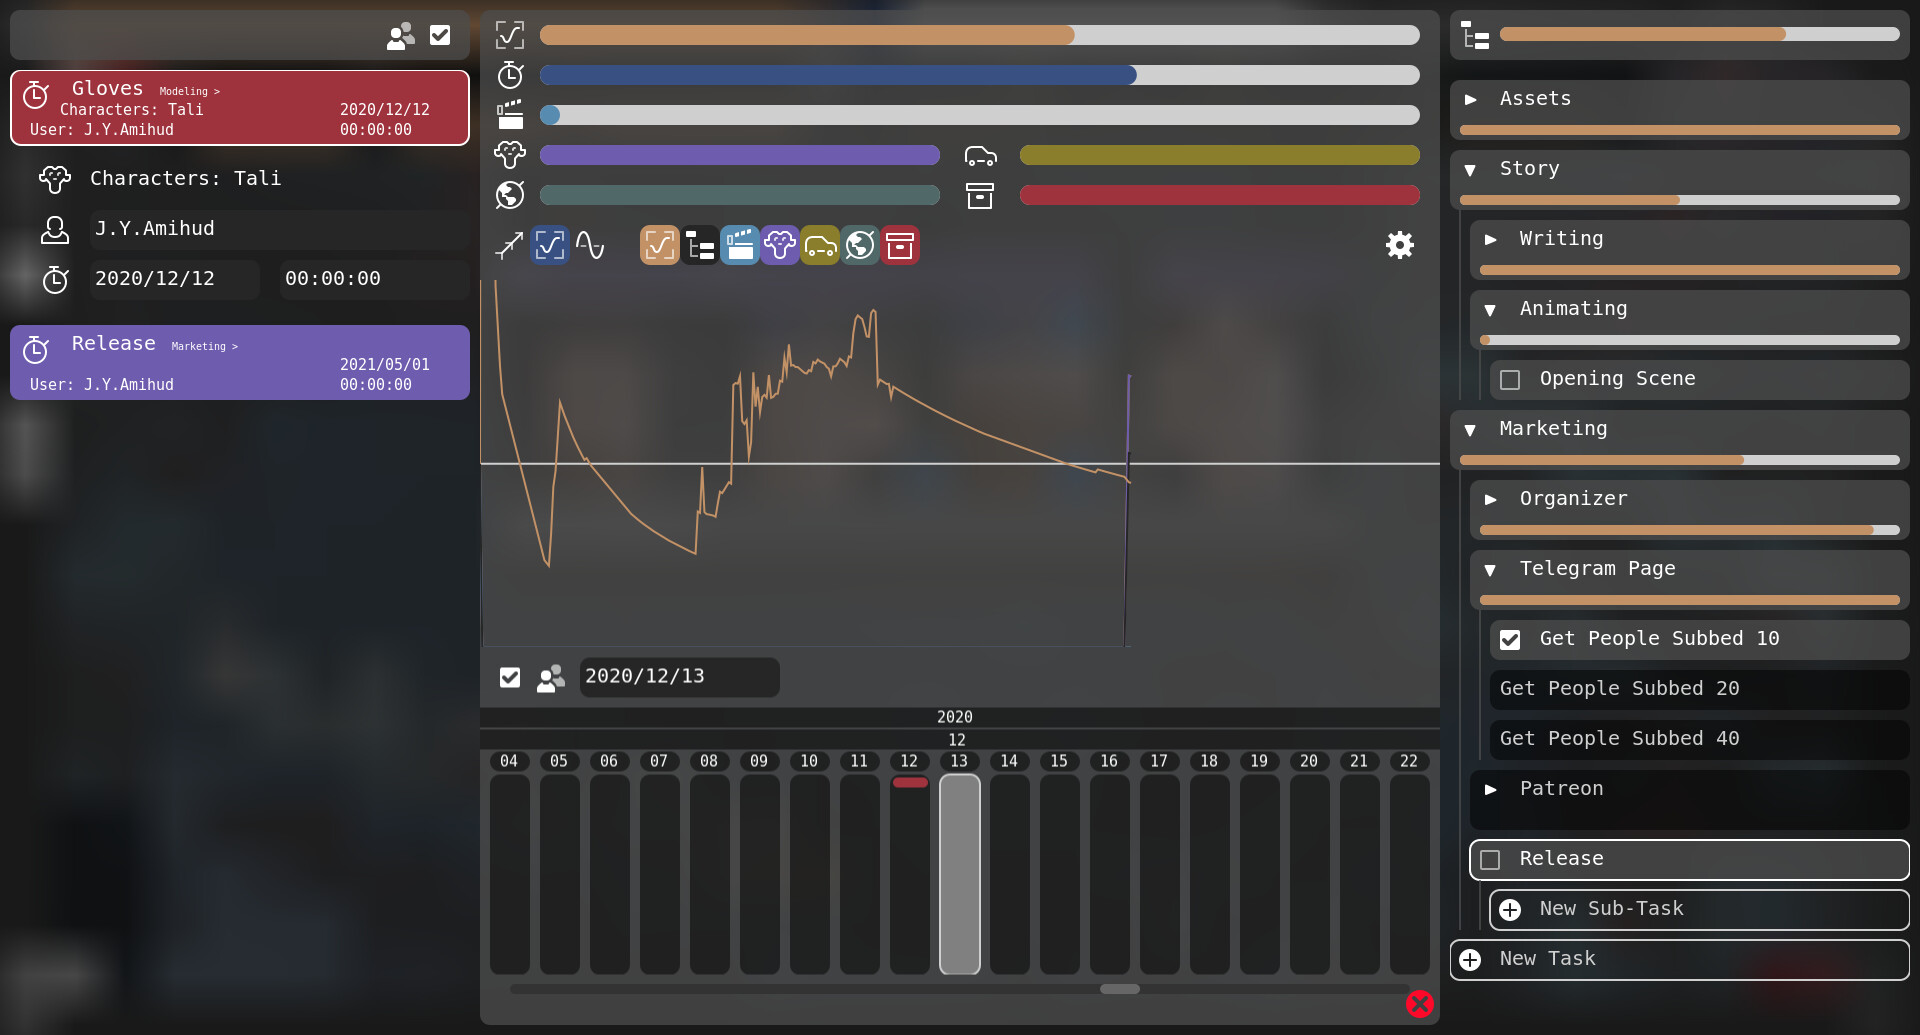
This is the analytics window that you will see when dragging any task into the center of the screen. Or by just simply accessing it from the top pannel in the story editor. Let’s look at it a bit closer.
Top. Progress Bars.
On the top you will always have the progress bars. One is missing, but I thought it would be a waste of space to include it anyway. It’s the checklist bar. Which exists above the checklist itself. So yeah.
Middle. Graph.
In the middle we have the graph. On the old Blender-Organizer I had various graph algorithms all the time. I could not stop rewriting it every time I wanted to see the data differently. So here I have decided to have all the algorithms in the same time.
And also I record now everything in the data. Not only the main progress. So you can see the graph of Characters, or a graph of Scenes. And understand stuff clearer.
Anyway the 3 algorithms are:
- Linear. The most basic graph. In the left is your start-date, in the right is your deadline. And the height is the % of a given time.
- Noramalized. The second one is more a graph of how much you have done in comparrison to how much you should have done. Basically if you take the linear graph and move the diagonal line so it’s the center line, you will get the normalized graph.
- Pulse. This is the most interesting graph. Because while it’s quite simple looking, I think it gives the best visual information to how well you are doing. The algorythm gives a fraction which is current fraction minus the previous date. Which looks more like a sound-wave and less like a growing destribution. The higher the spikes the more has been done between this day and that day. Ideally it has to be always slightly above the middle line. Because doing nothing will make the line flat in center.
Bottom dates.
In the bottom of the analytics you can see a date selector. It’s where you drop the tasks when I gonna implement it. At the moment you can look into schedules based on date when selecting the date in the list.
After I will implement this and History. I will start working on Script Writing already. Which I already have a taste of. Because i can already see peaces of the script with the scene list of the asset.
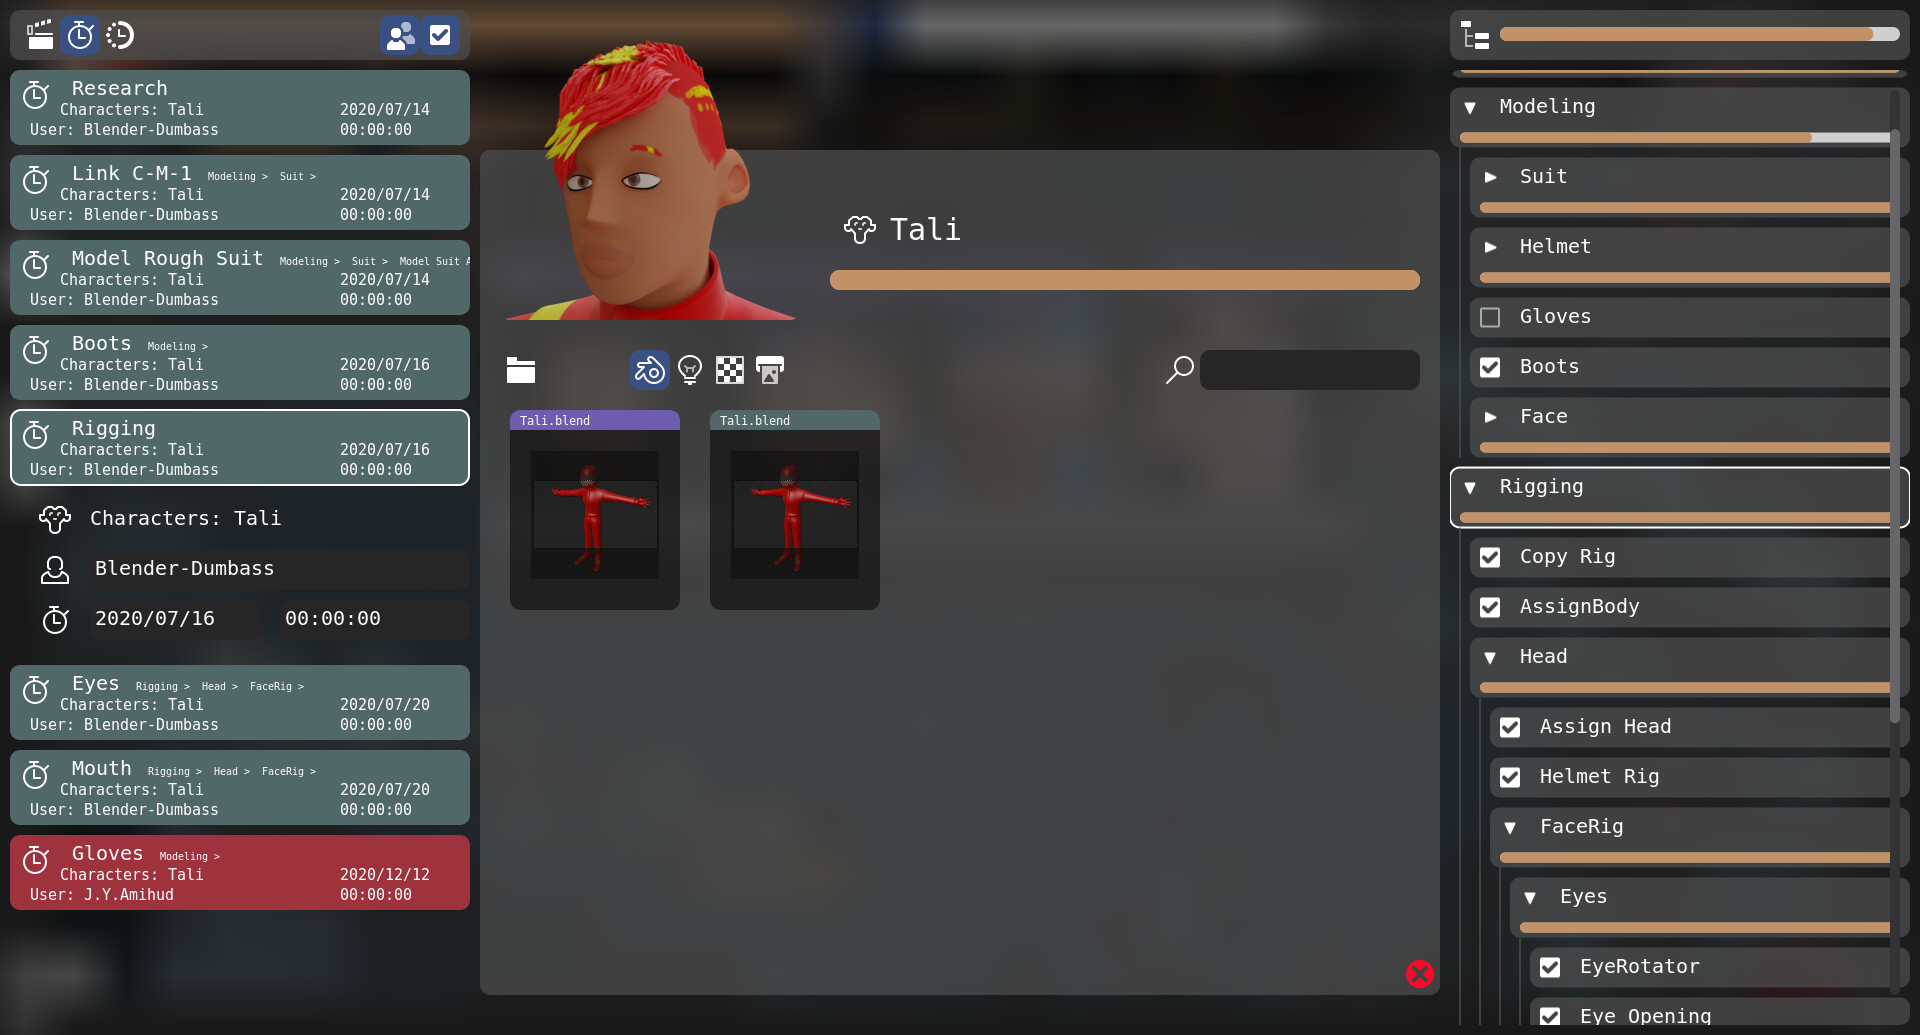
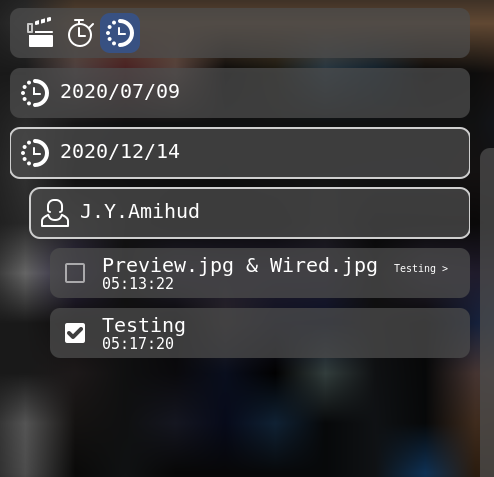
Scheduling and History Fully Functional
At least to the extent of the program’s current functionality in general. There are some stuff that is not yet implemented. That is still not having a corrisponding implementation of History. Tho in theory probably already works with both history and schedule. Untill those functions will be implemented in the VCStudio is self. There is no chance of making it work for scheduling and history. See studio/history.py for more details.
Little tutorial
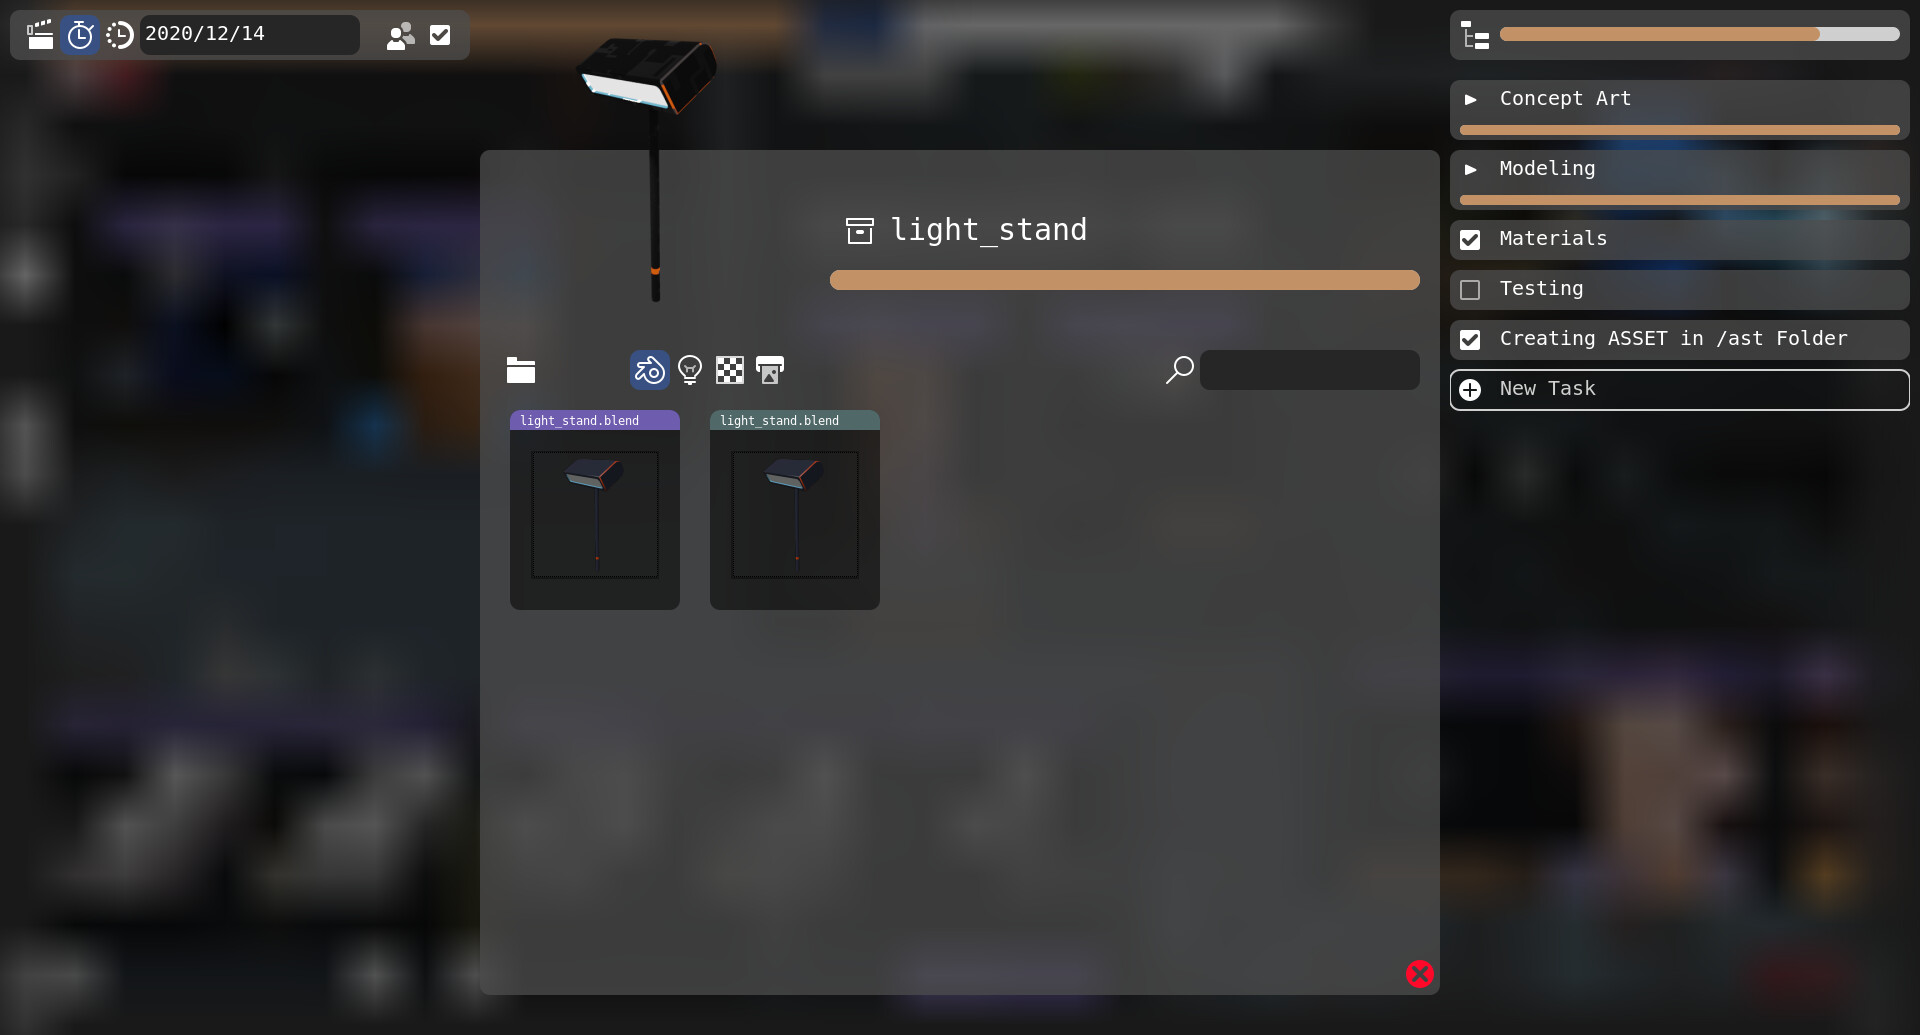
So here you have an asset. I use the Light_Stand from Moria’s Race. And you can see on the right. The Testing task is not yet checked in. Means it must be done one day. You want to schedule it. How do you do that?
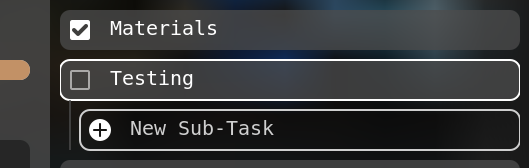
In order to schedule it. You have to grab the task with the mouse. And drag it to the middle of the screen. And as soon as you will be in the middle part, the screen will transform into an analytics window.

In the bottom of the analytics window you can see a calendar. Just drop the task there. As soon as you do it you will see the task scheduled on the left side.
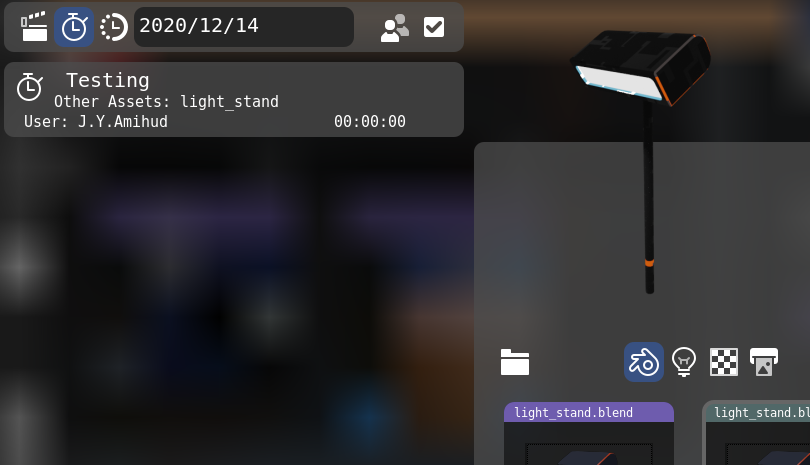
Here it is. Also you when all the previous schedules are finished. Or in other words checked. And this task is the next one to do. You will see a little link to the task in the top, left corner of the story editor.
Now if you click on the task. Or enter a blend file. Or create a new blend file. ( From stuff implemented in history ). You can see in the history tab, also in the left of the screen, that history is recording.
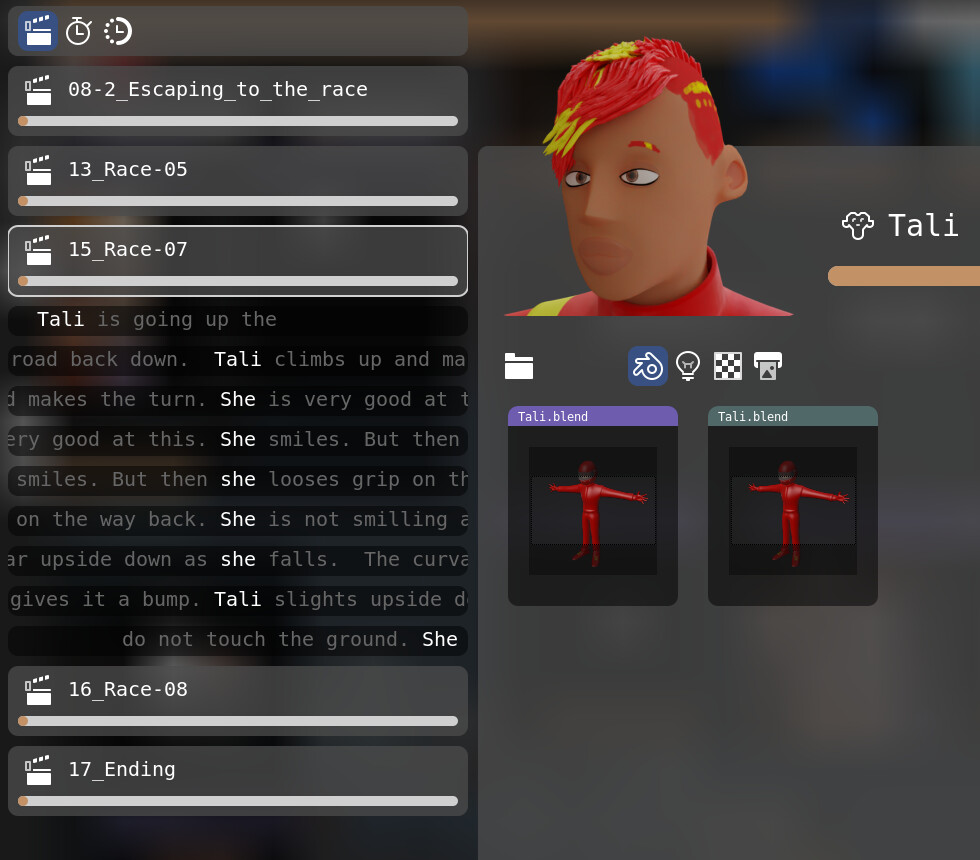
Per date history of all items you can see in the analytics window. And per asset, but for all dates you can see in each and every asset. When script writer will be implemented, you could see it also in the script writer.
By the way talking about the script writer. In the assets ( If you have a project converted from Blender-Organizer’s project and it had a script ) you can see now lists of scenes with mentions of the asset.
Anyway. There is this Update. I need to get some rest because the next thing will be the TEXT editor. OMG. I’m a little scared. But whatever.
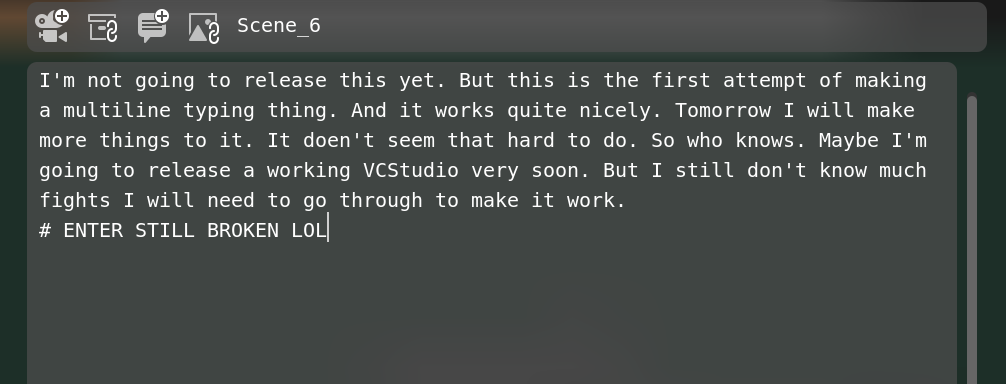
Working on the script writer.
This is not simple. At all. A lot of very broken stuff. And I’m quite tired already. So I’m taking a break. Trying to sleep over all the stuff I’ve done.
The code for this is not released yet because it might mangle people’s scripts. And it’s not cool.
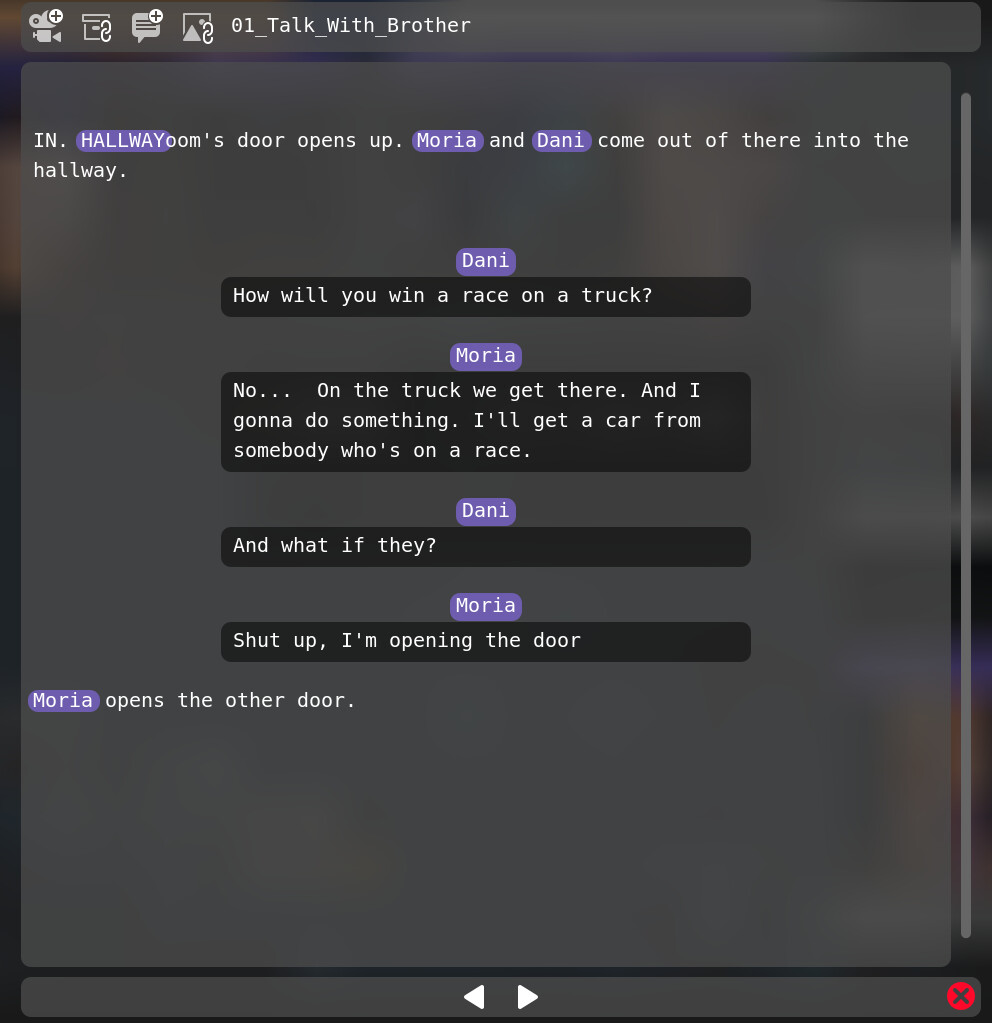
Tho it looks alright with the rendering of the text. But it’s not cool if you can’t actually edit the script normally.