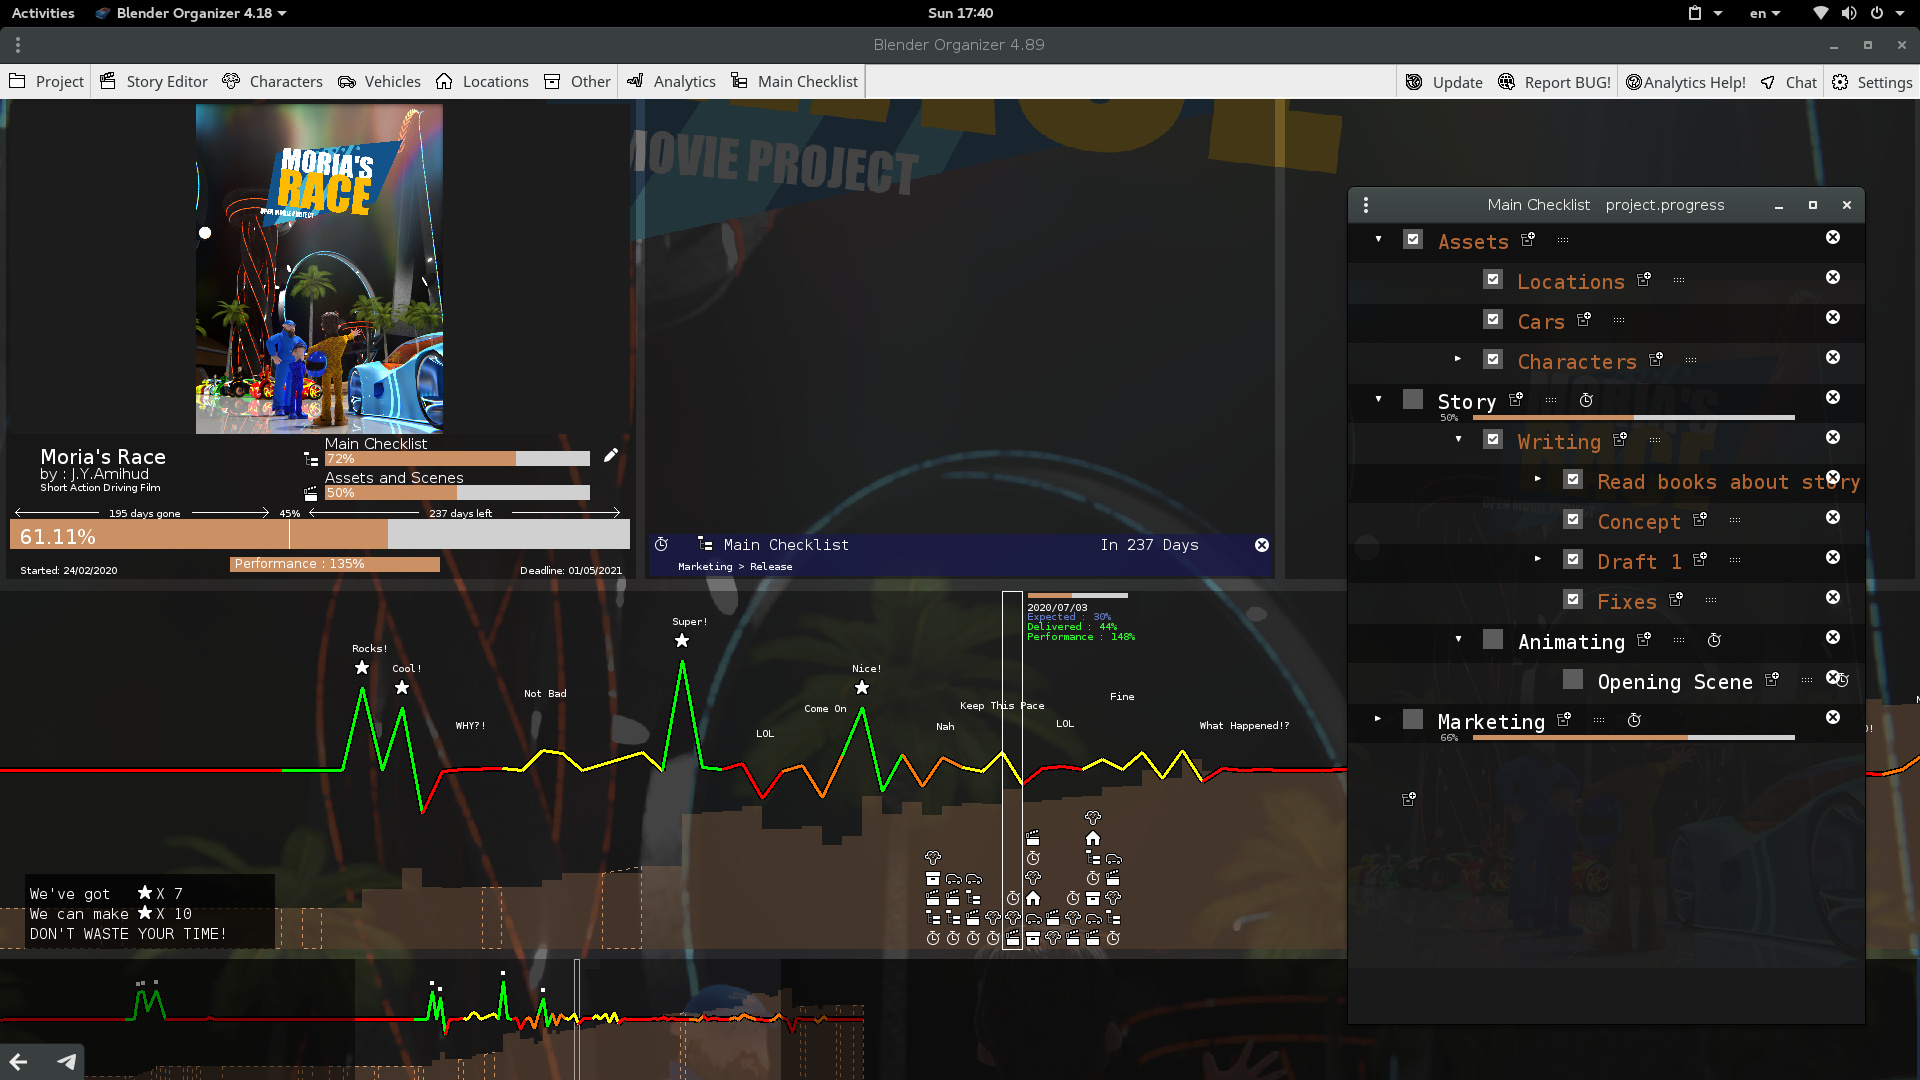
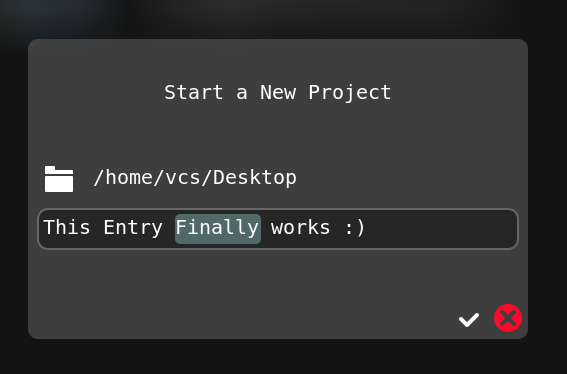
Blender - Organizer (VCStudio) ( organization of the projects )

I’m a developer of Blender - Organizer. I know It’s not the most clever name. But it sounds exactly what it does.

So little story. I was 18 or something. And was trying to blow everybody away with the greatest film ever done only by me. And as all dreamers you go through a realization that it’s going to take time or you are not going to be able to make it.

And the hardest part wasn’t even the modeling / animating part. But keeping track of everything. Knowing what I’m doing when. And also figuring out how much I’ve done.

So after trying printing papers and using Libre Office Calc for a long time. I figured out that I need a better solution. Something that will make way more sense.

I knew a bit of python from BGE because every kid loves to make a game. And learning to use something like GTK wasn’t too hard. Because they have a very nice documentation where I can grab an element I need and after 15 minutes of figuring it out I can use it.

Movie came out 1 month before deadline. It wasn’t the best. My animation is still not the best. And I used terrible amount of early denoiser. If you are interested. It’s called “I’m Not Even Human”

Then came my next little movie project. And I knew I need to redesign the hell out of the Blender-Organizer. Write as much of it as custom UI so I could have more flexibility.

Now We have a cool colorful, gamified analytics with calculable, collapsible checklists.

Asset manager. With blend file generator, list of scenes a given asset is in. And so on.

And a crazy powerful Node Based STORY EDITOR. That let’s you mark assets and shots right into the script. Generates shots folders. Have automatic linking of assets into the blendfiles. And has crash-proof renderer that records render times for analytics.

Github
Tutorials
Chat

Now At the moment I’m not working on it. And the reason is the stupidest one. I just have no idea what to work on. Anybody can help me?

VCStudio and Blender-Organizer are free-software packages for organizing animated project. Primarily to work with Blender3D. It’s written in python and distributed as a set of scripts. So in theory with little work you can make it run on any OS. It’s licensed with a GNU GPLv2 license. Primarily developer of the project (2018 - 2020) is J.Y.Amihud (also known as Blender Dumbass). Some projects done with this software may include I’m Not Even Human, The Package, The Car & The Time Is Running Out and Moria’s Race.

3 Likes

Taking a quick look at the github page…

RUN IT IN PYTHON 2 NOT PYTHON 3. MAKE SURE OF IT.

That’s the first thing to work on!

I’ll be sure to look at it in further detail, too. It looks really neat!

1 Like

I know lol. But I’m currently during a movie project and I don’t want to break the organizer. And also. With the current implementation of the update I’m not sure I can make a smooth transition for all the users. It’s a logistical nightmare.

Currently the scripts sits somewhere in the HOME folder. And you have all the .py files in it. On update it gets update.data file from github and reads what files should be changed. Then downloads only those files. And restarts.

Now most user probably pin the organizer like this
image
which is recording a given python version into a dot desktop file. It’s not that hard to find. But most people do not know about it. And so it will return tons of mistakes since I move to python 3.

Maybe instead I can have a working copy of python 2 somewhere in the files. Making the installation a peace of cake.

This is crazy hard problem.

EDIT: I was a little stupid kid when I started it. I had no idea that python 2 will be no longer supported. So never designed a thing that will make it so I could change a language on fly.

Possible solution will be make an update that will make those kinds of changes possible. And make it early. But there are 2 problems with it.

  1. How do I make sure people update to that version first?
  2. How do I edit the correct .desktop file?
1 Like

Wait. I can change the whole code of the main file. To just be a starter of python 3 version
something like

import os
os.system("python3 blender-organizer-new-startup.py")

And add a .sh file or something to clarify the thing. It might work. But then I will probably need to rewrite a huge part of GTK stuff. Because it changed as well. And I’m scared because of the amount of GTK code in the blender organizer.

If it was my project, I would just push an update to disable the update system and tell users to manually upgrade to the new version, and then break compatibility.

How many people do you have using this? I imagine they’re all pretty well versed in software. I think they’ll adapt :slight_smile:

1 Like

Interesting point. Still until the movie is finished. There is no way I’m doing such a huge move.

Well done, it looks like a really handy tool.

1 Like

I started remaking it for python3 with a lot more understanding of what I’m doing this time. It’s going be a lot more polished experience. I hope.

I’m calling the new one. VCStudio. Because I don’t want to force people who have projects with Blender-Organizer to move to untested new thing.

First I don’t want to have any executable python file with in a project folder anymore. It will be all handled by a project manager. Where you could create and launch projects.

Also it’s important to preserve some way of working on non GTK systems. Like Windows.
So for those who says Linux is hard because of terminal. They will have to use Terminal then.

At the moment with GUI I’m only developing the engine. Because I don’t want to draw a single button until I set it all up properly.

New engine ideas:
Animations
Layers
Blur
Rounded edges for buttons
Hidden diagnostics widget (DONE)

You can access it by clicking in the Top-Right corner below the close window button.

Dev page:

1 Like

The engine is at a moment where I’m happy to use it. I have animations and blur. Those were the hardest things to implement.

Now comes the time to design some UI. And I’m scared. Even tho Blender-Organizer is quite good IMO. I’m afraid to be too sure of myself and make something terrible. I’m afraid of being too worried about the glossy side of the UI and less worried about the actual experience of the user. Like being able to do the thing he/she needs to do.

If wish I could make some drawings of the UI and being judged on them. Hope somebody could be here for this.

What I gonna do is design first the Project-Manager ( like a hub where you chose what project you want to load. And create new ones. ) I will do a couple GIMP previous of what I think it Might look like. Please judge.

Here is the same design using the old Blender-Organizer color scheme.
I already have a possibility to change themes in the engine so far. So the colors could be picked by the users. And icons will be a part of the theme. So we could make for example icons pack for it. Those are currently just Blender icons.

I think 1 click will select a project. 2 clicks will enter it. Or is it too unexplained?

This is some real working UI. It’s in a very alpha stage. But soon I gonna update the Git repository. It’s still in a very early stage. Needs a lot of work. A lot of things.

Tilling works flawlessly. Probably because I have experience is this from the previous Organizer. Also now I have a somewhat button widget. Not really. I adjusted the rounded-rectangle function to be able to act like a button. So yeah.

This was a lot of a very hard math problems to make it work.
First I created a function for a scrolled area. That supports this time all 3
Mouse Wheel Scroll / Middle Mouse Button Drag Scroll / Scroll Bar Scroll.
And all is set up using one function. So I could do way more things now.

Also I needed to scale down the images. And i made a lot of math to make it look as it should. That’s insane.

Soon I will update. First I want old projects to open. At least.

1 Like

Okay. The current version of everything is up. You can see the scan button is working already. Tho it freezes the UI for a little bit. I know how to fix. But it will require some work. So I gonna continue tomorrow.

I just cloned the repository. Launched it and clicked the scan button. It did return me the projects. Lovely.

Okay I managed to install one VCStudio on another machine. And scan works just fine. Double clicking in the project will Open the project. So if you had multiple Blender-Organizer projects, you can use this as a kind of launcher.

Settings and internet buttons are a cheap solution at the moment. Both internet and update will just open a brother with the github repository. Settings will launch you the settings file in the text editor.

I will not move to the actual organizer. Until I figure out like a mods system. I thought about some kind of hidden URL system. And based on that it will draw something to the screen or not draw.

Will see.

BUGS While I was trying to make a .desktop file and put in into the Ubuntu launcher I discovered a weird terminal bug. It would refuse to launch it without a terminal. But I changed some order of things in the run.py file and now it runs.

Please play around with everything. Because who knows. Maybe I broke something.

hey the project looks very interesting. I hope I can run on windows :nerd_face:

Of course you can. but only in cmd. Or DELETE Windows. And install a real OS.

. :rofl: :rofl: :rofl:

Making the New_Project UI thing.
Look at that De-focus thingy.

1 Like

image
This moves very slowly because I need to write an entire new system of text entry.
Like I don’t want to just use some GTK solution as in the old organizer. Because i want to have complite control over the rendering of the text. But it means that I need to Re-invent the wheel. Or should I say. Re-implement.

image

This entry finally works. Somewhat :smile: . I mean it’s kind a buggy still. But it’s good enough for an alpha.

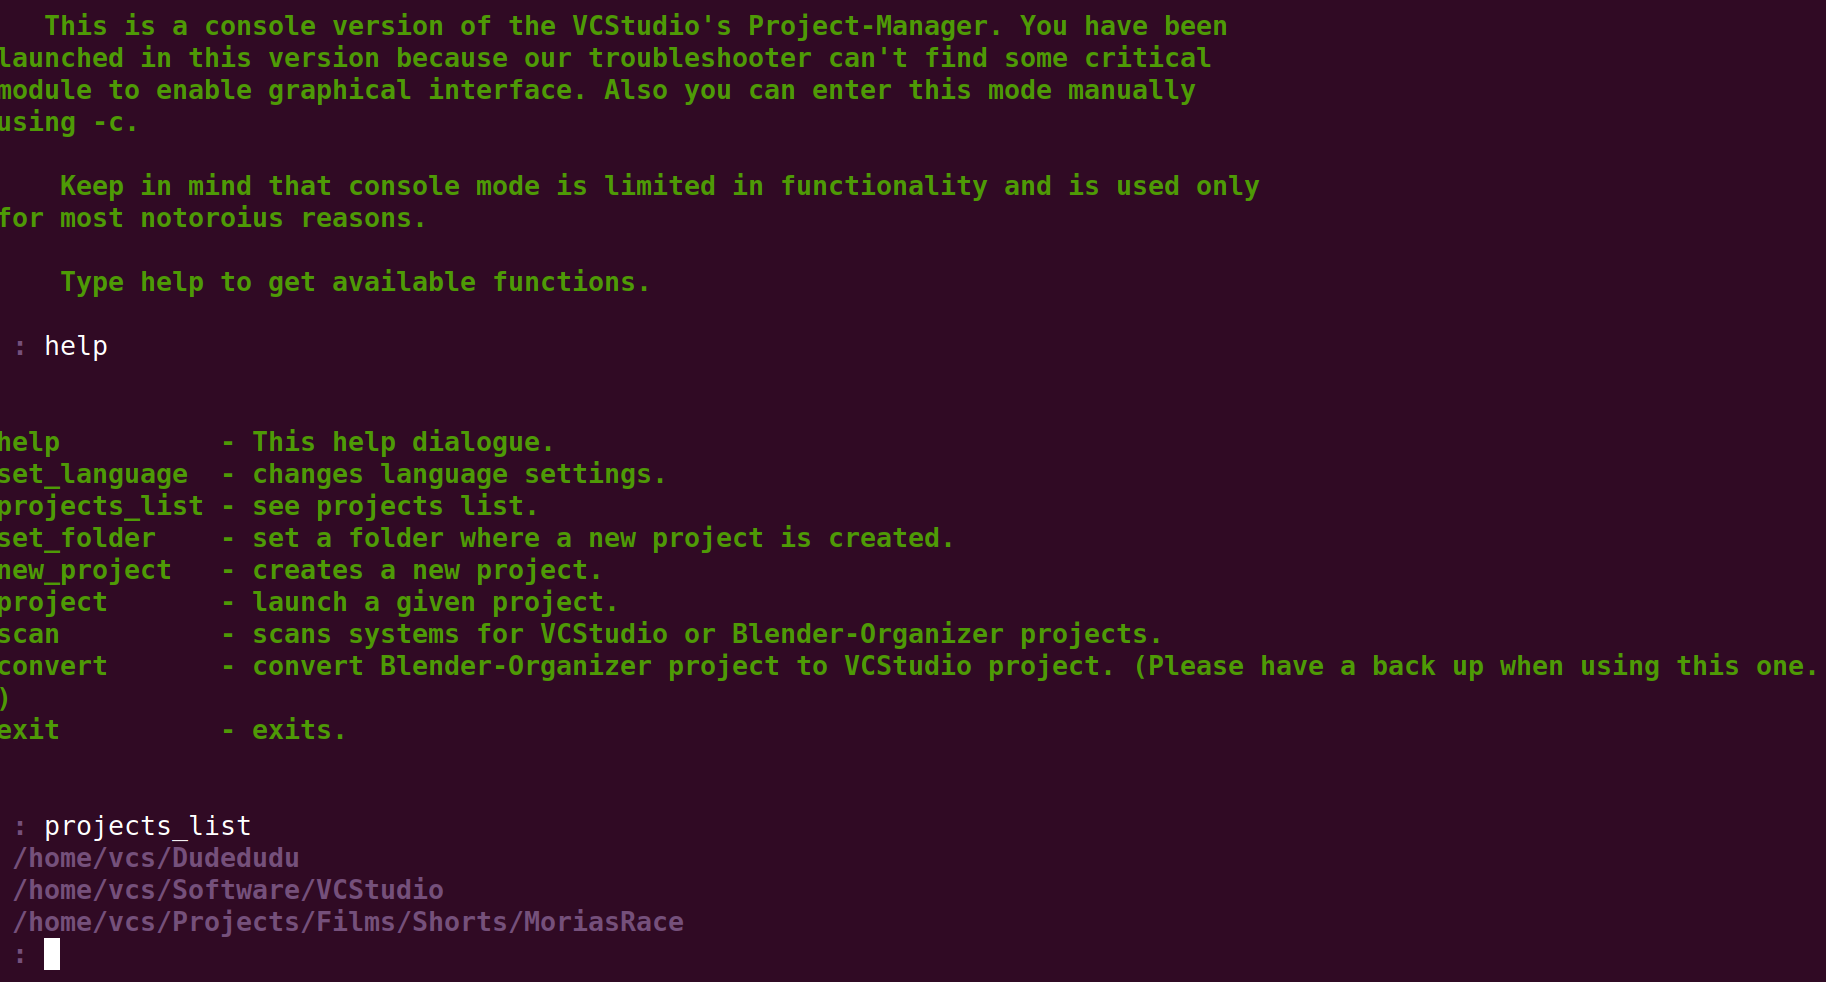
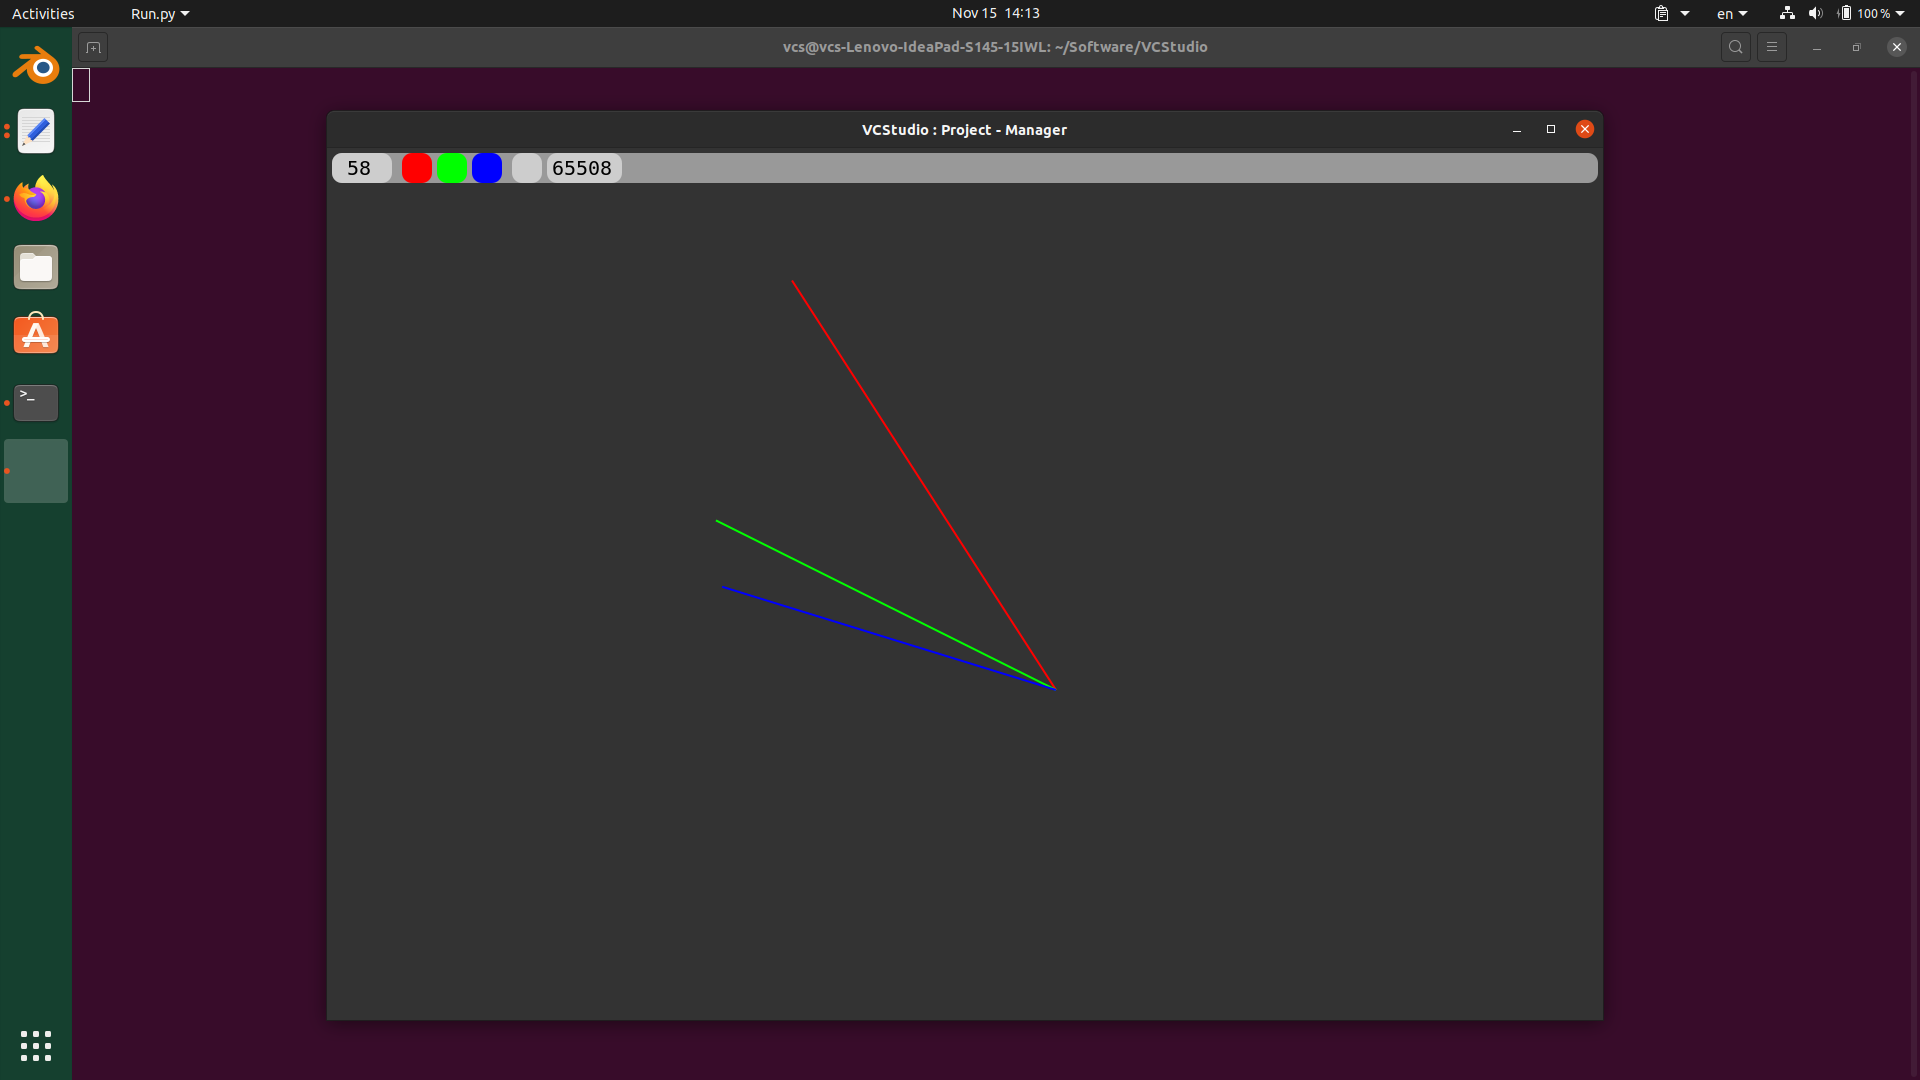
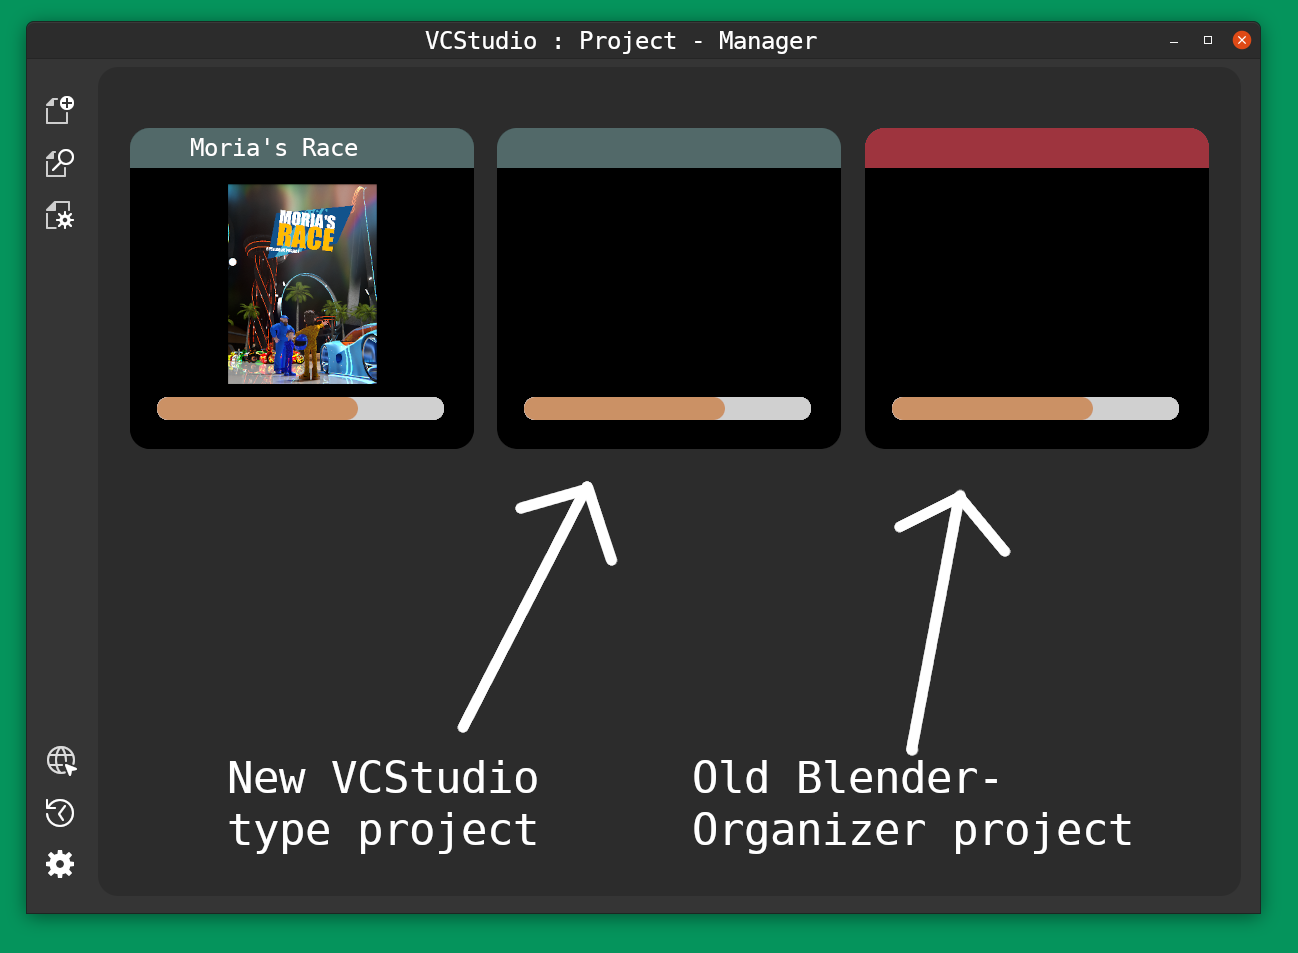
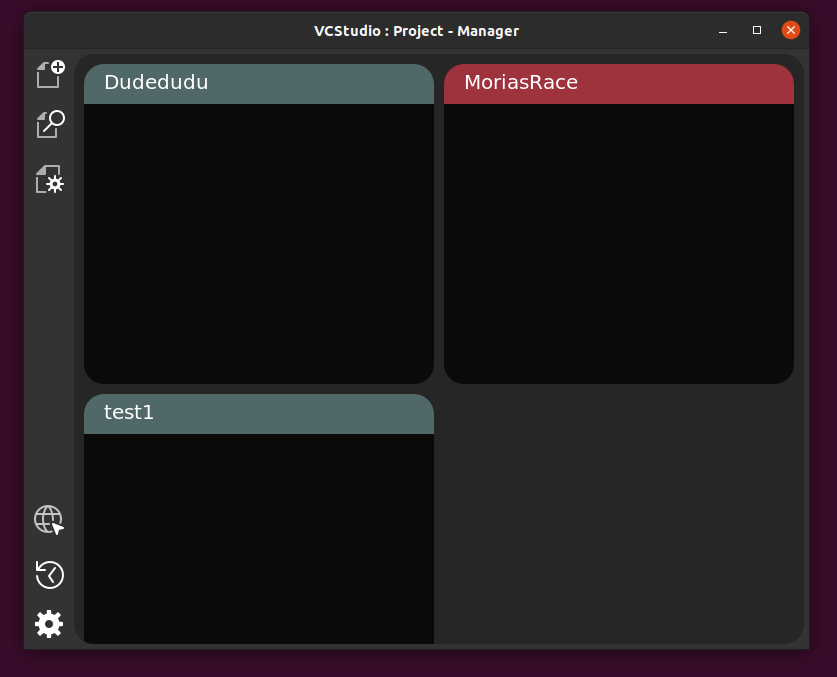
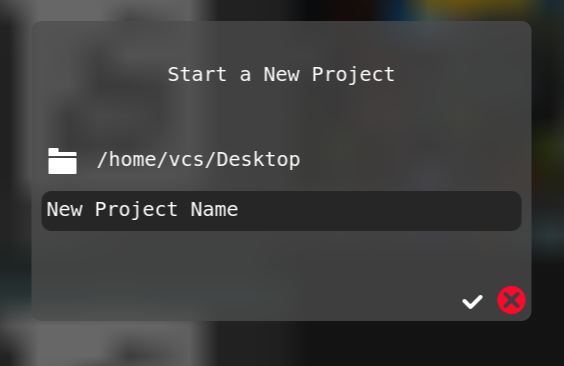
Look how much logic is in that little widget there:

def text(outlayer, win, name, x, y, width, height, set_text="", parse=False, fill=True,
    editable=True, multiline=False , linebreak=False, centered=False):

# This function will handle all the text writting in the software.
# I'm not sure about how parsing going to work for script files later. 
# But if it's currently works, means that I already implemented it into 
# the program. 

# Making the layer
surface = cairo.ImageSurface(cairo.FORMAT_ARGB32, width, height)
layer = cairo.Context(surface)
layer.select_font_face("Monospace", cairo.FONT_SLANT_NORMAL, cairo.FONT_WEIGHT_NORMAL)
layer.set_font_size(20)

# Some challenges that it will have is how to correctly store data about
# the text in the system. I think we can use the win.text variable to store
# directories of the data.

if name not in win.text:
    
    # I need to get something done before I can pu scroll in.
    scrollname = name
    while scrollname in win.scroll:
        scrollname = scrollname+"_text"
    
    win.text[name] = {
        "text"  :set_text,  # Actuall text you are editing.
        "cursor":[len(str(set_text)),len(str(set_text))], # Cursor
        "insert":False, # Whether the insert mode is on
        "scroll":scrollname # If multiline. The pointer for the scroll value.
        }

# Background
if fill:
    UI_color.set(layer, win, "darker_parts")
    roundrect(layer, win, 
        0,
        0,
        width,
        height,
        10)
    layer.fill()

# Now after filling it up. I want to clip everything. SO no text will get
# out of a given area. 
roundrect(layer, win, 
    0,
    0,
    width,
    height,
    10, 
    fill=False)
layer.clip()

# Now I want to give a preview of the text it self. BUT. I need to be sure 
# that if the text longer then a given width and there is no multiline or a
# linebreak. Then it scrolls sideways to the cursor. 

# Automatic scroll system: Based on the position of the cursor.
offsetX = 0
cursor2location = win.text[name]["cursor"][1]*12 + offsetX
while cursor2location > width - 50:
    offsetX -= 1
    cursor2location = win.text[name]["cursor"][1]*12 + offsetX
    

# Text selection. AKA cursor
# So here we draw the cursor
if editable:
    UI_color.set(layer, win, "node_blendfile")
    if win.text[name]["cursor"][0] == win.text[name]["cursor"][1]:
        layer.rectangle(
            win.text[name]["cursor"][0]*12+5 +offsetX,
            5,
            (win.text[name]["cursor"][1]*12)-(win.text[name]["cursor"][0]*12)+2,
            30
            )
    else:
        roundrect(layer, win, 
            win.text[name]["cursor"][0]*12+5 +offsetX,
            5,
            (win.text[name]["cursor"][1]*12)-(win.text[name]["cursor"][0]*12)+2,
            30,
            5,
            fill=False
            )
    if win.textactive == name:
        layer.fill()
    else:
        layer.stroke()


# Making sure that cursor is correct. Because a lot of bugs are happening
# with it and it's not cool.

# If second part of selection ends up bigger then the first. Reverse them.
if win.text[name]["cursor"][0] > win.text[name]["cursor"][1]:
    win.text[name]["cursor"] = [
        win.text[name]["cursor"][1],
        win.text[name]["cursor"][0]]

# If any part ends up beyond the text. Clip them in.
if win.text[name]["cursor"][0] < 0:
    win.text[name]["cursor"][0] = 0
if win.text[name]["cursor"][1] < 0:
    win.text[name]["cursor"][1] = 0
if win.text[name]["cursor"][0] > len(str(win.text[name]["text"])):
    win.text[name]["cursor"][0] = len(str(win.text[name]["text"]))
if win.text[name]["cursor"][1] > len(str(win.text[name]["text"])):
    win.text[name]["cursor"][1] = len(str(win.text[name]["text"]))


# Drawing the text

UI_color.set(layer, win, "text_normal")
layer.move_to(5+offsetX, height/2+5)
if centered:
    layer.move_to(width/2-len(str(win.text[name]["text"]))*12/2, height/2+5)
layer.show_text(str(win.text[name]["text"]))

# Editing the text
if win.current["keys"] and editable and name == win.textactive:
    # Let's filter the input first. 
    # For example
    if not multiline: #Removing enter key press
        if 65293 in win.current["keys"] or 65421 in win.current["keys"]:
            win.current["key_letter"] = ""
    
    prevlen = len(win.text[name]["text"])
    clipboard = Gtk.Clipboard.get(Gdk.SELECTION_CLIPBOARD)
    regularclean = True
    ORD = 0
    try:
        ORD = ord(win.current["key_letter"])
    except:
        pass
    backremove = False # Whether to make selection go to 0 width thing
    #print(ORD, win.text[name]["cursor"][0])
    
    
    # Backspace
    if 65288 in win.current["keys"]:
        if win.text[name]["cursor"][0] != 0 and win.text[name]["cursor"][0]\
                                       == win.text[name]["cursor"][1]:
            
            win.text[name]["text"] = win.text[name]["text"]\
            [:win.text[name]["cursor"][0]-1]+\
             win.text[name]["text"]\
            [win.text[name]["cursor"][1]:]
            
        elif win.text[name]["cursor"][1] != 0 and win.text[name]["cursor"][0]\
                                       != win.text[name]["cursor"][1]:
                                       
            win.text[name]["text"] = win.text[name]["text"]\
            [:win.text[name]["cursor"][0]]+\
             win.text[name]["text"]\
            [win.text[name]["cursor"][1]:]
            backremove = True
        
    # Ctrl - C
    elif ORD == 3:
        
        cliptext = str(clipboard.wait_for_text())
        
        clipboard.set_text( win.text[name]["text"]\
        [win.text[name]["cursor"][0]:win.text[name]["cursor"][1]], -1)
    
    # Ctrl - V
    elif ORD == 22:
        
        cliptext = str(clipboard.wait_for_text())
        
        win.text[name]["text"] = win.text[name]["text"]\
        [:win.text[name]["cursor"][0]]\
         + cliptext +\
        win.text[name]["text"]\
        [win.text[name]["cursor"][1]:]
        win.text[name]["cursor"][0] = win.text[name]["cursor"][1]
    
    # Ctrl - A
    elif ORD == 1:
        win.text[name]["cursor"][0] = 0
        win.text[name]["cursor"][1] = len(win.text[name]["text"])
    
    # To clear up the Controll
    elif 65507 in win.current["keys"]:
        pass
    
    # Shift
    elif 65506 in win.current["keys"]:
        # Right
        if 65363 in win.current["keys"]:
            win.text[name]["cursor"][1] = win.text[name]["cursor"][1] + 1
            #win.current["keys"].remove(65363)
        
        # Left
        elif 65361 in win.current["keys"]:
            if win.text[name]["cursor"][1] > win.text[name]["cursor"][0]:
                win.text[name]["cursor"][1] = win.text[name]["cursor"][1] - 1
            #win.current["keys"].remove(65361)
            
    # Right button
    elif 65363 in win.current["keys"]:
        win.text[name]["cursor"][0] = win.text[name]["cursor"][0] + 1
        win.text[name]["cursor"][1] = win.text[name]["cursor"][0]
        win.current["keys"].remove(65363)
    
    # Left button
    elif 65361 in win.current["keys"]:
        win.text[name]["cursor"][0] = win.text[name]["cursor"][0] - 1
        win.text[name]["cursor"][1] = win.text[name]["cursor"][0]
        win.current["keys"].remove(65361)
    
    # Escape
    elif 65307 in win.current["keys"]:
        win.textactive = ""
        win.current["keys"].remove(65307)
        
    else:
        win.text[name]["text"] = win.text[name]["text"]\
        [:win.text[name]["cursor"][0]]\
         + win.current["key_letter"]+\
        win.text[name]["text"]\
        [win.text[name]["cursor"][1]:]
        
           
    # Auto moving the cursor    
    nowlen = len(win.text[name]["text"])
    if win.text[name]["cursor"][0] == win.text[name]["cursor"][1]:
        win.text[name]["cursor"][0] = win.text[name]["cursor"][0] + (nowlen - prevlen)
        win.text[name]["cursor"][1] = win.text[name]["cursor"][0]
    
    elif backremove:
        win.text[name]["cursor"][1] = win.text[name]["cursor"][0]
    
    
    if nowlen != prevlen and regularclean:
        # Deleting all the keys from the keys. So yeah.
        win.current["keys"] = [] 


# Outputing to the outlayer. 
outlayer.set_source_surface(surface, x, y)
outlayer.paint() 

# Button if editable.
if editable:
    def do():
        win.textactive = name
    roundrect(outlayer, win, 
        x,
        y,
        width,
        height,
        10, 
        fill=False,
        button=do)
    outlayer.stroke()

if win.textactive == name:
    UI_color.set(outlayer, win, "button_active")
    roundrect(outlayer, win, 
        x,
        y,
        width,
        height,
        10, 
        fill=False)
    outlayer.stroke()