UV Editing

I wanted to start a little discussion about the uv workflow in blender. It has not really got much attention in the 2.8 update aside from the multi object mode.

First off I dont want to spend too much time on talking about nice shiny features - for instance I think we all can agree that a good convex packing would be cool - but really I think the workflow has more pressing issues which ideally should be adressed at some point, as its very basic task in 3d…

UV selection sync
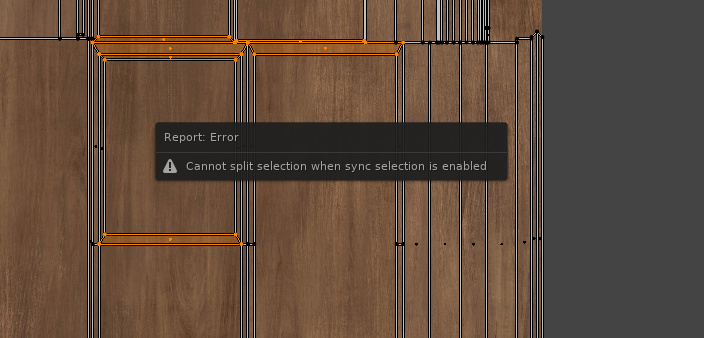
My biggest concern is this mode separation between synced and non synced selection.

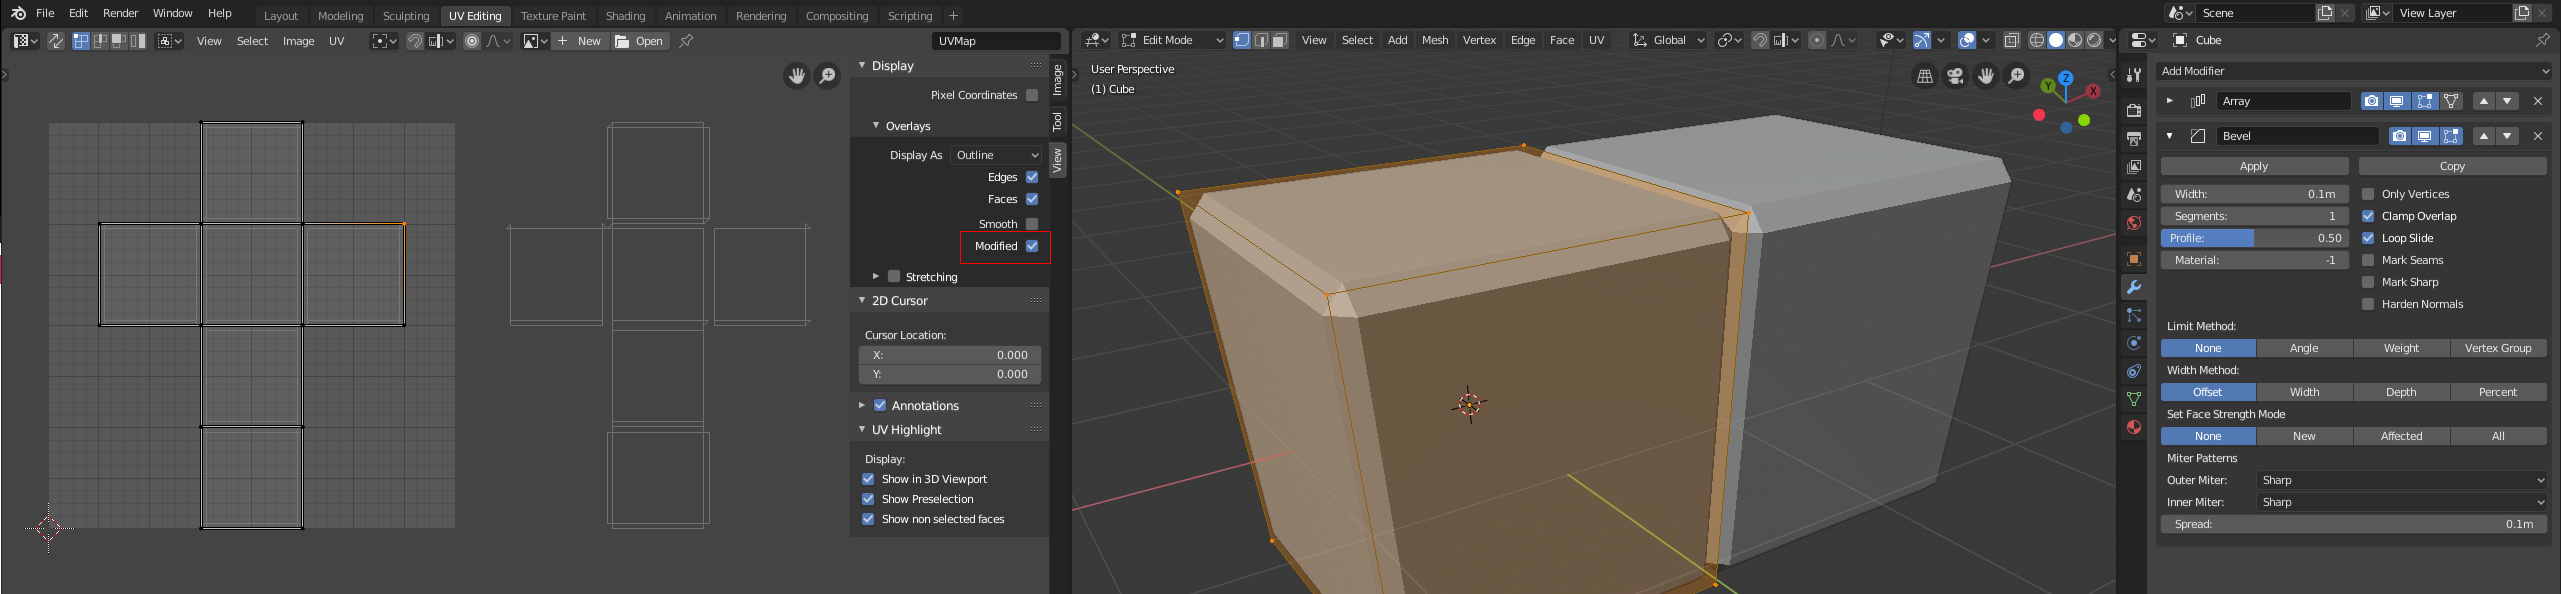
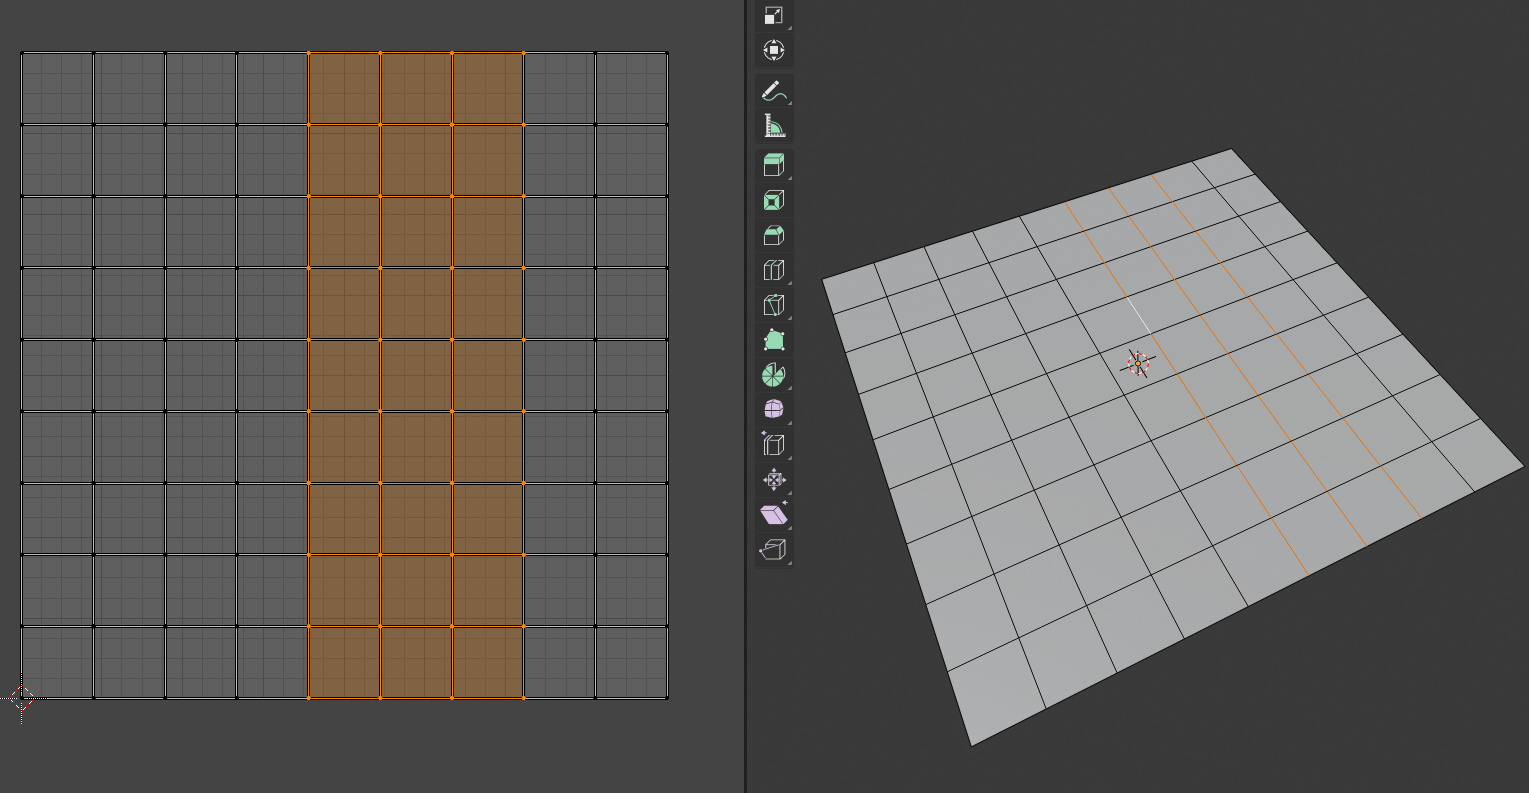
Synced Mode is a bit like maya - but somehow missing the UV component layer. It has very little use in my opinion as you just can’t work there because everything you select will select all the corresponding components - which is something I never need, and I wonder what use it has… :man_shrugging:

Non Synced mode is much more usable, but the downside is you just can’t see what your working on… this is crucial as uv’s are really hard to ‘read’ - the mapping from the 2D component to the 3D counterpart can be confusing! So I end up switching modes, changing my selection just to find out where something is on the actual model…

To adress this I wrote an addon some time ago: GitHub - BenjaminSauder/uv_highlight: Addon to improve blenders uv display
It draws the uv selection in the scene view and does a few other things as well (there is a wip 2.8 version in a branch). Quick demo: https://twitter.com/EsIstBenjamin/status/1154881812403032065

Now imagine this with native speed, great - well… not really. The problem I see is that it’s just not a good idea to overlay two selections on top of each other. To edit the uv’s you need to select the faces, to show what uv’s you’ve selected it needs to be drawn over the other selection. This is just confusing.

So I would suggest the following changes:

  • remove mode separation

  • show all uvs by default (context is important!)

  • sync selections between uv view <-> scene view:
    select uv → select vert
    select uv_edge → select edge
    select vert → select all corresponding uv’s
    select edge → select all corresponding uv edges
    faces have a 1:1 mapping anyways

  • add better highlighting of matching components, for example select an uv edge → it shows/hints which other uv edge is connected to this on the actual geometry.
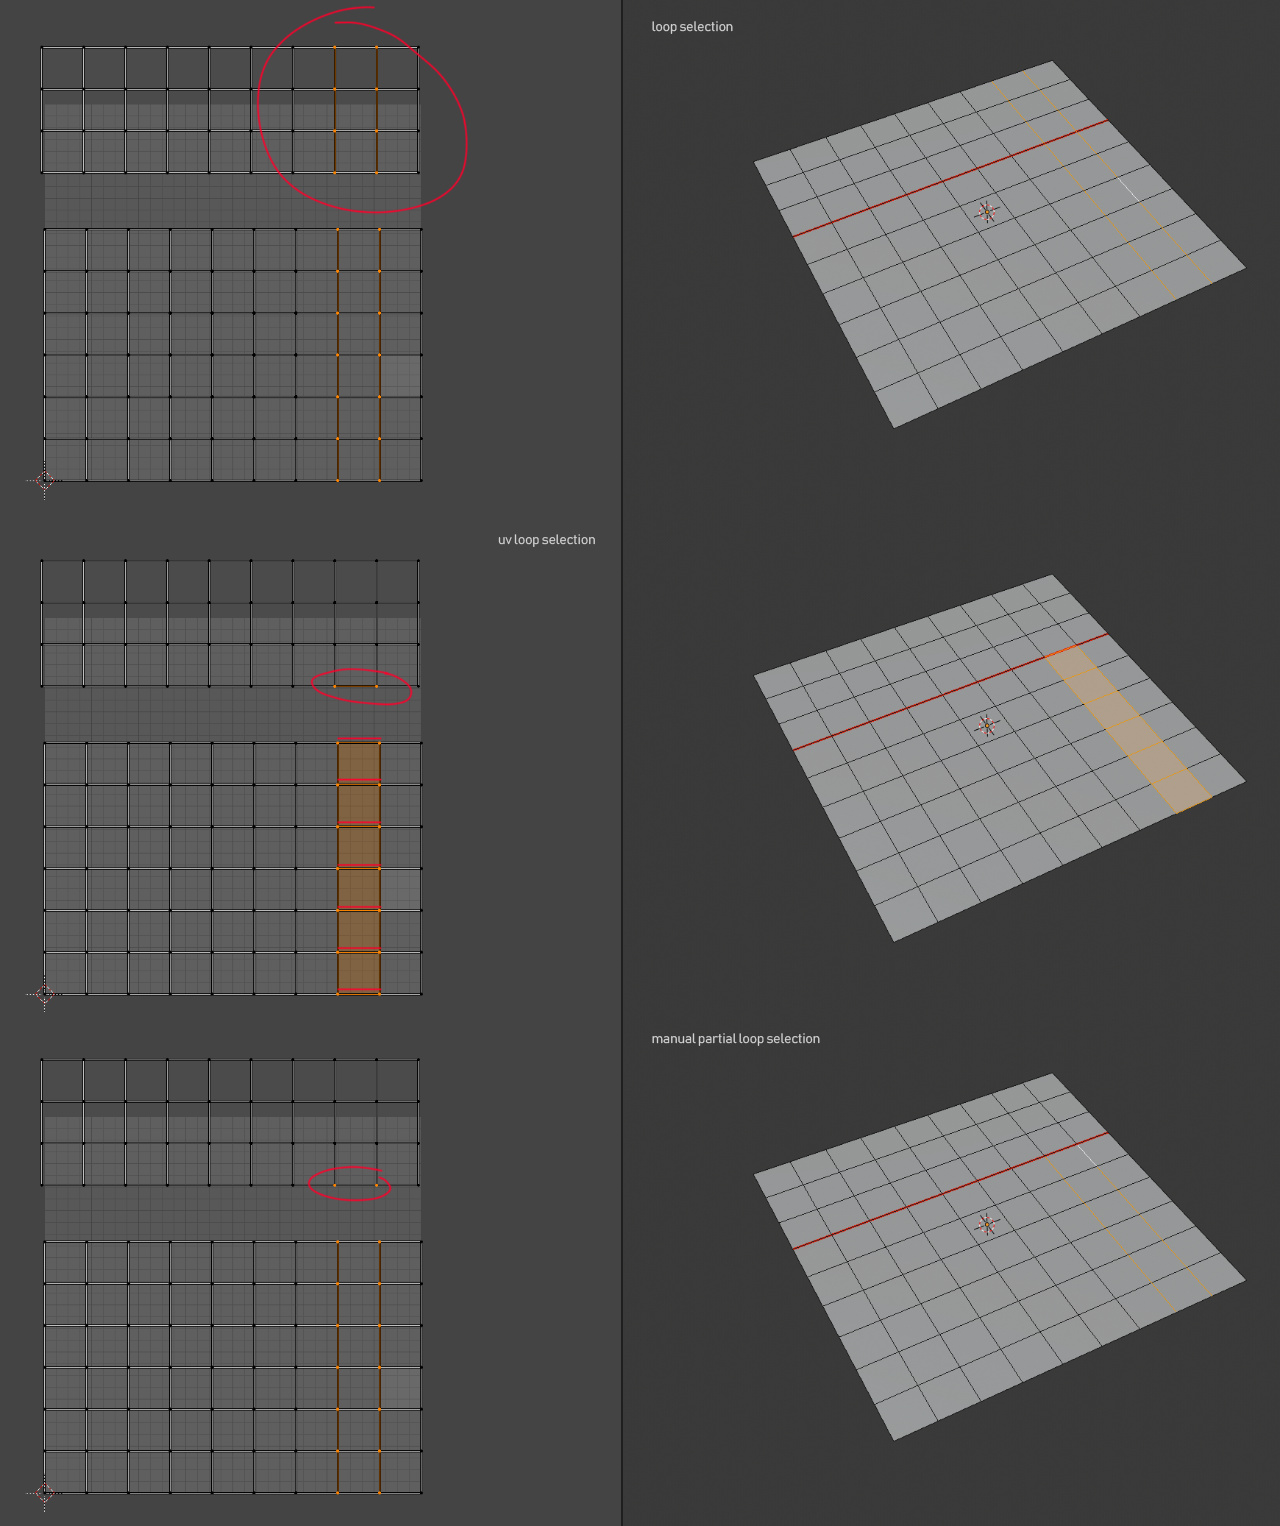
UV Edge Selection

Basically I want to be able to select uv edge loops the same way as in the mesh counterpart. Just to be clear, I want to be able to select parallel uv edge loops without selecting the crossing loops. With the current state of things its really tedious for reshaping operations which involve multiple loops. For me this is actually a pretty big annoyance, because like this its just not possible to quickly straighten a few loops.

Sticky Selection Mode

grafik
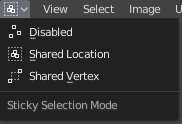
Is there really any practical use of anything other than shared location?
I really have a hard time comming up with a usecase which justifies that these settings are even there… but please enlighten me here :slight_smile:

…im sure there is more, but this post is already pretty lengthy…

15 Likes

Another example of the problem with display is the Mirror Modifier. It has options for UV Offset and Flip, but AFAIK there isn’t a way to see the results of it in the UV editor (other than applying the modifier).

1 Like

you can already do that:

Admittedly its kinda hidden… and the display seems to be broken too as you see the bevel edges on the duplicated cube are missing.

EDIT: bevel uvs are as expected :slight_smile:

1 Like

Speaking of flipped UVs: Blender has no native way of displaying flipped UVs in the UV Editor.
Currently this is only possible by adding a texture and cheking on the model in the viewport. Small pieces can get lost quite easily that way. Also flipped normals have a way of behaving quite funky with tangent normals if the user isn’t careful.

A color coding for flipped UV islands could be halpful ere, already.

2 Likes

You can select UV Island in 3D View by using Select Linked operator (L key) that is stopped by Seams.

So, when you are in synced mode, all UVs are visible in UVeditor and you have a clear idea to what part of mesh corresponds to what UV Island.

Well . This is currently how synced mode is working in 2.80.

It is how it works in Synced mode.
In Non Synced mode, it is reason of existence of Shared Vertex sticky selection mode.

Disabled sticky selection mode allows you to select a piece of an UV island to move it and disconnected it, at same time, in order to create 2 new UV Islands.

Difference between Synced mode and Non Synced mode is more about display than selection.
Globally, with Sticky Selection mode, you have same abilities of selection in UV Editor under 2 modes.
Difference is that :

  • in Synced mode all UVs are displayed in UV Editor.
  • in Non Synced mode, only UVs of selected faces in 3D view are visible.
    So, Non Synced mode is working as a local view in 3D view, a way to restrict complexity of what is shown in UVEditor.

For me, Alt left click (Select Edge Loop) is working in 2.80. You are probably talking about another thing. Do you mean Ctrl Alt Left click (Select Edge Ring ) or Ctrl Left click (Pick Shortest Path) ?

When using you are using Stitch operator, there is such pre-highlighting.
Do you have more tools in mind ?

Yes. That would be a useful overlay.

1 Like

Regarding Sync Mode:

Yeah Im aware of these tools (linked as loops etc). Thing is, it already needs defined seam edges for this to work which is not always the case. And as this mode selects all correspondig uv’s you can’t work on uv verts and uv edges…

And no synced selection does not work like I describie it … i mean not at all. I dont want to select corresponding elements in uvs. If I select a uv vertex I literally never need to move one of the ‘other’ corresponding uvs with it.

Sync mode right now misses a ‘uv’ component selection.

Regarding UV edge loops:
yes sure you can select with alt click - but that was not my issue at all. Select two loops next to each other and you will see it selects all the faces & edges too. This is not the case on mesh loops.

Regarding highlighting:
yeah the stich preview is great - same could be done for regular selections!

1 Like

My biggest issues with UV mapping in Blender are the fact that you have to select your objects and then go into Edit Mode to even see your UVs and that the toolbar tools in the UV Editor are quite undercooked.

I don’t mind that you have to go into Edit Mode to edit the UVs, but I do mind that you can’t see them until you go into Edit Mode. It should work just like it does in Maya; just select the object and voilà! The UVs are visible.

As for what I mean by saying that the tools are undercooked, you just have to use Maya to understand why. The tools that both softwares share are not always equivalent in quality. For instance, the Relax tool in Maya is so much better. One thing I can say is in Blender’s favour is that the automatic unwrapping process is a bit more clean than in Maya (often got weird unwrapping artefacts when cutting up the UVs), but it’s in the final stages of fixing UVs where Maya truly shines.

The lack of UDIMs is also an issue, but luckily that is already addressed in the 2.81 master branch, which will allow for way more freedom and quality.

3 Likes

Yup agree on all points!

Ah, thanks, I didn’t know that. Wonder if maybe it should be on by default as that is indeed easy to miss.

That overlay panel should be moved to the header as a popover, like in other editors.

1 Like

When the Bevel modifier is set to only one segment then it has to make a choice between placing the new geometry on one of the two edges that it attaches to, it tends to alternate from one piece to the next, that’s what’s causing the mess you see.
You have to use an even number of segments to bake the bevel modifier properly. Two segments always works properly for me but in the past, 4 or more segments would create random triangle streaks across the baked texture so I just got used to only using two. Maybe it’s different now.

Ah I see what you mean - yeah thats actually correct. I just didnt investigate at all :slight_smile:

UV edges
Here I have an example of what I think is annoying to do in blender:
parallel_uv_loops

As far as I understand it - selected uv edges are defined through their correspondig uv verts. But as two parallel edges ‘select’ all four uv verts, the important information which edges are actually selected is not stored anywhere - and thus such a tool cant be easily scripted.

Have you tried activating UV Sync Selection to select parallel edges while omitting connecting edges?

that doesn’t solve the problem at hand - as edge loops are not the same thing as uv edge loops.

Look at this example:

  1. mesh edge loop selection cant be delimited by seams
  2. uv edge selection results in selecting too many edges
  3. manual partial loop selection … almost there - but connected verts are still selected (as expexted)

Sure i can work around - but its really not a fluid process…

1 Like

There is a Seams from Islands operator into UVs menu.

OK. Now, I get it. An exception to synchronization should be made for that.
No synced selection in UV editor but still synced with 3DView.

Globally, we are all agreeing that UVs editing is not as fluent as mesh editing and expecting that work on UDIM will be concomitant of an improvement of UV Editing tools.

One big issue with the current UV editor is that face mode uses face dots to select the faces. This does way more harm that good, but unlike 3D view, in UV editor there is no xray mode toggle >: (

It results in further stupidity, that it is not possible to select 2 opposing faces of a quad face ring without selecting all faces of the quad face ring, and it is then not possible to deselect the unintentionally selected faces without deselecting the intentionally selected ones:

To further add to the frustration, the selection works better in sync mode, but sync mode is unusable since crucial tools do not work within it (for no logical reason):

And just when you are in at the brink of sanity, you get yet another hit, when you try to use the selection from synced mode in the unsynced mode so that you can use the tool but the selection in UV editor gets lost as soon as you switch to unsynced mode…

3 Likes

I feel like this post on RCS would also help a lot:

as I have that working as an addon - it helps, but having two different kinds of ‘selection-layers’ on top of each other is really not the greatest idea…

1 Like

Why can’t you make a manageable number of image repeats in a uv editor in a blender? This is in all editors and only in a blender can not be done this way. Only endless repeats.

Couldn’t agree more with these UV editor observations. UVs should show by default, add a “UV” selection mode in addition to regular vtx, edge, face. UV operations can be executed in any selection mode. Get rid of the sync mode and sticky modes. So much more confusing than it needs to be. I find myself constantly switching sync on and off and having to re-select stuff. Super annoying.

2 Likes