Hey, so the intention for these nodes is less for people to go inside and make changes. For that they definitely would need to understand what’s going on inside. But for the most part artists can treat these as monolithic nodes that they don’t need to go inside of, just like any other node.
The notion that to use these you need to go inside the node-tree is a misunderstanding that I’ve seen before. But that’s not the case, the intention is very much to use these nodes on a surface level. Either as a modifier directly, only touching the parameters in the modifier panel. Or as a node on the top level, for example by starting with a modifier and using the Move to Nodes operator.
Also:
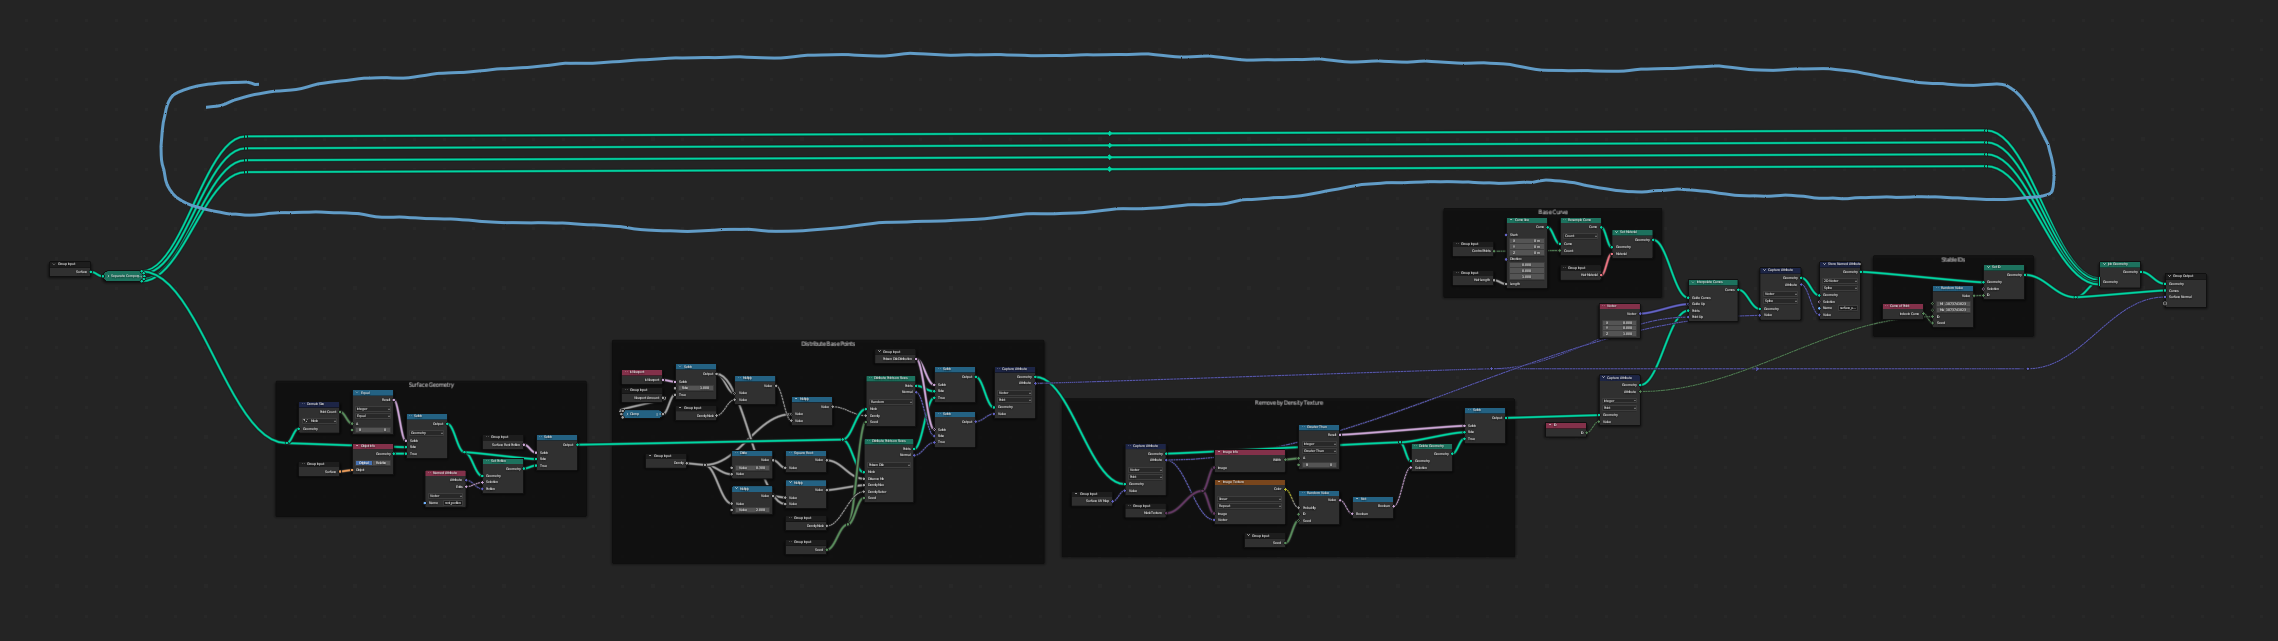
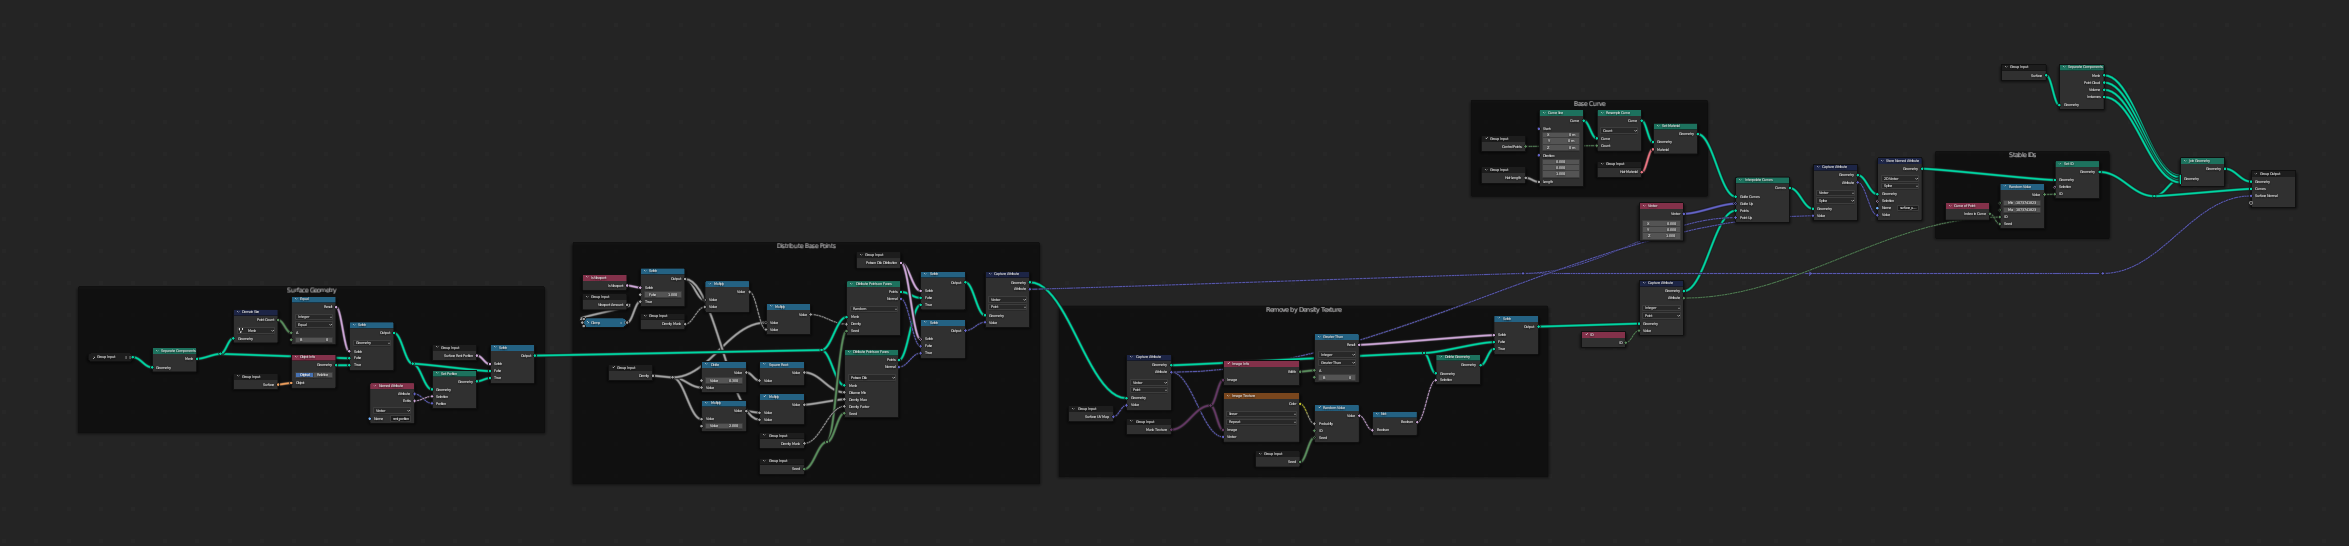
I’m not sure which version of the nodes you are talking about. Just the last few days I went over all the node-groups to clean them up by reorganizing the nodes and adding panels with titles of what is going on. That said, some of them are still quite difficult to work through, but that’s just how they work and at some point we just need to do better with the UI of the node editor to make node trees easier to understand.
Maybe you just saw a version before that, maybe not.
But yeah, regardless of that:
The intention is for people to use these nodes, as they are, in higher level setups which will then be quite simple. The documentation, example files and educational material in video still needs to be prepared for the release.
This is good development.
The only thing i don’t like is the icons. They don’t look very “Blender-like”.
I’d envision them to look more simplified, not 3D renders. More into the stylistic direction of active tools in sculpt mode.
What they mean is they’re automatically generated by capturing the viewport. That’s how assets get their thumbnails. Now I guess the system could be made to use Eevee instead of solid shading, or something, to improve on the looks. But it’s supposed to be wysiwyg, and I believe that’s a good thing
Assets can use custom thumbnails. (Actually, they are not even called “Thumbnails” in the blender UI, but “Previews”).
And these previews were not autogenerated. These are custom made.
Nodegroup assets do not get autogenerated previews. By default, the preview of a nodegroup asset looks like this:
The node-setups are much more cleaned up now, great job!
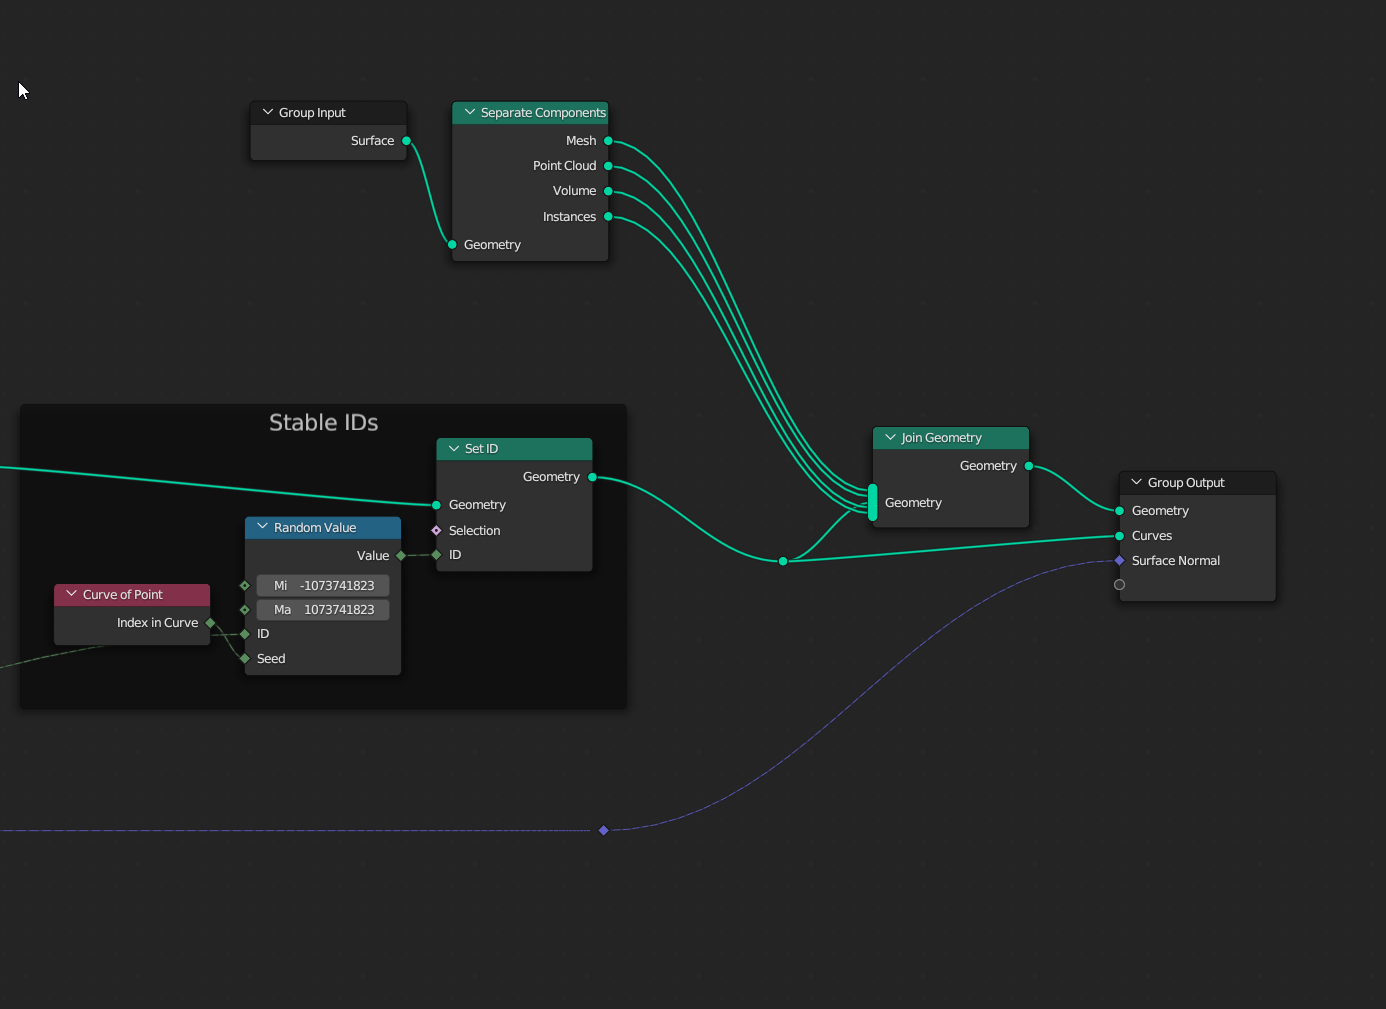
But there is one thing that I find confusing. Why are the “Mesh, Point Cloud, Volume, and Instances” being routed over the network instead of just using another Group input at the end?
Speaking of something like geo_std, one could have a group of nodes that would receive a geometry and 5 booleans inputs for each component to just disable the curves.
Fist off, congrats to the devs on the release! Simon’s intro videos seem really helpful as well.
Had a lengthy post with questions which partially answered themselves throughout the day, plus the fact that I need more mileage with using the system.
Quick remaining question - any chance we can get a guide hair overlay with adjustable color/thickness? I might have seen something in the works, not sure if it’s planned anytime soon though.
After playing around with the interpolated hair node and these node groups I must say that they are very useful basis for future hair grooms, good job on that! I am not sure whether the issue tracker should now be used for these groups since they are part of the release? However, the ‘Clump Hair Curves’ group is behaving incorrectly in a number of cases that seem to be mostly related to guide curves being deleted by the ‘Density Mask’ or ‘Mask Texture’ in the ‘Interpolate Hair Curves’ group. I couldn’t find this issue being described before.
It seems that in some cases the ‘guide_curve_index’ becomes zero for all children. There is some logic that tries to select new guide hairs whenever one is deleted that I don’t fully understand. However, I could see that no ‘New Guide Points’ are being selected by ‘Select New Guides by Distance’. My ad-hoc solution was to avoid original guides from being deleted, but maybe it would be nice to resolve this procedure. I don’t quite understand why it selects a new guide hair and then puts it back into the spot of the original one. Doesn’t this just make it equivalent to the original ones (except that some get deleted because the closest one might overlap)?
I cannot seem to share attachments yet, but I will try to make some examples to showcase the issue.
Thank you! I’m glad a lot of the questions have been answered already.
It’s not currently planned afaik. However, the way that the guide overlay works right now was added relatively late into the release cycle and once we have more user feedback I can definitely see changing that or adding more options.
Yes, due to the fact that the mapping is currently entirely based on the index, anything that changes the index breaks the mapping. I believe what you are describing is something different though and is not actually ‘breaking’ but the pattern of clumping is changing based on the curves that are available.
I put some effort into ensuring that the operations wouldn’t change depending the density of the base curves. This is the exception due to the way that the guides are selected based on the exisiting curves. I do want to make this more stable in future iterations of the system, but right now that is a restriction and part of how the system works.
The guides are selected procedurally. So when the existing curves change, the guide pattern also changes. To have more specific control you can either use the original guide curves, or generate guide points separately that you use with the Create Guide Index Map node. I’m not sure whether we mentioned that specifically in the docs already.
Yes, these nodes should be treated just as any other functions in Blender and issues are tracked the same way on projects.blender.org . The previous point is a known issue though, I would say. We just need to make sure that it’s documented if it isn’t already.
I’m not exactly sure what you are referencing here. There is only ever 1 guide map on the same attribute currently, which is always replaced, but in nodes you can pass around previous guide maps as anonymous attributes, if the indices didn’t change. It should never just all become 0, unless there is not a single guide.
This is a bit of a workaround to make sure that all curves propagate the attributes from the surface mesh, as the original guides don’t. Hopefully this can be solved in a better way in the future.
Thanks for looking at this in-depth. I do believe that most of the things you run into might be known issues. I have a long list of things to improve myself. But please do make reports, for what you see as issues, if you can’t find anything about it in the documentation.
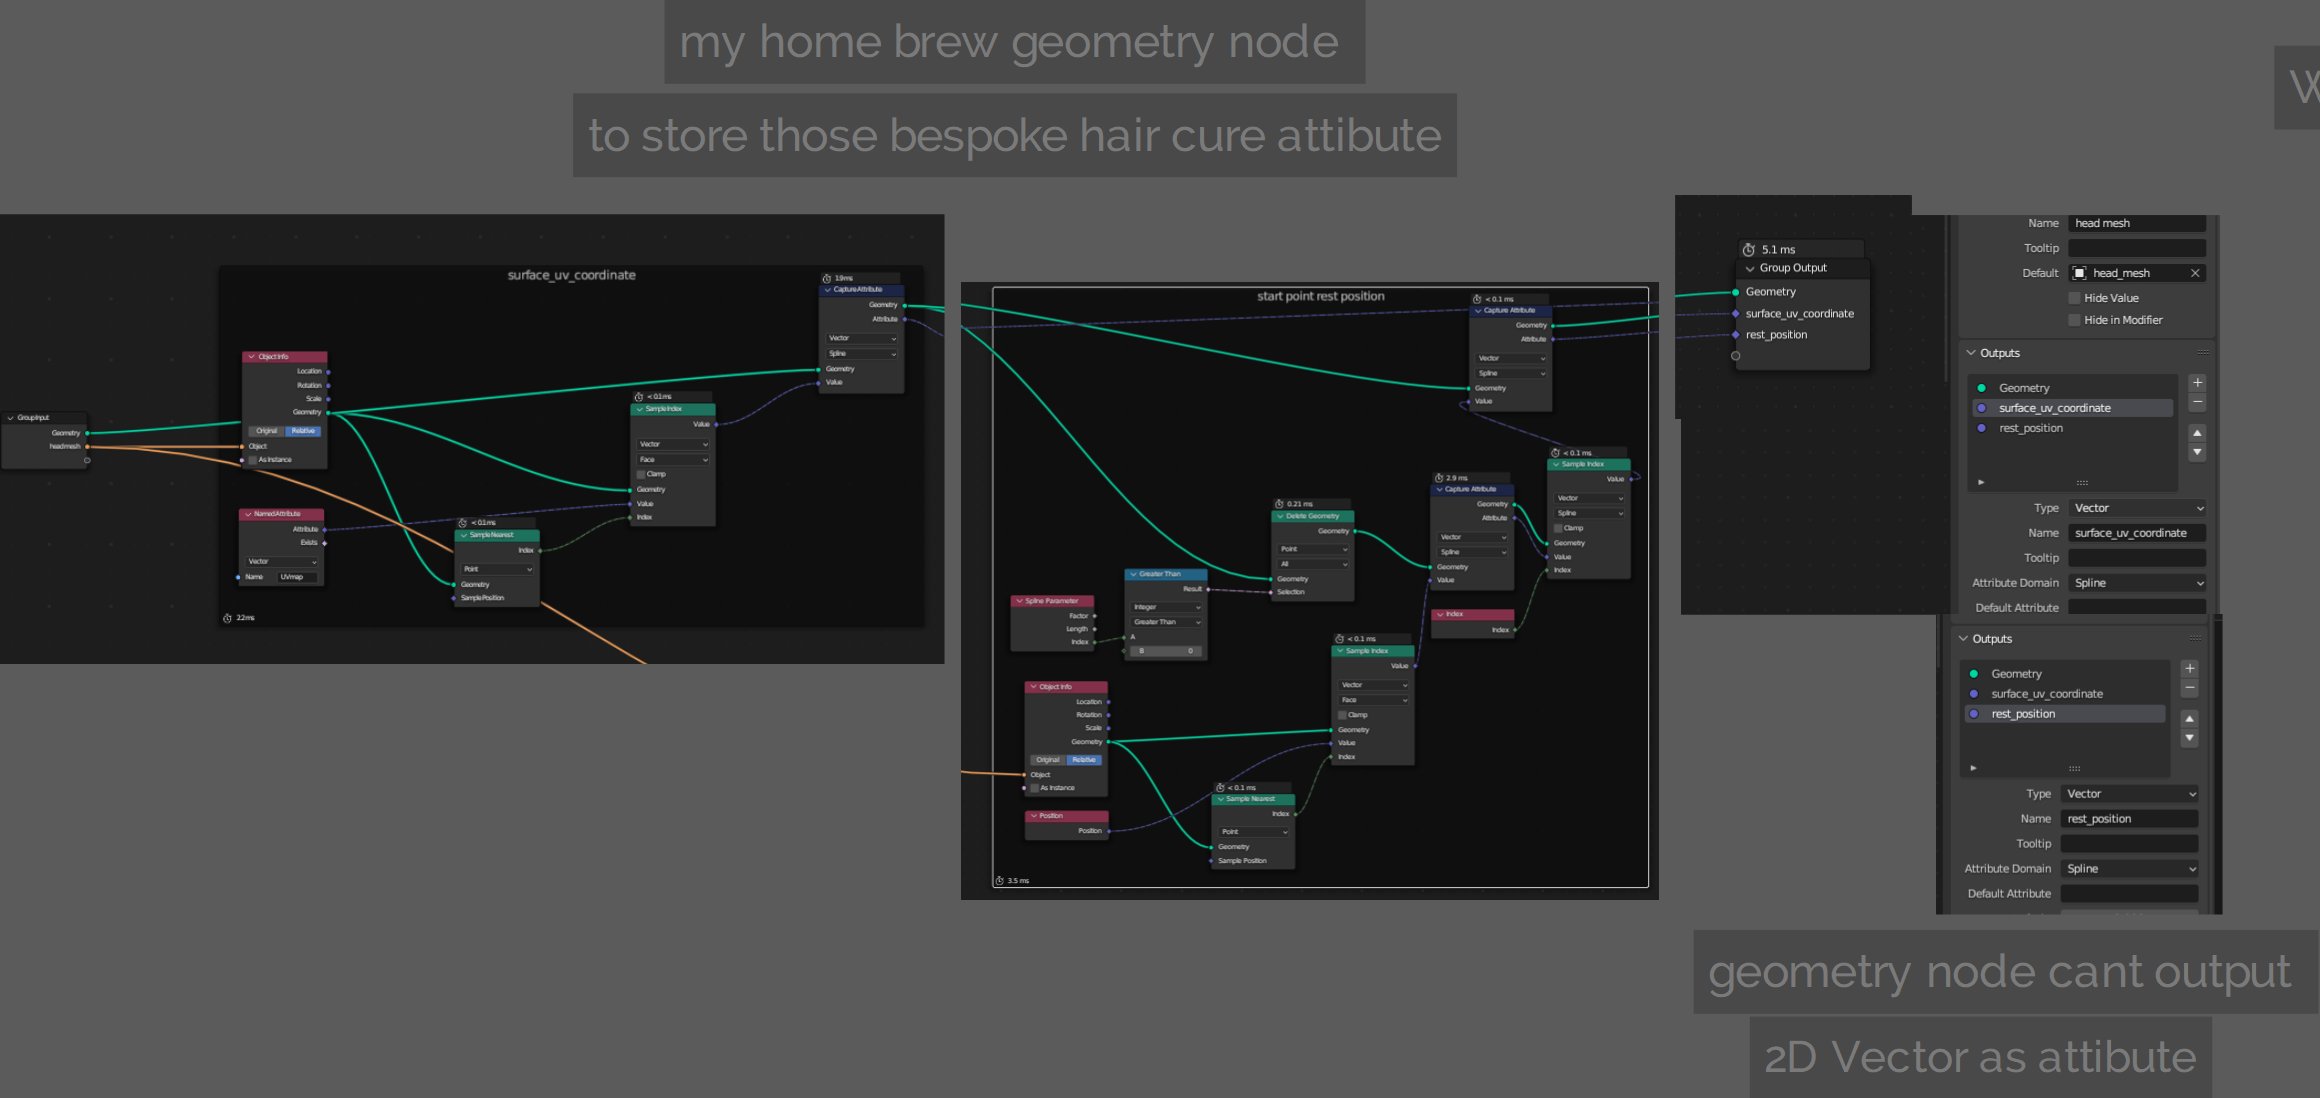
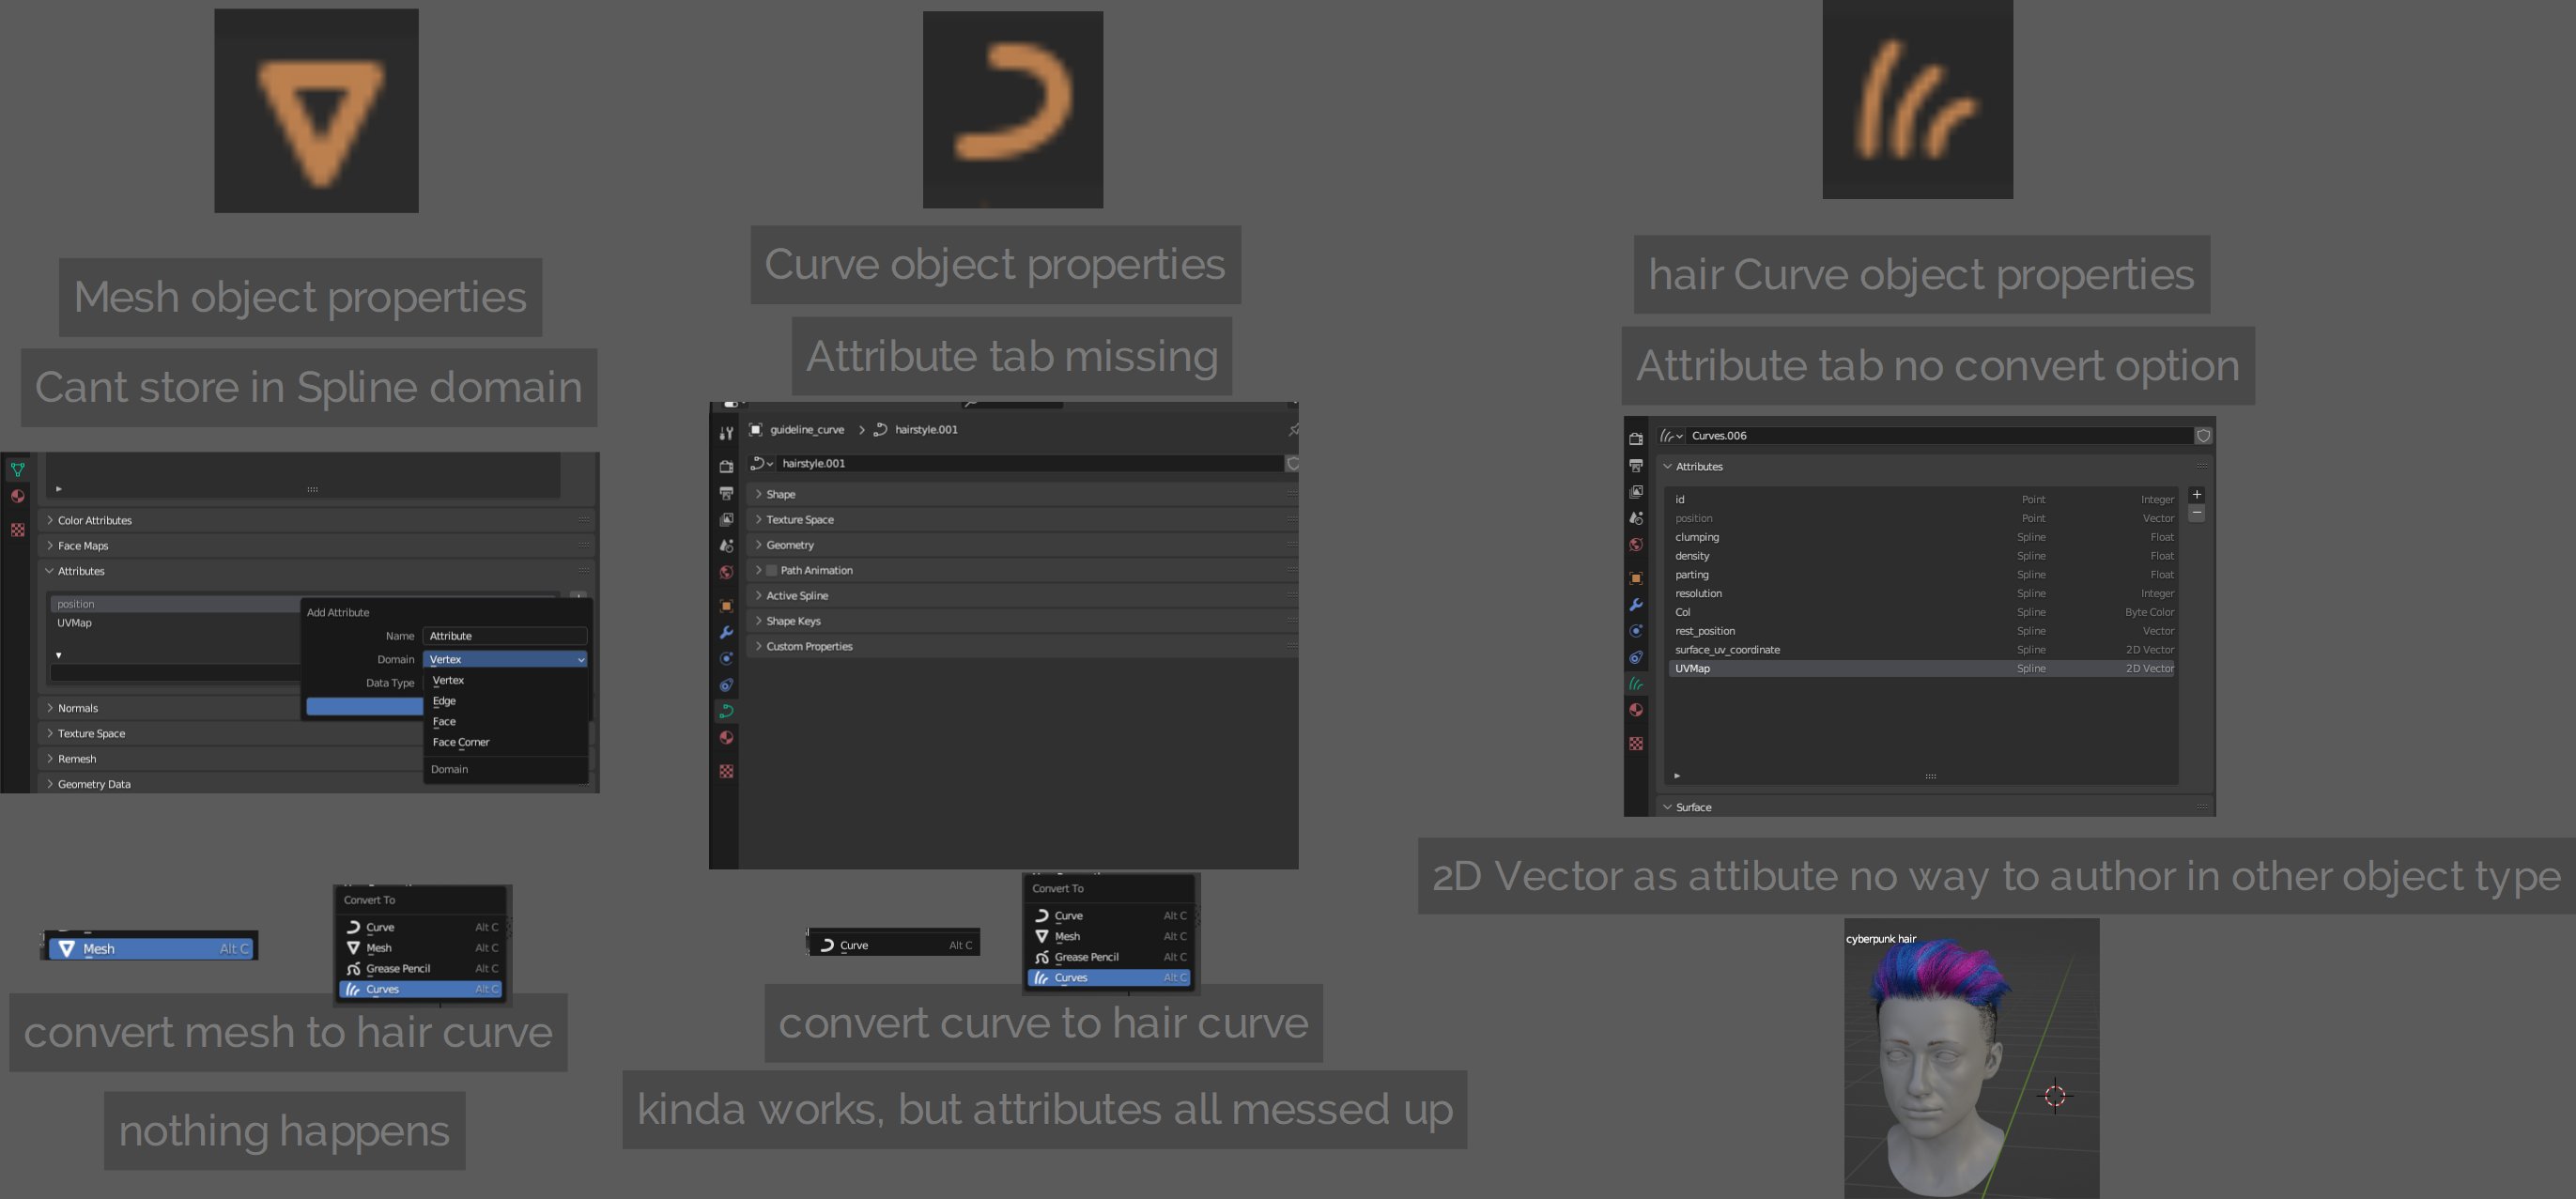
Great work all around so far. having played abit with Geometry node before, specifically on manipulating mesh/curve lines to procedural Haircards.
I noticed some inconsistencies in the new Hair curve object type when compare with Mesh and curve objects.
As far as i can tell the new Hair Curve and default hair geonodes are dependent on 2 “bespoke” attributes relative to the skin/growth mesh:
rest_position (spline, Vector) &,
surface_uv_coordinate (spline, 2D vector),
which are initiated upon object creation.
From debugging the values I tried to capture the corresponding vectors/data with the following nodes
I also noticed some incompatibility when trying to convert mesh /curve object into the new Hair curve object type. Since there is no option to convert the attributes under Hair curve properties, etc. i cant convert the 3d vector to 2d vector