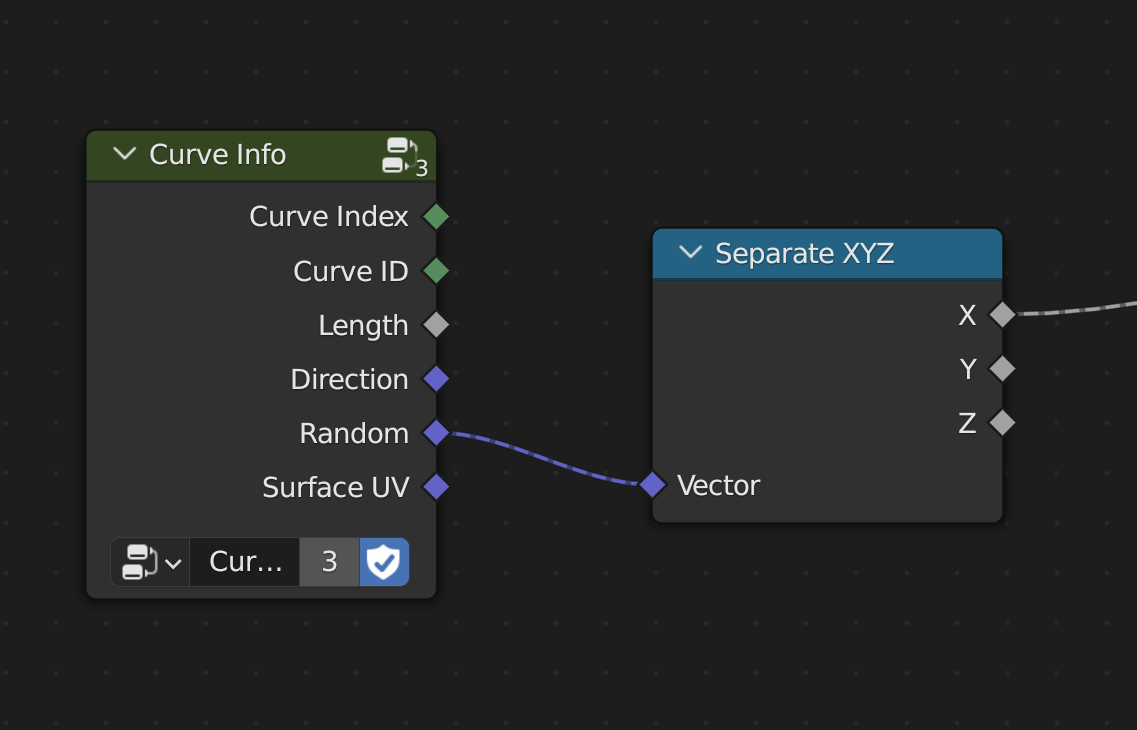
I think it would be better if the random output of the curve info node is a float, because
Each time you require a single value you will need a separate XYZ node (more work each time). Plugging the vector directly into a float will result in less variation.
We can’t expect everyone to be aware of this problem
Converting a random float to a random vector is very easy with a white noise node.
I find a global-space to curve-space (Tangent, Bitangent, Normal) conversion node to be useful
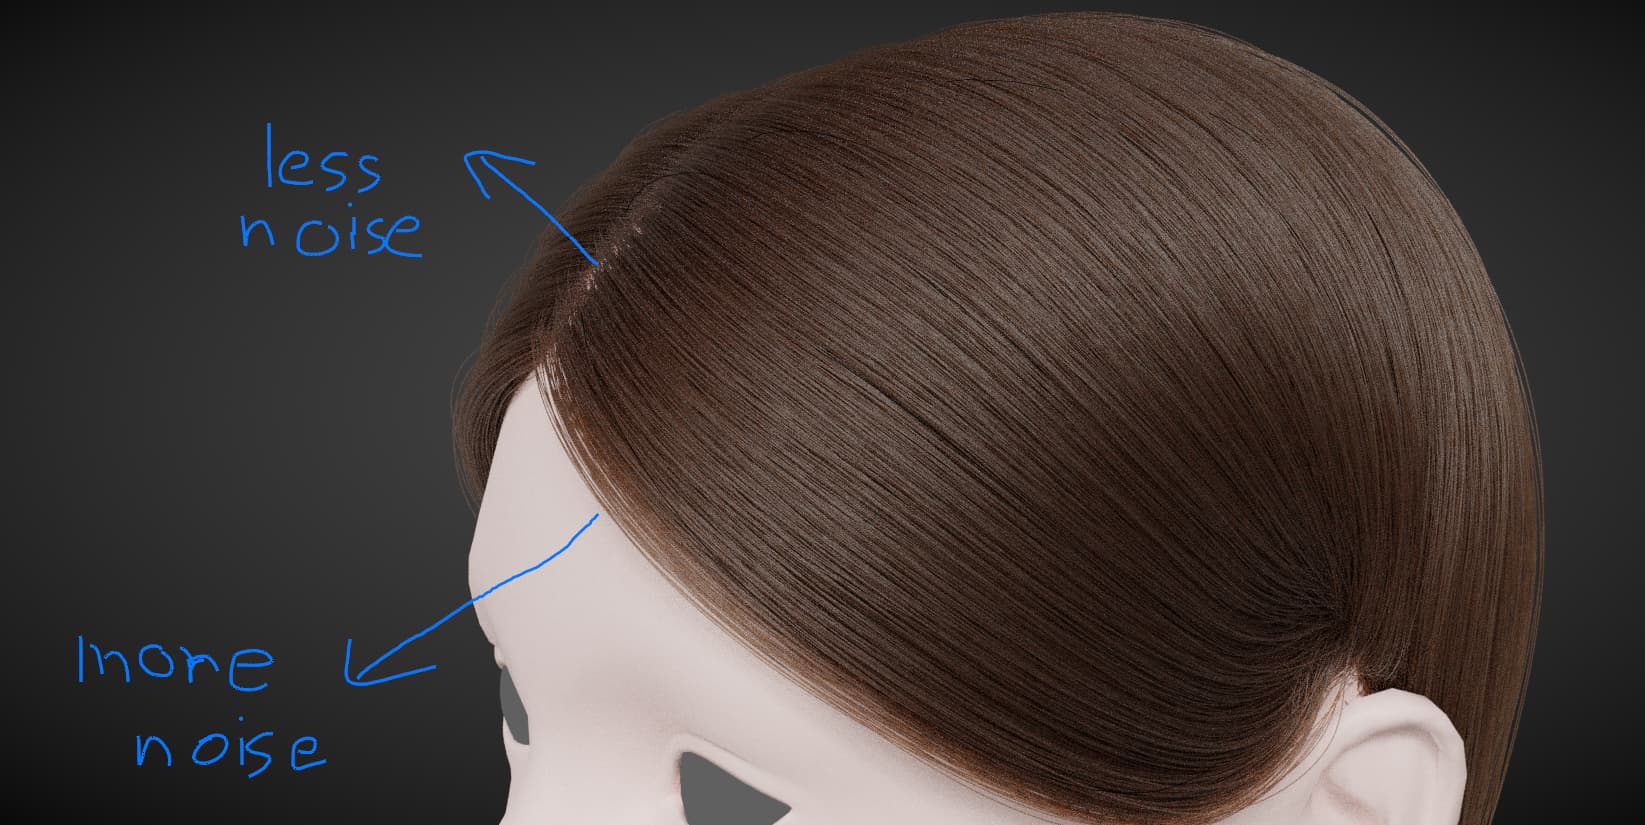
The noise node factor can be split into normal factor and bitangent factor. For example, I wanted the noise along bitangent to be stronger compared to the normal in one of my recent projects. This change can also be applied to the duplicate curves and frizz node.
Just want to mention that a lot of the feedback in this thread is on issues that we are aware of, but cannot be addressed in this coming Blender release. Building this hair system to be the best it can be will require more iterations, that involve Blender development that goes beyond what can be done with just nodegroups. But most of these things are on the roadmap and will just take some time until they can be prioritized.
But the feedback is very much appreciated, knowing that we’re moving in the right direction is also very valuable!
I changed this setting myself in the file. By default everything will be in meters.
That’s why there is a fully supported workflow of manually creating the guide mapping. There is a dedicated not to generate the guide map so that is can be used by the following nodes/modifiers. I’m planning to add more options of how this is created, I didn’t get around to it yet though.
The node is called Create Guide Curve Map.
I understand the importance of stability. With layers of procedural operations that depend on each other this is only partially achievable though. With the nodes we ship with Blender it’s for now a bit difficult to accommodate for several different workflows at the same time. Keep in mind that for more advanced use-cases, the node editor always gives the same amount of flexibility that I have building these node-groups.
And for freezing and working on top of something: We are planning to make this a general feature in the node workflow as well, but for now you can always apply the modifier and manually tweak whatever result you got.
(Partially also related to my previous response in the paragraph above)
This is definitely possible, I will try to find a way to make this intuitive as part of the Create Guide Curve Map node. The issue right now is that there can be several different ways of generating the guide map. There needs to be better node-group customizability to allow us to put these all into one node with a dropdown menu to pick which type should be used. Right now this needs to be split into different nodes (which I usually want to avoid) or all inputs need to be available and depending on which are used the another method is used. But that get confusing quickly, as the UI is not adapting.
This issue was already clear previously, but shipping nodegroups as full on feature sets elevates the issue to a more critical level imo. Hopefully we can address this until the next release after and adjust these node-groups in that regard.
Pinning is currently always happening. Do you have a use-case for when you would need it disabled?
Good point, I agree. I will change that.
Hm, to me this sounds like something that would be better suited as a generic space conversion node, rather than a specific node-group. This topic came up at some point, I believe.
Similar to the shader nodes Vector Transform node, but with axis inputs.
Tangent space is something that is also very useful with meshes, but there are currently no builtin tools for that either. I think that is something we can live with being available to advanced users for now, until we can support it properly.
I can see that being useful in certain cases. But similar to my previous point: There is currently no proper support for aligning the normal of a curve, so I don’t think it really makes sense to build separate control like that into the nodes that we ship.
I think what I can do for now would be to expose an attribute output of the offset vector. Advanced users can then more easily adjust the deformation space how they need it.
Ah, got you. Yes, basically this demo here from Jacques is kind of what I was looking for. Groom and tweak the settings on the same hair object, without having to jump back and forth between a parent and a child groom.
Right, I mean that’s pretty much already how it works by default. The only difference is that right now the children are spawned on the entire surface using a mask input, rather than only within a certain radius around the guide.
I was thinking of adding a culling radius, but so far this didn’t seem to really be all that useful, but I can try it out and see how it feels.
But yeah, using the original curves as the guides is the intention for most workflows and how it should work by default. On top of that there are other ways of manually defining the guide map. Supporting all of them out-of-the-box at the same time is probably not possible without making a confusion mess of. That needs a more customizable node/modifier UI. Same thing for the hair parting.
Right now there are some compromises that need to be made with the tools that are exposed with these nodes that will be addressed in the future.
Ah, you’re right. He just did a basic clump thing so it wasn’t so obvious that everything is changing when he slides a single guide on the surface. I take that back then, this probably wouldn’t work.
Well, as long as you guys aware. This is great to play around with and I don’t think anyone is expecting the whole system to be perfect right off the bat.
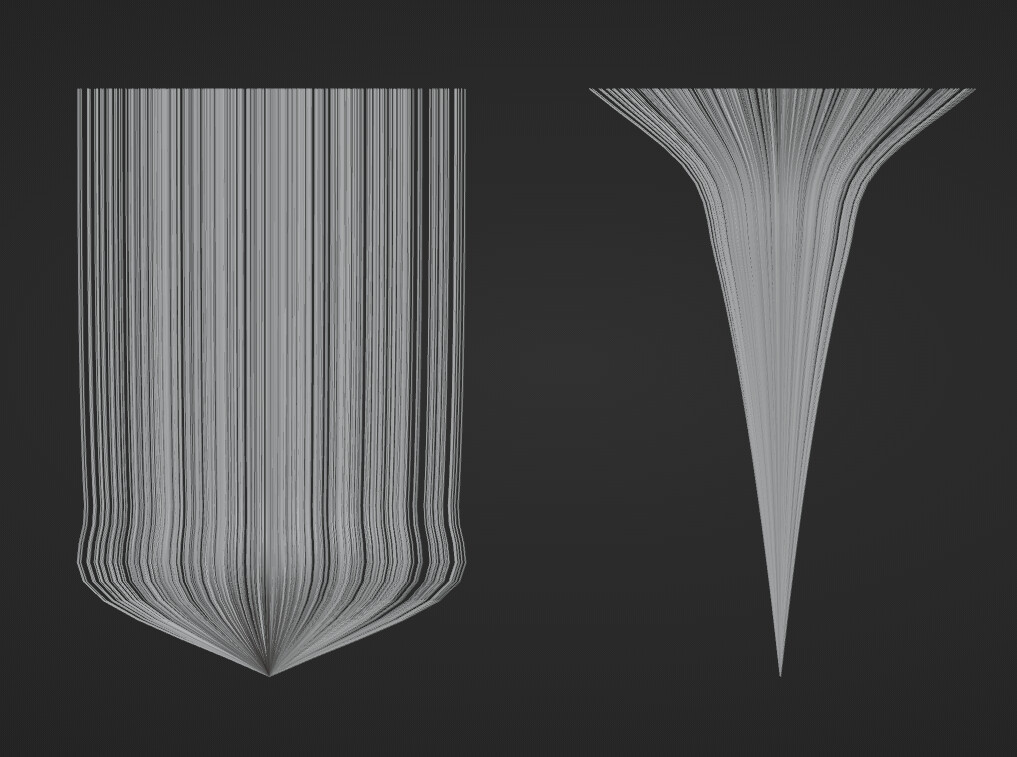
Sorry my bad, I forgot how shape works in Blender. I was comparing it to exponentiation. But still, your implementation is not exactly clear to me. Setting the shape to negative in the noise node creates pinning on both ends. While doing so in the clump node simply clumps at the root instead of the tip.
Another small thing- the shape profiles are not as smooth as I would like them to be
Yes, it’s not actually symmetrical in that regard. I had it differently at first, but then got feedback that in a practical use-case you would want to keep the root pinned, even with a negative shape of noise. So I opted for doing it like this in favor of practicality over making it perfectly logical.
That’s one of the trade-offs I made in that regard.
Yes, part of that issue is that the catmull rom interpolation creates an overshoot. If you increase the amount of control points wit will be a lot smoother. I can try iterating over the function to achieve a better result for average cases though.
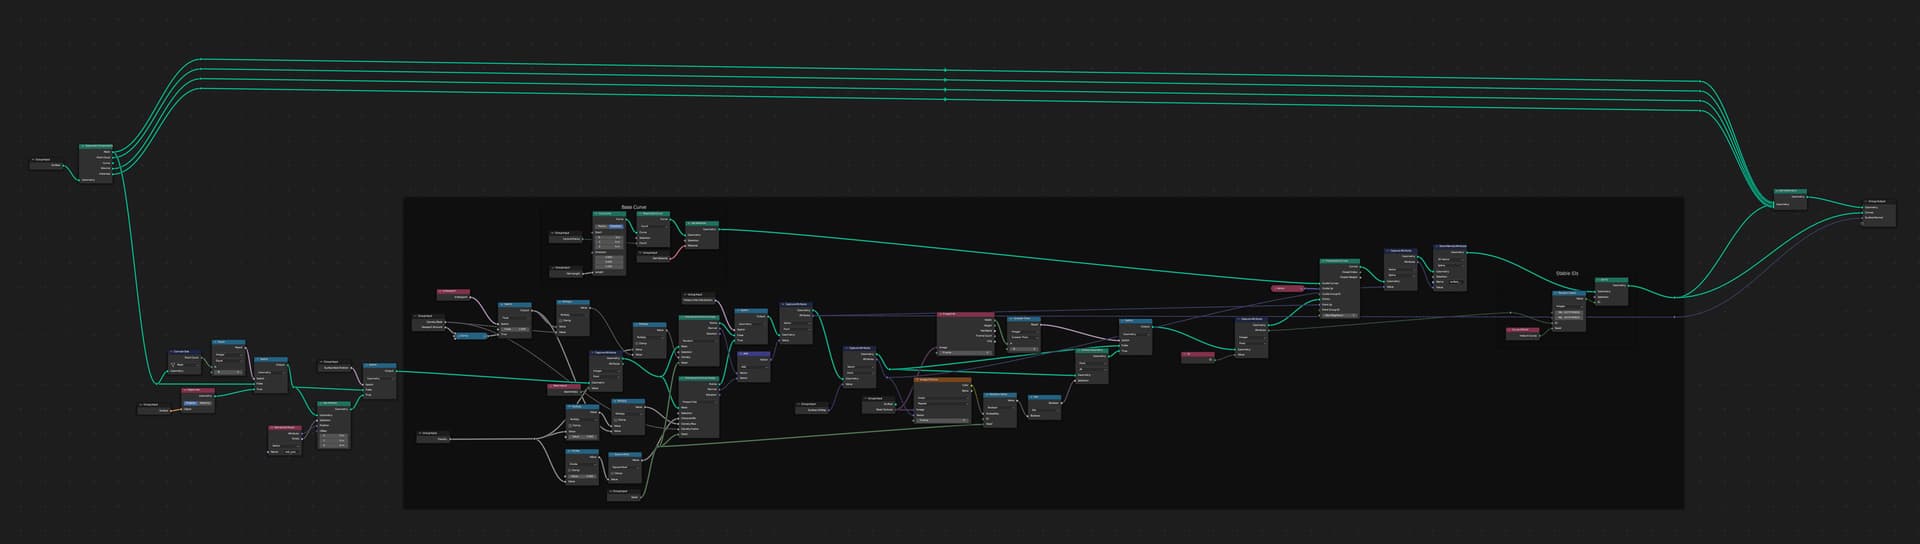
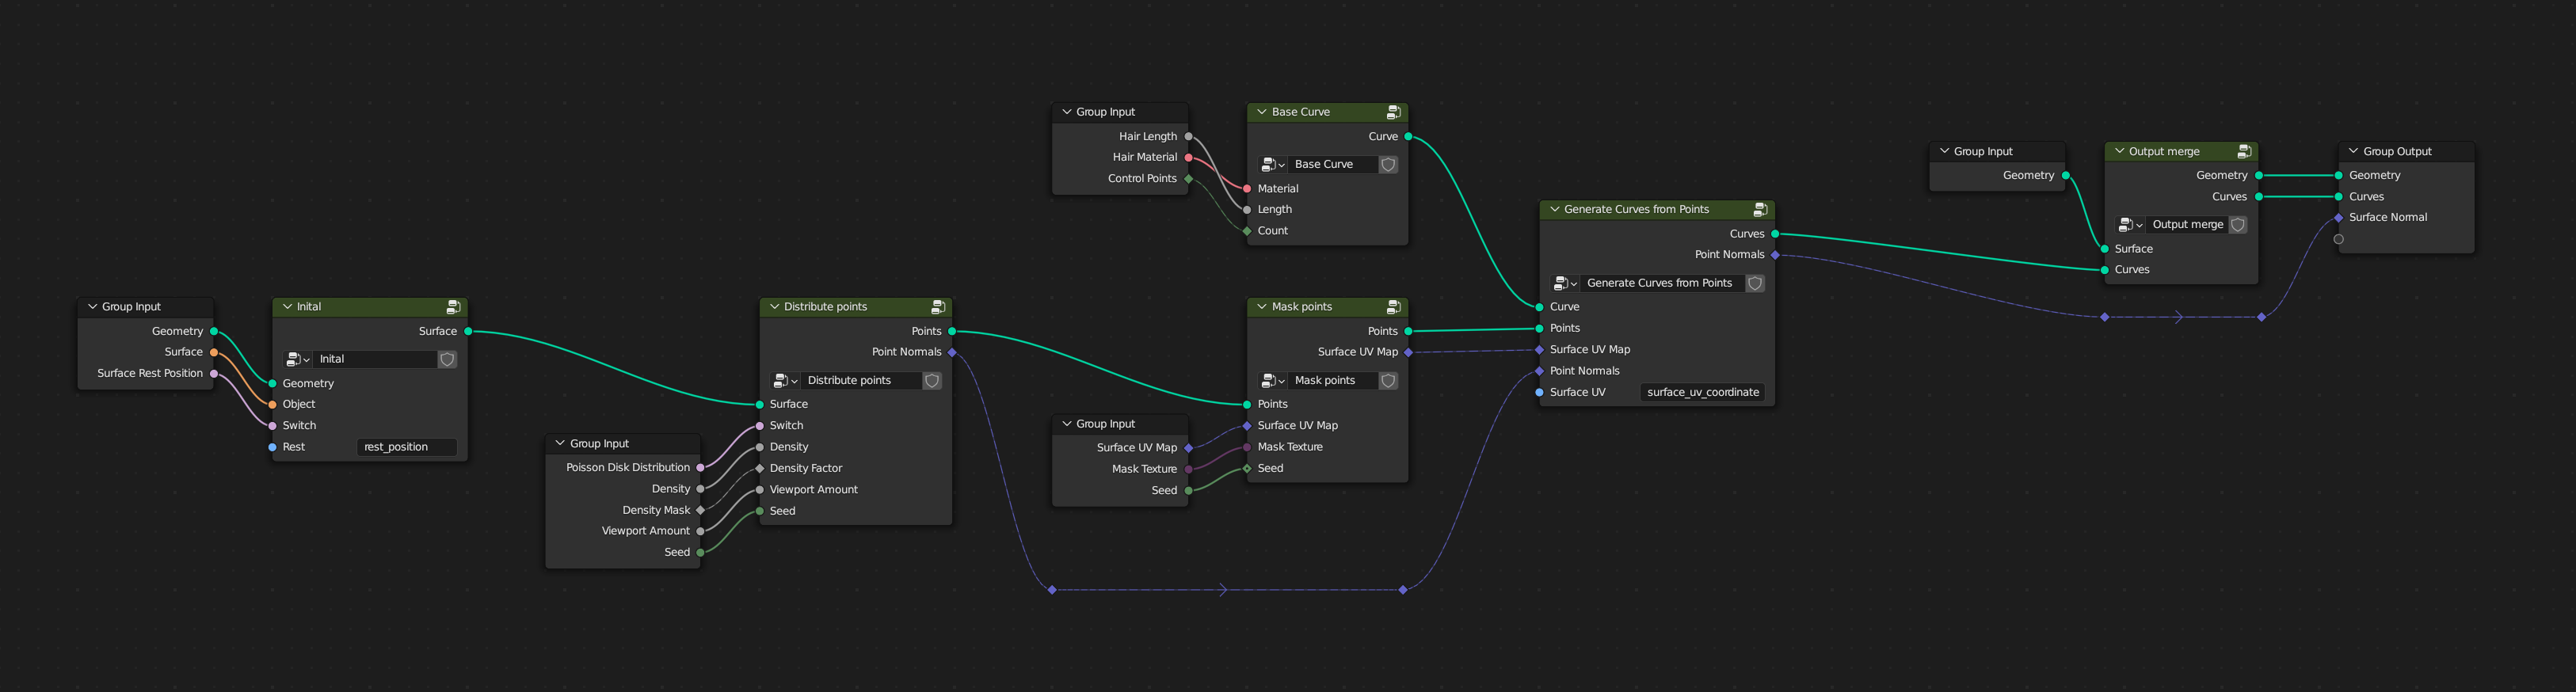
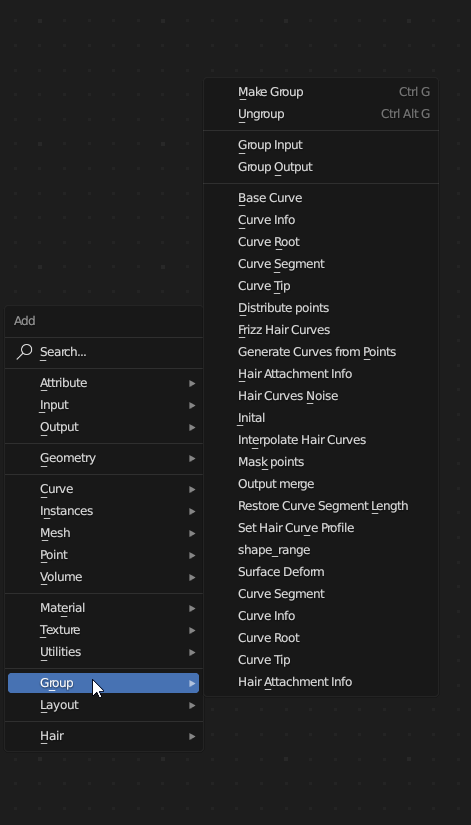
Really cool to see the groups in today’s build! Drag and drop works like a charm, the icons look neat, love it. Looking at the node graphs is intimidating I got to say.
While starting to play with them, a question came up regarding multiple hair clumps - currently when I try to make big clumps, and try to further break them up, it doesn’t really work by adding another clump on top of the first one -
How would you go about doing that?
Actually, make that a general question for adding clumps. It seems it doesn’t have much of an impact when preceded by certain node groups -
Creating different levels of clumps is the first thing I tried as well
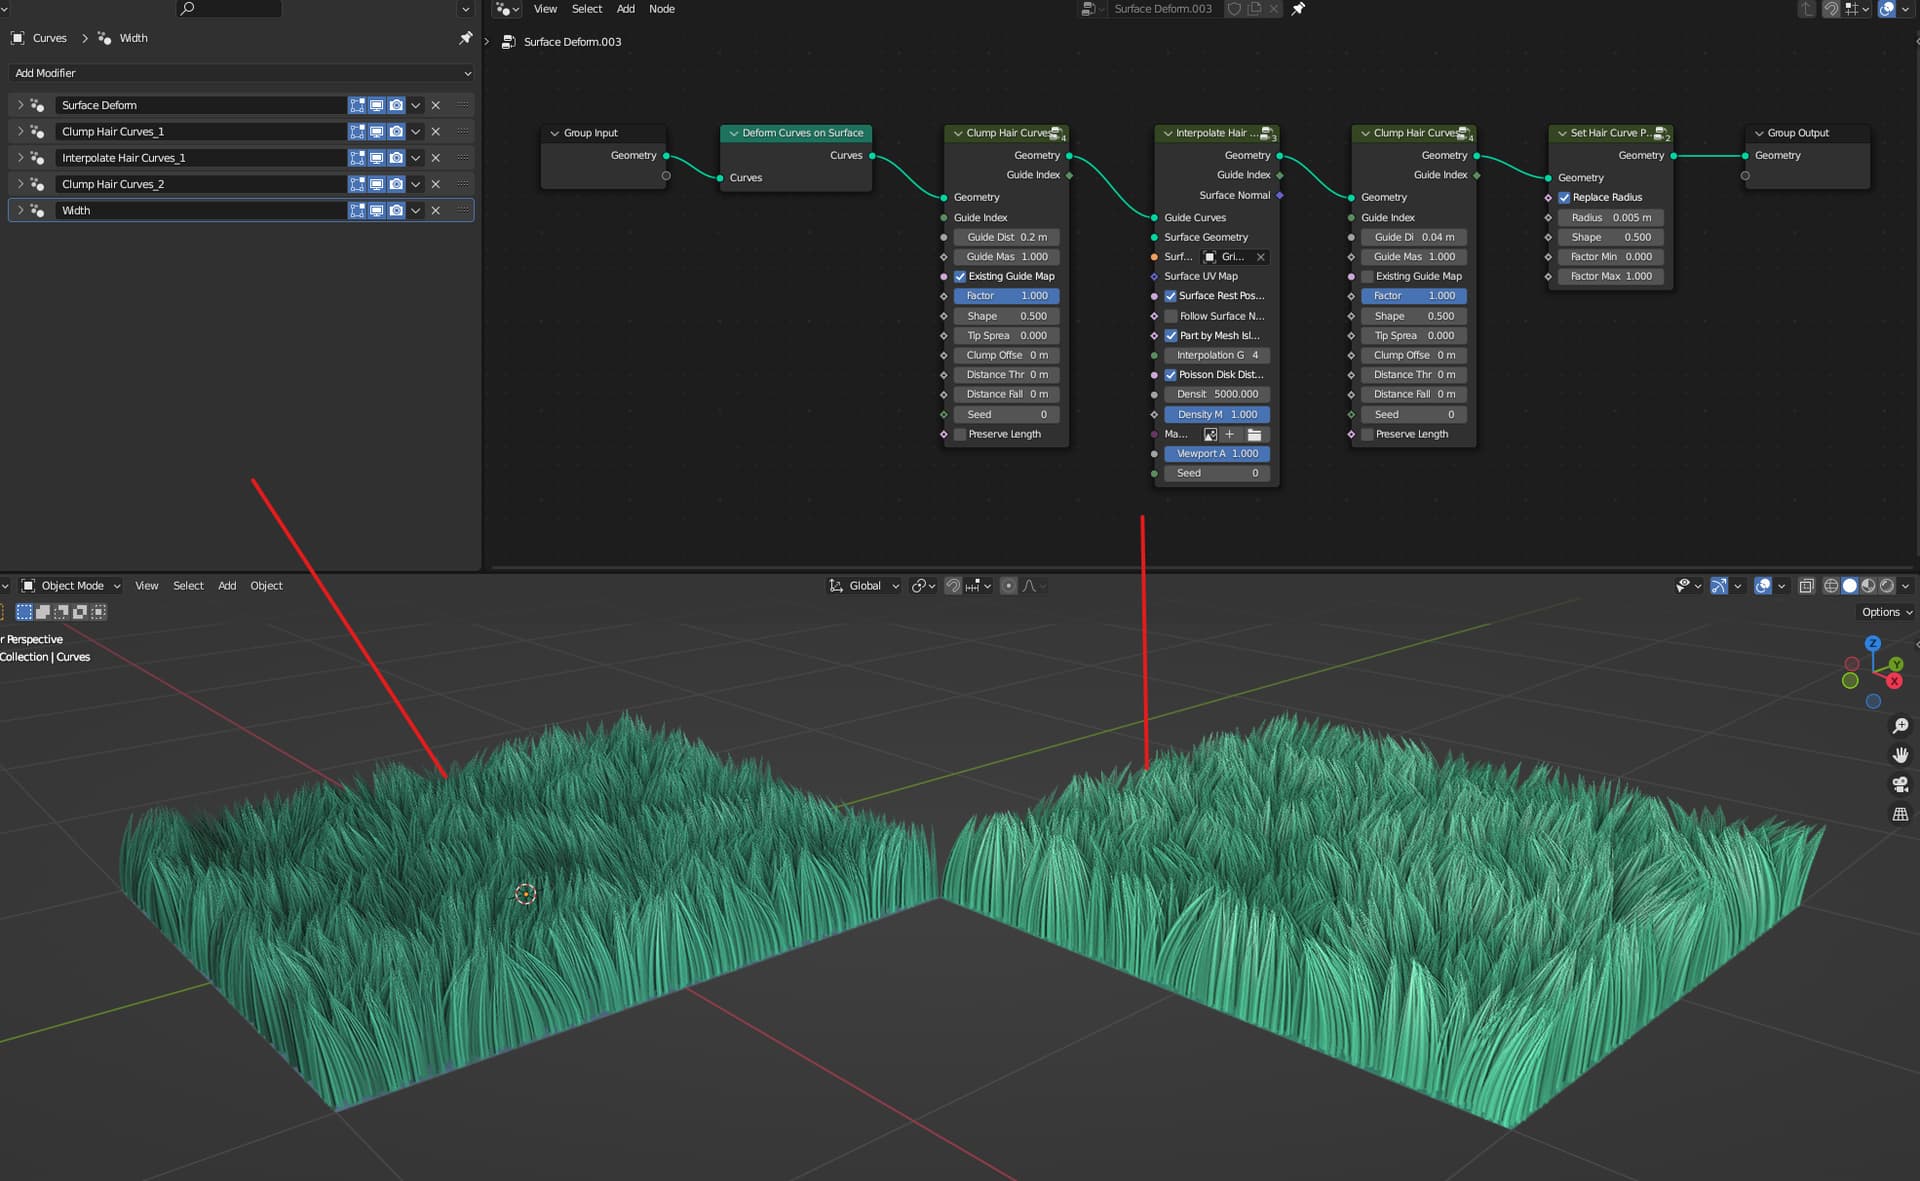
When the “Existing Guide Map” Checkbox is turned off in the following Clumps, it does work.
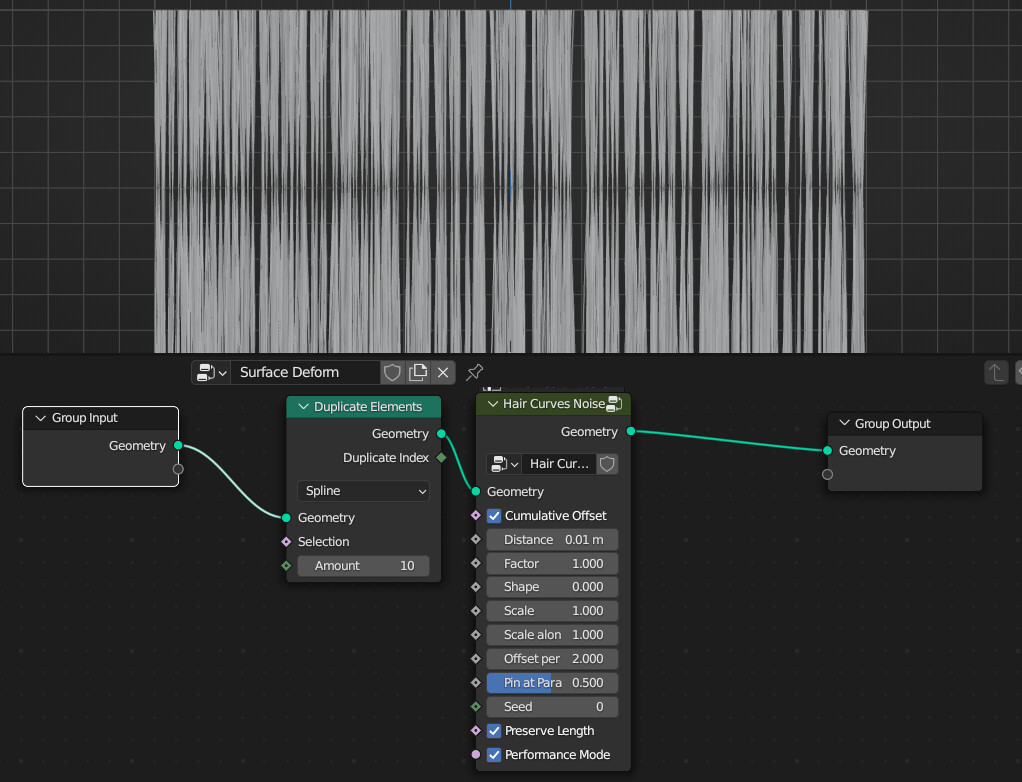
Here are two examples of the same thing:
The left one is using the seperate modifiers and the right one is using the nodegroups instead.
For now I much prefer the connected nodegroups from the right example. @SimonThommes Is there a disadvantage in using it that way?
Also, is there a way to visualize the original guidehairs somehow?
Yes, I didn’t have a chance to actually clean them up yet. That will diefinitely happen, I might do a first pass of that today, to avoid people freaking out, as Blender 3.5 is now in beta.
It’s important to have an understanding of the guide workflow that these nodes use for this. Unfortunately it isn’t super intuitive, as I don’t have a way to present it in a super clear way, that will be polished for 3.6, for now we have to rely on educating people with documentation I’m afraid. (which doesn’t exist yet, but it will before the release)
Every operation that creates a map from each curve to its guide stores this on the curves as an attribute. So whenever this exists and Existing Guide Map is turned on, it will use the mapping of the previous operation. So by default, If you start with spares guides, interpolate them on the surface and then clump, the clump guides will be the original, sculpted guides.
If that attribute does not exist or Existing Guide Map is turned off, the operation will fall back to the settings in the node and create + store a new guide map attribute, which can then be used by the next operation.
So in short: If you want to clump with different guides, turn of Existing Guide Map or use the Create Guide Index Map node explicitly in between the operations.
Quite the opposite actually. I did focus mainly on the modifier usage, as that is the more restricted way of using them, so if this works the nodes will usually also work. But in nodes you have a lot more options for extending functionality.
There are some issues with UX that we unfortunately couldn’t resolve for this release, but will in the future, like having to manually point to the surface object and the attachment UV map.
So in your example you should ideally link up a Named Attribute node pointing to the right UV map to the Surface UV Map input.
A patch has recently been merged that visualizes the original curves in sculpt mode with an overlay. The first iteration of edit mode for the new curves has also landed and visualizes them as well.
To get a preview in the node-tree you can compare the Guide index attribute with the index. If they are equal the curve is a guide.
Yes, makes sense. For some reason I was dropping them into the viewport and using the modifier panel, but that’s not really going to work. Using the node editor as you suggested seems way more intuitive for this workflow.
Got me confused with the terminology At work a map would usually refer to a baked version of a mapping, most times in form of a texture (like a dsp map, weight map, etc.). Getting closer to get the hang of it now.
Looking forward to the docs as well. Exciting to see the first node groups arrive! Can’t wait for the asset shelf as well - will that be something for 3.5, or rather something for later?
They aren’t cleaned up yet. I’ll do that soon though, hopefully.
I won’t be creating nested groups if there isn’t actually shared functionality. I’ll use frames, reroutes and hiding of sockets and options when sensible.
Just started playing with this stuff in the 3.5 Beta, and the first thing that popped to mind was the Shrigwarp Hair Curves might allow for basic rigging of hair. So after paying with it, it does. However, it has a limited range. Once the controlling mesh gets too far away it loses influence.
When it comes to GeoNodes I have zero experience. My Node knowledge stops with Unreal Engine and logic. So I can’t do this myself… yet. However.
TL;DR. If the “Shrinkwrap Hair Curves” node group kept the hair inside of the controlling mesh regardless of distance from the hair curves this could open up the possibilities for some really cool stuff.
Also sorry if this had been said before. I confess to not reading and only doing a search for the word “rig”.
Hair dynamics in the sense of rigging or simulating the hair are things that will need to be addressed in more detail later. For now the Surface deform modifier that is added by default to a new hair object is the only builtin way to move the hair with an animated surface.
Generally this topic will be revisited for a later release, the main focus for now has been static grooming cases.
I just wanted to start by saying that I appreciate all the work thats gone into creating these node setups.
I think there is a case though for some “simple” hair node setups. I come from a teaching point of view and find these node setups pretty complicated to work out myself let alone trying to explain to someone who may have more difficulty than myself to understand. Is it possible to have some less complicated node setups that are a bit easyer to explain the inner workings? Maybe prehaps some simple templates with less options/controls and a set of more advanced nodes for people that know what they are doing more. I think its about making it all a bit more accessable for all artists! Cheers.