[BUILD] Blender 3.50 Custom Build
[DIFF] 350 custom
The latest commit to that diff has some binary junk either from doing a make icons or something else icon related, so you’ll have to scroll through a few things. Go have a look at this diff to get a better idea what is going on. That one will be updated to main (currently 3.6) but doesn’t have a couple ui things in it yet. Mainly it doesn’t show the mesh options thing if you are using the move, scale rotate tools with box, lasso, or circle.
I’ll probably make some videos for the different features, so I might as well make one for this build as well. Will be a few days at least though. For now I’ll just post a few screenshots with some descriptions
First thing, I’ve setup defaults, but they won’t apply if you already have a startup file for Blender 3.5. You’d either manually set them or start fresh if interested in seeing what the defaults are. My intention is to not alter vanilla Blender, but have some optional extensions of existing behaviour.
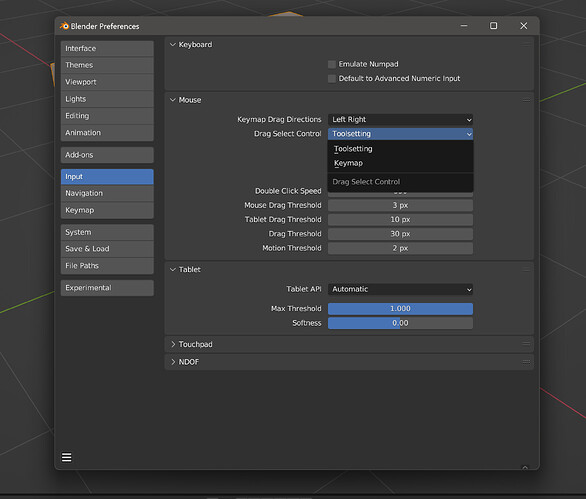
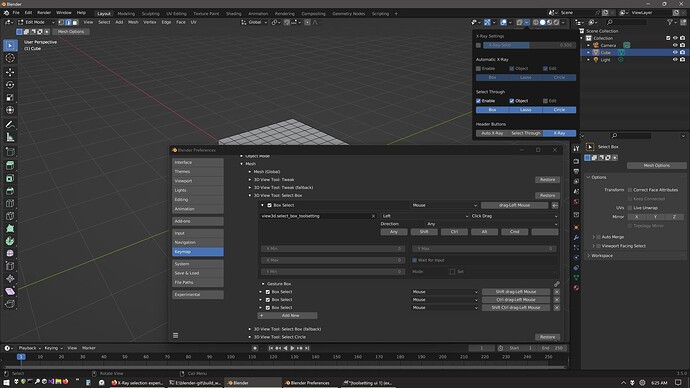
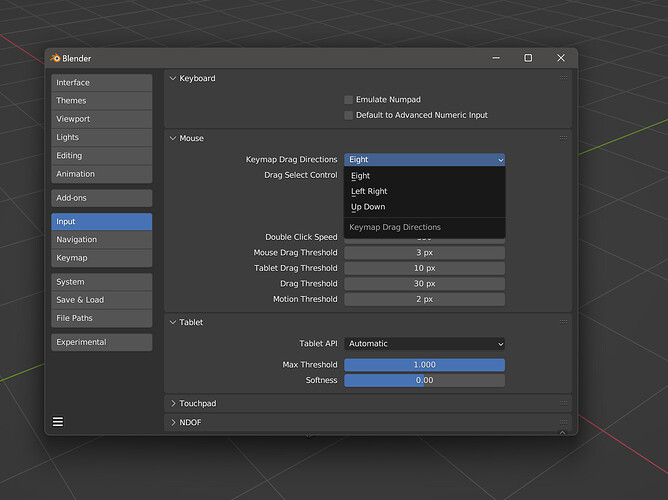
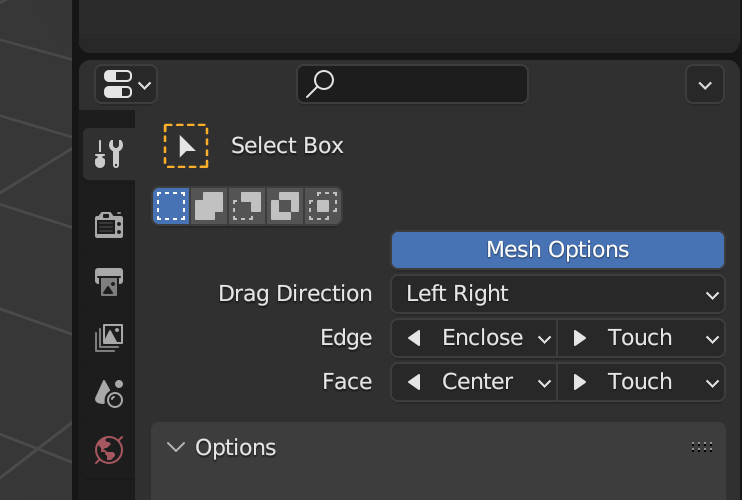
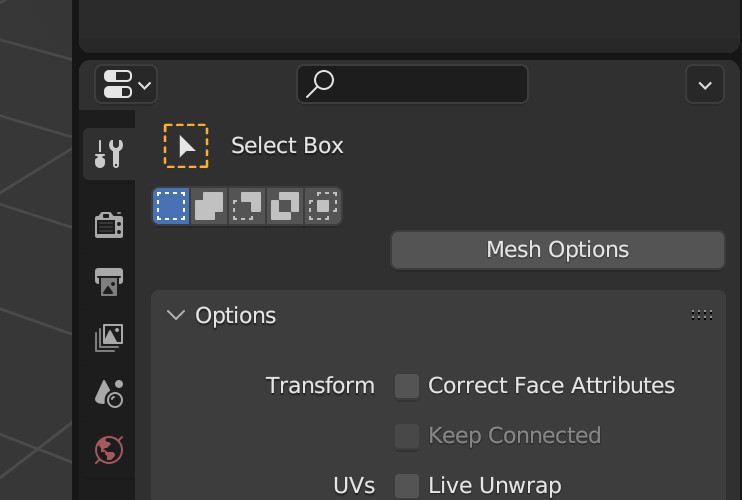
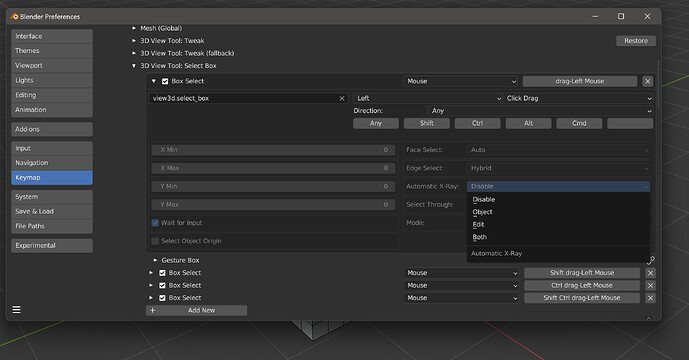
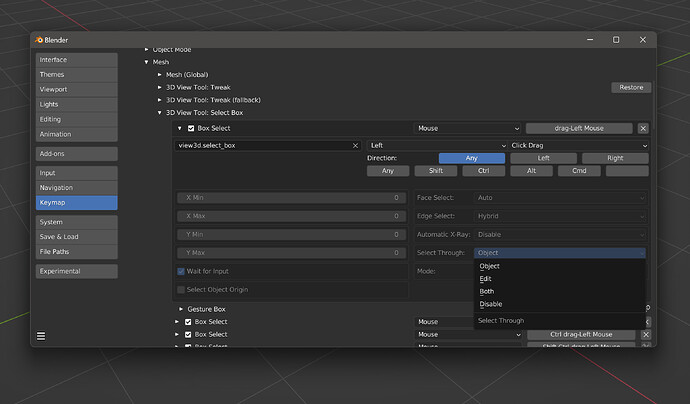
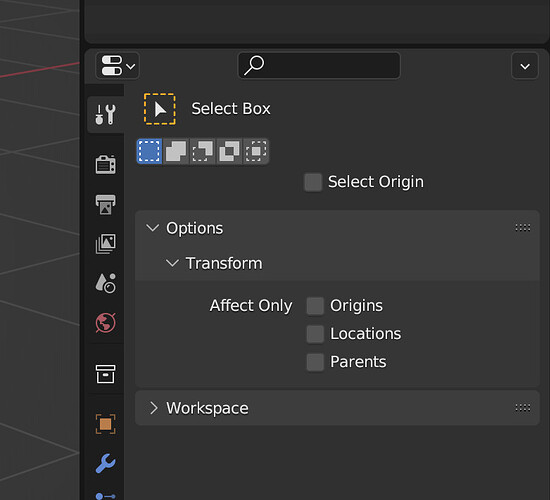
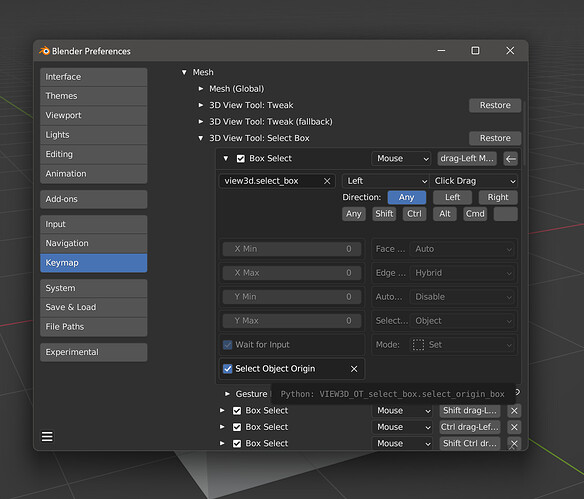
Second thing, a lot of these options are available as either a toolsetting or from the keymap. It’s an all or nothing thing, either all from keymap or all from toolsetting / header button. There’s a Userpref -> Input -> Mouse -> Drag Select Control to choose which way you want to use. Default is toolsettings. The toolsettings / header areas should disappear when you choose keymap, and the Mesh Options is collapsable.
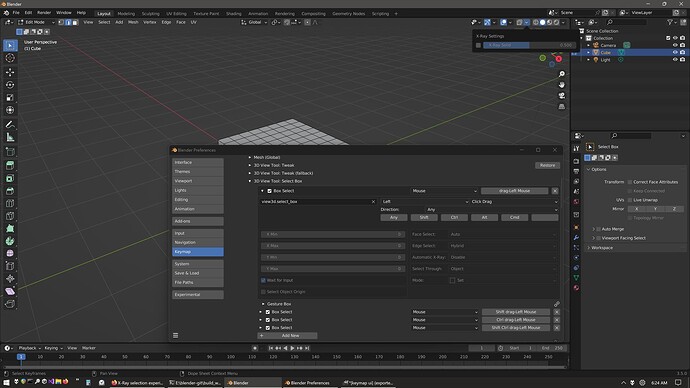
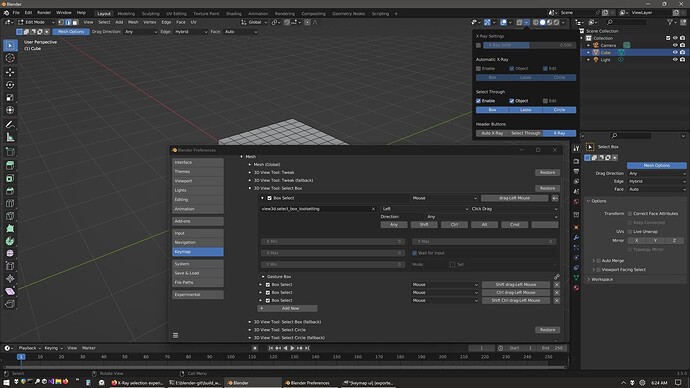
The keymap options will only disappear if you use one of my optional box or lasso operators that merely hide the new operator props. Circle is also there but it doesn’t work right, you’ll see if you try to use it, the radius doesn’t update. Don’t really care about this, was a last minute idea, but wanted to at least attempt to make the keymap more dynamic. You can try these by changing the keymap id, just add a _toolsetting to the end of box and lasso. From view3d.select_box to view3d.select_box_toolsetting
1. Keymap Click-Drag Direction
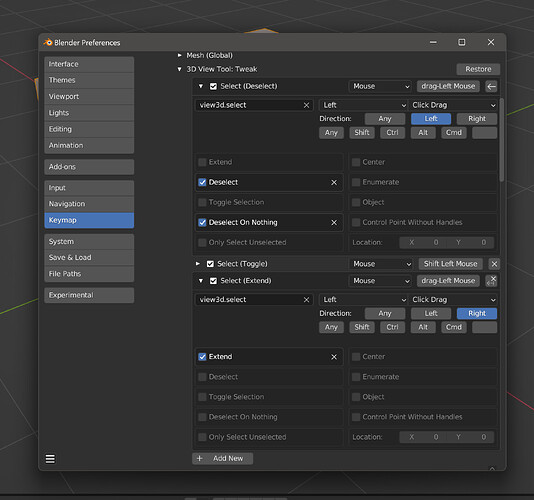
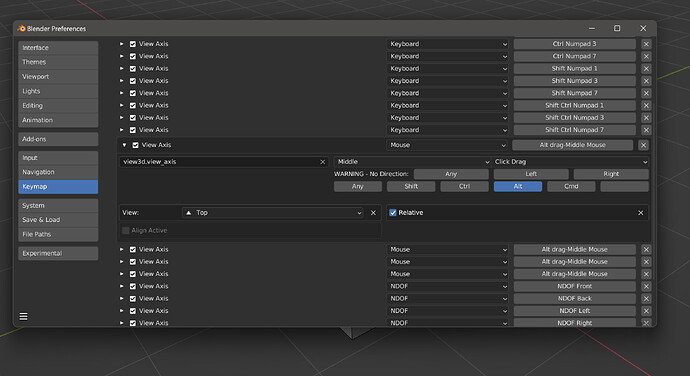
Simplify mouse drag direction to left/right or up/down. Userpref to choose which one, Eight = no change (N, NE, E, SE, S, SW, W, NW) and then you have either Left Right or Up Down. If you use LR or UD you will have some operators that show up in the keymap to pick the direction for that keymap item. If you have something mapped to a non-applicable direction like South-East it will tell you it doesn’t have a direction for that keymap item. The only thing in the default keymap I’ve seen that uses anything like that is view3d.view_axis that does an Alt + Middle Mouse + North etc. No big loss especially if you have a numpad available. I actually thought directional keymap options were a new thing that was done after this and this were made, but turns out these directional options have been in keymap the whole time. Not interested in using directional drag for now, but it was interesting and relatively easy except for the adding to keymap part.
2. Mesh Select Options
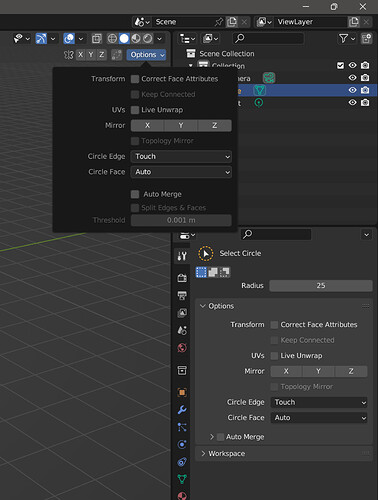
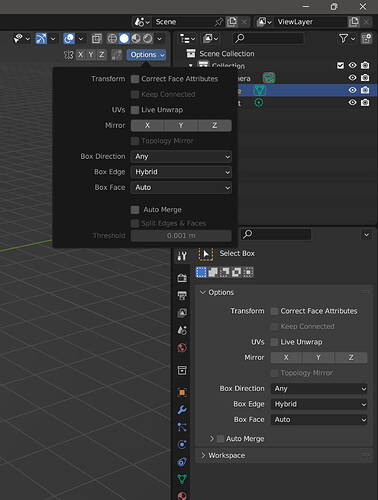
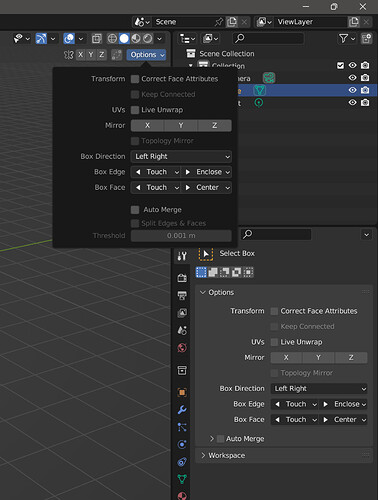
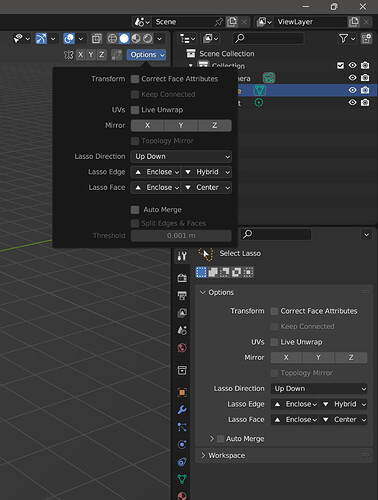
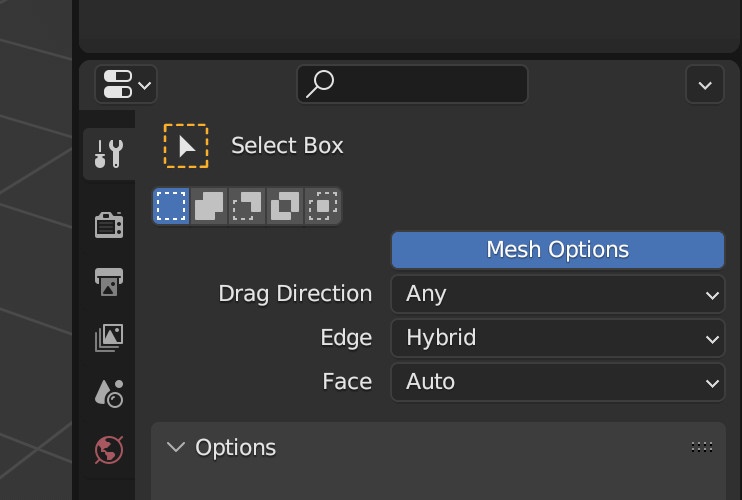
Edges and Faces have new ways to select them with box, lasso, and circle. If you use the toolsetting version, you have directional control available in toolsettings. This area is collapsable.
Edges:
-
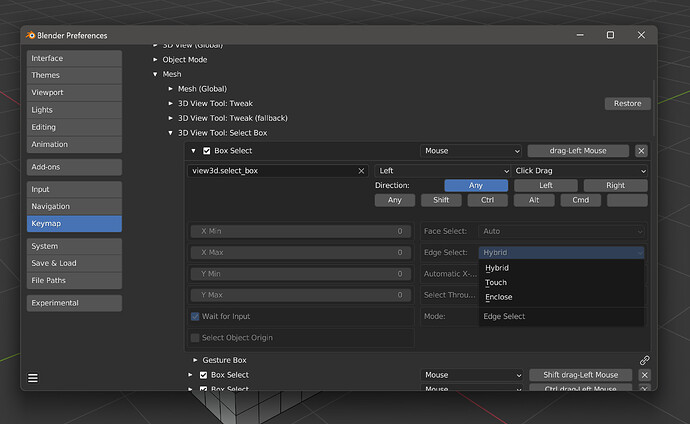
Hybrid - Blender default for box and lasso. If any edge is fully inside the selection area, select fully enclosed edges. Otherwise select any edges touched by the selection area. Not available for circle.
-
Touch - edges that are touched by the selection area, default for circle
-
Enclose - edges that are fully inside the selection area
Faces:
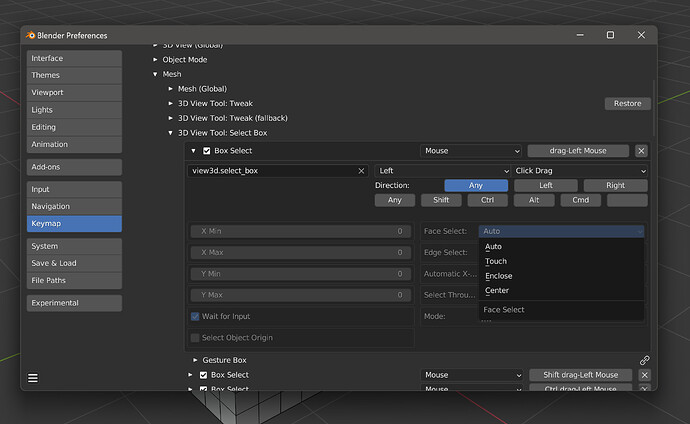
-
Auto - Blender default. If in solid shading, select any faces that are touched by the selection area. If in X-Ray, select faces when the selection area touches their center / facedot.
-
Touch - faces touched by the selection area
-
Enclose - faces fully inside the selection area
-
Center - faces whose center is touched by the selection area
3. Auto X-Ray
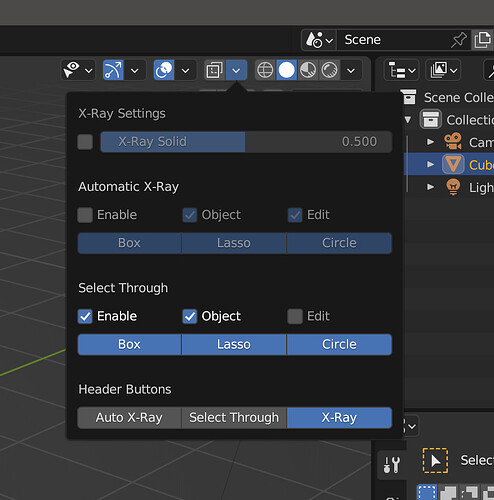
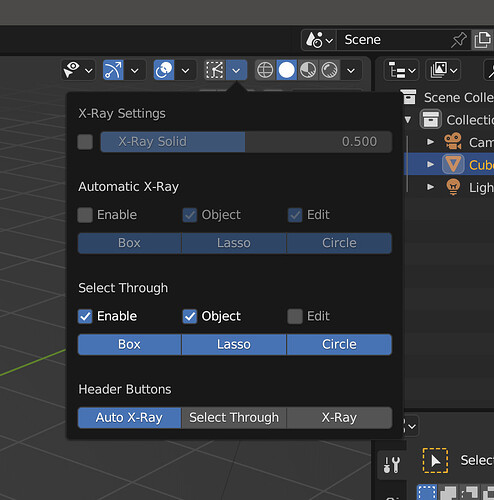
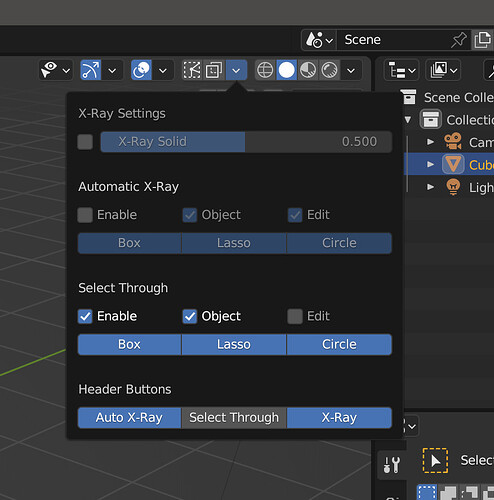
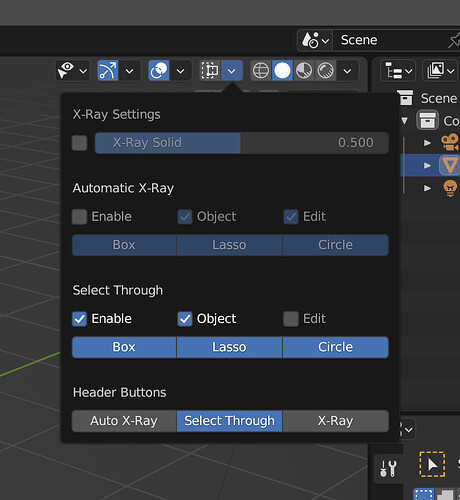
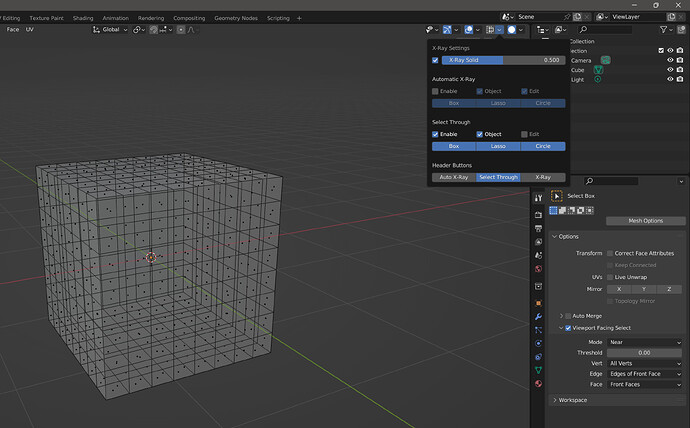
Turn on X-Ray during box, lasso, and circle. Either keymap or in a new popover next to the xray header button. Object and/or Edit mode, each tool can be opted out of individually. Optional header button that can either replace or sit next to the existing xray header button. Both this and select through have a custom icon provided by AlexeyAdamitsky
4. Select Through
Select unseen objects and mesh elements. Technically, this is just using X-Ray selection without the X-Ray visual change. In vanilla, you are forced to use select through in object, and are forbidden to use it in mesh. Now you have control over this. It works, and is located, exactly the same as Auto-Xray. If you turn off all 3 buttons in the xray popover, it will keep the xray button up there. You could have all 3 buttons visible if you wanted, but is it worth the risk? Who knows what would happen to your brain if you did this for very long? I hereby indemnify myself from all liability resulting from any psychological damage you incur should you ignore my warning and have all 3 xray header buttons visible. I will not show you this, I wouldn’t dare.
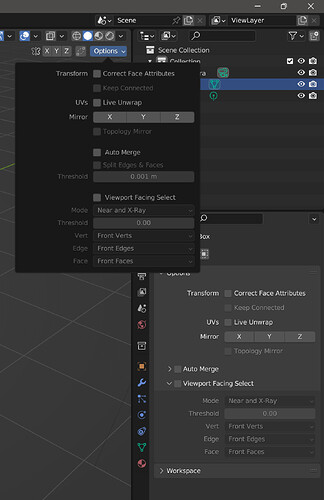
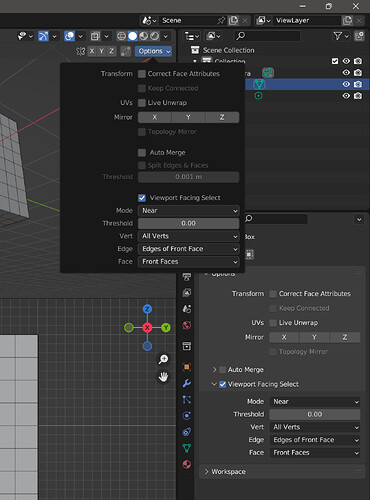
5. Viewport Facing Select
Can select mesh based on the direction of their normal, relative to the viewport. Box, lasso, and circle, near and/or xray select. This can filter for either facing toward the viewport, or away from it. It is toolsettings only, for box, lasso and circle. It is on/off for all 3 tools, but can do solid shading, xray, or both. Each mesh element (vert, edge, face) can be opted out of, and set differently. For me personally, I just wanted near select to not be so unreliable, because it almost always selects stuff that it should not. At least edge and face, verts seem good. I’ll make a video later, probably youtube for all the videos I am going to make because I can’t imagine they’d like that much space being used.
Verts
- Front Verts - select verts that have normals facing the viewport
- Vert of Front Face - select verts if they are part of a face that has a viewport-facing normal
- Rear Verts - select verts that have normals that are facing away from the viewport
- Vert of Rear Face - select verts if they are part of a face that has a normal that faces away from the viewport
- All Verts - select verts regardless of their normal direction
Edges
Same as above, just replace vert with edge
Faces
Front and rear faces, same as vert and edge. Then there is Faces of Front Vert and Faces of Rear Vert. Faces of front vert will select a face if it contains at least one vertex that has a normal pointed at the viewport. Faces of rear vert is the same, just in reverse.
The All Faces etc are a way to opt out of a particular mesh element being calculated. This is for performance. The way I plan on using this would be in near select only, threshold seems to matter less than previous build so I think it’s fine at 0. This doesn’t mean it isn’t effective, it just doesn’t seem as necessary to give it a little padding to filter out unwanted edges and faces. Based on a very small amount of testing though. If you set the threshold higher, the mesh needs to be facing more and more in the direction of the viewport.
This still does not do exactly what I had hoped for, with faces you are stuck in a middle ground where you have to choose between not being able to select something visible but technically not pointed at the viewport, or having a more reliable (but still selects unseen faces so who cares) version. I think I will opt for the more reliable but sometimes annoying (because you can’t select something you can see) Front Faces rather than getting the same wonky behaviour that vanilla offers, just less of it and less often. Edges are either following the lead of Front Faces (reliable but not perfect) or they will actually look at the edge normals and not select things at the edges of your mesh. Verts don’t seem to have any problems as far as selecting unseen verts in near select. So I just leave them on All to save performance. Otherwise they will behave the same as edges do, follow how Front Face works or not select things on the edges of your mesh.
This feature also does not change anything about the other side of “select what you see” being wishful thinking. Flip some normals on your mesh and turn on backface culling. You can probably “see” some interior mesh elements that are behind a now invisible bit of mesh that has rear-facing normals. Near select (aka not X-Ray) will still not select what you can see. It will hit an unseen exterior bit of mesh and stop dead without proceeding to what is actually visible.
This is just how bitmap selection works, at least for now. I would not hold my breath for anything on that front. Like I had said a while back, maybe the planned use of Vulkan will affect the 3d Viewport and maybe that would actually change at least some of the really unusable and inconsistent aspects of near select.
Regardless, I think this can serve some purpose outside of my intentions. I don’t expect to see it getting any serious consideration for real blender, but you never know.
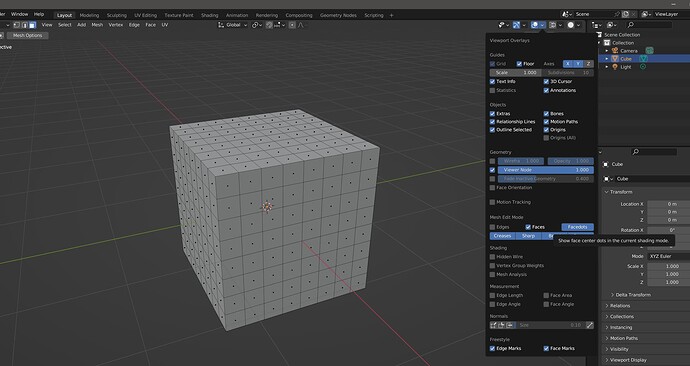
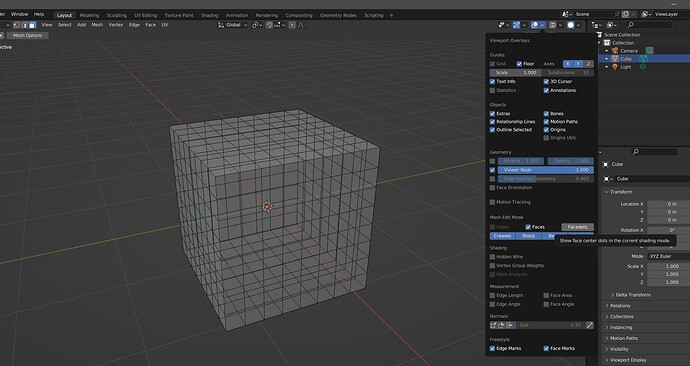
Second picture is how I plan on using this feature, if interested.
6. Select Object Origin
Keymap or toolsetting for box and circle. Can choose to select by object origin or not. Sorry, lasso don’t work right. But there’s good news, because this addon can get you what you want for lasso object select and probably other things you might not even know you needed. I’m not the one to ask about this addon though, because I’m not very familiar with it.
7. Single-Click Radius for Mesh
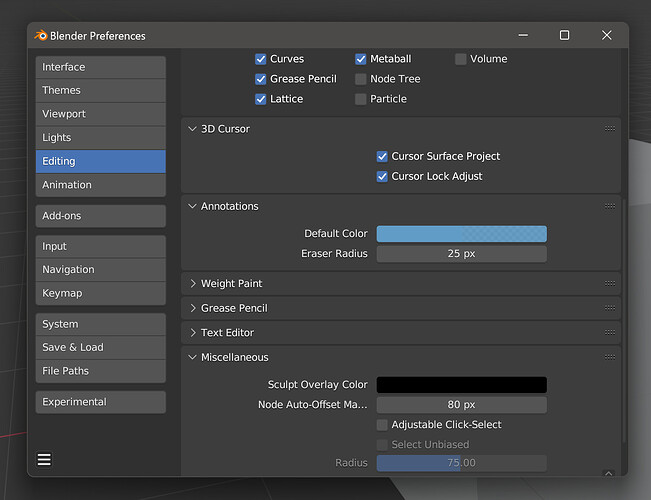
Selecting mesh with a single click has a radius that is a little excessive in my opinion, too big. Now it has an adjustable range in Userprefs -> Editing -> Miscellaneous -> Adjustable Click-Select. The default value will be the same as it is in vanilla Blender, but this is an opt-in feature. Why? Because despite this large radius for verts and edges, Blender has no love for single-clicking faces. Your cursor is either on top of the face, or you get nothing. This feature will change this so the three mesh elements behave the same. The radius itself is adjustable from “act like faces and make me click exactly on top of everything” to “please send help, the selection radius is twice as big as before”. Can also disable the small bias that is given to unseleced mesh elements. That is something that likely wouldn’t even be noticed, but it is there and can be seen if you put your cursor out in empty space at the limit of the selection radius. You can select something, but until you move the cursor a little closer, you won’t be able to deselect it.
8. Repeat Tool
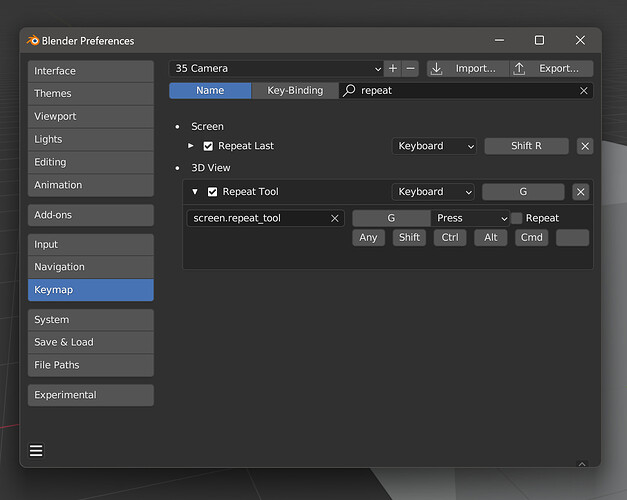
New operator that will invoke the previous operator. Similar to repeat last except it will invoke instead of executing. Filters out stuff like delete, tranform, select all. Probably need to go through and do a proper filter list. If you ever need to undo, it loses memory of what was done before. Has to be added to keymap manually, id is screen.repeat_tool.
Why do this? Maybe you need to perform an awkwardly mapped, or unmapped, operator a handful of times on different things. And instead of executing it exactly the same way every time, you only want to invoke it, then proceed from there. Now you can do this a little easier. Perform the more obscure operator one time, then do a repeat_tool, which would ideally be mapped to something convenient.
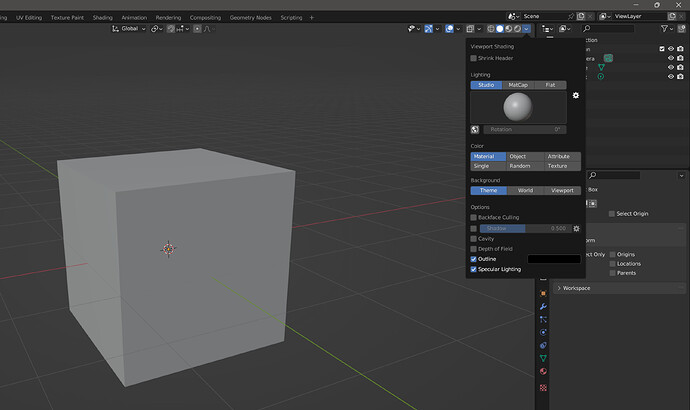
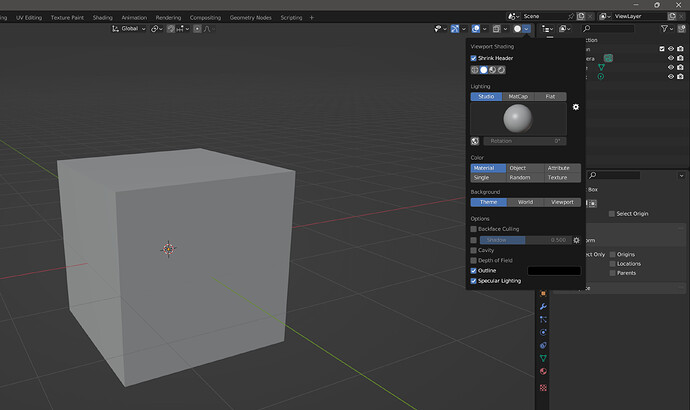
9. Combine X-Ray and Shading Header Buttons
I don’t need a button to tell me when X-Ray is on, it’s usually pretty obvious. I also don’t need 4 buttons to pick a shading mode, I’ll use the pie menu or a keymap. And I definitely don’t need 4 buttons to tell me which shading mode I’m currently looking at, it’s usually pretty obvious and can be done with 1 button.
So, why not take 5 buttons I don’t need, and turn them into 1 button I don’t need? To be fair, I guess I need this button for one reason. It serves as an anchor for the Shading popover, because a floating myserty popover would just be weird. It is the usual X-Ray header button, except it changes its icon to reflect which shading mode you’re in. If enabled, the 4 clickable shading mode buttons will show themselves at the top of the Shading popover should you need them.
Finally, instead of having 2 X-ray header buttons, just replace the first one with a button to tell you if Select Through or Auto X-Ray is on. Not an option if you aren’t using toolsetting to control that, but not a big deal I imagine. You could always edit space_view3d.py to put the xray options back in the shading popover and remove the xray button + popover.
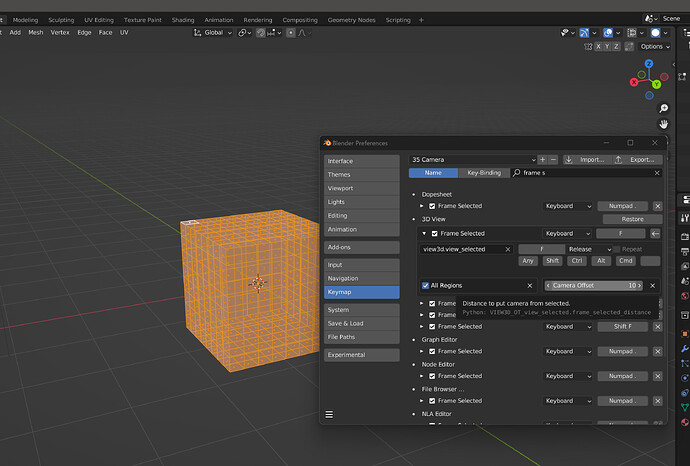
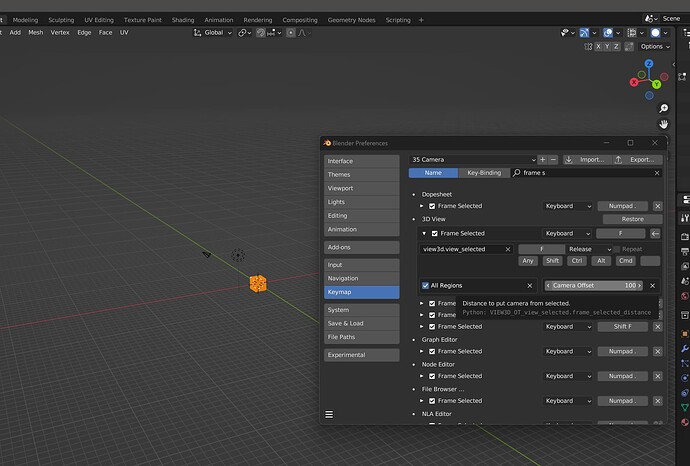
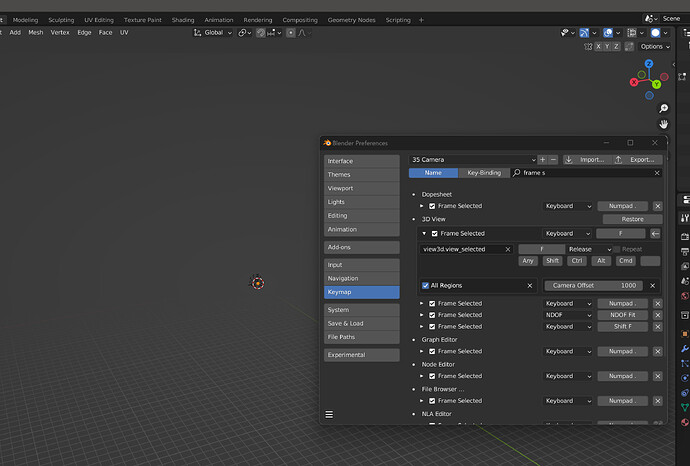
10. Frame Selected Distance
Sometimes view3d.view_selected puts the camera too close. I’d like to have control over that, and maybe even have different mappings for short and medium distance. This is an easy way to avoid extra scrolling, and scrolling, and scrolling, every time I use Frame Selected to get where I want it to be. The max offset I used was 1000, which is the edge of the default clipping.
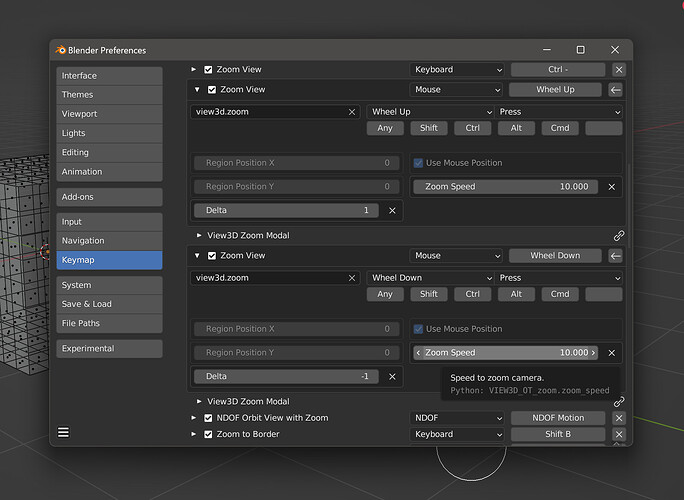
11. Zoom Speed
Sometimes, you gotta go fast. Now you can. A bit sensitive though, careful how high you set this thing.
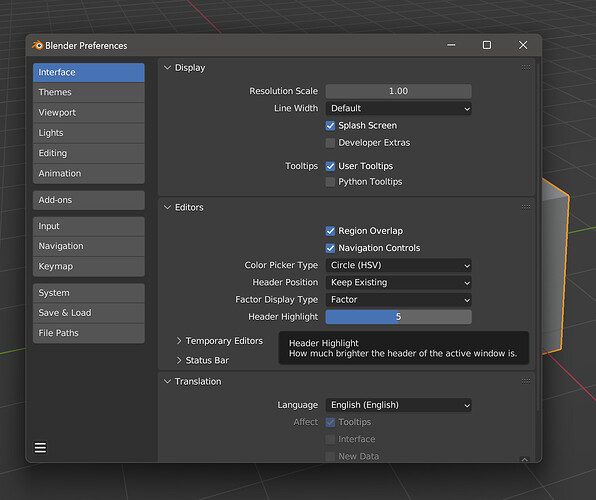
12. Header Highlights
The header of the active windows gets brighter. Don’t need this, can adjust it to be twice as bright or turn it all the way down. Userpref -> Interface -> Editors -> Header Highlight
13. X-Ray Facedot Toggle
Operator in Viewport Overlay Popover to turn off facedots for the current shading type (solid or xray).
14. Alternate Cursor(s)
This replaces the edit mode crosshair with a larger and more open one. The vanilla crosshair blocks what I am trying to look at, so I made this. I also included a bigger one, it’s too big but I had tried to mess with the one I already have and decided to make it optional. Userpref -> Editing -> Miscellaneous -> Alternate Cursor (and Large Cursor) PrtScn doesn’t capture cursor, so I’ll make a video and use a frame of that later.
I want to expand on this, make a handful of different cursor options for different things. Not a priority, but implementing should be pretty easy. I am thinking a dropdown list of cursors for each type that have options, with an icon representing what they look like (roughly).
Making a good cursor is very nitpicky and subjective work that I’m not terribly knowledgable about. If there’s any interest in this, I will likely ask for people to submit their own designs. Serious ideas or just nonsense for fun, who cares.
15. Python Macro / Operators
I put a few things I found useful inside of space_view3d.py. This is not where they should go, and should probably be some other place. Never figured out where that place is, and since they work fine I never looked very hard.
Gizmo Tweak / Move / Scale / Rotate
Show hide the translate tools, and depending which one is visible, you can do a tweak event instead of the usual click-drag on a gizmo thing. Taken from this, but I changed the names (can be mapped to whatever you want not just Q W E R) and just add them to the keymap manually instead of having icons / buttons for them.
ids
view3d.gizmo_tweak
view3d.gizmo_move
view3d.gizmo_scale
view3d.gizmo_rotate
Box Lasso
Cycle between box and lasso select instead of tweak → box → circle → lasso. id is view3d.box_lasso
I think that’s everything. Build has been updated. Depending how far out it is, any new fixes will be implemented in 3.51

