You can get all the latest details inside the blenderartists thread. The idea is to keep things the way they are, while giving you more options for:
Edges and Faces
- Box, lasso, and circle will select random unseen edges and faces in near select (X-Ray off) because the viewport is drawing some of them erroneously, since some of their verts are visible. With my build you can filter this out based on the direction of mesh normals relative to the viewport. It works with a high degree of success and customization.
- Blender selects edges in a hybrid fashion with box and lasso. If the box or lasso contains at least one edge with both of its verts inside, you will only select edges that are like that. If you are touching some edges, but none of them have both of their verts inside, you will select any edge that is touched by the box or lasso. With circle you select any edge that is touched by the circle regardless of other factors. With my build you can also use these options to select edges:
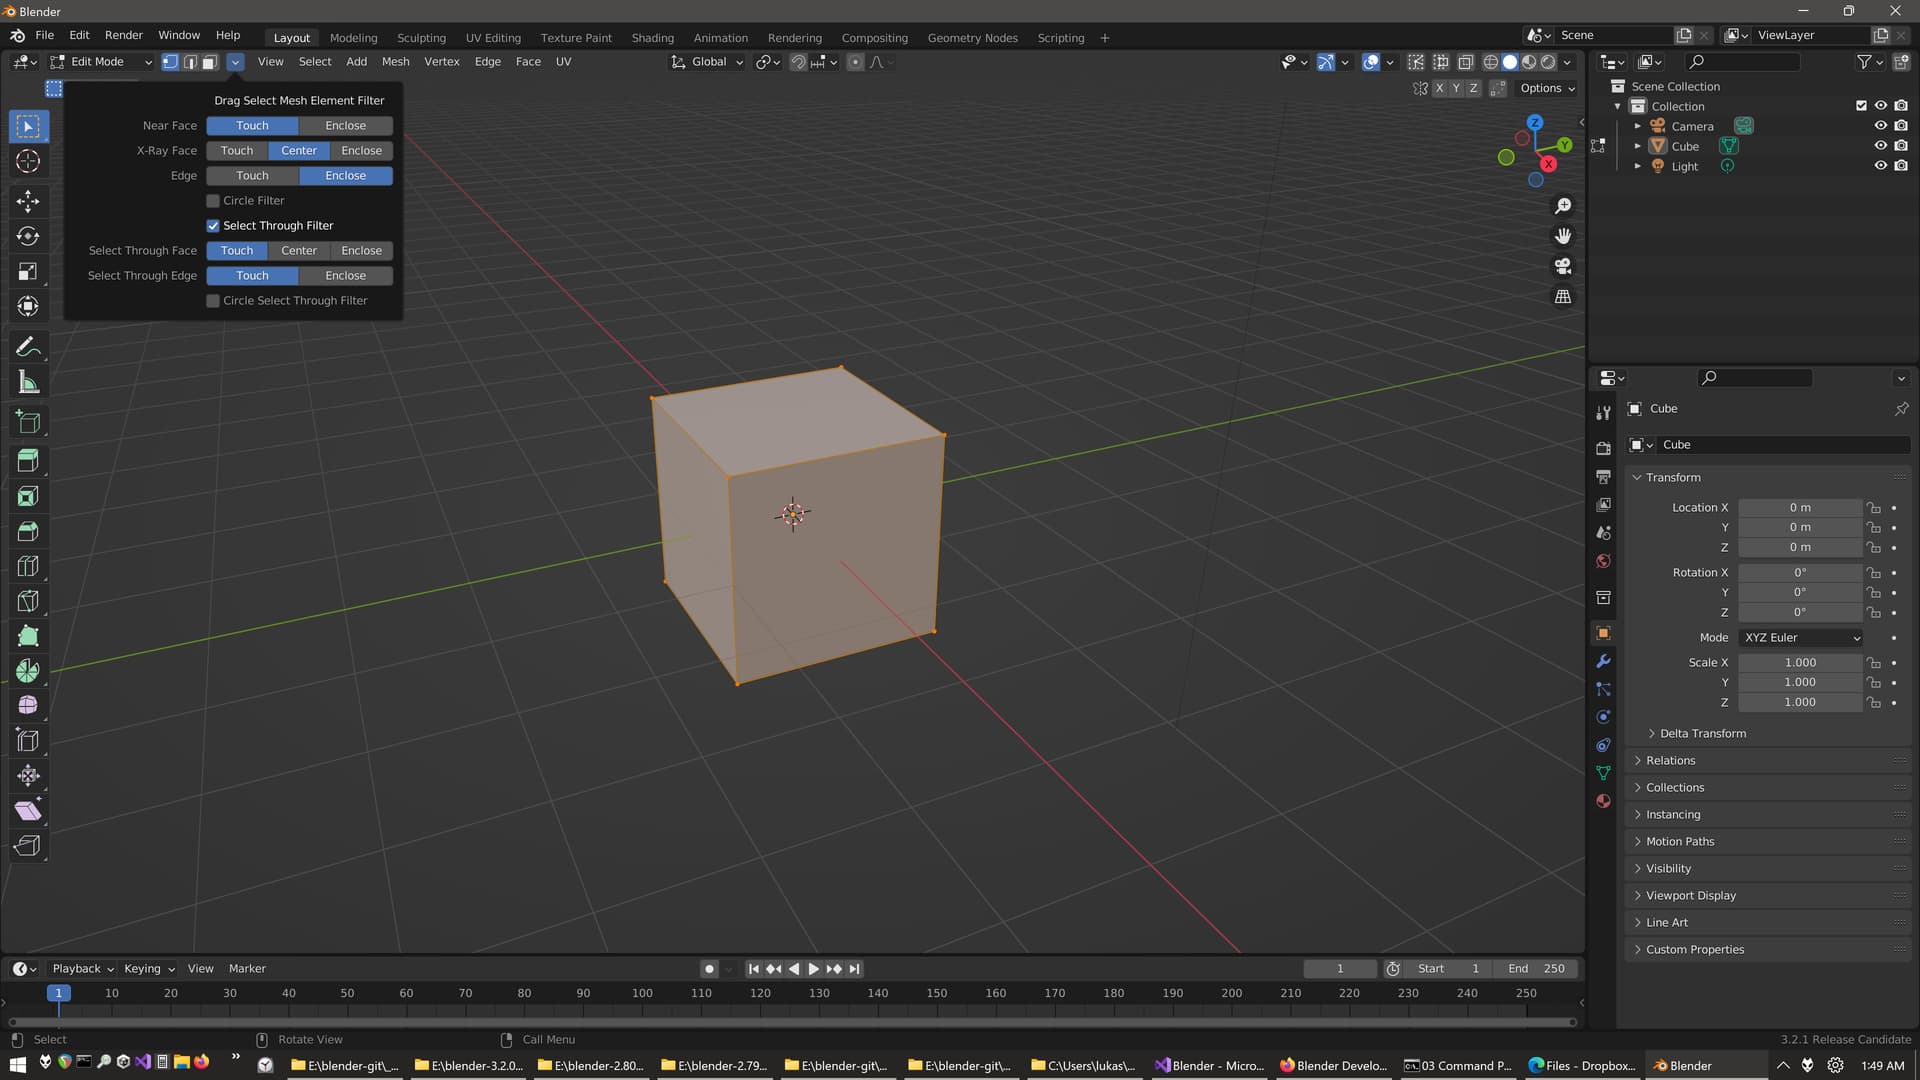
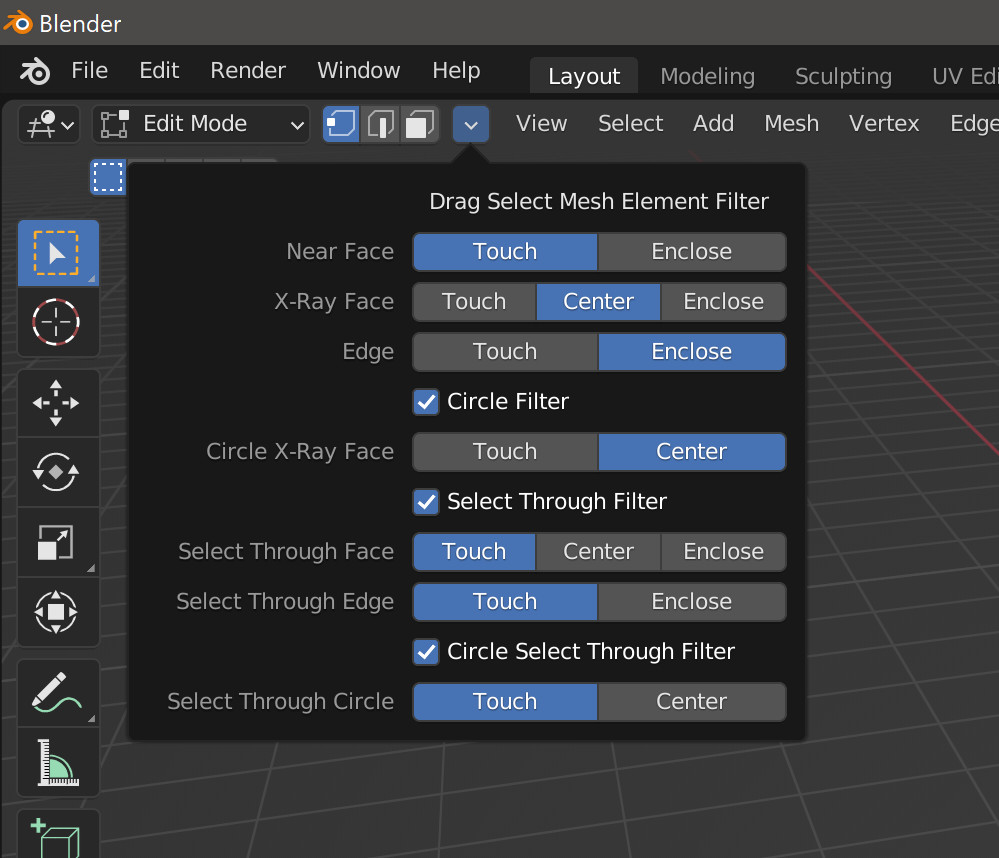
- Touch will select anything the selection area touches
- Enclose will select edges that have both ends inside the selection area
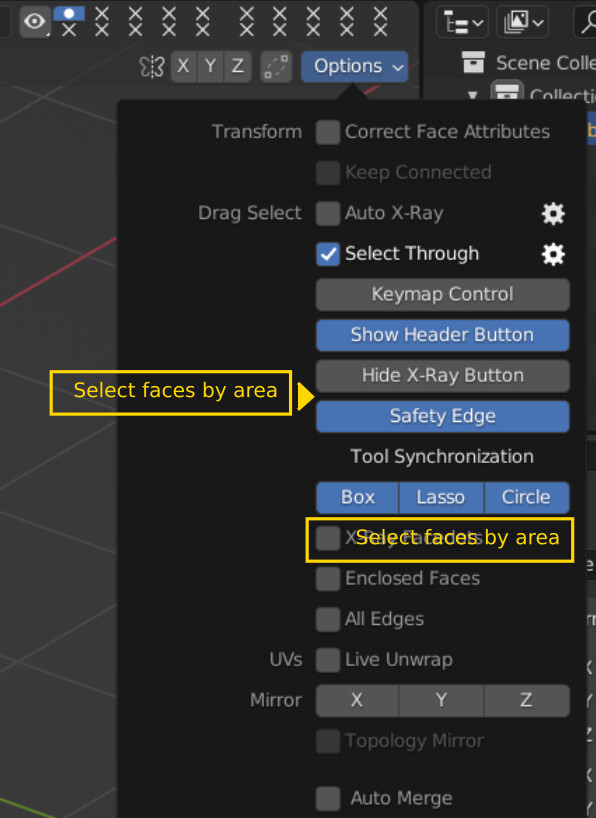
- Blender selects faces in a hybrid fashion with box, lasso, and circle. If X-Ray is off, you select any faces you touch, and if X-Ray is on you select them by their center. With my build you can also use these options to select faces:
- Touch will select anything the selection area touches
- Enclose will select a face if all their verts are inside the selection area
- Center will select a face if the selection area touches their center
X-Ray
- Box, circle, and lasso always select through objects in Object mode, and never select through mesh in Edit mode. With my build you can do either thing in both Object and Edit mode.
- Automatic X-Ray can turn X-Ray on for you in Object and/or Edit mode while using box, circle, and/or lasso
- Both of the above are implemented modularly. There are many ways to setup your shortcuts so you can dynamically or permanently decide which tools and modes will use Select Through and/or Automatic X-Ray. There are some optional operators with header buttons that can be shown and hidden as you see fit. They will intelligently handle the modular aspect of either X-Ray feature for you in an on/off fashion for whichever tool and mode you are currently using. The icons for these operators were made by Alexey Adamitsky.
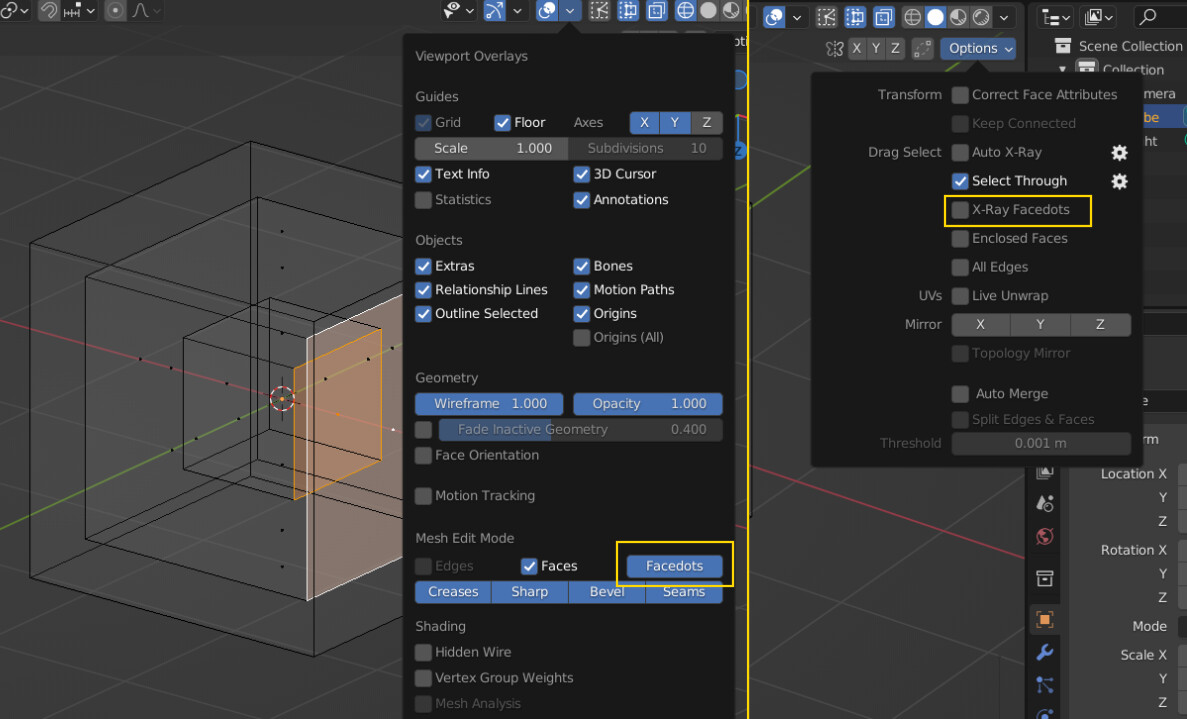
- Can turn off facedots in X-Ray shading
Drag Direction
- Blender lets you choose up to 8 directions to move in when click-dragging. If all you want are 2 directions (left vs right or up vs down) they aren’t implemented very intuitively, take a lot more keymap items to set everything up, and they are innaccurate. With my build you can restrict the directions to either left vs right or up vs down. It makes sense, is easy to setup your keymap, and has accurate calculation of your drag direction. Dragging in the
Anydirection is unaffected.
Selection Radius
- Verts, edges, and facedots (X-Ray on) have a large radius for single-clicking them. Faces (X-Ray off) have zero radius, the hotspot of the mouse cursor needs to be on top of the face. With my build you can use a consistent selection radius for everything, and adjust how large the selection radius is.
Mouse Cursor
- Now you can choose which mouse cursor to use in different tools and modes. I included some new ones as well.
Header Highlights
- The top of the active window or panel gets brighter. This can be adjusted or disabled.
Header Buttons
- Can combine the X-Ray and Shading buttons into one thing. Same X-Ray button, just changes icons to reflect what shading mode you’re in. You aren’t losing the shading buttons either, they are just moved inside the shading popover. Assuming you don’t click on the shading buttons to switch shading modes, this makes a lot of sense.
Camera Zoom
- Can adjust how fast the camera zooms, as many different mappings as your keymap can handle.
Frame Selected
- Can give an offset for the viewport camera when using
Frame Selected
Repeat Last
- A new operator called
Invoke Lastthat will invoke the previous operation instead of executing everything exactly the same.
Thankyou
- This build is only possible because of the knowledge and experience shared by the community. I want to mention some people that helped me figure things out like Chris Blackbourne, LazyDodo, Harley and Campbell. Everyone on devtalk and in the chat, thank you. Most of all, I want to thank kio. Select Through, Facedot visibility, and Touch select faces in X-Ray are from the work he did. Some of it is basically untouched, and I learned a lot by updating it and changing how it works.