I’ve been a little disappointed that cycles can’t currently create realistic clouds like rendering engines such as Arnold can (see link: Help).
Cycles’ volume rendering engine is already pretty decent, but it simply doesn’t have the same capabilities as a rendering engine like Arnold in the volumetric department.
I propose that a transparent depth parameter be added to the volume scattering and principled volume nodes.
It would be INCREDIBLY simple, here’s all that needs to be done:
in Blender 3.0\3.0\scripts\addons\cycles\source\kernel\closure\volume.h:
and update the references, and add a transparent depth parameter to the cycles volume scatter node and the principled volume node, which theoretically should be no more than a few minutes of work that would help me and probably hundreds of other artists create more realistic volumetric materials.
(Edit: Sorry I didn’t realize this forum wasn’t for recommending features, I put it on rightclickselect a few minutes ago)
@Samuel_Krug I don’t think your post is a “recommended feature”, on the contrary you are proposing a development solution to the problem you find.
I want to mention @brecht here, but apart from that I would recommend to create a patch in developer.blender.org.
If you need more guidance on how to contribute a patch I’m sure @ThomasDinges csn guide you through the process, I’m sure more contributors to improve Blender and Cycles are always welcome
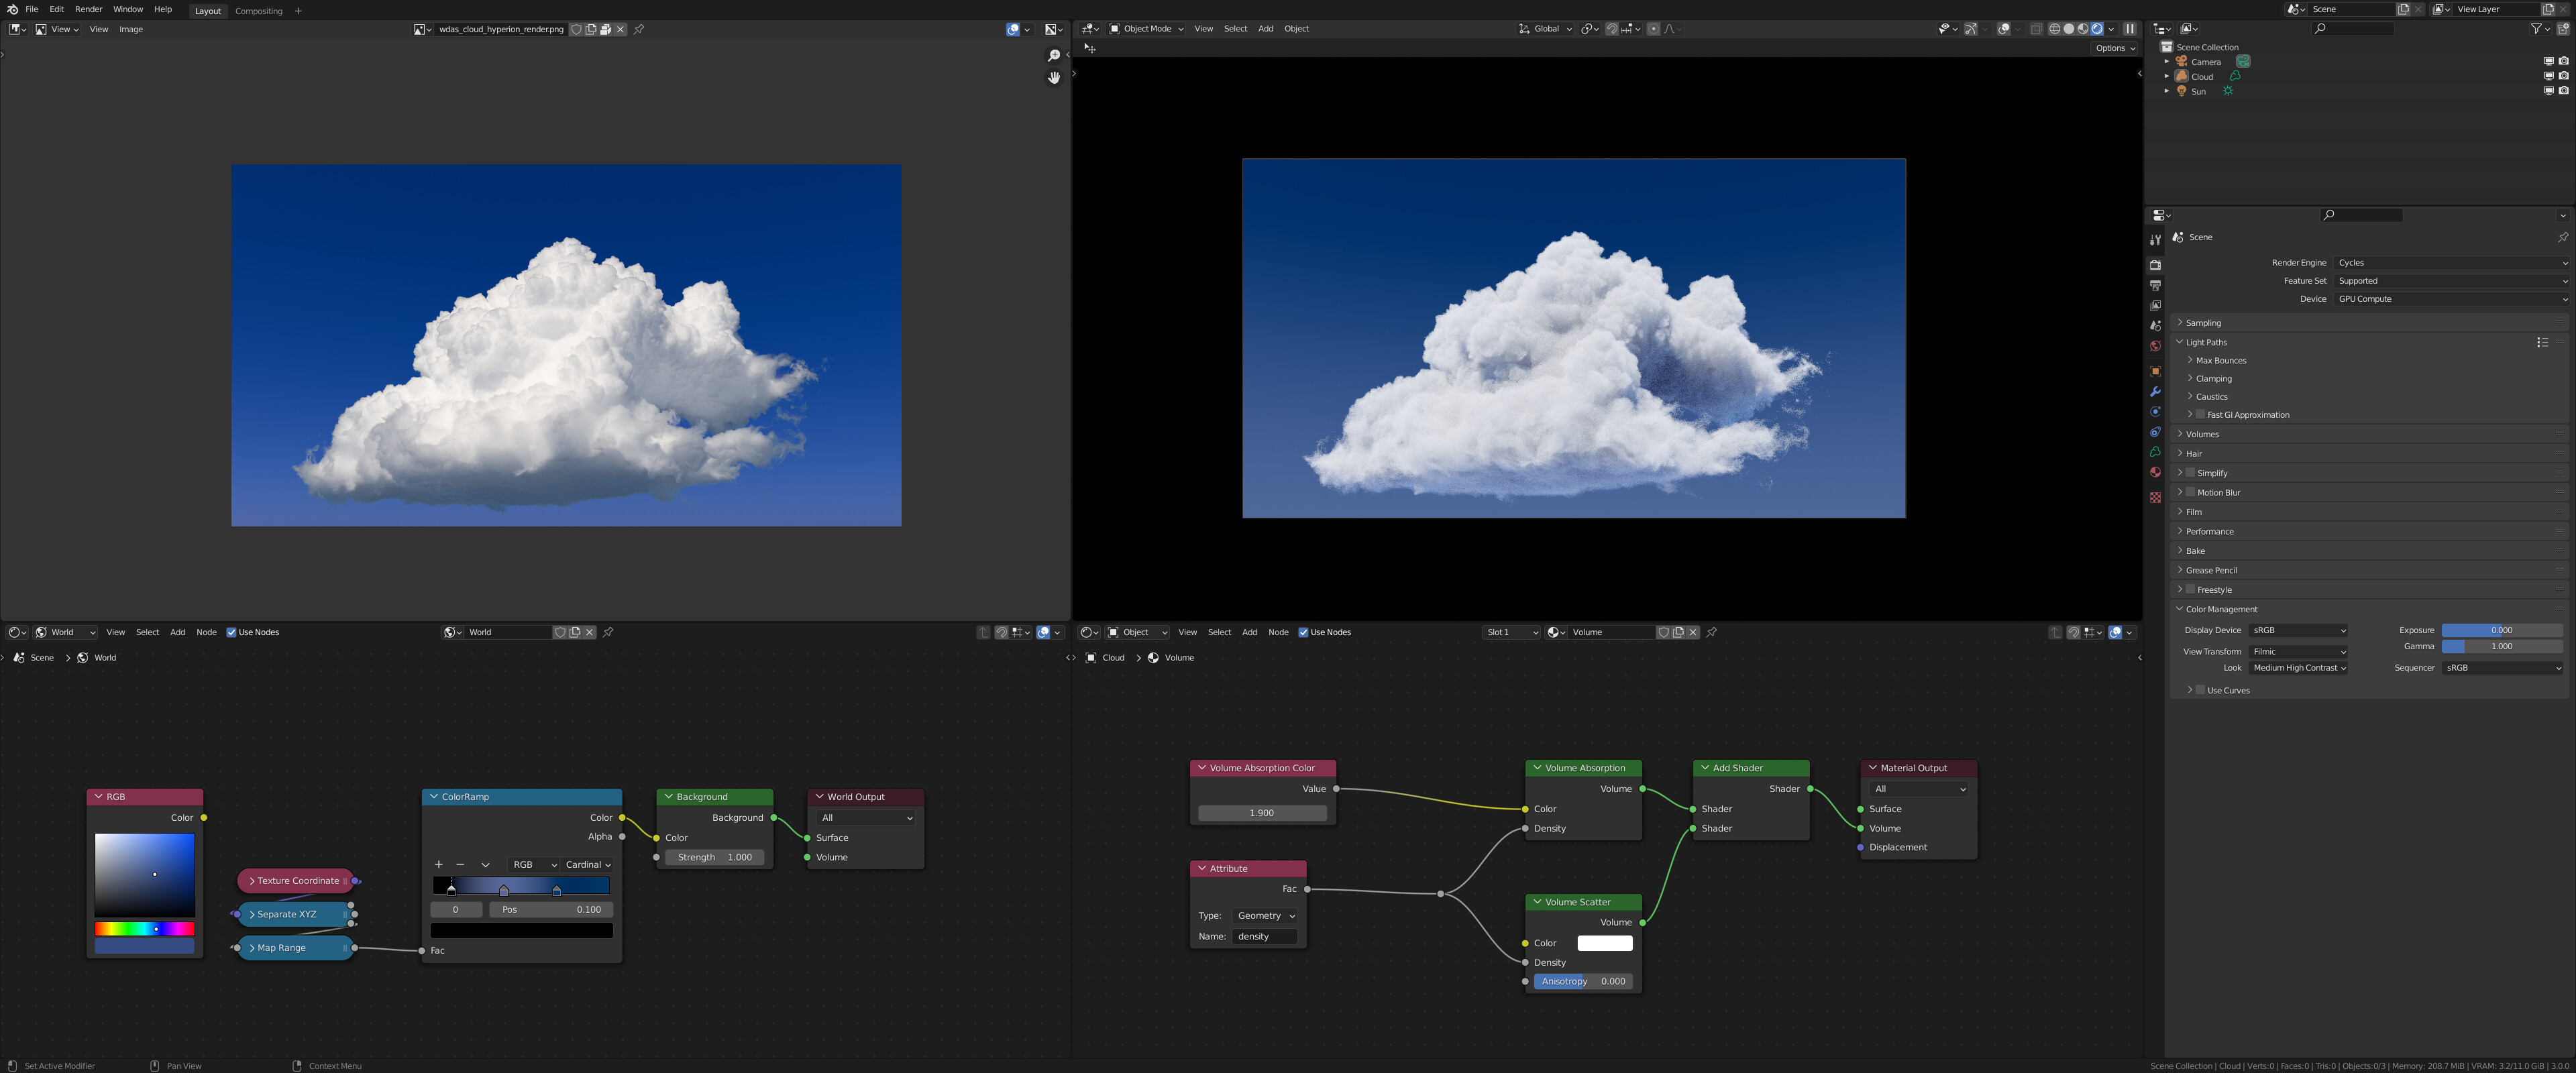
If I’m not mistaken this would be equivalent to have Volume Absorption and Volume Scattering combined with an Add Shader node, and then increasing the absorption color above 1.0.
Maybe you could try this to see if it works as you expect, and then we can consider adding it to the Principled Volume node.
Also, in the proposed change the “transparent depth” is unitless, whereas the other one has a unit. So I don’t think it’s actually the same.
A unitless parameter seems better though, since similar values can work regardless of density / size of the object. Just would need a good name for a 0…1 parameter to boost lighting in a non-physical way.
Around the 1.8 value it looks the best and if you go above 1.999 everything disappears
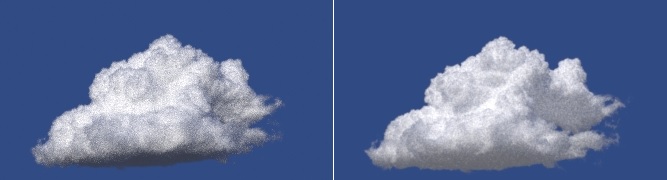
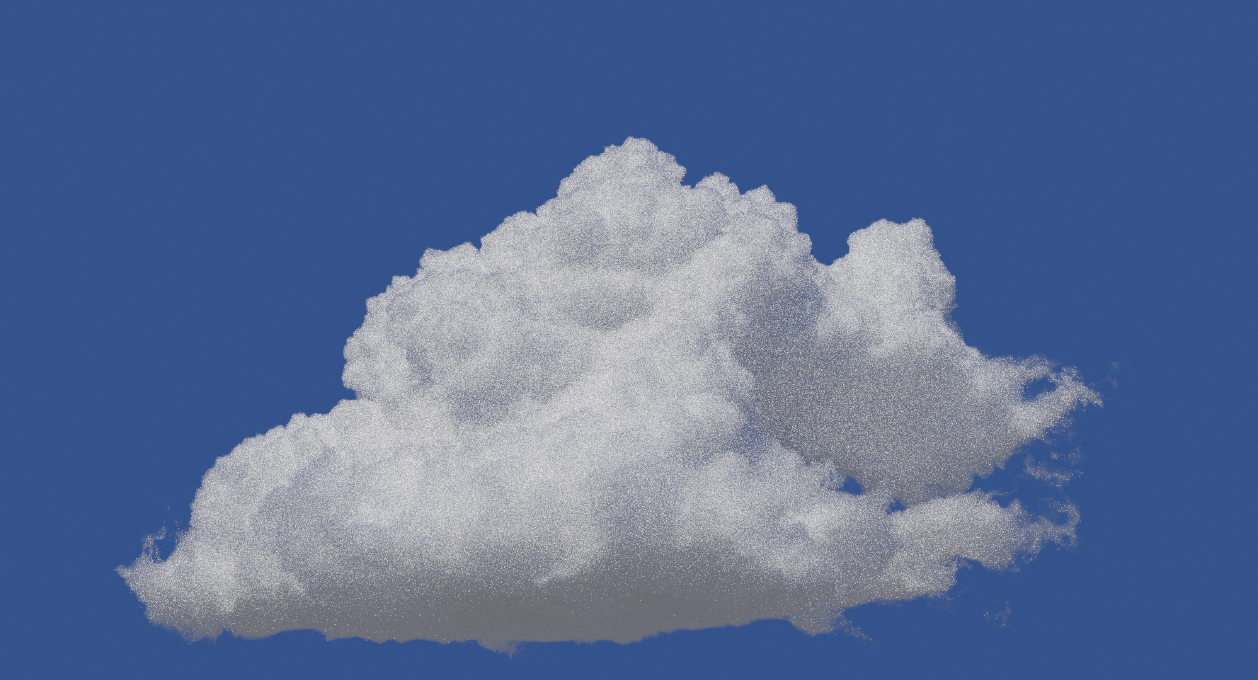
With this method you get a lot more light spreading but it isn’t perfect. In the link provided above the results still have visible edges but with this method you “lose the shape”.
Yes, that’s the setup I mean. Of course I don’t know how that this is how the setting actually works. I’m just going by the code provided by @Samuel_Krug.
Potentially differences can be due to anisotropy, number of volume bounces and light intensity.
I know there are also tricks where people change extinction and anisotropy with ray-depth, so you still get the same results for the first bounce and keep the detail from that, but then lower extinction and make the volume more isotropic for further bounces.
So that setup does not give those sweet silver edges on the reference. It will basically scale the value that the ray has computed for the volume by a certain function of that absorption value for each density sample in the volume. The results are sort of similar to adding a lot of volume bounces. Transparent depth is basically just the amount of material in the volume that the ray has to pass through for the full diffuse color of the volume to be fully realized.
I can’t make any guarantees because I’m not a blender dev, just a hobbyist coder, but the shadertoy implementation I made on a (rather) similar volume scattering engine (on the rightclickselect link) has the exact same changes that I highlighted here and it works perfectly. I believe Arnold documentation might have a bit more info on what the actual attribute does conceptually, but it’s implementation should be as straightforward as altering the volume extinction function and it’s references.
Then you might want to experiment with the shader setup I suggested and figure out if you can get it to give similar results, since as far as I know it should give similar control to reduce the extinction.
I’ve been experimenting with shading techniques for these sorts of things for a few months now (including the one that you recommended). I’ve only found one way to get those silver edges like the references, but that technique is slow and limited. This transparent depth feature is the only real way to do it properly, and I believe it would be awesome for blender to have such functionality. I’d ask you to consider implementing it, but I understand you guys probably get spammed with stuff like this all the time and I don’t want to take up too much of your guys’ time. If it’s a no from you I’ll look into submitting a code review to try and get it implemented sometime in the future. If you need any more info from me please ask, thanks for all you guys do!
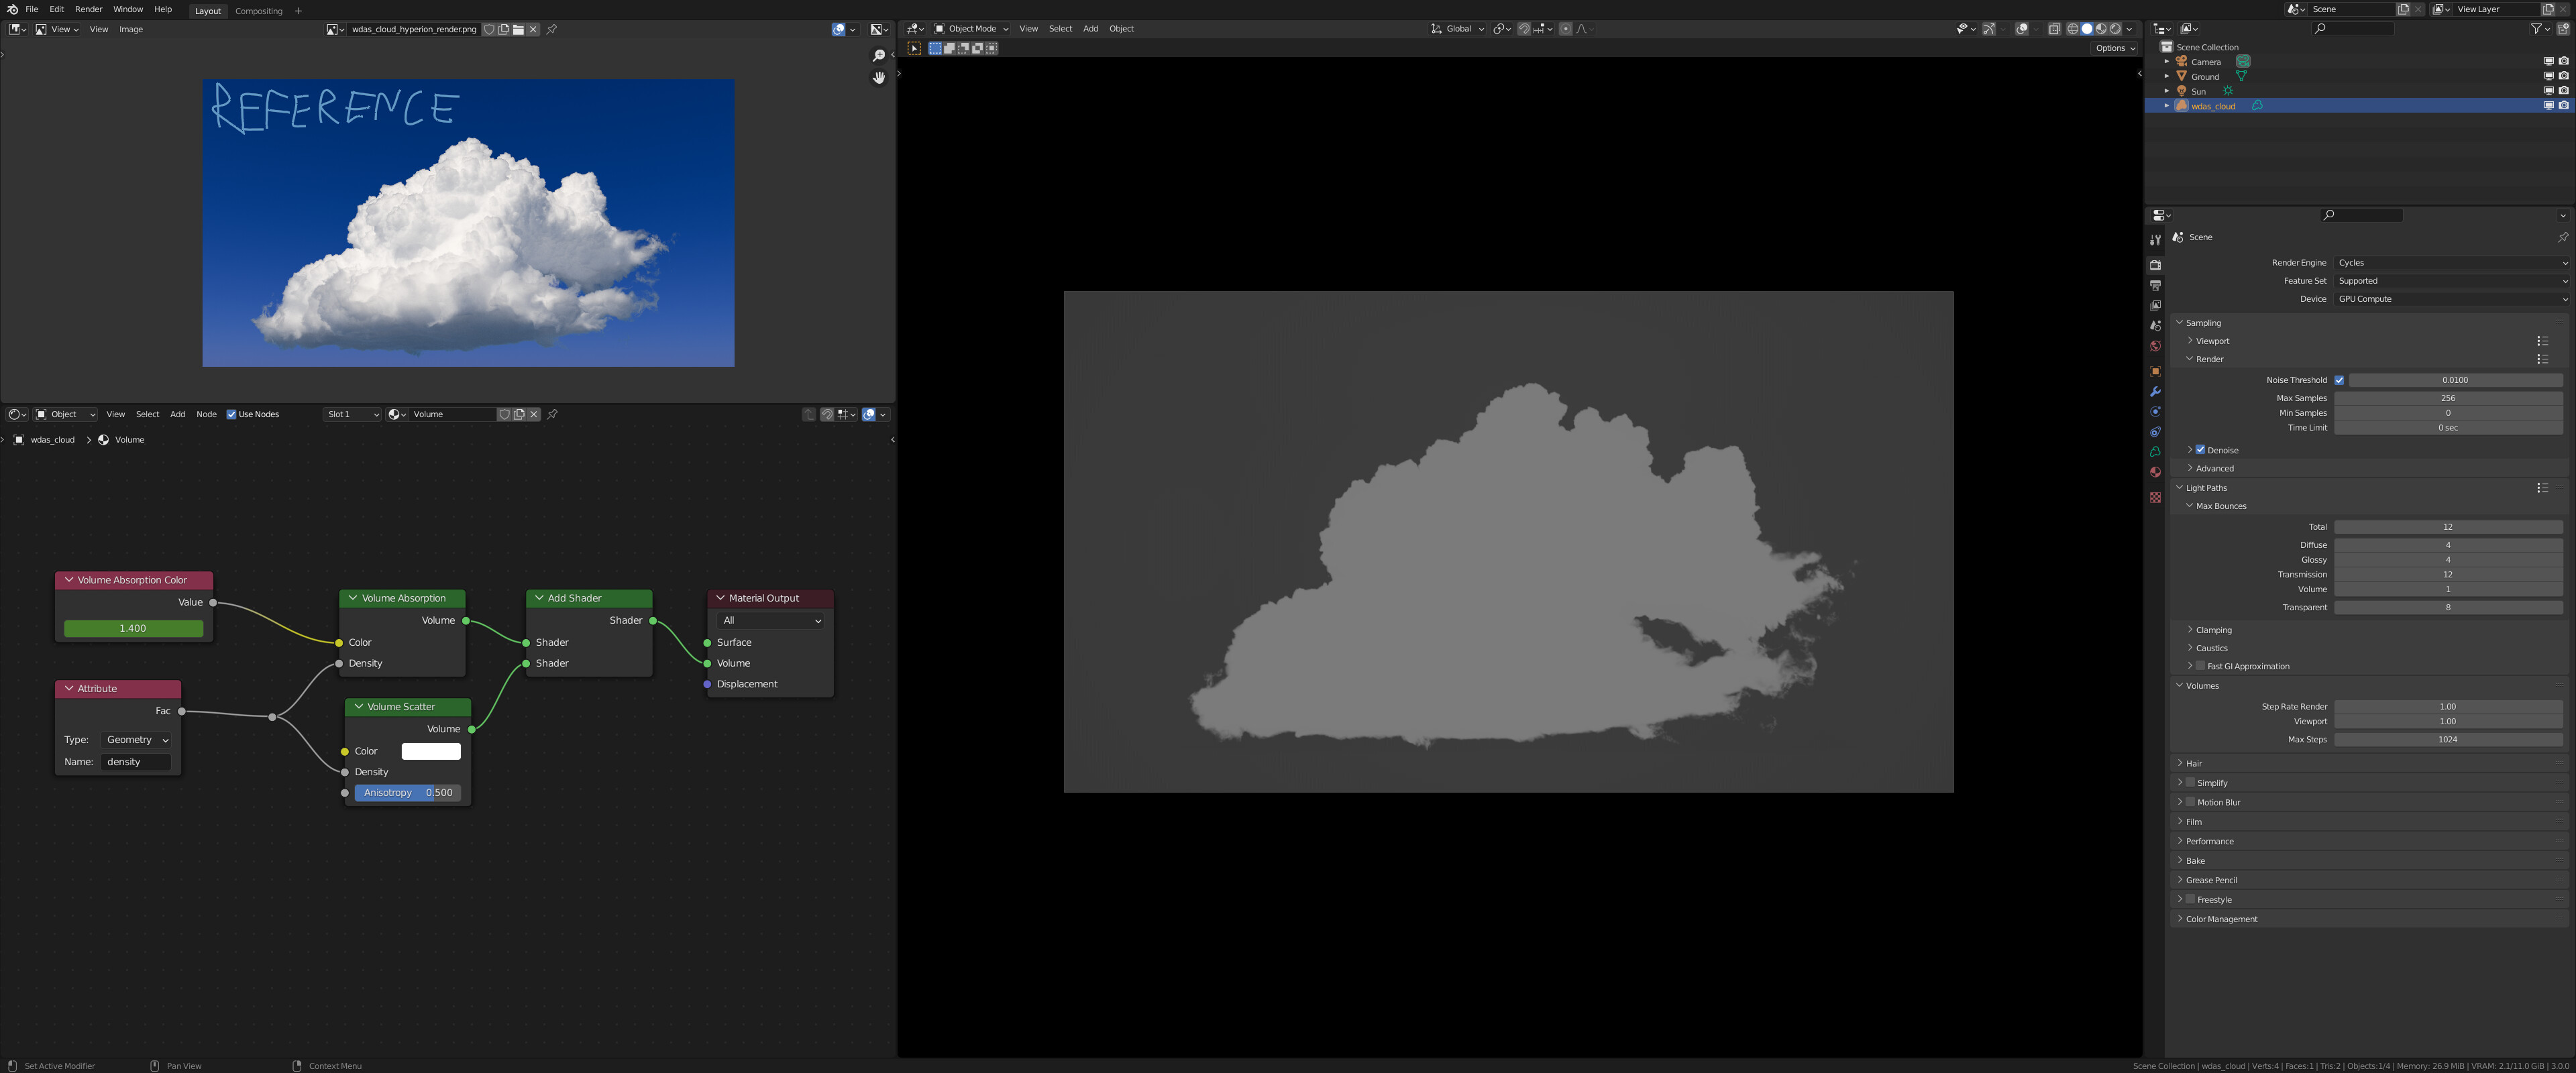
I’m sharing the [.blend(Disney_Cloud.blend - Google Drive) file of the cloud scene for testing. You also need to download the .vdb from here to use it in the scene. I have matched the camera position and the sun position as closely as I could. I also packed the reference render from Disney into the file which I think should be the reference to test how close we can get to that result (image on the left in the image editor).
I also found this pdf which goes over a few rendering things in the Hyperion renderer which was used for that cloud render. It might be useful because it goes over volume rendering on pages 11-13
You have to turn up the anistopry to something like (0.8, 0.9), in theory for clouds. In fact, Disney recommends/uses 0.857 when using the Henyey-Greenstein (which blender uses) (fig. 4):
P.S. the .xml for mitsuba contained within the wdas cloud folder is also helpful
Yeah, heterogeneous medium + high albedo + high anisotropy + max bounce depth = extremely long render (except if you are disney)
In my test Mitsuba 0.5.0 took a few seconds less, which is nothing compared with the total render time of both, the problem is not exclusive to cycles.