Let us call something like R X 45 (as a combo) a “hidden action”. There’s nothing on screen after I hit R X to inform me that typing “45” will result in a 45 degree rotation. In fact, after weeks in Blender and then discovering it, you feel like you joined a secret club.
Nonetheless, a hidden action is not required to rotate a cube 45 degrees on the X axis. I can just type 45 into the panel dialog. If I don’t know the secret clicks, I can still easily accomplish the end result.
As this Snap is currently implemented, it’s a hidden action and as just this morning demonstrates, took me 2+ hours to even figure out what I was supposed to be doing, which required a Youtube video, risked sobriety, and several forum messages. To me, this indicates there’s a flaw in the UX for this.
I should not have to initiate a move by dragging the mouse, in order to enter the “set snap origin” mode; it’s like I’m having to tell the application - let’s move something, but this time not really - and don’t let go, else we WILL move to some random place.
You can compare the action speed by typing GX2 SZ3 RZZ60- in 3d viewport versus doing the same using panel dialog. At the time when we were comparing, our results were quite definite.
It is AutoCAD-like behaviour which is widespread in the industry (Blender originally is a very AutoCAD-like application, way more than max or maya which was also inspired by it, for example).
I’ve never used AutoCAD, (but have used Max, C4D, XSI, etc etc.) So that workflow isn’t familiar to me.
I’ll agree speed of operation is great - i don’t like having to use an application made for users that have no clue whatever, and jump through 20 mandatory hand-holding steps to get to the finish line. But, I feel like there’s a balance that should be there. Users should easily know what is going on, as they click about.
I’m now using this feature with ease, but it was hell to get there.
Perhaps I’m in the minority, and nearly every blender user will find this feature completely intuitive as is. Or, maybe it will wind up being demonstrated in hour 12 of a new donut modeling video.
For me it was very intuitive but I don’t use gizmos and use “g” grab instead. Back in the days when I used Max this feature did work but the implementation was allaways clunky. Blenders implementation is vastly superior imo.
However, I just tried it in Blender with the gizmo and, yes I agree that it does take a while to get accustomed to the sequence of holding the mouse button pressing “b” and releasing the mouse button at the correct step.
A weird thing, I made my video on windows because both Linux Mint has got problems with a build.
A desktop version (GTX 770, Peek recorder) record lags which doesn’t visually exist (they are visible only on a record) and the laptop Linux Mint (MSI-175A, nvidia 850m) refused to launch the build.
An example of a lags:
official 3.5.1 has no problems
UPD Aw, it looks like 3.5.1 official also doesnt launch on my laptop, 3.4 does =)
Still the biggest challenge in any software, IMO. How to get the functions people are actually looking for to them when they are (or even aren’t) looking for them.
Intuitive tool design can always only go so far until you need to look up how to actually use a tool in the way the devs have intended. Complete and understandable documentation, man.
I am not entirely sure that it is technically possible to design a basepoint snapping that is compatible with gizmos-driven axis restriction in the other way.
For example, C4D tried to design something like that, but this attempt resulted in well known cumbersome and overcomplicated system with much lower usability and discoverability which also require a pivot point system similar to Max and Maya (which doesnot exist in Blender or AutoCAD and bringing which assumes quite deep rewriting nearly from scratch since influence object’s structure).
As a result closest and basepoint axis-restricted snappings in C4D are rather challenging to perform.
The new transforms with a base point and Navigate during transform are really great to see! Especially for architects and designers with Cad/SU/Rhino experience, where base point transforms are the default. Thank you all for working on these improvements!
A few comments:
will base point option somehow be incorporated into the gizmo transforms as well?
it may feel most natural to press and hold Alt or another key to place the base point.
Maybe holding Alt while in G, R, S could also make sense to move the base point? Someone already mentioned something similar earlier.
in the current implementation, base point rotate with R doesn’t quite work right. Typically in Cad, rotations have the point of rotation and then the target point that can be snapped to say an edge of another object. So, essentially two base points to use the same terminology.
will navigation during transforms be enabled for NDOF devices? I use a space mouse and having the space mouse for navigation while the regular mouse for transforms is the best workflow.
This is a great idea. Having the capability to precisely defined what can be snapped to and what can be excluded from snaps is fantastic.
A good feature that I am noticing is the possibility to exclude non-selectable items per the different items. I assume that also means that objects inside a non-selectable collection wouldn’t be snapping candidates?
The Presets is also a feature that makes total sense - so to have a few standard ones, and whoever needs more advanced presets can create their own.
The ability to set basepoint by holding a button is provided but disabled by default on purpose.
To enable it, you need to set “set snap base (off)” in keymap to “release”
The problem with such a behaviour occurs at gizmo-driven axis restriction - the resulting action assumes both hands pressholding, which is possible, but is quite confusing to perform.
Typically in Cad, rotations have the point of rotation
In 1pt alignment (aka basepoint snapping) a 3d cursor (or other pivot from pivots list) is supposed to be used as a center of a rotation and scaling, which is especially useful when large or complex object is transformed.
Typical CAD rotation technically can be achieved with 2pt and 3pt alignments (2points to 2points and 3points to 3points “full matrix” transformations), such an actions deserves a separate tool (possible prototypes was displayed in B.A.S.E. video)
For the tools and gizmos, there can be an option in the tool options to enable the tool with a base point. So that could alleviate having to do finger yoga. Or perhaps, instead of holding ALT or similar, maybe pressing it once could toggle base point mode. Essentially like “B” at the moment. Maybe B is starting to make sense to me…
I see what you mean. I tried it out and works as expected. Yet is not the most intuitive process, especially for newer users:
go into edit mode and select a vertex
Shift + S and set 3d cursor to selection
go to object mode and set pivot point to cursor
select object(s) and press R
Press B to enable base point to align
This UX could be improved in a few ways:
when enabling Base point with rotate, the most common is the two point pivot, so this option could ask for pivot point and then for target point. However, I do get that setting a pivot point could be separate from the transform. Yet, in most CAD programs, when rotation, you are typically asked to set the base pivot point for rotation
this is a bit different and its own topic, but I wish the 3d cursor could be snapped in a similar way to other geometry, especially to vertices. That would make the process of setting Pivot much easier
for gizmo transforms (especially rotate, but applicable to all), first holding a button like ALT to set the pivot and then perform the transformation
It could be possible for tools (“autobase mode” checkbox) but it is not possible for gizmos. Use ng gizmos assumes “gizmo-driven axis restriction” which assumes a pressholding to set the axis restriction first.
but I wish the 3d cursor could be snapped in a similar way to other geometry, especially to vertices
It already does it. 3dcursor was enhanced, and dragging it has snapping behaviour.
I’ve missed that. Thanks for pointing it out. Testing, I also see that it works in 3.5.
Good, so it’s actually one less step in the process to adjust pivot point when rotating with a base point. Still not the most intuitive for a beginner, but better than having to go into edit mode and shit+s.
Minor followup on the finger contortions; I spent some more time with it over the weekend, and found this procedure works fine with no contortions required.
Assume 2 cubes in scene.
Select one cube.
Without delay or mouse action, on the keyboard hit G B. (One right after the other).
You are NOW in “source pick mode”. Move your mouse over the selected cube (hovering), and click something on the cube you have selected. (Example: a corner point).
After clicking the source point, hover your mouse over second cube (the first cube will travel along for the ride). The destination point (say, another corner point) will highlight, click to set the desired destination.
The last proposed change was the implementation of presets and filters per element snap (intended to help with retopology).
While I’ve seen some positive feedback, I’ve noticed that there’s still a lot of question as to whether it’s worth the complexity, or whether it’s better to save “presets” per workspace rather than a menu of options.
Due to these issues, (and as retopology is not currently a focus), this change was postponed.
Now the focus is on smaller changes like new defaults for Blender 4.0.
Continuing from the other thread, as I was requested to:
This feels like stonewalling. I believe the user would prefer to ability to snap something to the center of a face, rather than endure the minor effort of reading another option in the dropdown menu.
#78434 includes within the proposal, adding the ability to snap metaballs. I don’t see how that feels more essential and basic.
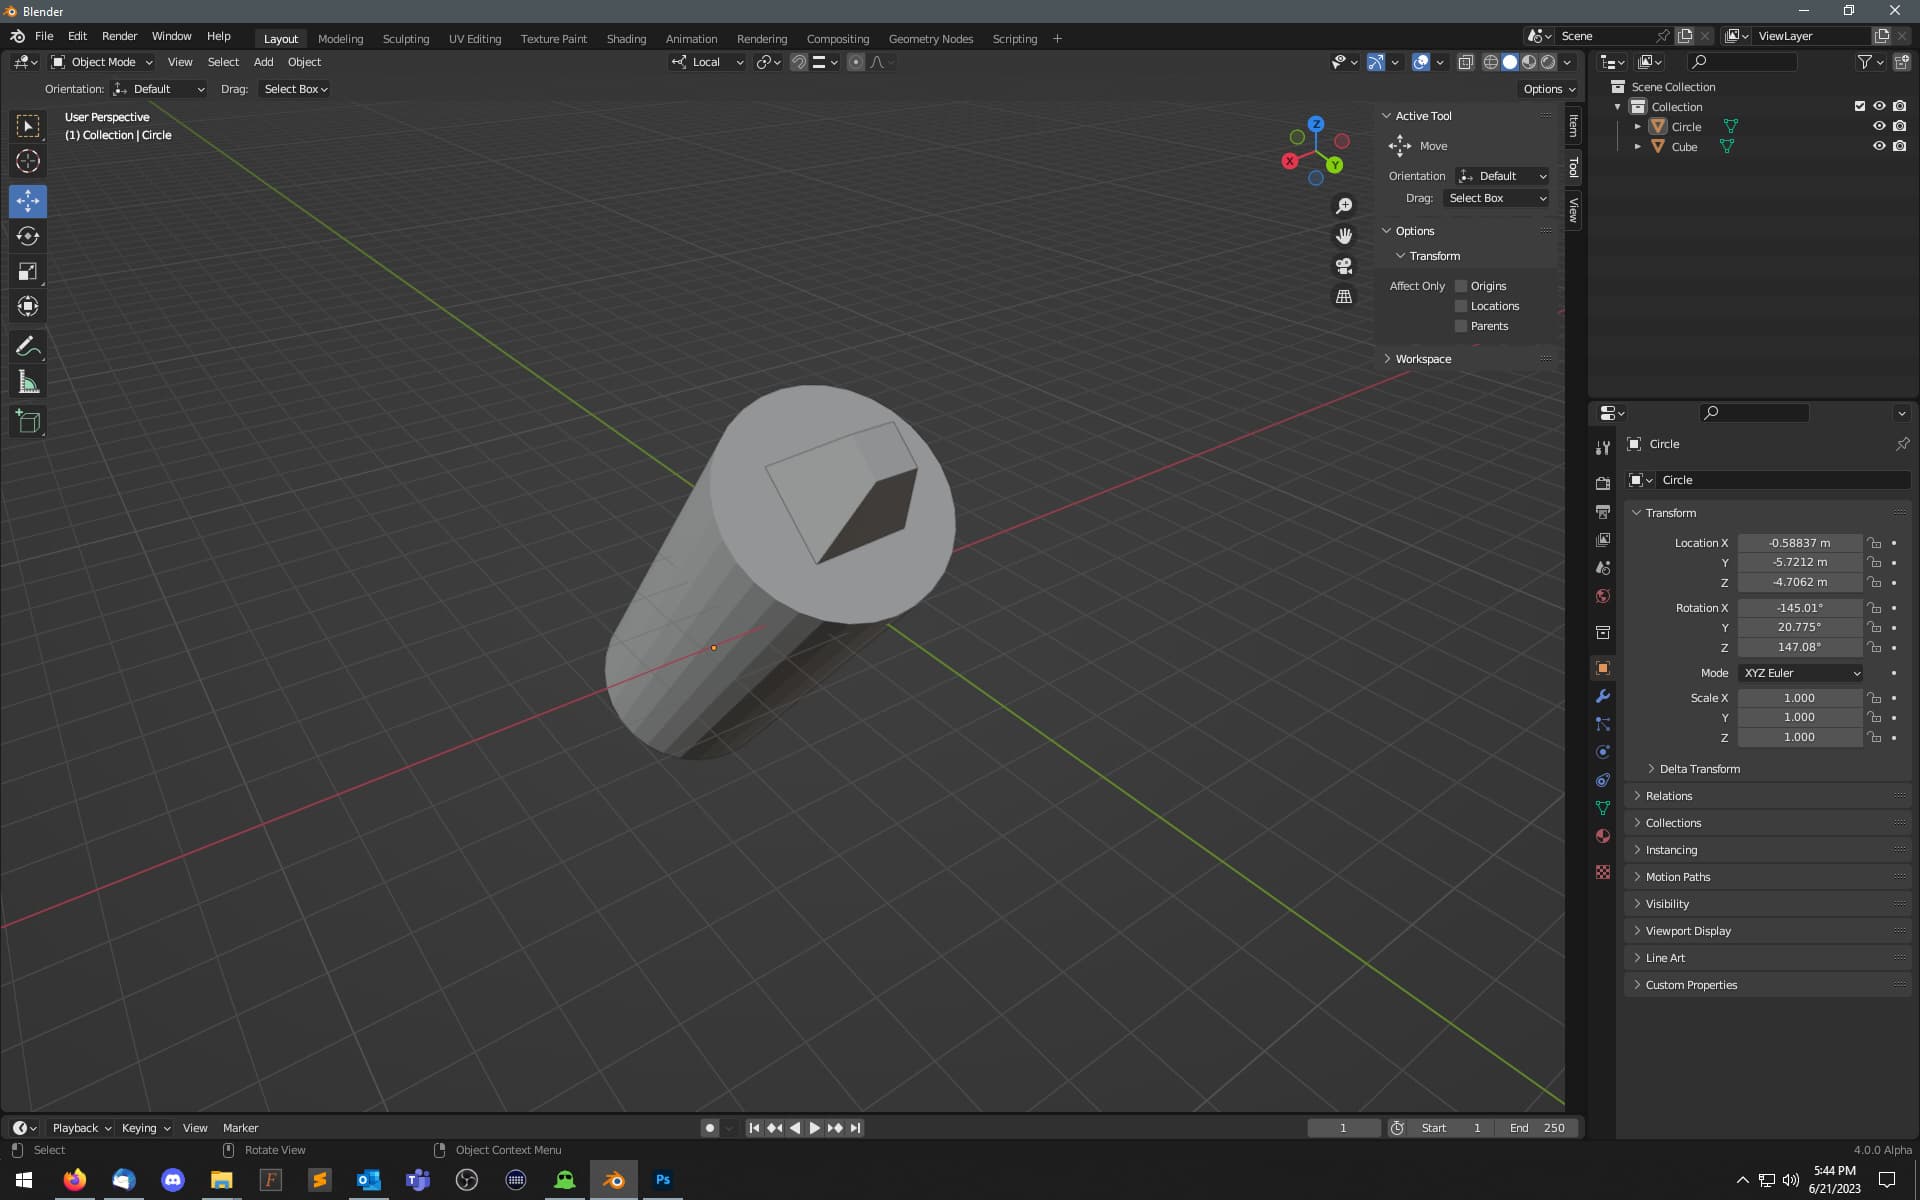
Here’s a quick “result” image of why one might wish to snap an object to the center of a face:
Note that I am not suggesting that the normals be displayed during the snap operation. I’m simply pointing out that their actual postion and “up-vector” is where the user would expect the cube to snap to. The fact that the top of the cylinder is an n-gon (made of discreet triangles, fine - not relevant) doesn’t create a situation of a user wondering “why did it snap there”?
Additionally, I cannot determine how to snap one entire object to another object, using the origins as the snapping points. I accept that I may not be clicking the correct combo options in the menu. However, if this is indeed not currently possible with the new feature set, I trust that the use case is obvious.
Such an action depends from a specific conditions that influence specific method realization, I guess.
I believe that snapping to a 3d cursor as to a vertex (being able to use it as snap source or snap target), including its orientation could be useful for different operations, for example, for self-snapping.
Self-snapping is a separate iceberg though.
An example - putting a cube from its bottom to its top.
There was proposed ghosting (like in most CAD programs), but it could be performance expensive when you work with heavyweight selections (like precisely placing houses that consists from up to 50k objects). Ghosting can be optional, but it is also challenging to make I guess.
At the moment self-snapping can be solved with building additional geometry (temporary constructions aka helpers), like drawing a mesh edge from snap source to snap target, and removing it after operation (or keeping it for multiple similar operations, which is typical for working with instances for example), so it is a question of a QOL-feature rather than critical missing functionality, so it can be postponed.
If you have to do workarounds like that, it might as well be missing functionality. Maybe not critical functionality, but functionality nonetheless. I definitely would not just call that a QOL issue.
Sure, but the point is that in some cases you have to build them anyway, even if it will be solved in the other way. (for example, moving a window in a wall at the desired distance and direction, where opening in a wall is a unique mesh and window object is an instance, so they cannot be edited with a single multiedit operation)
I mean - this probably borders on a feature request but I still think it’s important for precision modeling:
One feature I have not seen in any regular 3D modeling app except one is simply the functionality to input dimensions and position of a selection in edit mode (relative or in world space).
Sure - we can edit the precise scale, position, dimensions and rotation of an object based upon it’s pivot root. But it is so damn useful to also have that same functionality for an arbitrary selection in edit mode. Rotation of course will not really work well since there is no real base for it but for position and scale alone.
It eliminates many actions with rulers, temp geometry for scaling or placement and scale calculations pretty much instantly. Granted - with the new point snap the positioning will be far less of a problem any more but still - picture this:
You know how big a selected part of a model should be or how big you need it. Simply select the geometry and the Item transform tells you not only the median position but also scale of the selection. Goes both ways of cheking and adjusting really: You can immediately see the dimensions of a selection and rescale them precisely by median input if needed. No rulers or scaled temp-geo to snap to.
If that goes off the rails too much please ignore this. Since this is also a thread for precision modeling I found it very fitting here. Especially since from my experience somehow this seems to be a feature that never crosses the minds of many people working with 3D modelers, even for many years.