That´s great! Looking forward to read the documention when it is available 
Yes, makes sense. For some reason I was dropping them into the viewport and using the modifier panel, but that’s not really going to work. Using the node editor as you suggested seems way more intuitive for this workflow.
Got me confused with the terminology  At work a map would usually refer to a baked version of a mapping, most times in form of a texture (like a dsp map, weight map, etc.). Getting closer to get the hang of it now.
Looking forward to the docs as well. Exciting to see the first node groups arrive! Can’t wait for the asset shelf as well - will that be something for 3.5, or rather something for later?
How will the node setups get cleaned up (or are they already)? With frames or groups?
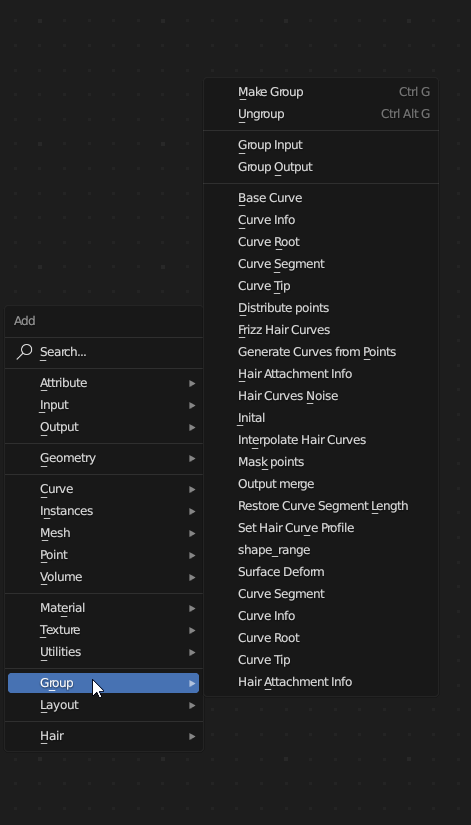
I’ve tried to reorganize the “Generate Hair Curves” nodes but in the process that produces a lot of groups which makes the “group list” long…
Current nodes:
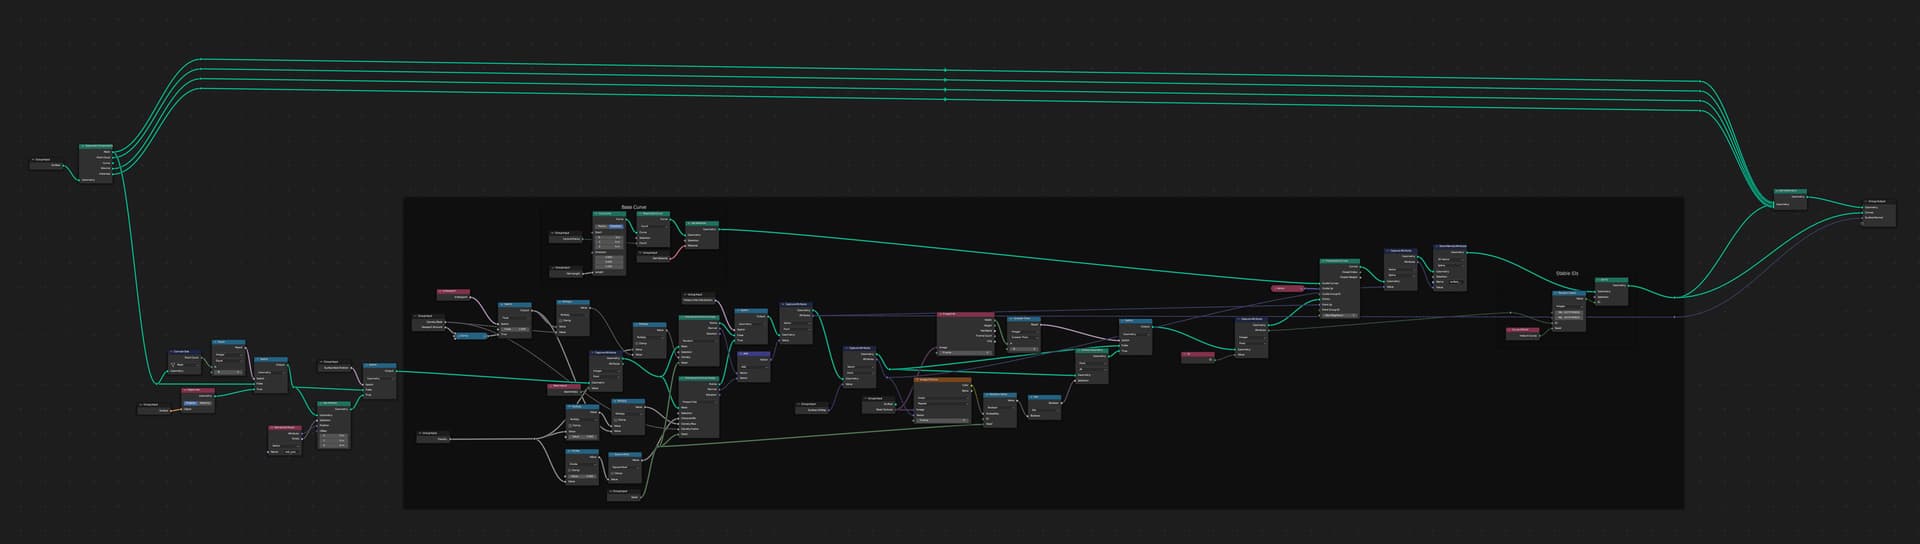
Packed version:
Group list:
They aren’t cleaned up yet. I’ll do that soon though, hopefully.
I won’t be creating nested groups if there isn’t actually shared functionality. I’ll use frames, reroutes and hiding of sockets and options when sensible.
5 Likes
Just started playing with this stuff in the 3.5 Beta, and the first thing that popped to mind was the Shrigwarp Hair Curves might allow for basic rigging of hair. So after paying with it, it does. However, it has a limited range. Once the controlling mesh gets too far away it loses influence.
When it comes to GeoNodes I have zero experience. My Node knowledge stops with Unreal Engine and logic. So I can’t do this myself… yet. However.
TL;DR. If the “Shrinkwrap Hair Curves” node group kept the hair inside of the controlling mesh regardless of distance from the hair curves this could open up the possibilities for some really cool stuff.
Also sorry if this had been said before. I confess to not reading and only doing a search for the word “rig”.
1 Like
Hair dynamics in the sense of rigging or simulating the hair are things that will need to be addressed in more detail later. For now the Surface deform modifier that is added by default to a new hair object is the only builtin way to move the hair with an animated surface.
Generally this topic will be revisited for a later release, the main focus for now has been static grooming cases.
3 Likes
I just wanted to start by saying that I appreciate all the work thats gone into creating these node setups.
I think there is a case though for some “simple” hair node setups. I come from a teaching point of view and find these node setups pretty complicated to work out myself let alone trying to explain to someone who may have more difficulty than myself to understand. Is it possible to have some less complicated node setups that are a bit easyer to explain the inner workings? Maybe prehaps some simple templates with less options/controls and a set of more advanced nodes for people that know what they are doing more. I think its about making it all a bit more accessable for all artists! Cheers.
1 Like
The current version is just the simplest working version. As I understand it, they will still be redone to be much easier
Hey, so the intention for these nodes is less for people to go inside and make changes. For that they definitely would need to understand what’s going on inside. But for the most part artists can treat these as monolithic nodes that they don’t need to go inside of, just like any other node.
The notion that to use these you need to go inside the node-tree is a misunderstanding that I’ve seen before. But that’s not the case, the intention is very much to use these nodes on a surface level. Either as a modifier directly, only touching the parameters in the modifier panel. Or as a node on the top level, for example by starting with a modifier and using the Move to Nodes operator.
Also:
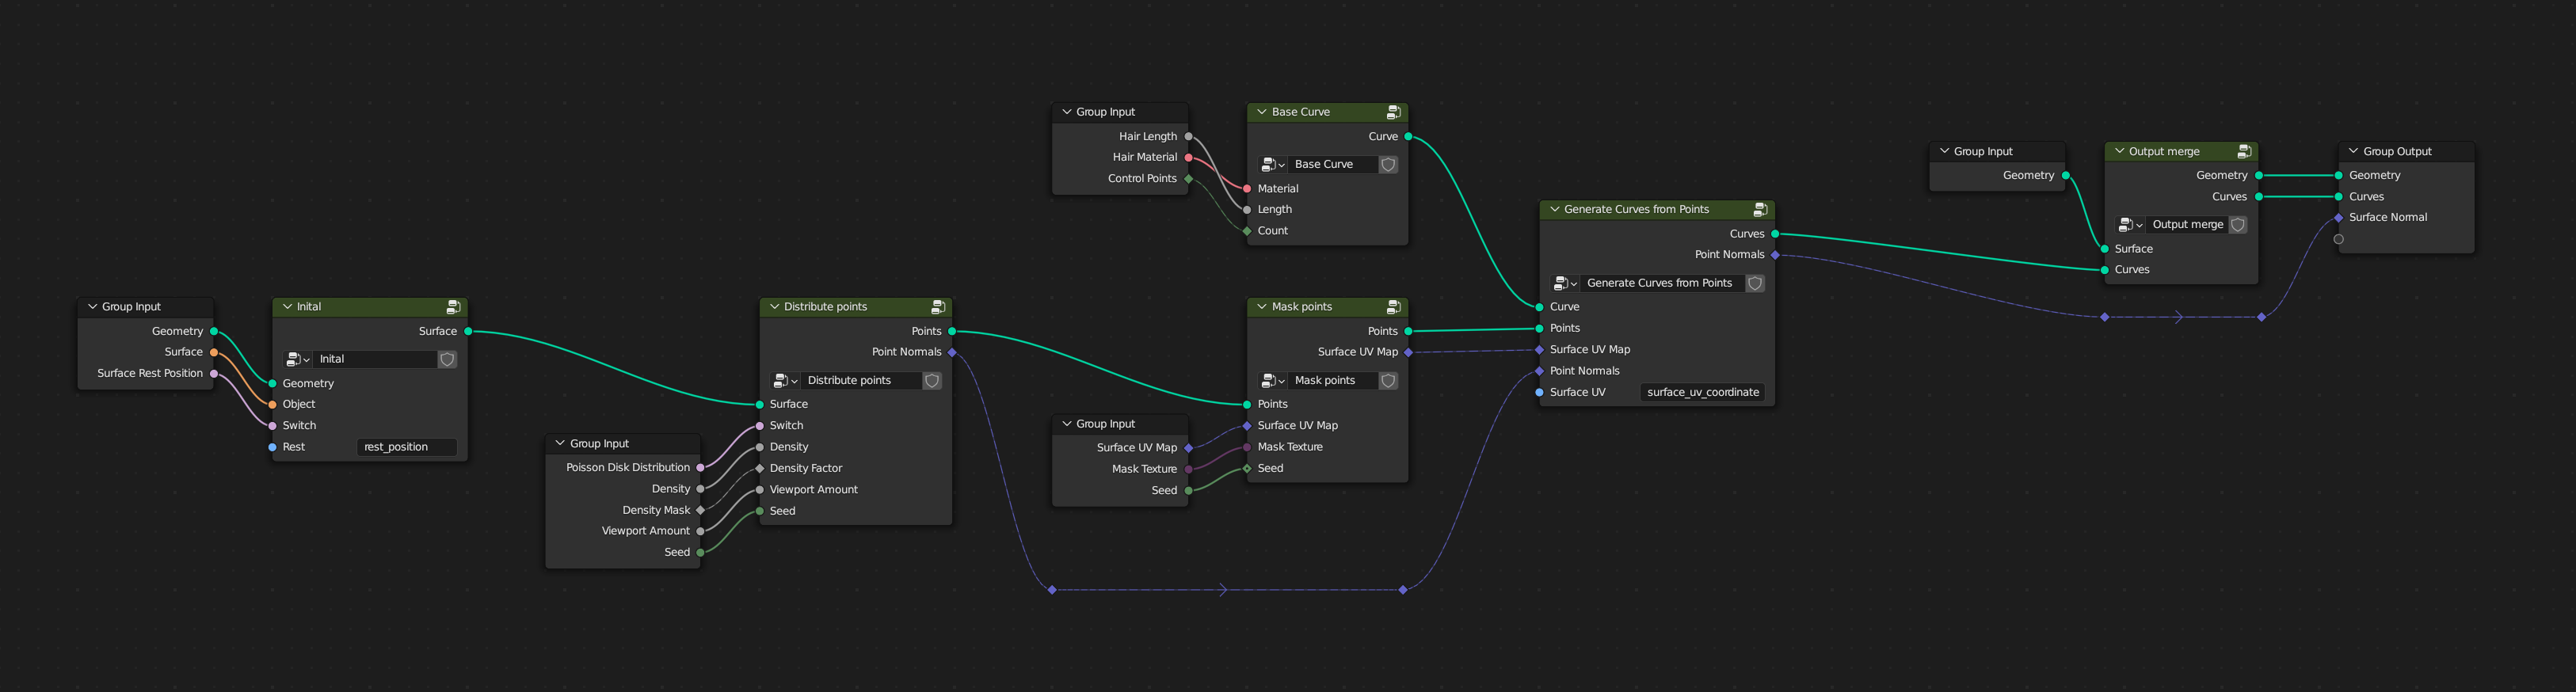
I’m not sure which version of the nodes you are talking about. Just the last few days I went over all the node-groups to clean them up by reorganizing the nodes and adding panels with titles of what is going on. That said, some of them are still quite difficult to work through, but that’s just how they work and at some point we just need to do better with the UI of the node editor to make node trees easier to understand.
Maybe you just saw a version before that, maybe not.
But yeah, regardless of that:
The intention is for people to use these nodes, as they are, in higher level setups which will then be quite simple. The documentation, example files and educational material in video still needs to be prepared for the release.
6 Likes
This is good development.
The only thing i don’t like is the icons. They don’t look very “Blender-like”.
I’d envision them to look more simplified, not 3D renders. More into the stylistic direction of active tools in sculpt mode.
2 Likes
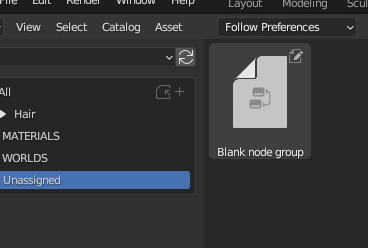
But they are not icons but thumbnails, the node groups are assets
Whether they’re called “icons” or “thumbnails”, my point stands.
1 Like
What they mean is they’re automatically generated by capturing the viewport. That’s how assets get their thumbnails. Now I guess the system could be made to use Eevee instead of solid shading, or something, to improve on the looks. But it’s supposed to be wysiwyg, and I believe that’s a good thing
Assets can use custom thumbnails. (Actually, they are not even called “Thumbnails” in the blender UI, but “Previews”).
And these previews were not autogenerated. These are custom made.
Nodegroup assets do not get autogenerated previews. By default, the preview of a nodegroup asset looks like this:
1 Like
My bad, didn’t know that
For what it’s worth, I like them. They clearly put effort into making them.
A more simplified approach would look weird if we can’t make the size smaller.
4 Likes
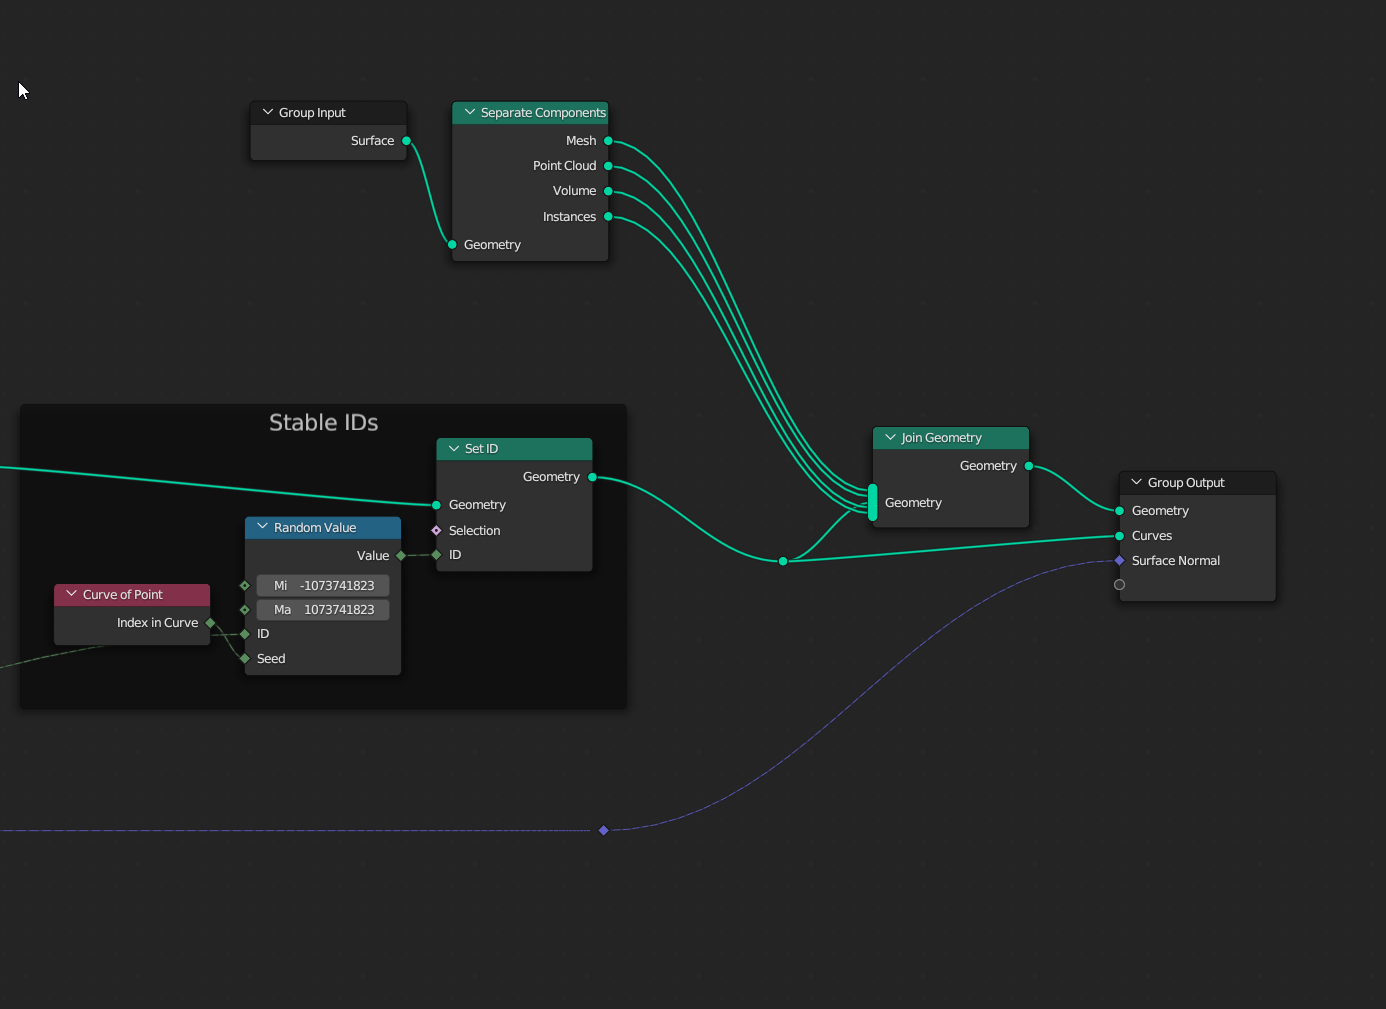
The node-setups are much more cleaned up now, great job!
But there is one thing that I find confusing. Why are the “Mesh, Point Cloud, Volume, and Instances” being routed over the network instead of just using another Group input at the end?
Current:
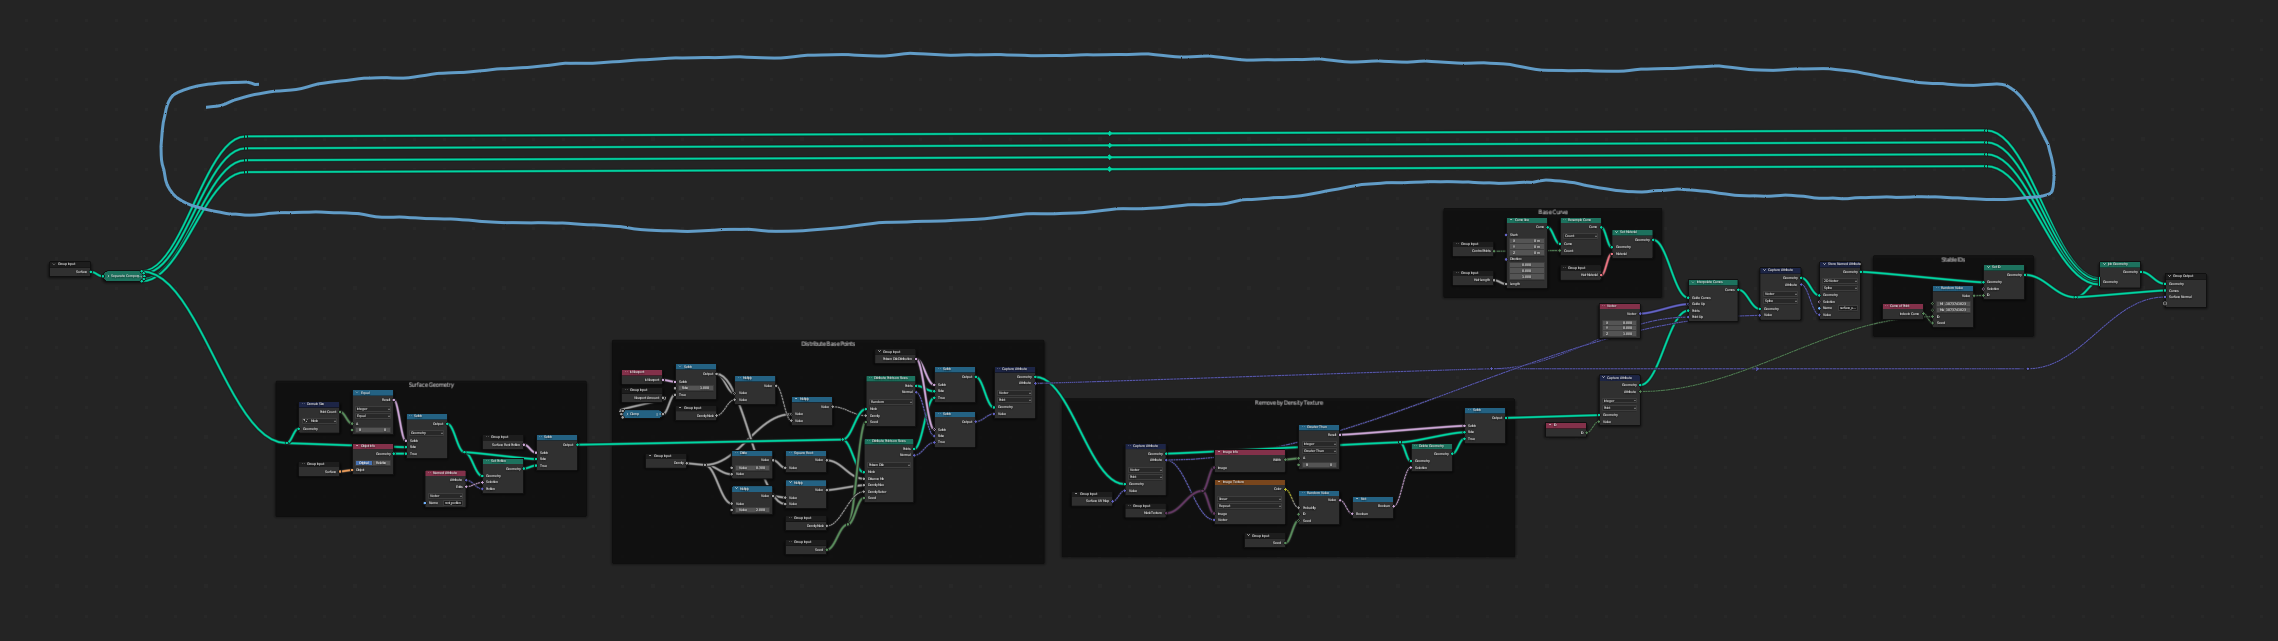
Proposed:
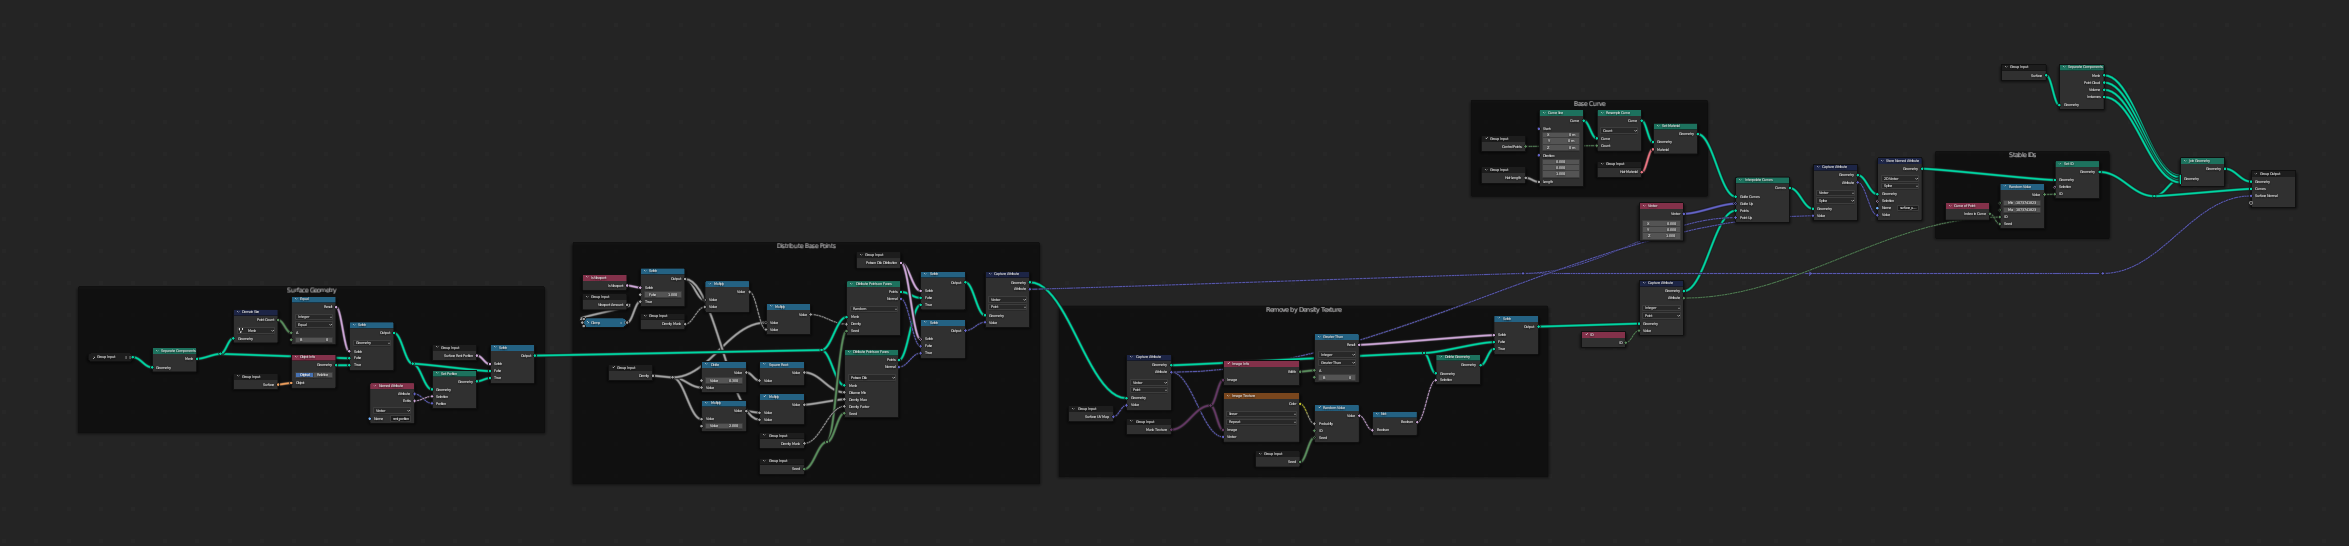
Ending closeup:
6 Likes
Yeah, it shocks me that even hardcore blender users aren’t aware you can have multiple group inputs. It needs to be advertised more.
2 Likes
Well, multiple group inputs are used in this network but not for that specific case which I don’t understand.
Maybe it is there to save performance because you only need to use the “Separate components” node only once?
It should be negligible compared to all the other stuff being calculated. ![]()
1 Like