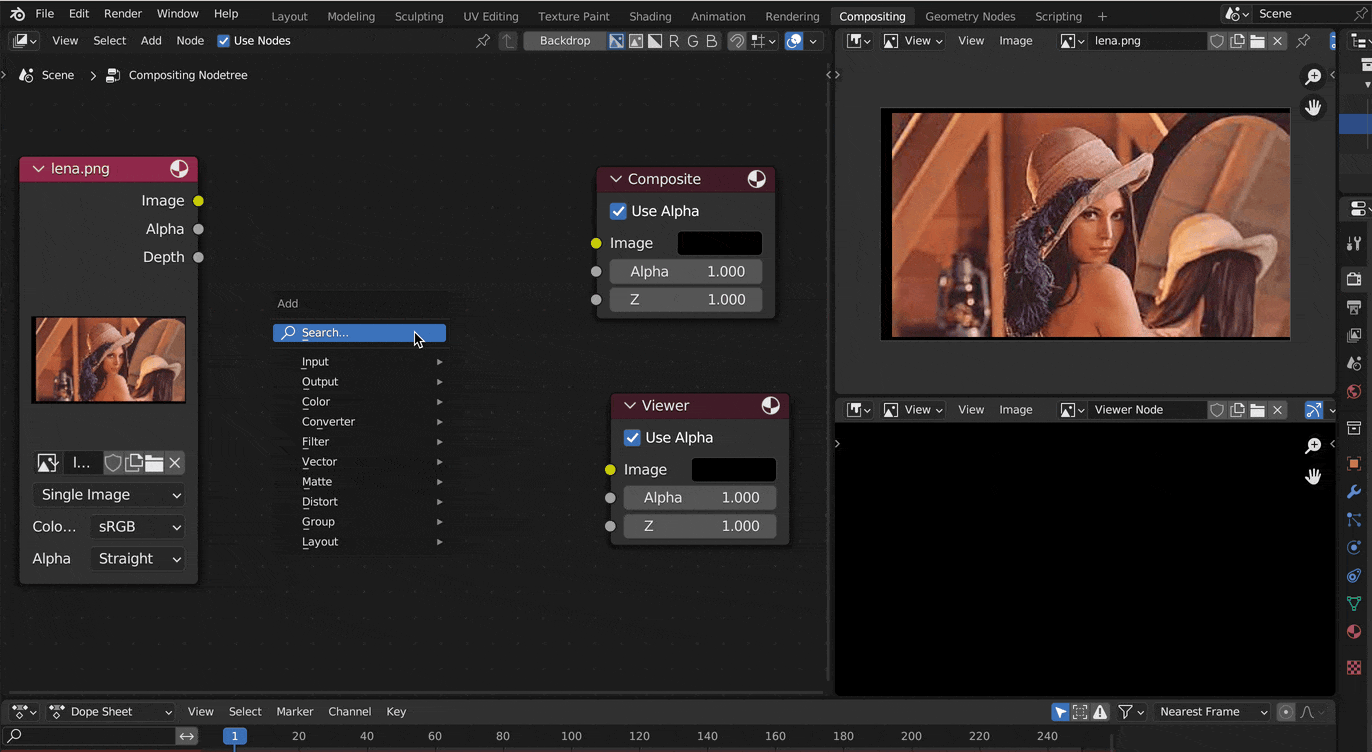
Hi, I implemented a new compositor node “Kuwahara filter” that I want to get user feedback on. The node lets you create stylized image from a realistic one.
Demo:
Note: only full-frame compositor is supported for now. Full-frame compositor is an experimental feature. To activate it:
Go to Edit → Preferences → Experimental → Enable “Full Frame Compositor”
Then go to Compositor → Optionsl and set Execution Mode to Full Frame:
Hi ! I think this filter will be familiar to anyone having used an image editor. It’s usually presented as a way to denoise. I haven’t seen “Kernel size” used in Blender anywhere. The compositor’s various blur nodes just call it “size”, but the meaning may be more obvious in the case of blurring than it is here. I think “size” might be enough.
Same goes for “sigma”, not sure the term is very meaningful to the average user, even though they can consult the doc. I would go for something that describes the effect, which you already did in the tooltip description. Perhaps “Smoothing”. edit or “Strength” ?
In any case the build doesn’t work for me. The node is a no-op, and doesn’t update on frame change.
I forgot to mention the node is only implemented for the full-frame compositor. I will add a note on the node and prevent it from crashing when used with viewport compositor.
Makes sense, I will consider renaming the parameters.
I think color of the node is inconsistent, as other filter nodes have dark purple color but this one is yellow like color nodes.
Just curious. Is there a particular reason that the soft minimum value for size is set to 4? I can see that 4 would be a good default value but the soft minimum value could be 1 in my opinion. I imagine 1~3 values have many use cases (subtler stylized look for example) and think putting in behind a soft limit makes it less discoverable.
Make it clear viewport compositor is not supported
Built packages for windows, macos and linux
Made color part of filters, so its color is now purple
Since the kernel size is an absolute value in pixels, its effect is highly dependent on the size of the input image. For 1k-4k images the value 1 almost has no effect. That’s why I chose 4.
Another reason is the anisotropic variation will only be free of visible artefacts for values >= 4 (ideally should be >=8 actually). I also adjusted the default for smoothing accordingly, where the effect starts to get noticeable starting from the value 2.
I don’t think strength reflects the effect well. Kernel size (now called “size”) is the value actually affecting strength. Sigma (now called “smoothing”) only influences edges but not how “stylized” the image looks. So I went with the user-centric name “smoothing” : )
The image sequence is PNG 1920*1080, and I’m not sure if there is a way to log the execution time, but it updates on frame change in about 0.6 or 0.7s on this machine (gtx970).
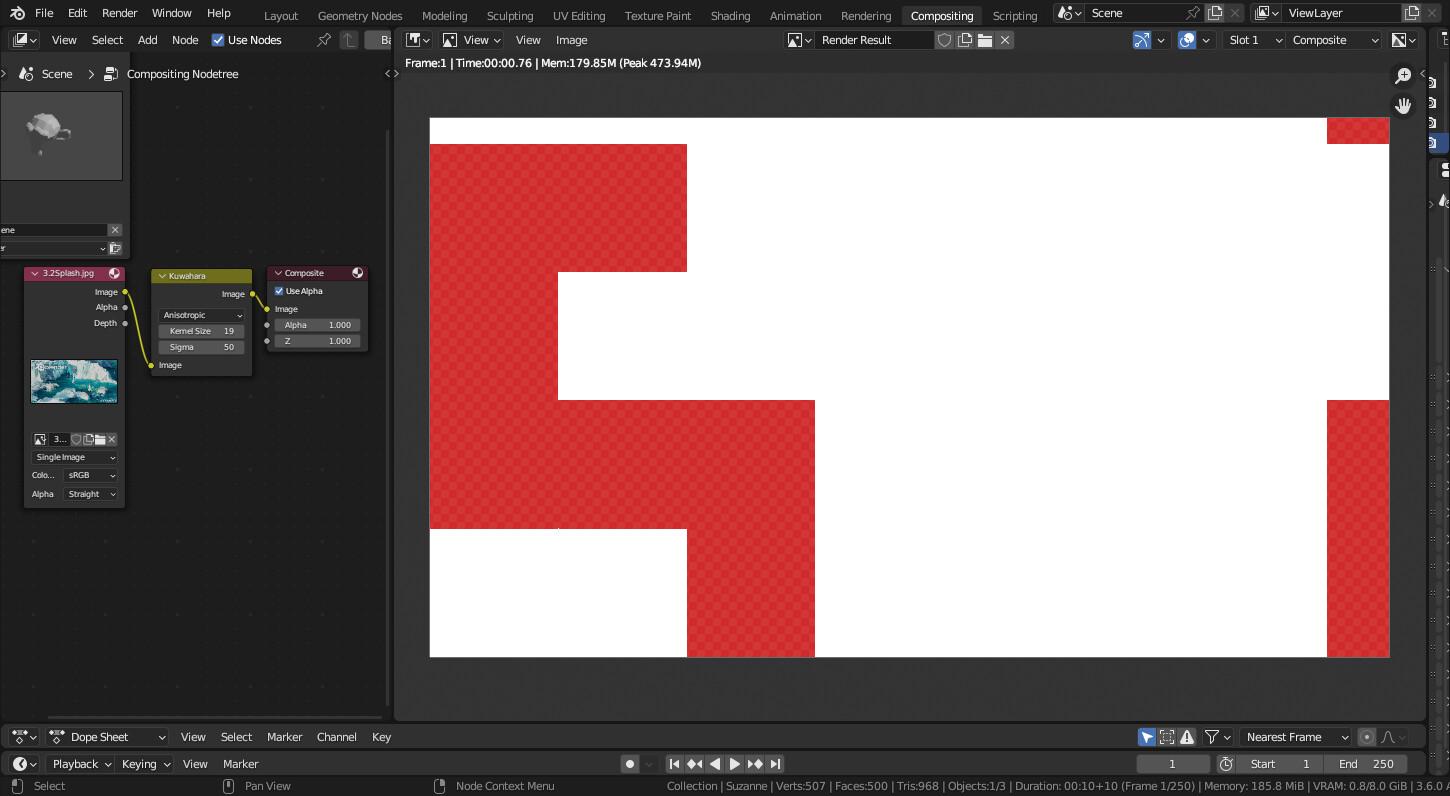
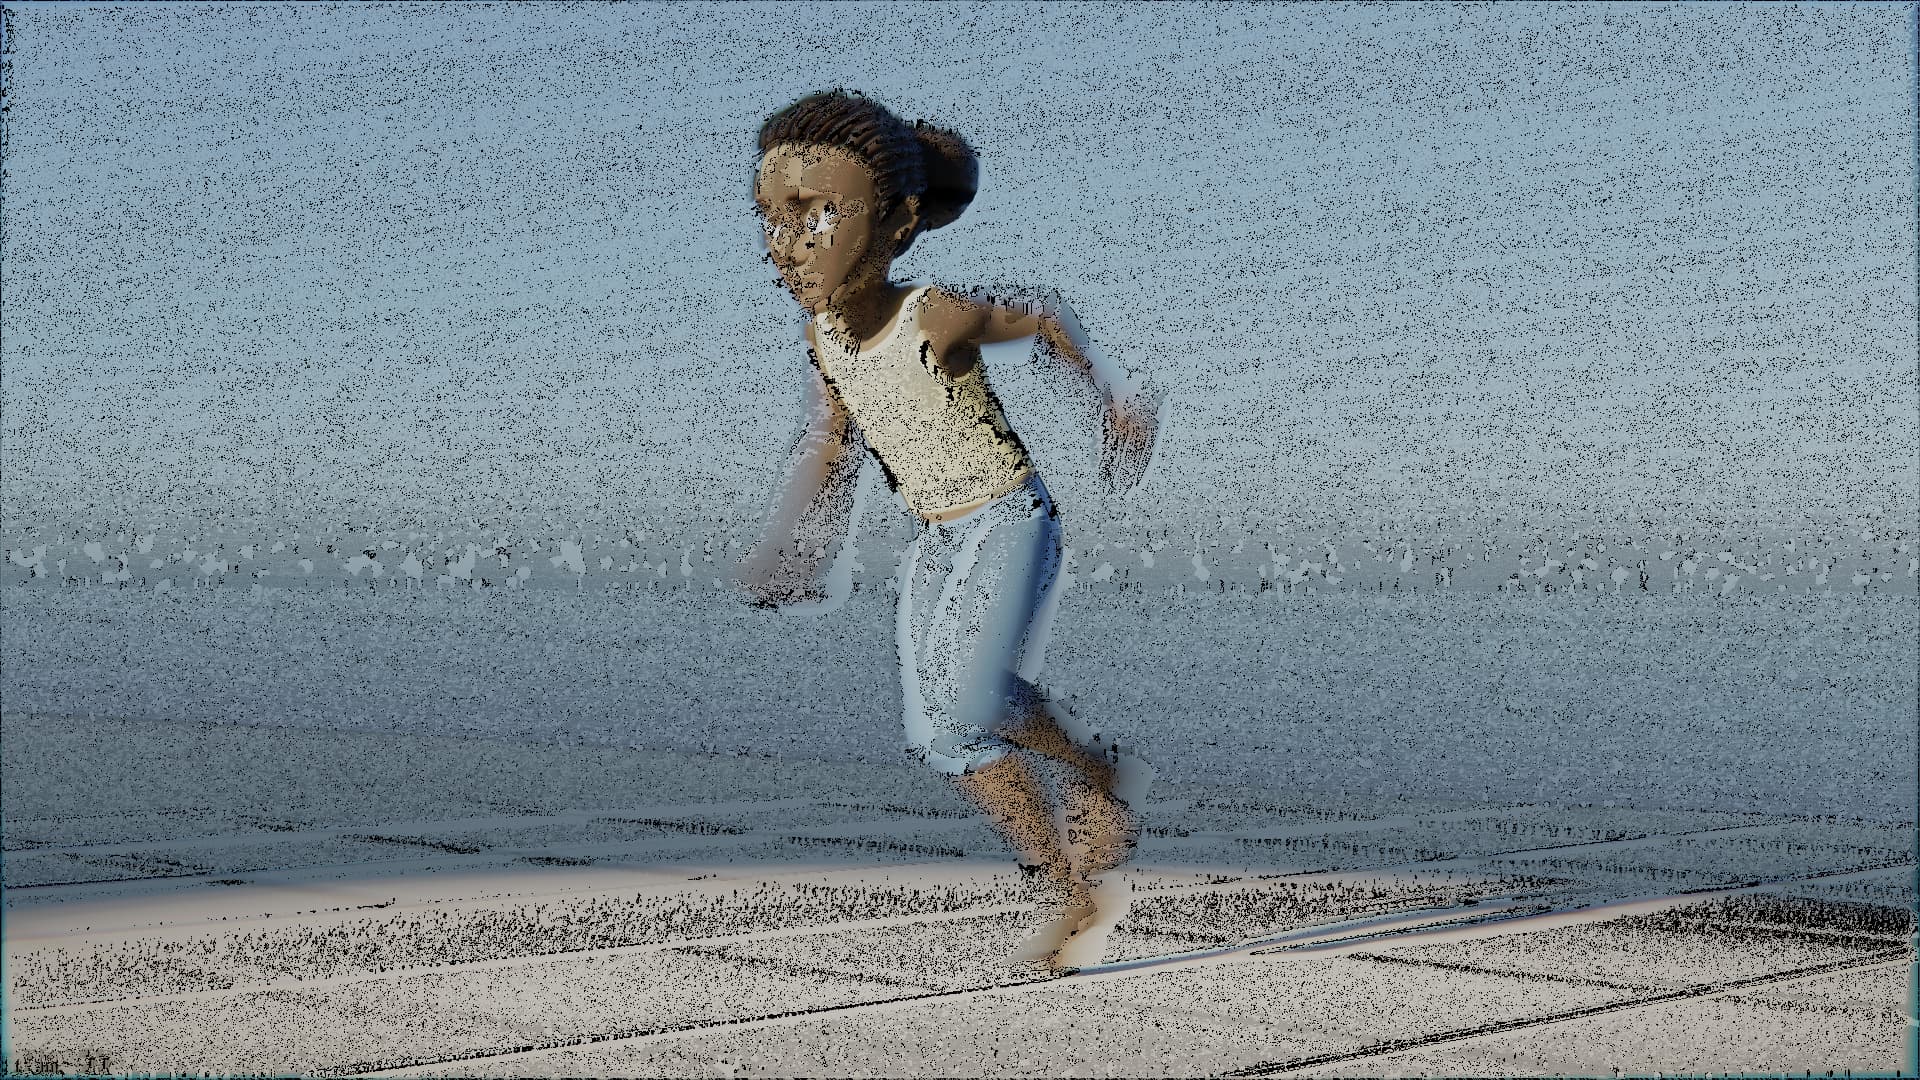
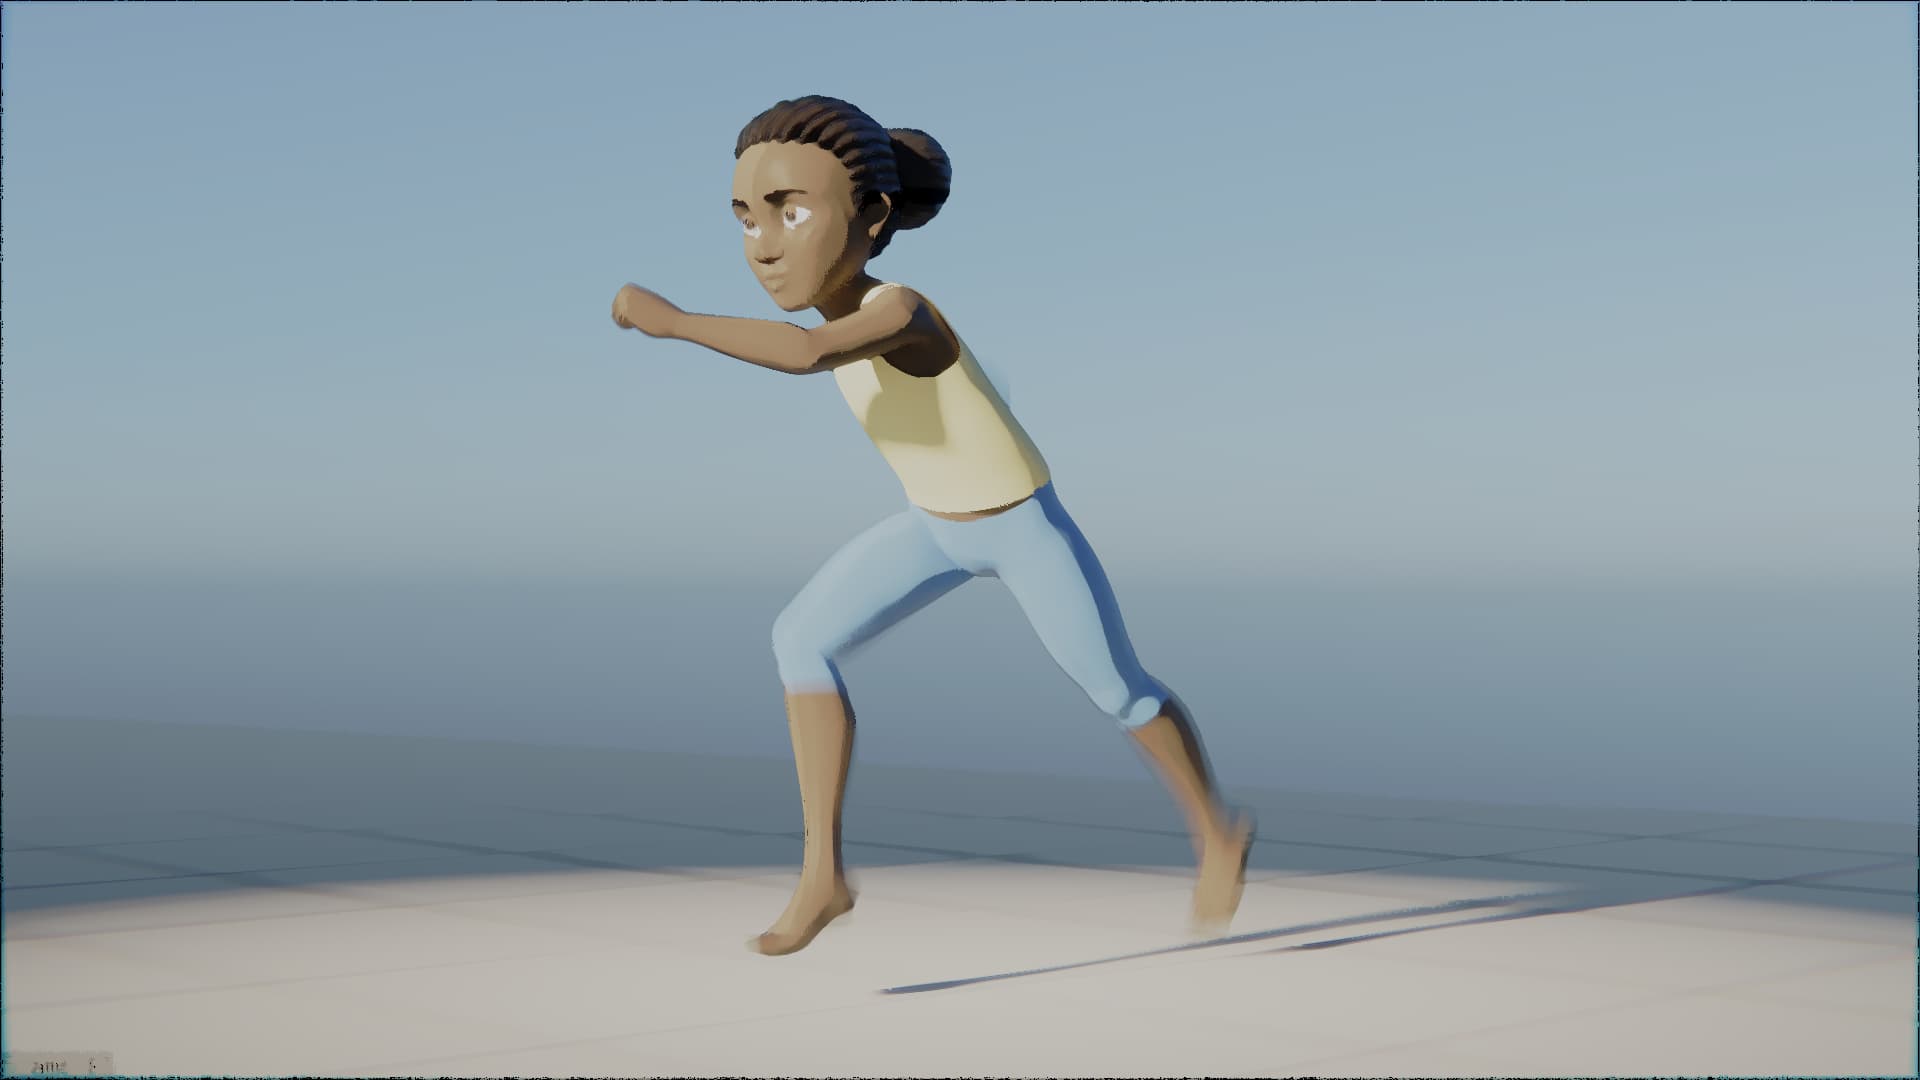
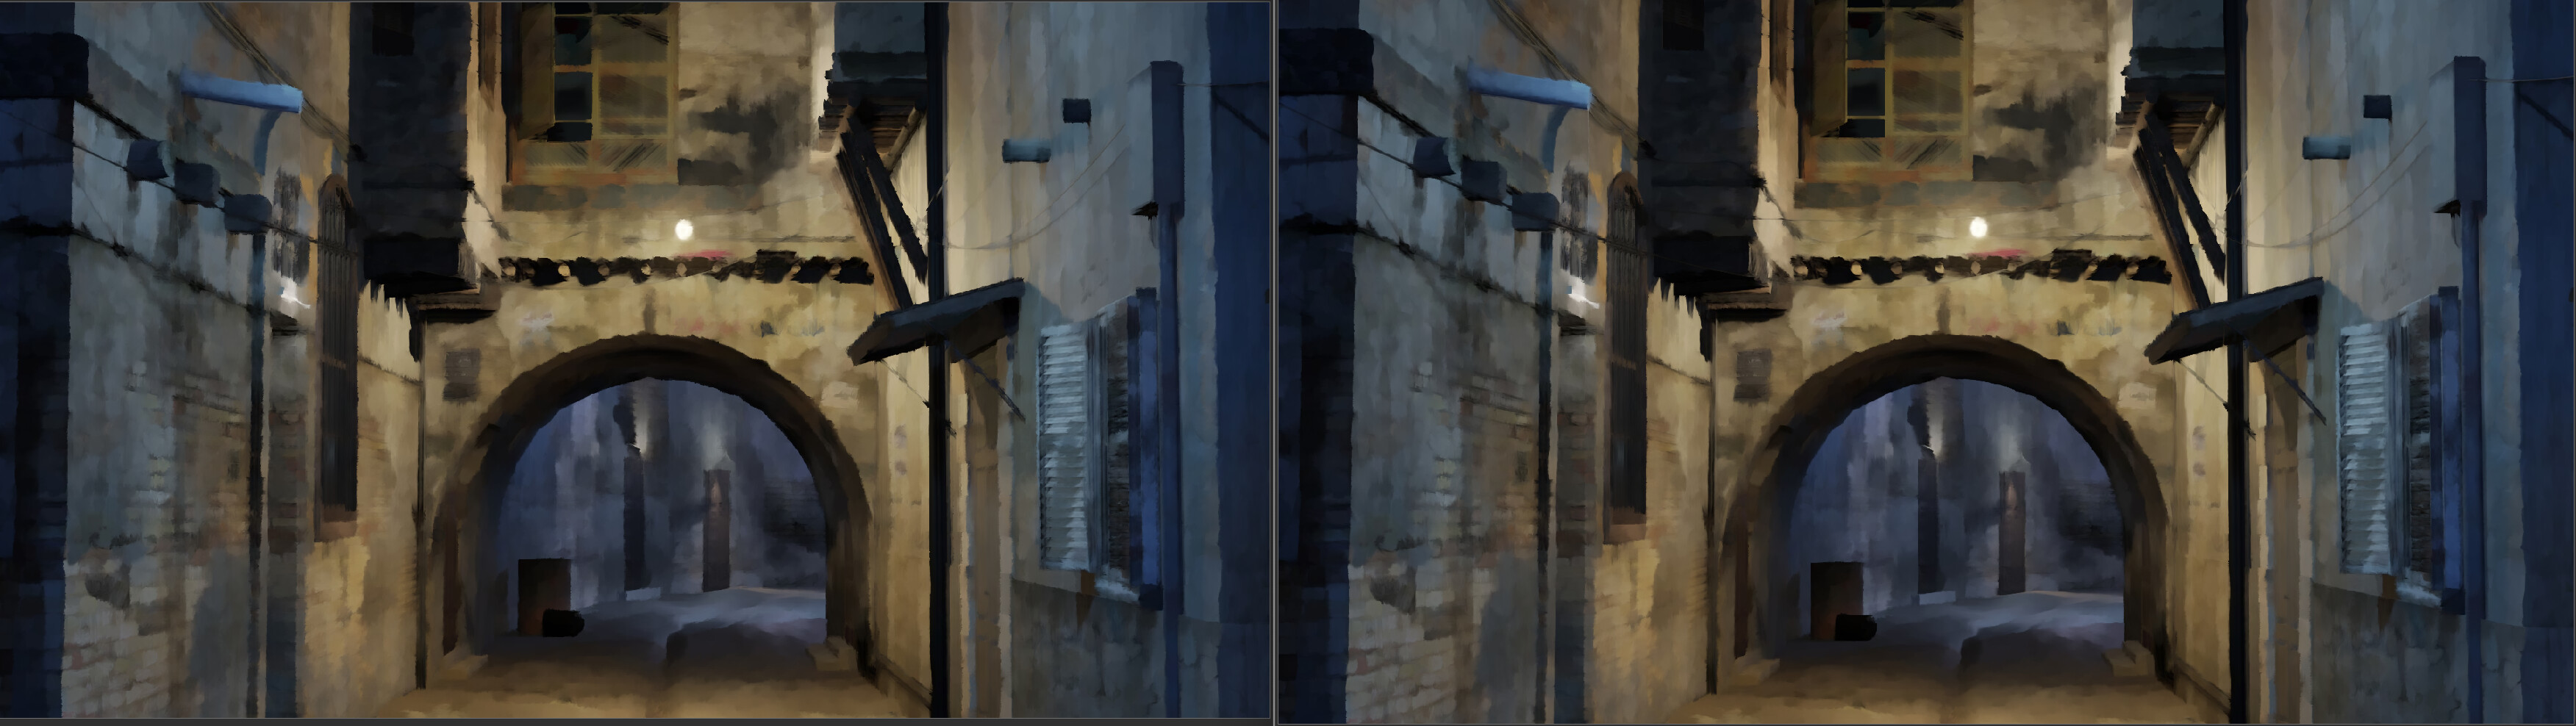
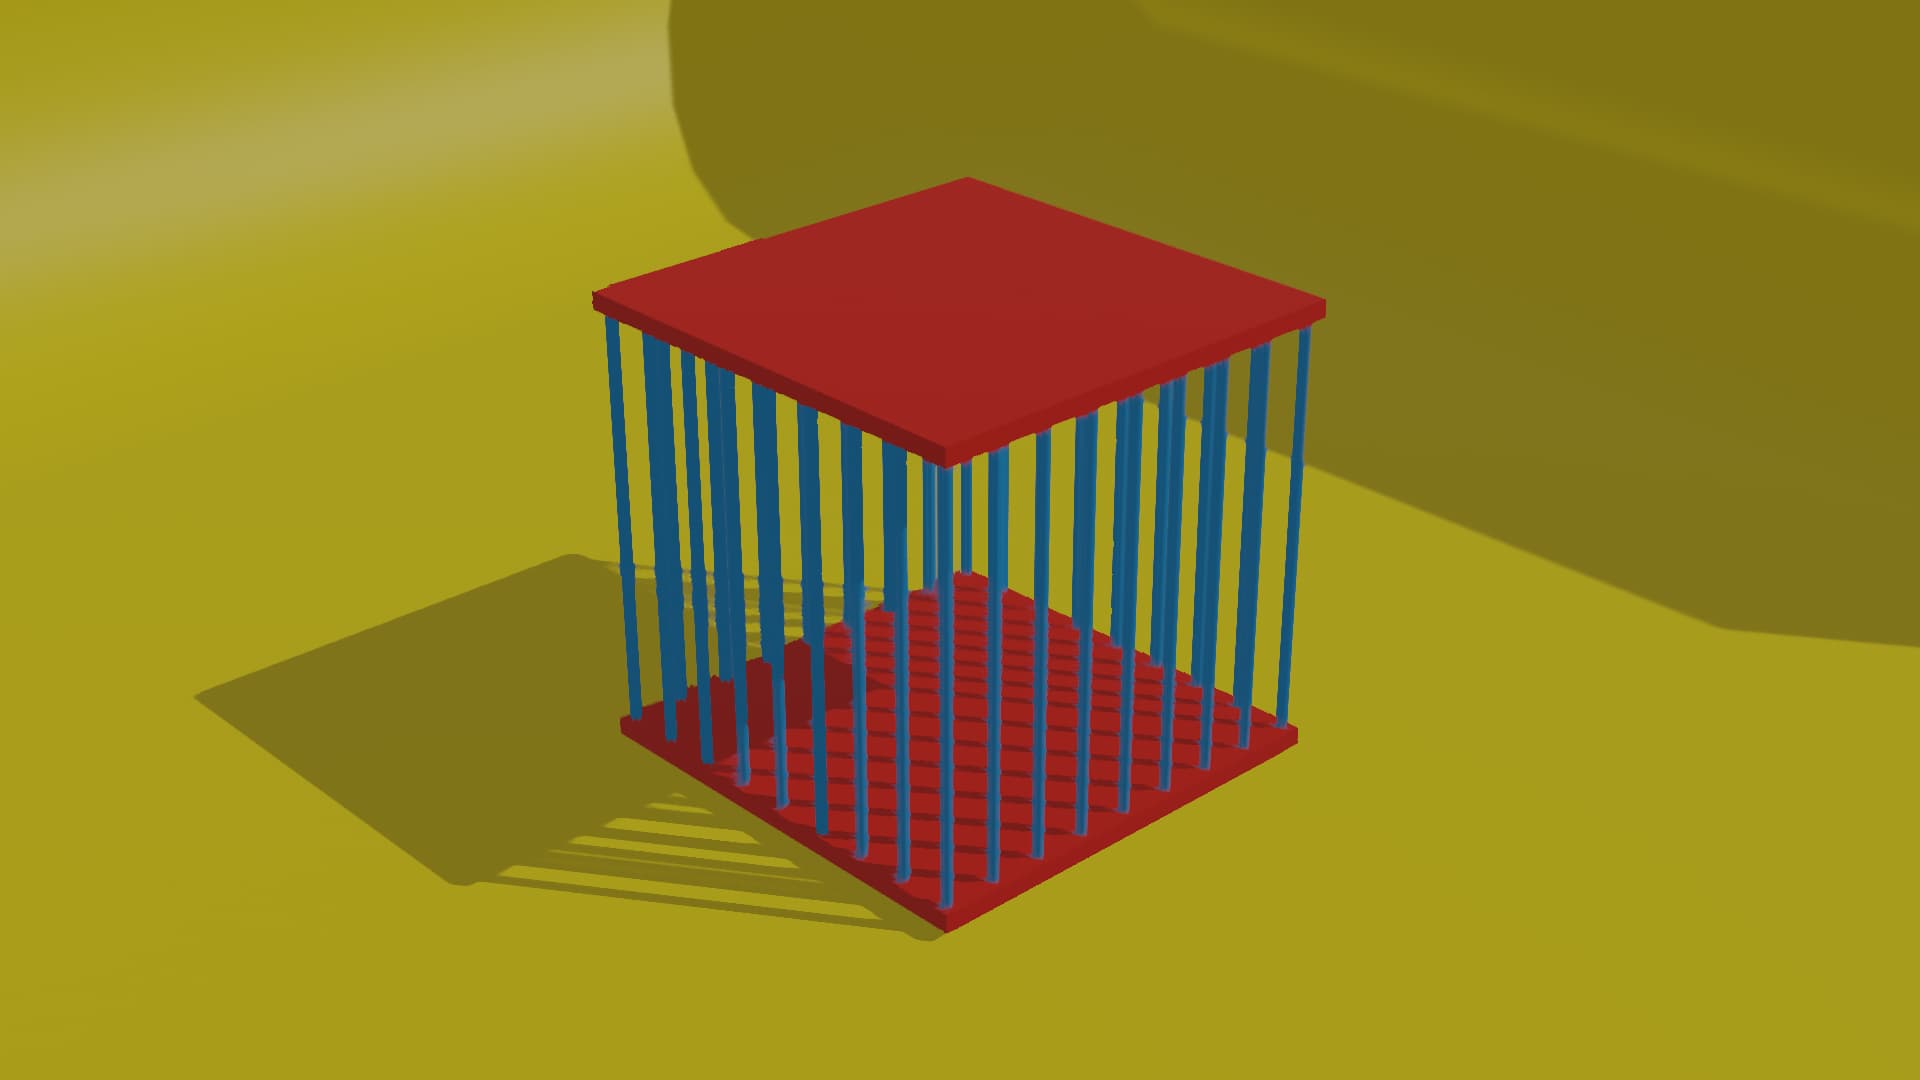
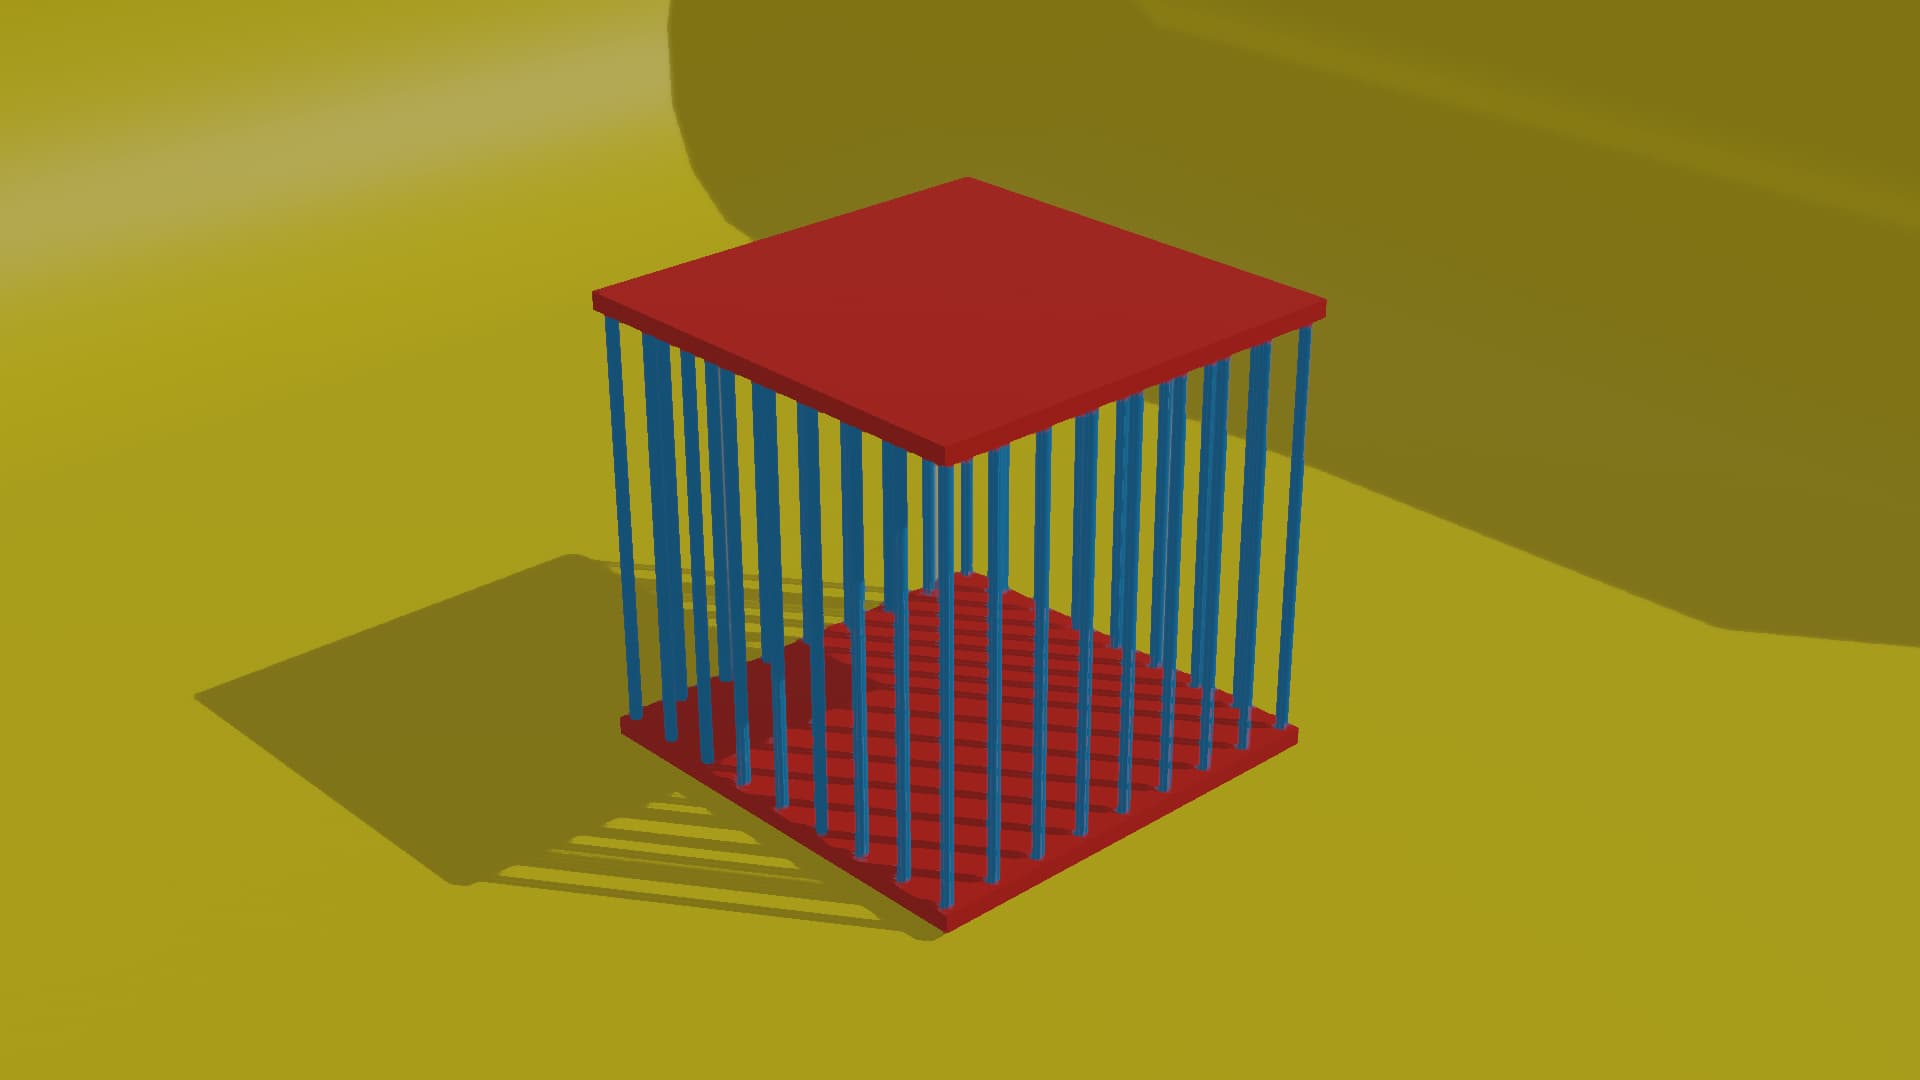
Anisotropic variation is now 4x faster. However, results are less accurate, and this is what this post is about.
The patch #108796 speeds up the anisotropic variation significantly, but results are less accurate. We would like to ask for artist feedback regarding the significance of the difference.
Following images show how the new patch affects results (left: original, middle: fast and inaccurate, right: slow and accurate):
Hello! First of all, let me congratulate you on getting this into main, thanks for your awesome work and for adding this long awaited node !
Here’s my two cents on the speed vs accuracy, coming from a studio perspective that specializes in stylization in Blender:
It’s true that the “accurate” version can run prohibitively long sometimes, in a sense where it almost hinders the artistic process of iterating over the settings to adjust the node tree (it’s also a limitation of the compositor which has no caching, meaning any variation in a node tree containing the Kuwahara filter basically grinds to a halt at every variable change.) That being said, the results are very promising and great in most cases, and stable enough for animation.
The fast version enables faster tweaking which is great for the compositors, but as @sunkper demonstrated, the artifacts generated (and flicker heightened during animation) in some cases unfortunately simply render the shots unnacceptable from a quality standpoint, making the filter unusable in some demanding production settings.
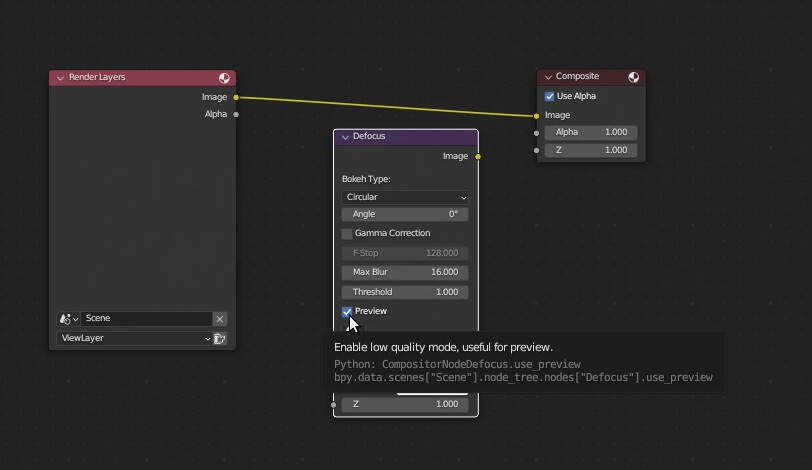
Ideally, I would say the best option is to have a “preview” toggle such as with the defocus node, which switches between the fast and accurate algorithms:
However, I understand that this might not be the most optimal option for you as you’d have to maintain and update both implementations.
If I really had to pick one, I would choose the accurate version, even if it means much slower performance (and keep my fingers crossed for performance updates, and more importantly, the GPU implementation, as it could resolve all performance issues!)