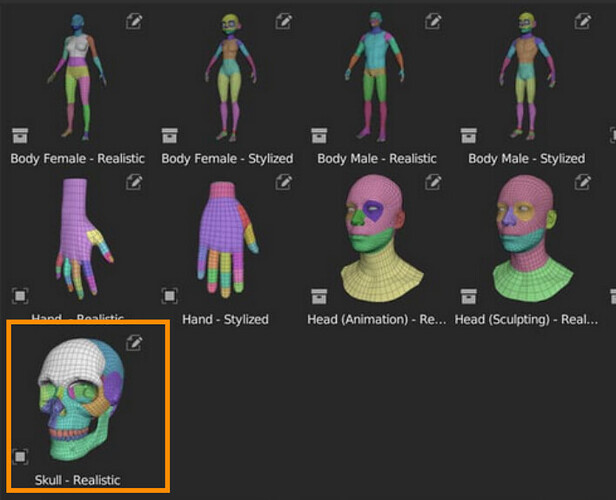
I think you can take final Realistic Skull asset from the bundle to check how exactly it was unwrapped.
I guess the skeleton UV is supposed to be similar.
Use as many UDIMs as you like. Go nuts ![]()
I think the seams can be placed pretty freely. On the skull I placed them primarily at the creases between major separations (same as the face sets). But the rest of the skeleton doesn’t have them defined that much, which is fine.
The skull already has UV maps. If not then those can be transferred from the original asset.
The only difference between the skull and skeleton asset is that the skeleton has a slightly downscaled skull.
I am going over all the head asset scales atm and adjusting them to fit each other more realistically.
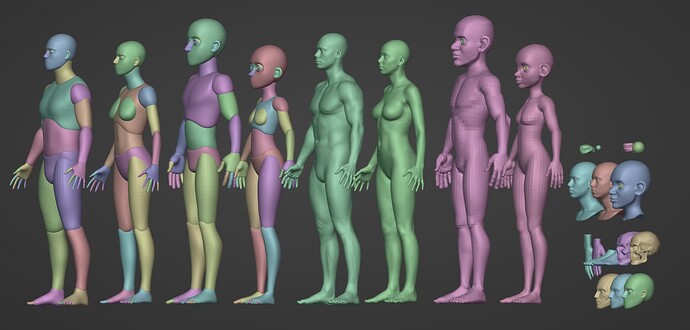
Okay, at the next step I decided to reconcile both parts of a Sculpting Base.
I has got a couple of ideas how to reach that - to borrow Realistic sculpting head topology and refine LP body.
At this time I made an important decision to not to reinvent a wheel and it actually worked out well.
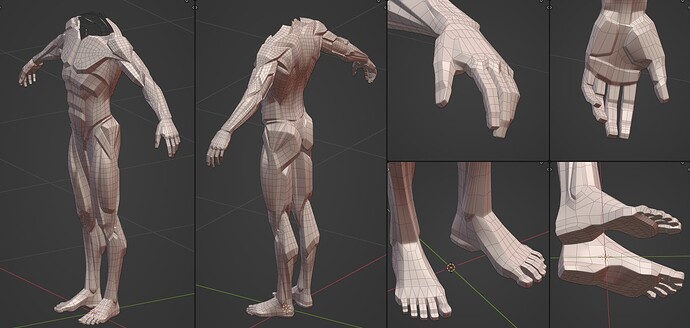
The result was a better hand topology, which very usefully required an extra loop between the thumb and palm.
Then I spread the resulted topology across the other shapes and it fit nicely.
I especially enjoyed transferring palms and foots, it is so easy to transfer box-shaped fingers.
As a result I has got a shapekeyable solution that passed testing quite smoothly.
I placed all the test models below zero in case if they could be interesting.
Here is the resulting file (Bundle Skeleton+Blockouts+Head+LP_v10.blend)
https://pixeldrain.com/u/fY6SkwNN
I think we are getting dangerously close to our ultimate goal.
Hey Julien,
I uploaded a male counterpart to the female to the repo in case it’s useful. Topo and UVs should be consistent (need to double check vert order as well to be safe) As always, feel free to tweak and modify as needed.
I’m planning to further refine the models in the repo, it’s just finding the time that can be tricky. ![]()
As the next step, I decided to give a test to the resulted Sculpting base.
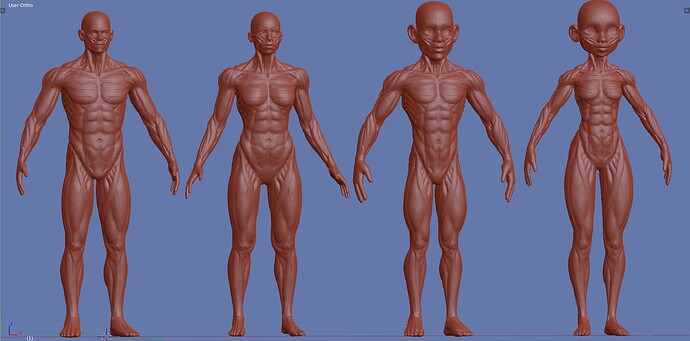
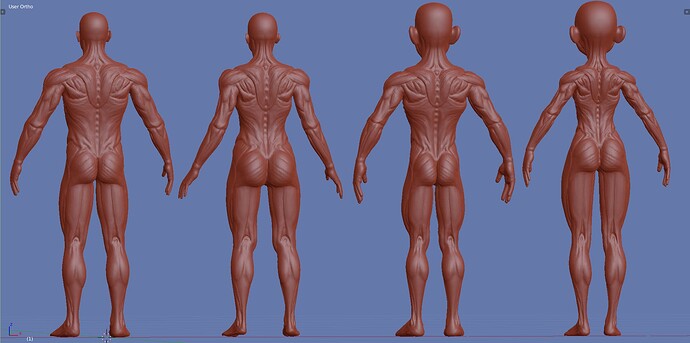
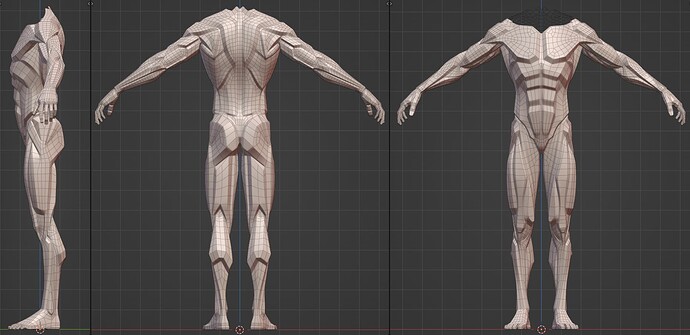
Planar head model was pretty good example, but testing better be quite stressful so this time I decided to draft an Écorché.
Mutires level 6 gives 10mln vertices while remain fast enough, but I decided to use Multires level 4 which gives ~600 k vertices.
I made a sketch of a realistic male shape following different anatomic guidelines, then I assigned shapekeys, and here is how it looks like.
In my opinion the topology works pretty nice, but I am not sure if I am confident enough in this area.
So here is a separate file with the resulting sculpt and shapekeys (Sculpt_base_Ecorche_v01.blend)
There is no hurry I guess, pesonally I have other cats to skin.
In the background I explore the compatibility of a sculpting base with different stylization and do some polishing.
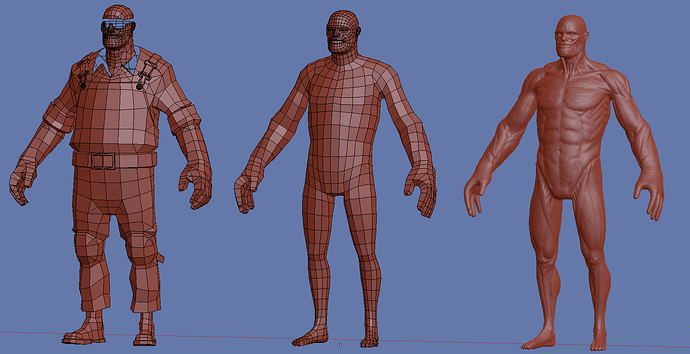
For instance, TF2 style (engineer model).
It really shows how versatile these topologies are as base meshes! ![]()
But I’d say it’s not that helpful to include the shapekeys on the ecorche sculpts. It’s skews the sculpted displacement so much that it’s no longer accurate enough to be reflective enough of the base shapes.
Sure, I made it mostly for concept testing purposes, to check how the details follows the shape.
Also, for example, sculpting female ecorche could be more convenient having distorted base rather than making it for scratch.
For testing purpose I made a child shapekey for our archviz project and in the process I managed to formulate the problem that had been spinning in my head all this time, which I also faced during making head LP.
An eyebrow problem.
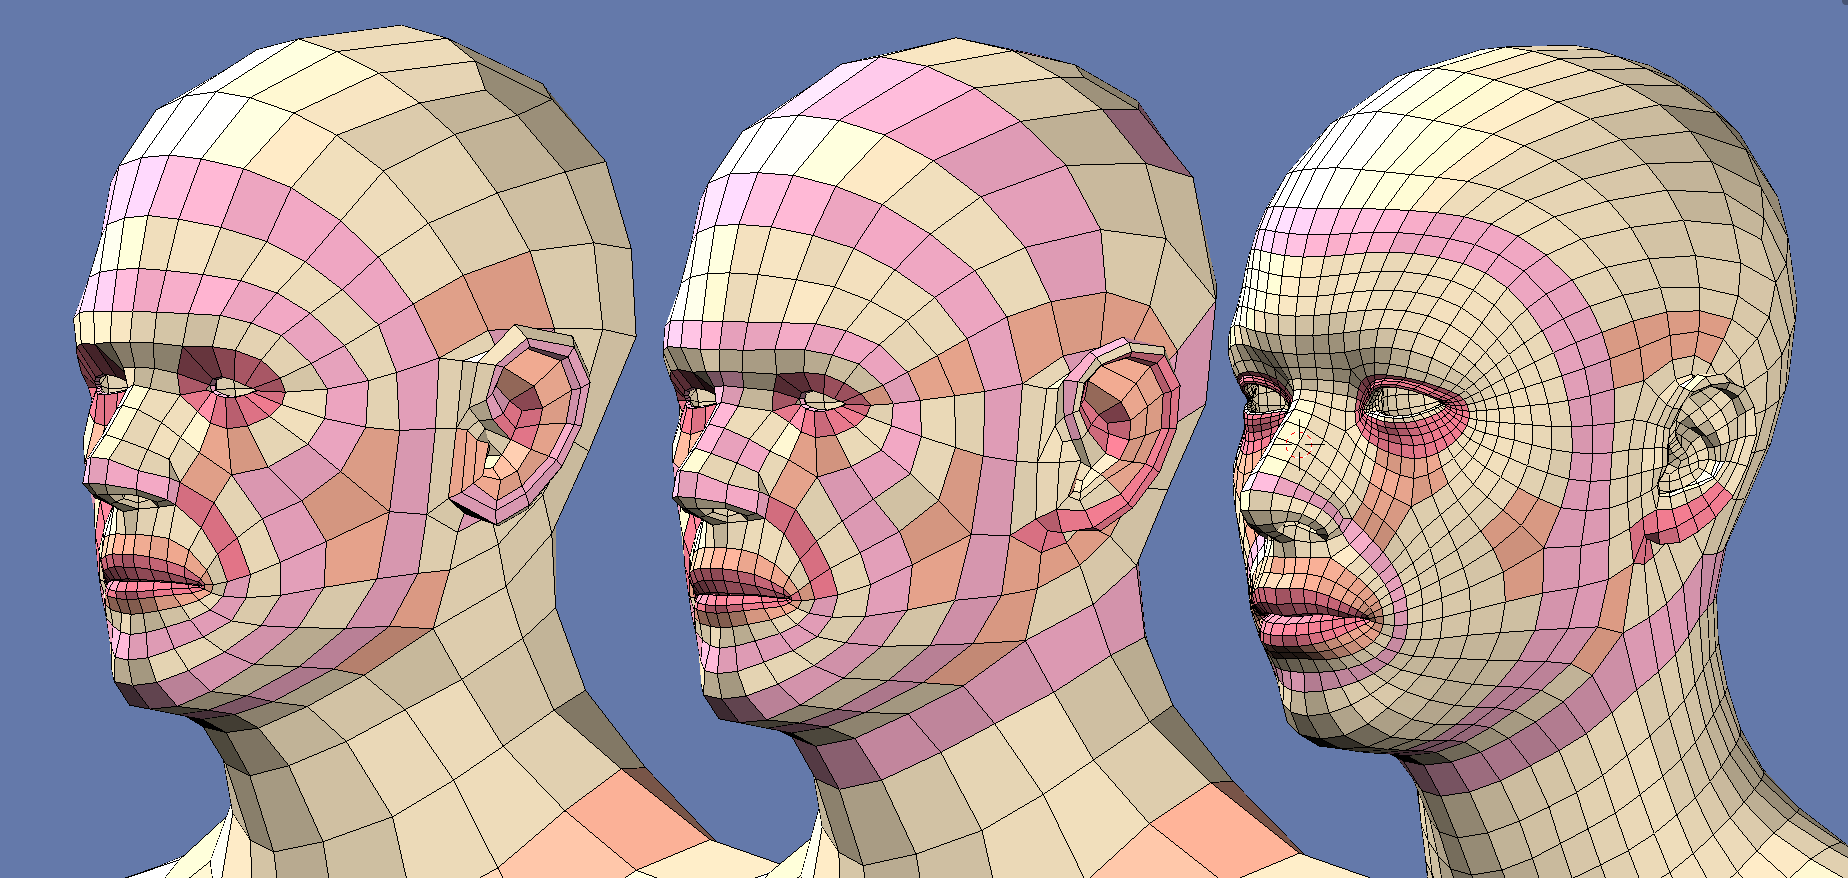
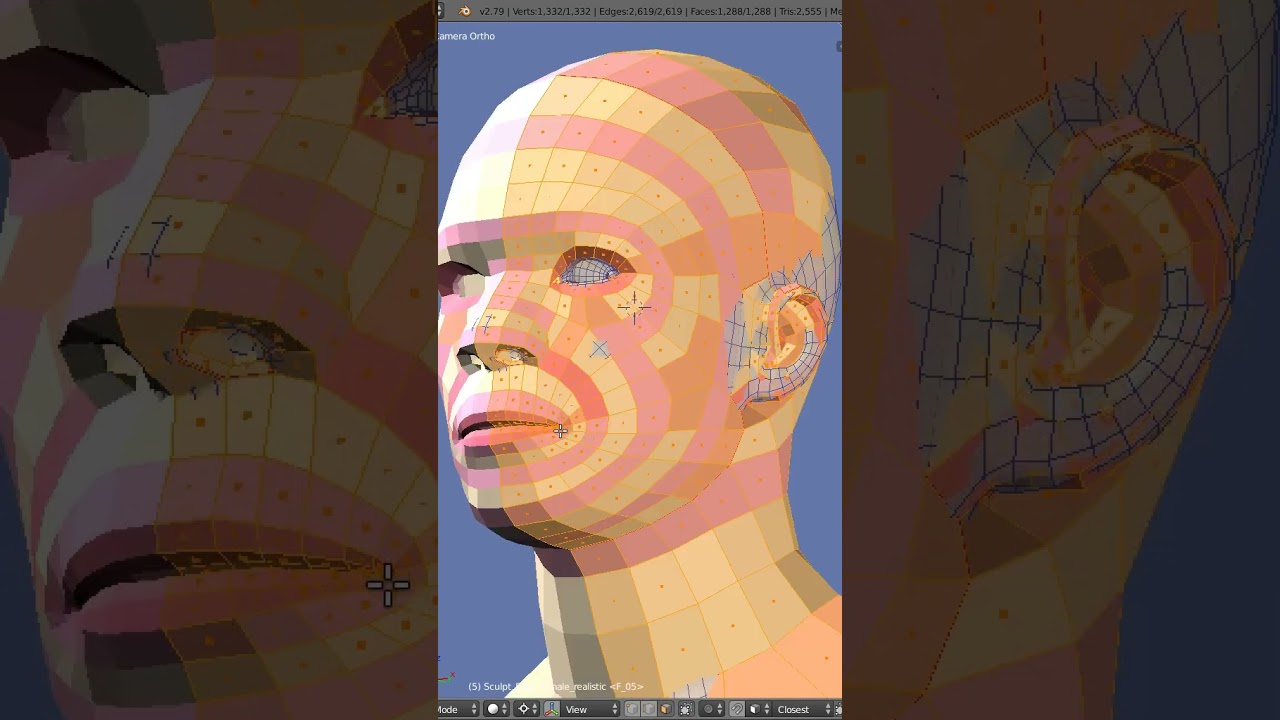
The problem is that eyebrow/forehead/cheek has less topology than jaw, as a result there is no predefined loop specifically for eyebrow - the existing one shifts back and forth from model to model.
As it turned out, it is possible to add pretty cheap self-eliminating loop to solve it.
It adds 65 vertices, so multires levels will be 3% heavier, but the resulting topology will experience less tension in this area, so it seems to be worthful.
However, this makes ecorche sculpt immediately obsolete)
From the other side, fixing this on shapekeyed model will allow to reconstruct all the basemeshes faster.
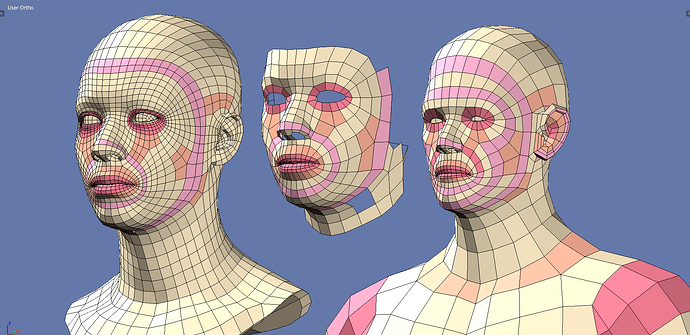
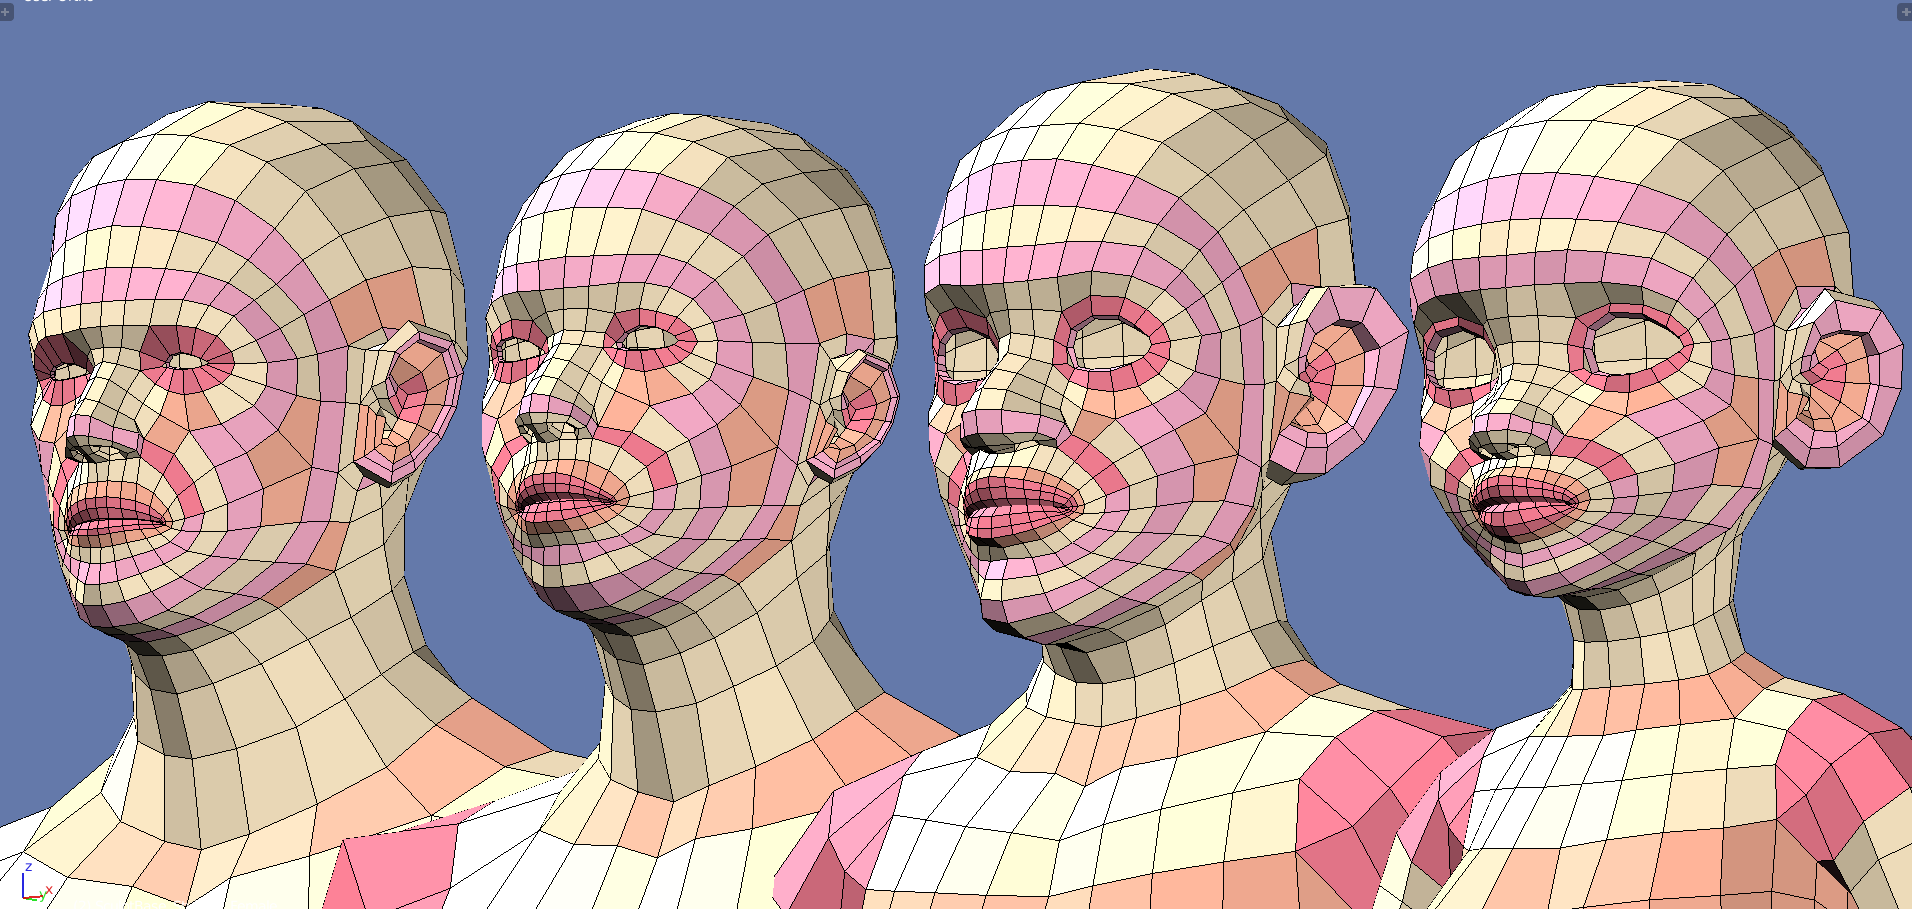
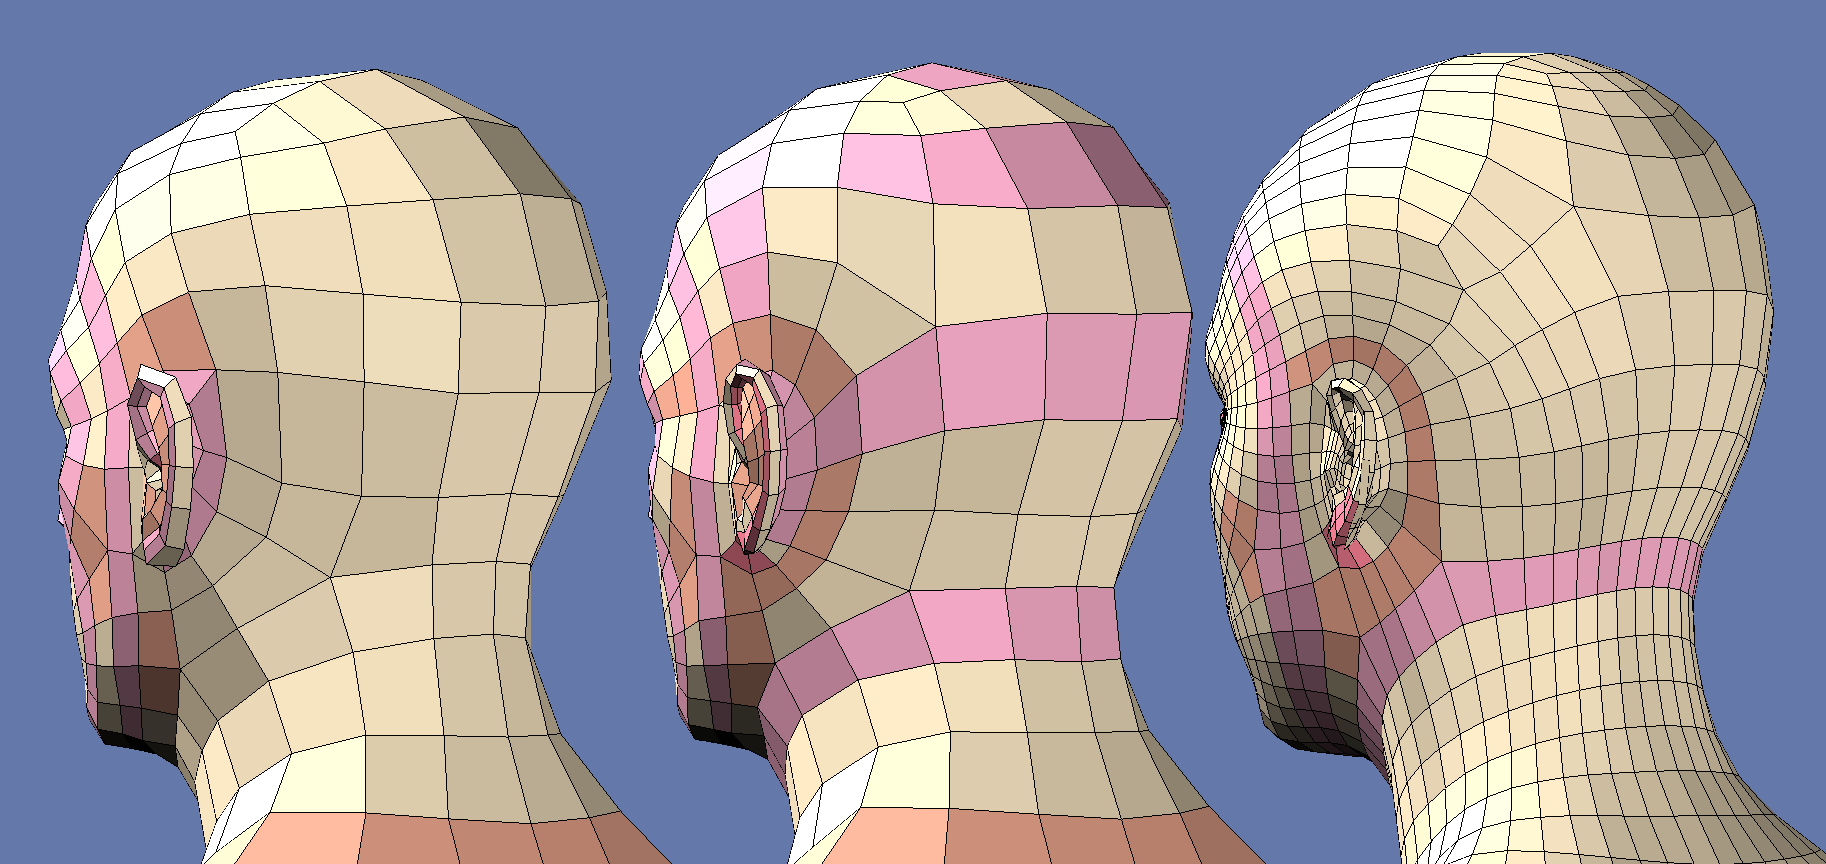
Okay, I decided to make it in a hard way, instead of a slightly eyebrow polishing I also added uvula and tried to refine and rework an ear topology to match its topology flow to the original sculpting head.
9th attempt:
I also reworked the topology flow of the back of the head to achieve similar results.
Pretty massive changes are coming that will take some time.
The primitive and realistic base meshes are all cleaned up with better naming, transforms, origins, UV maps & face sets.
I added a primitve realistic head to use as a standalone asset and for the realisitc primitive base meshes.
The original generic topology of @1D_Inc is also included with all it’s shapekeys and another version with the planar multires subdivs on it.
The realistic male base mesh from @dan2 needed some retouches on the symmetry but was otherwise good to go. It now properly replaced the old realistic male base mesh ![]()
Looks awsome!
A lowbow from T-1000 for the shapekeys)

Can you please share how did you detected/fixed asymmetry of the model with multires sculpting ontop of it?
Luckily the topology was already symmetrical. So I enabled the “Topology Mirror” option with X Mirror enabled in edit mode and just selected everything and moved it 0 units.
It’s abusing an issue with mirror to snap both sides to the same location.
That doesn’t work for the center loop so I scaled that one down along the X axis to 0.
I did some more adjustments on top because the face became wider as a result.
I left the subtle asymmetry from the multires levels as it is. The whole process worked instantly because the base from @dan2 already had a rebases topology and is really well done ![]()
Tbh I wish the “Snap to Symmetry” operator would work better for this purpose. But it has a hard time detecting the correct verts on high poly models or heavy deformation. It’s better for asymmetrical models though.
Looking good – this available for download yet?
FYI: I’ve got some personal stuff happening for the next few weeks, I’m not gonna get much done on UV mapping the skeleton for a while. I’m not giving up, just wanted you guys to know.
In the main description at the top there’s an svn repository link. That’s where I save the latest work files.
That’s fine. There are some more base meshes to work on in the meantime. Just let us know if you can’t get to it after all so someone can take over.
Hello!! you all are doing an amazing work!!!
I’m try to finish the planar body, the only thing missing now is the neck and head.
@JulienKaspar do you want to have the model I’m doing as is now, so you can put planar hands and feet on the asset package? also you can chop it as you like until I finish it complete?
I’ve tried to improve ear topology even more to avoid topological twists and didn’t succeed.
So now I reshape the models, the workflow is pretty much straightforward and beginners friendly - cavities first, then loop reprojecting and final shape refine.
UPD. I asked for a help in our local group and they advised to not to touch an ear topology, but refine an occipital zone instead, since it is too much lowres, and head topology better be more evenly sized.
And it worked)
The solution shifts a pentagon, but it is quite far from the ear anyway, so the solution seems to be nice.
That looks fantastic!
You can keep working on it for now. No need to chop it up yet.
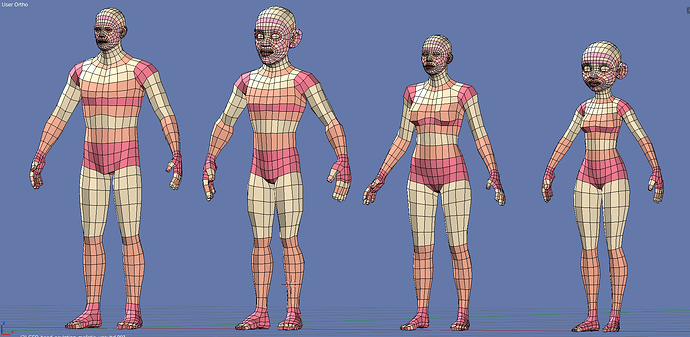
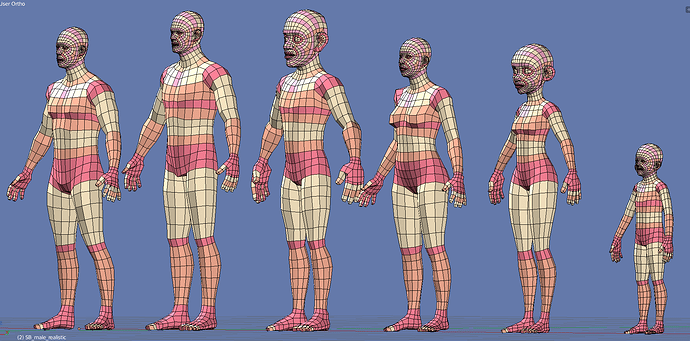
Here is the latest version of a lowpoly Sculpting Base.
Not sure if I would be able to present something essentially better that this topology.
I also added a child model and joined other shapes to it as shapekeys - for testing purposes.
Bundle Skeleton+Blockouts+Head+LP_v11.blend
Model’s scale is not applied for the sake of a shapekey (foot-eye) size compatibility.
