Speaking of a of a limiting conditions, I also tried to set UV seams.
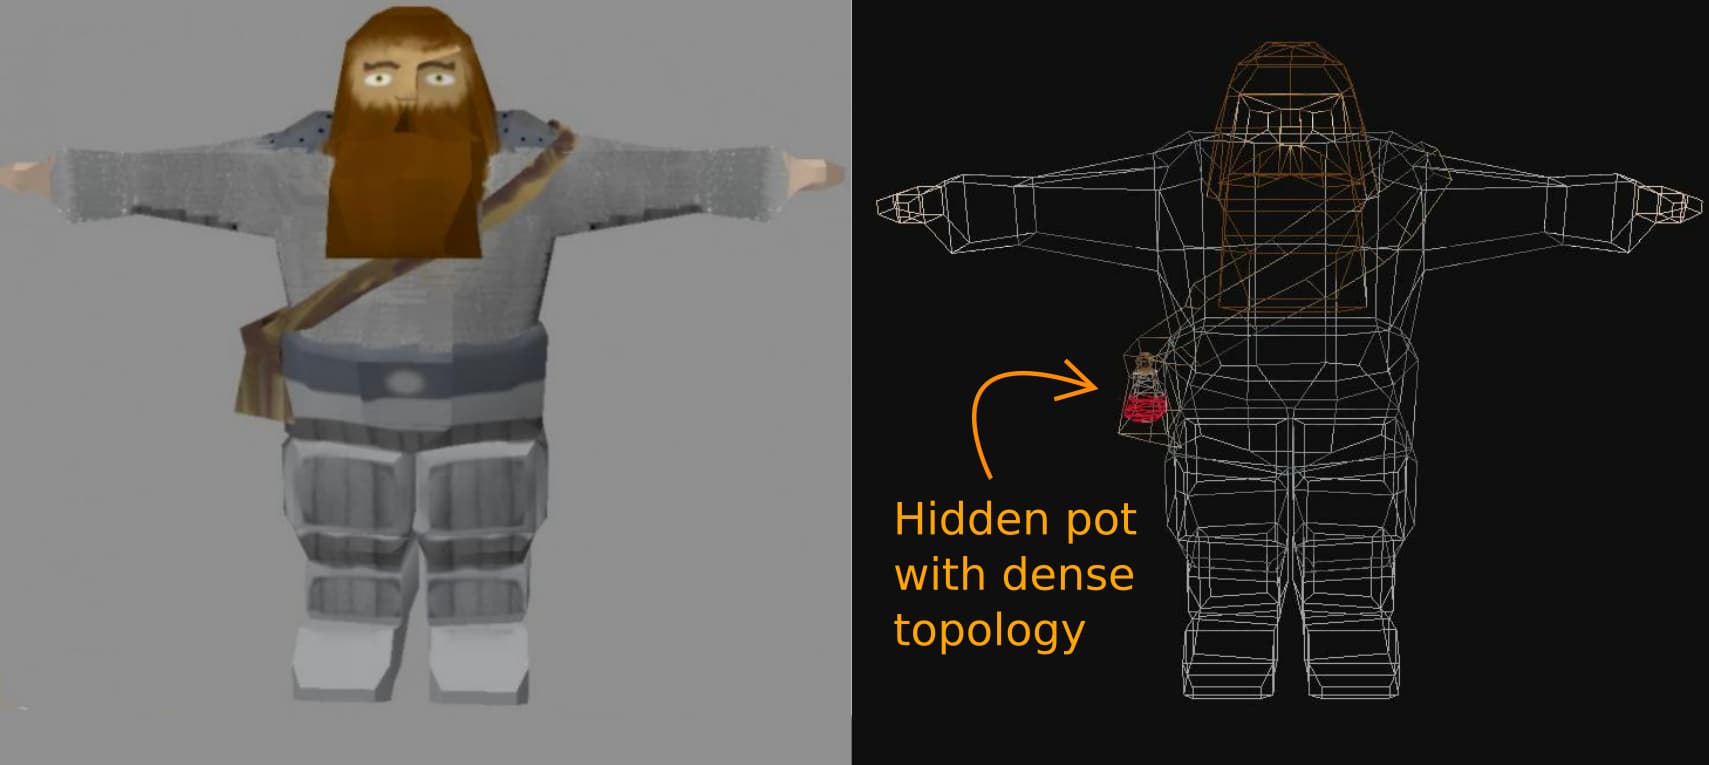
UV is also one of a reasons I am not sure that highpoly could be efficiently replaced with LP+multires.
The problem is that LP’s topology is not that flexible as subdiv’s - there are no that much topology to operate, so it is technically possible to unwrap them, and such a UV will be useful, but it will not be as optimal as UVs with seams assigned to subdives.
For example, box-shaped LP fingers could be unwrapped only as boxes.
Last days I was busy with different regular work, mostly architectural.
However, I did come up with a few ideas and tried a couple of things during procrastination, which was helpful when needing a break from the topological mess.
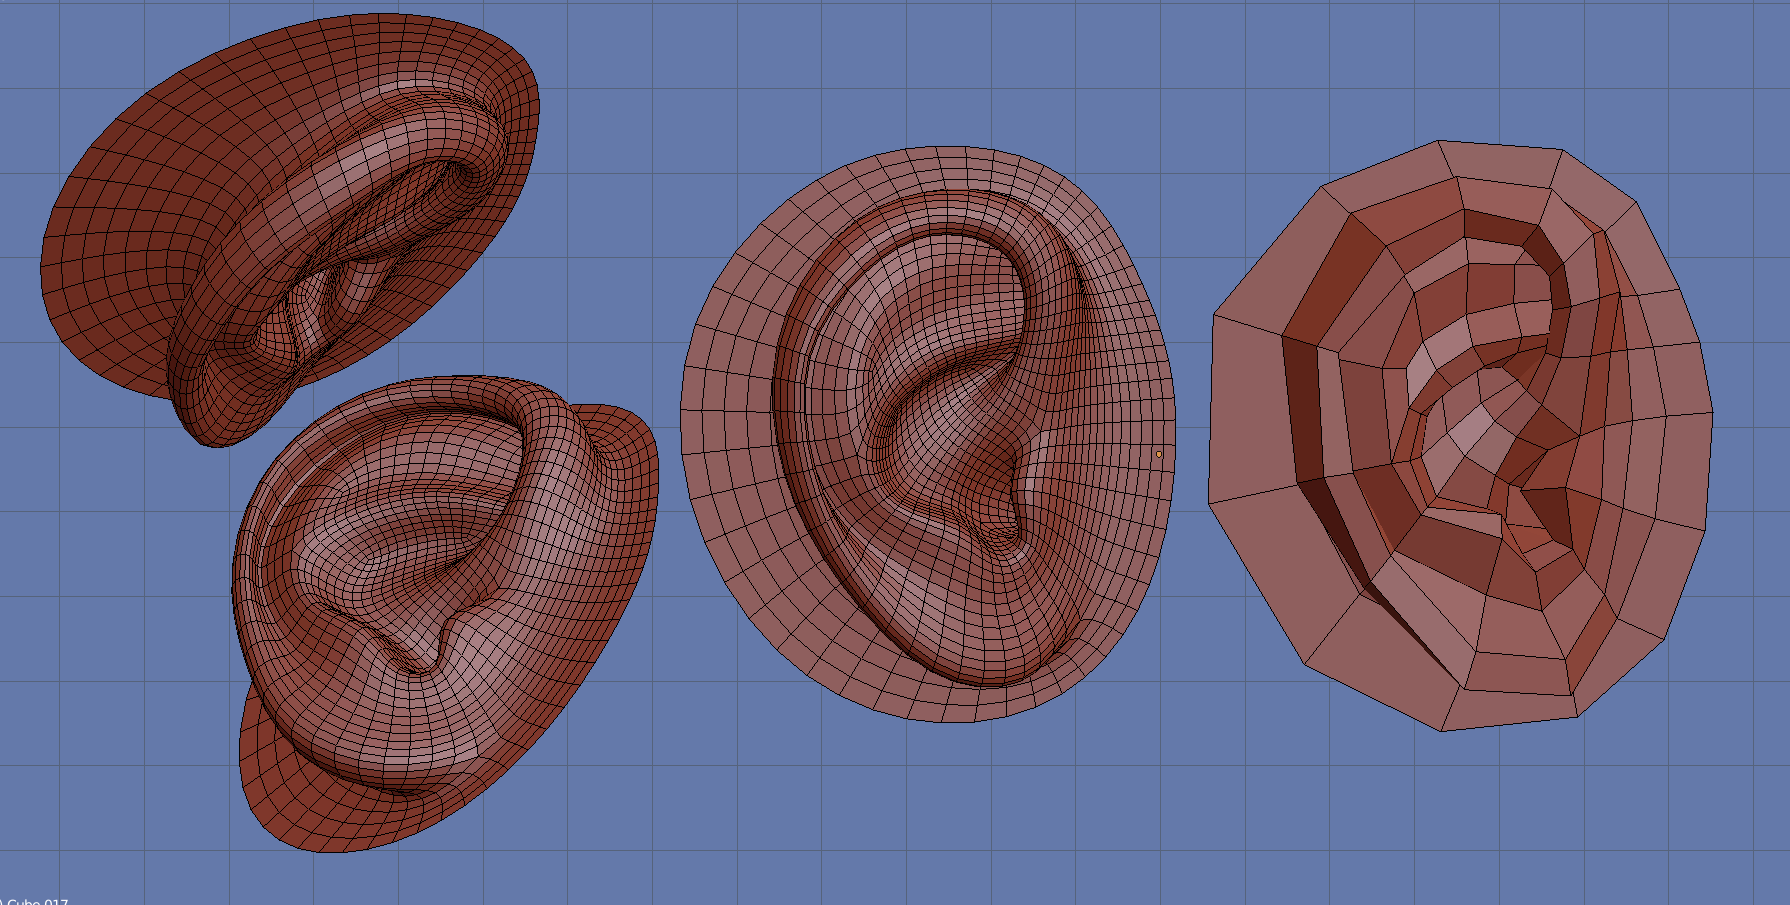
For example, I decided to unsubd ear model to figure out the lowest regular topology that preserves basic shape features, especially cavities and twists, came out with such a result.
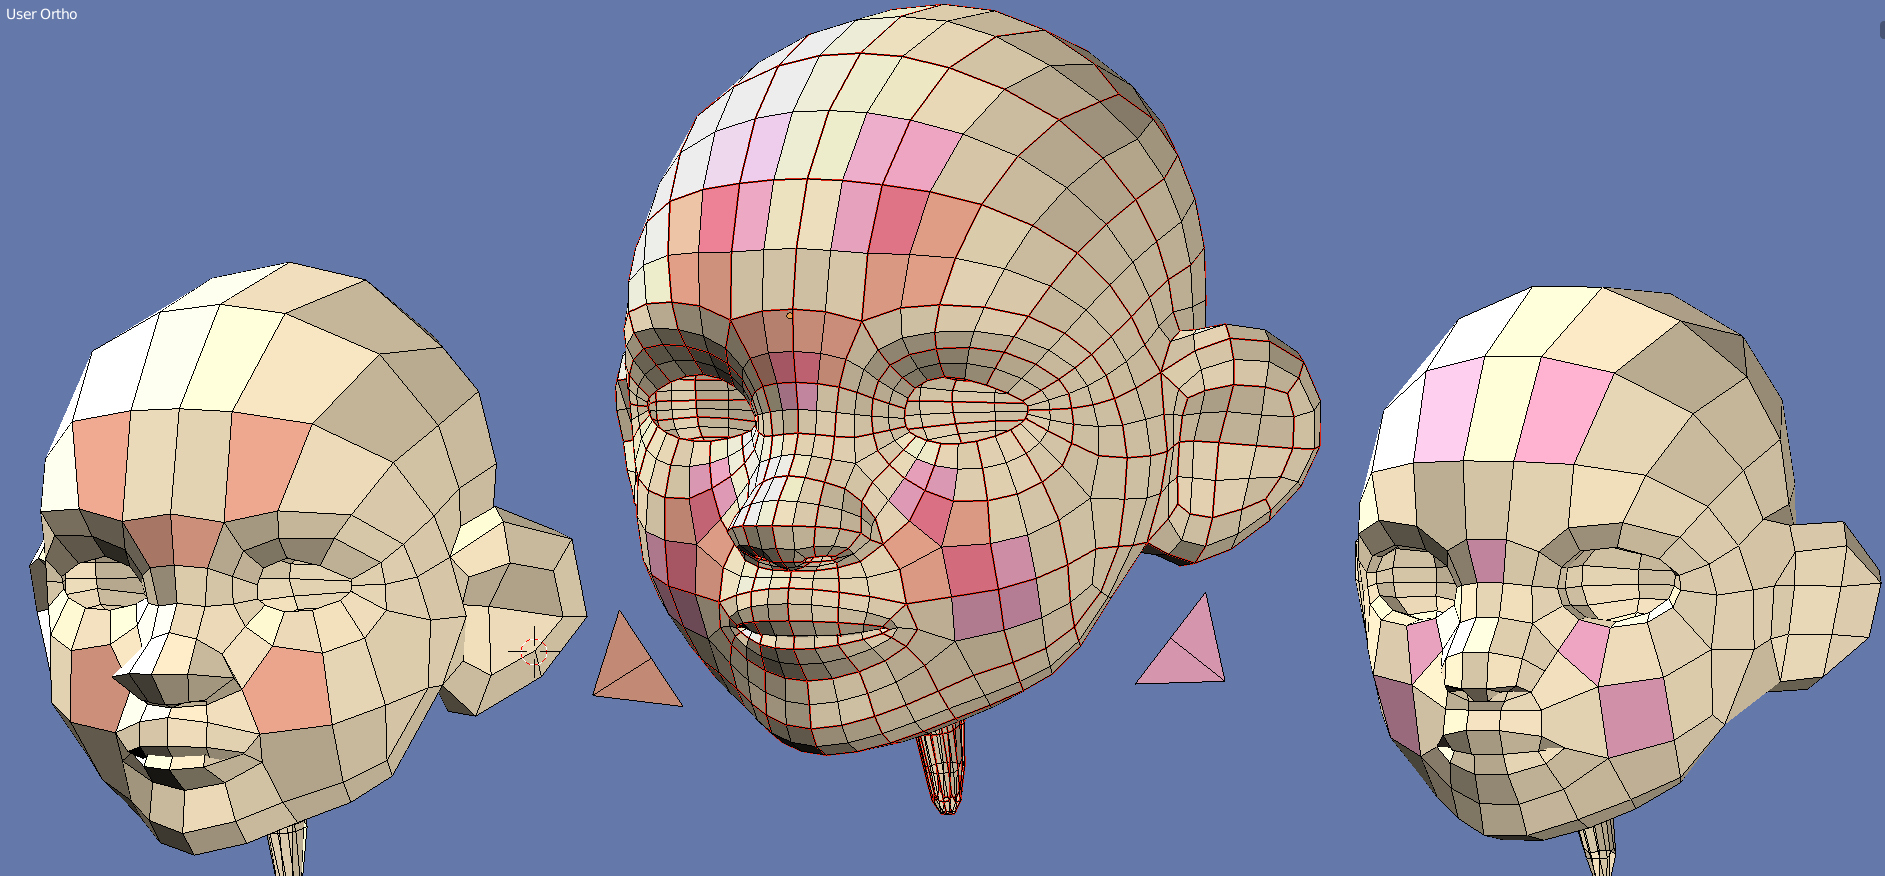
Also started to think about possible LP head.
The problem is that for multires sculpting purposes full body LP basemesh better have a bit more dense facial topology than separate head so lower multires levels could produce more dense facial topology for the sake of efficiency.
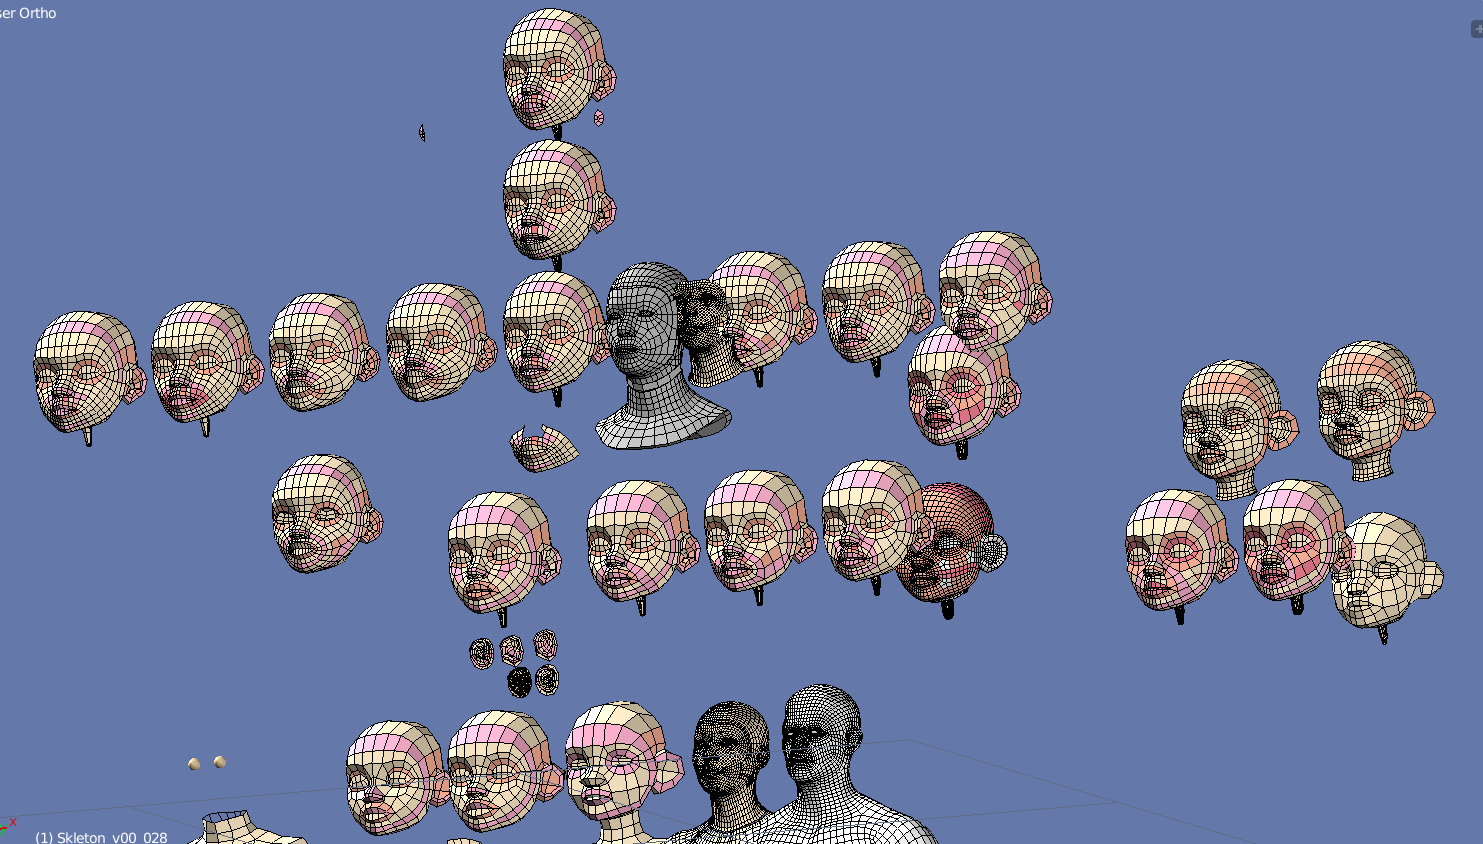
In the hope of finding inspiration to determine the desired research vector I decided to started from comparisons of basemesh heads I already made - a separate shapekeyed head with female character LP base, and could not avoid noting many topological… similarities.
Just FYI for those on this whose talents tend more to modeling than UV unwrapping: I’m reasonably good at UVs, given a final(ish) model to work with I can get a decent UV map done for it.
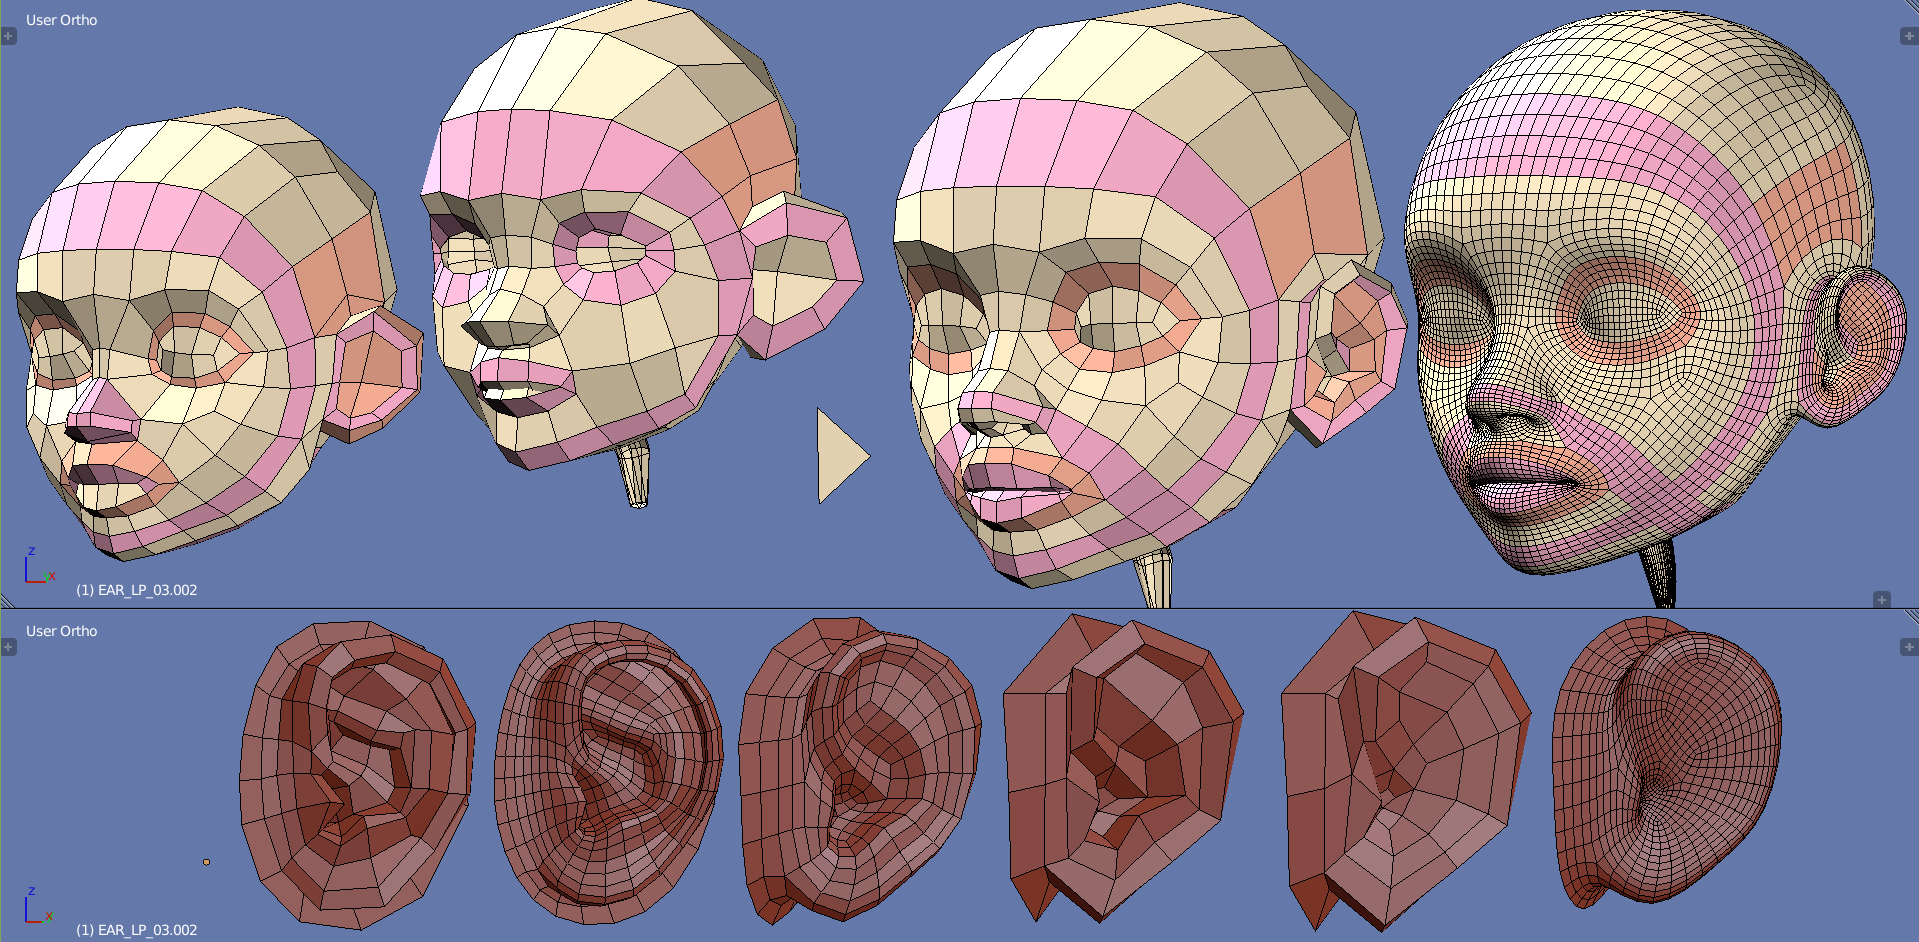
I like the direction it goes on - it has pretty regular and slightly more dense topology so lower multires levels will produce more dense topology for facial details, but it is still lowpoly enough to be easily tweaked, the topology is technically compatible with the shapes of a previous shapekeys, which test results was promising, and the neck loop has the same amount of vertices as body LP, so it will fit just nicely.
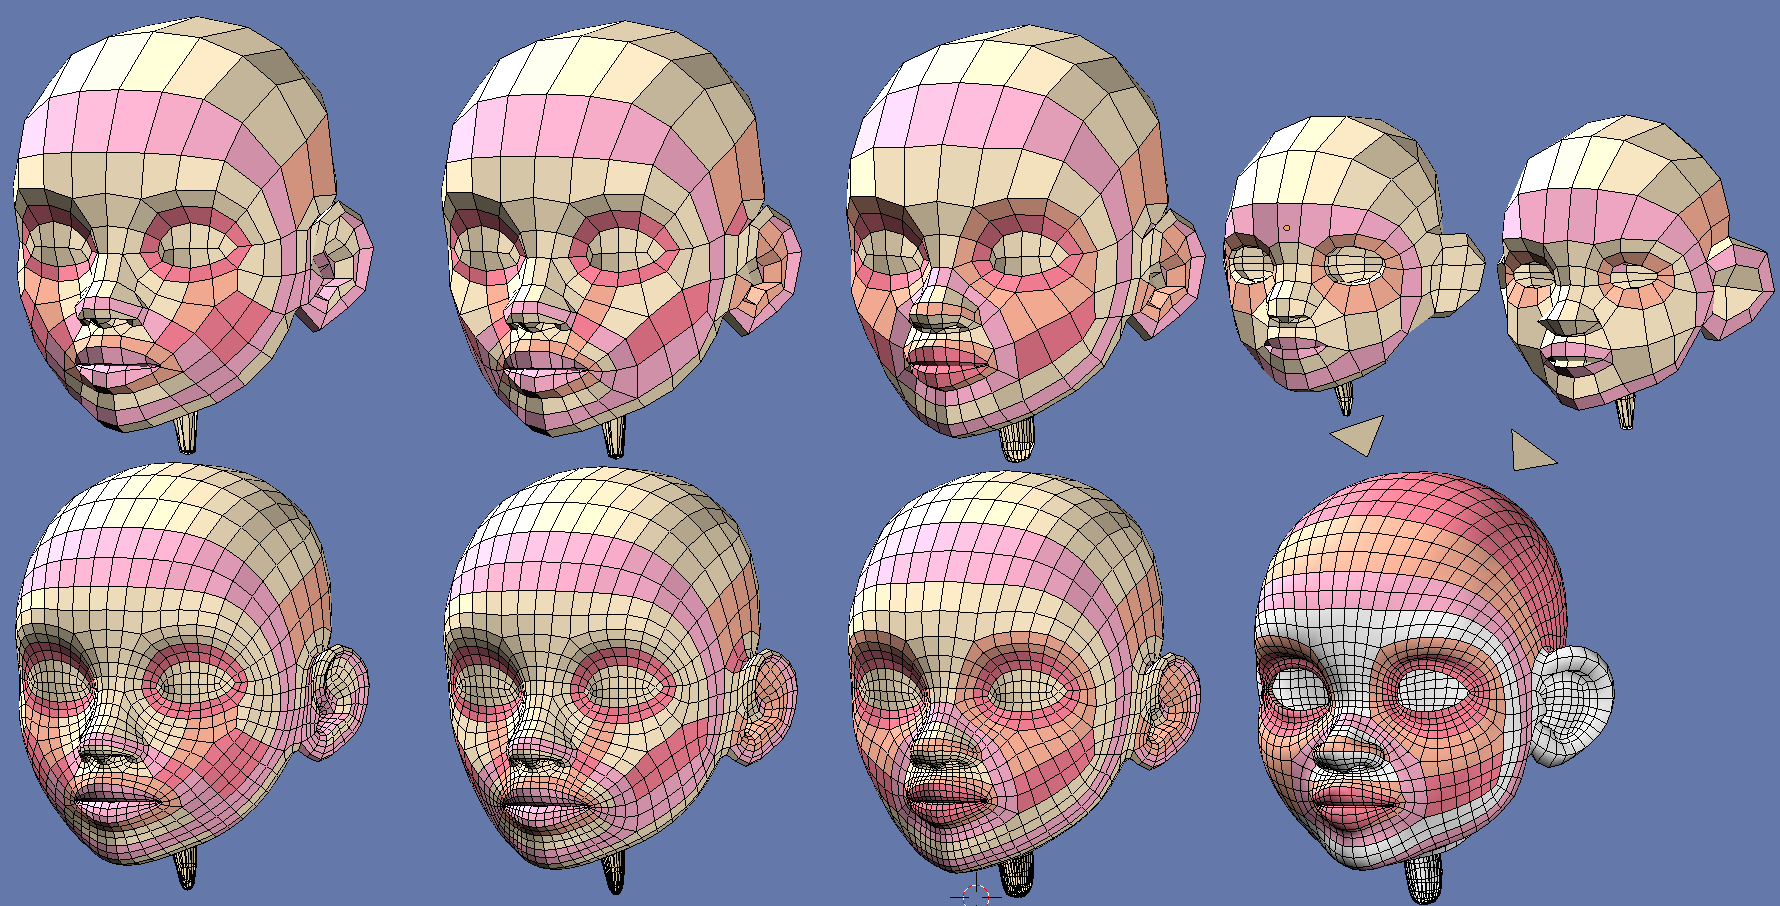
When I sculpted planar head I noticed the lack of a topology on an ear and decided to design a lowpoly version of it, which will produce enough amount of a topology with multires. However, it is hard to keep compatibility with stylized ear shape, so I am trying to figure out possible solution.
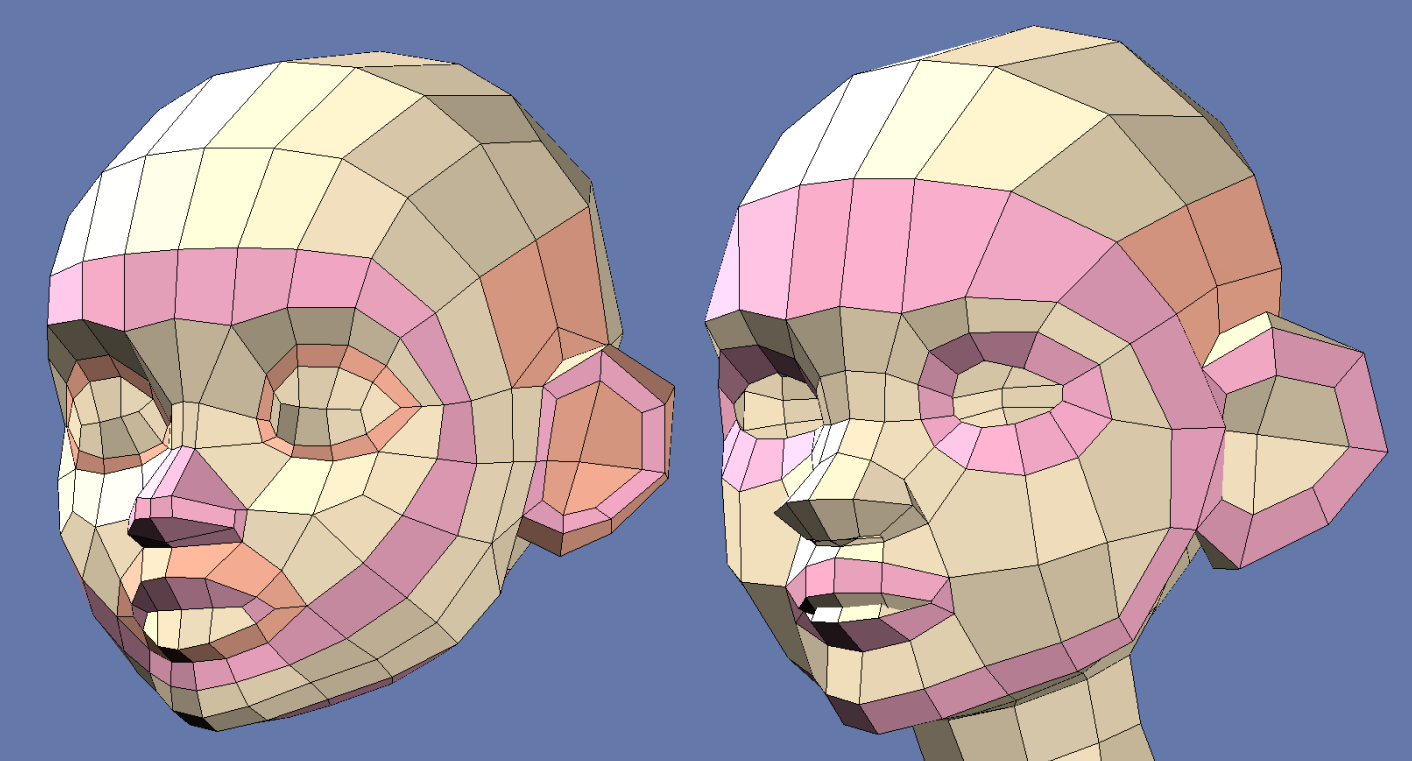
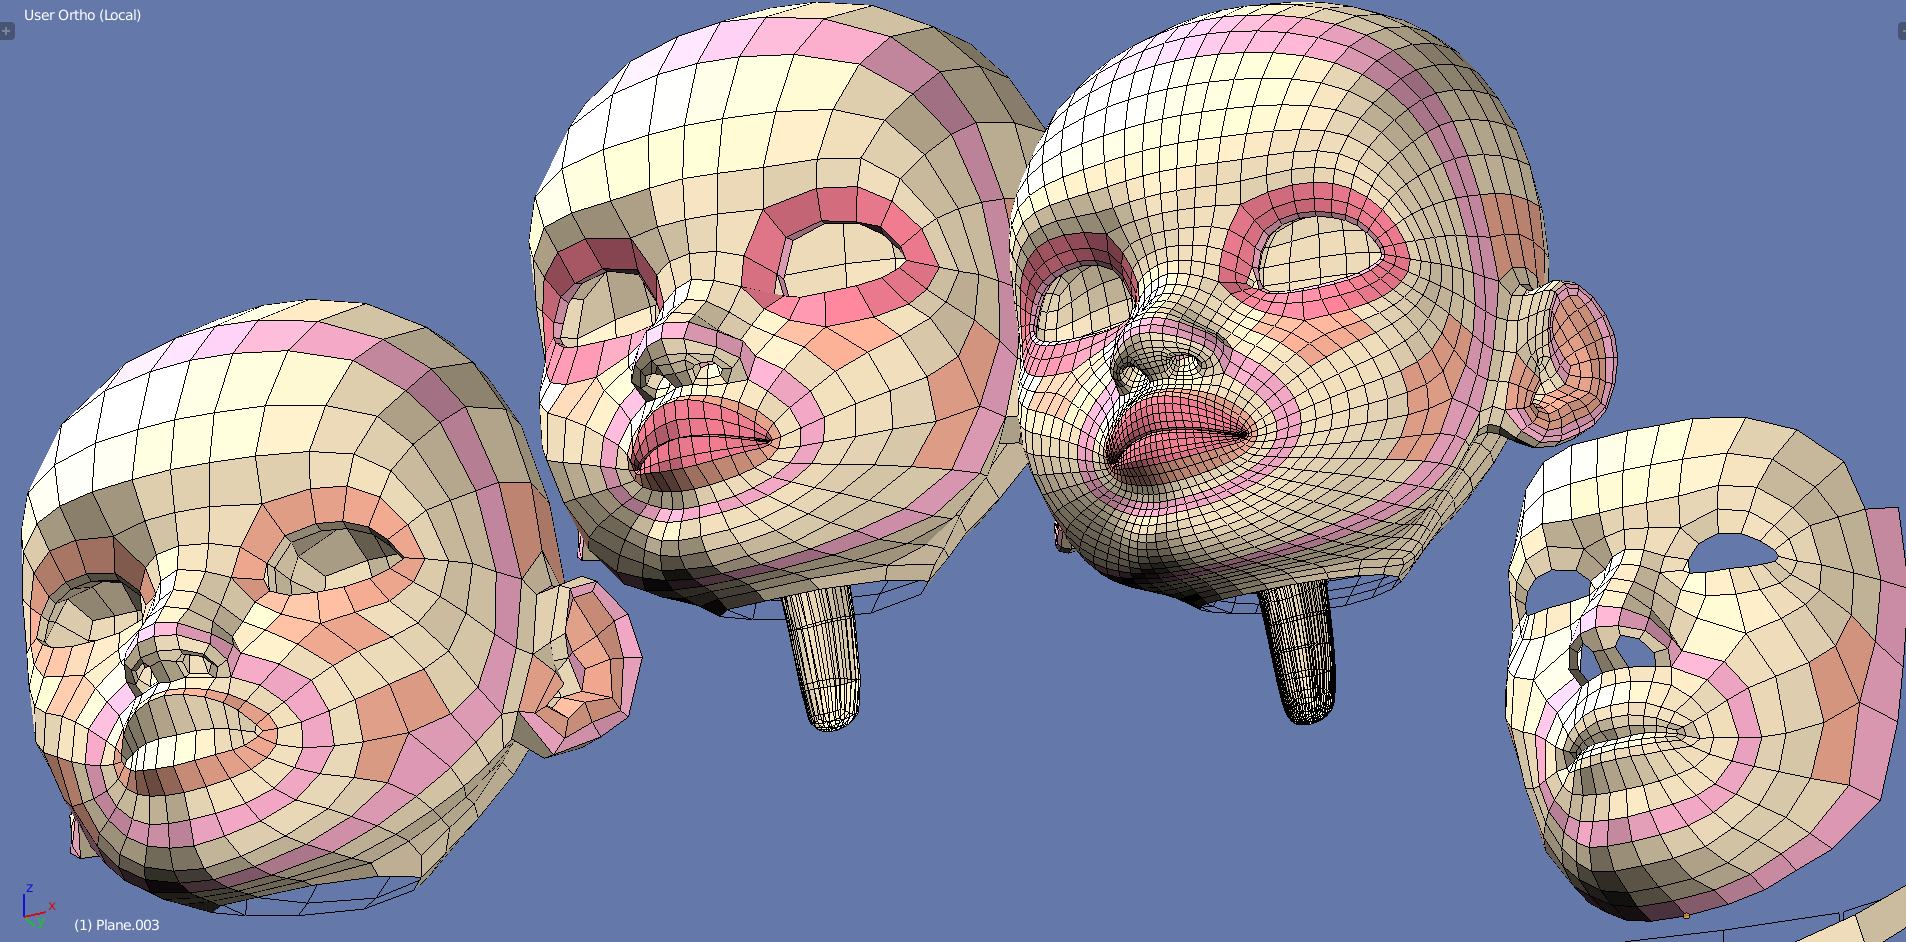
At the next step I tried to move the topology in the direction of a classic animation layout, avoiding direct pentagons that resulted from unsubd, even/odd trick allowed to get additional topological inspiration.
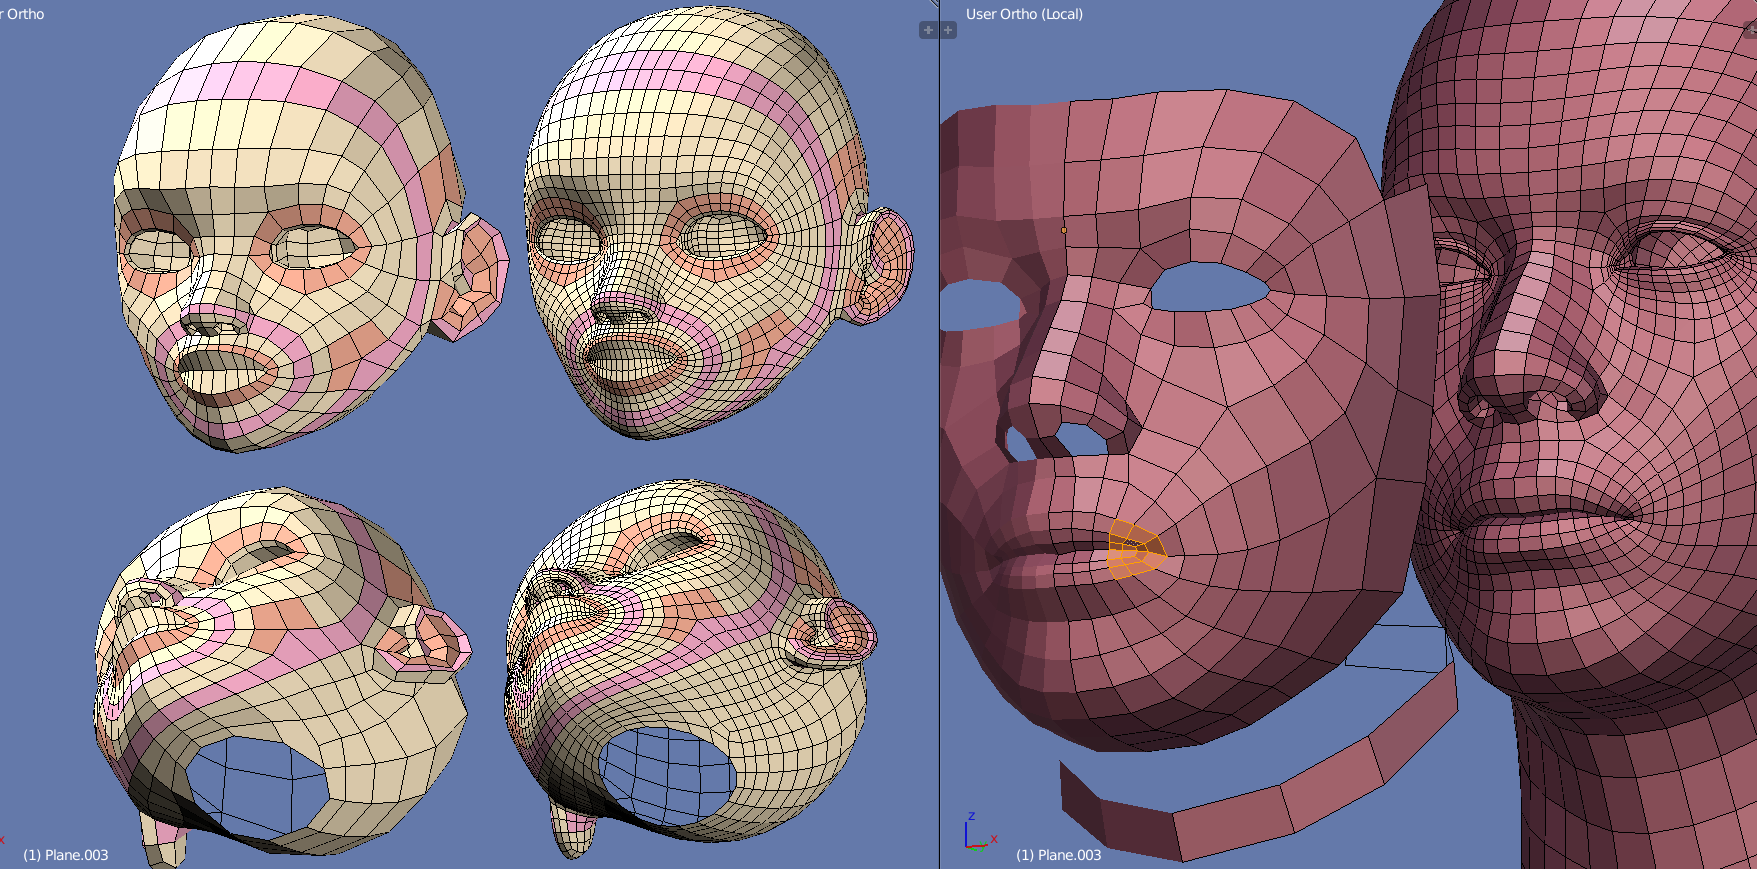
Here is the closest result (original model on the right):
Such topology can have certain problems during shape transition (personally I prefer direct connecting eye with lips), but I spotted that realistic male model and stylized characters models shares the same classic facial topology layout, so I guess it worth trying.
@1D_Inc Just keep in mind that the amount of poles should be kept to an absolute minimum. This is very important for multires sculpting, especially if the starting resolution is very low since this can cause quite a bit of stretching/pinching of resolution density and makes sculpting harder.
1: This cluster of poles would make me nervous
2: Pole placements like these are a mistake imo.
I did this on the original base meshes too and it’s too much on a surface that would be deformed with wrinkles. Not easy to sculpt at all. Placing this one more inwards towards the eyes might be better (like in the “Head (Sculpting) - Realistic” base mesh)
Ideally the poles would be on surfaces that would have a low chance to be sculpted a lot like with creases.
I started cleaning up the skeleton mesh. Great job again! Only UV maps are missing now to add it to the bundle @KickAir_8p If you’d like to give the skeleton a shot for UV unwrapping I can share the updated .blend file.
I moved E-poles closer to the eyes loop, reduced the amount of poles in general, but I don’t like the result as much as it is supposed to be since it produces lots of trash geometry in background - under the jaw and ears, which also makes LP neck connection messy.
However, I’ve got a nice starting point to analyse and explore, I need to meditate around it for a while.
Thank you for guiding!
There is a chance that we will need this skeleton in the future. It is not that large chance, but I decided to handle this task anyway since it is interesting in general.
I didn’t got the requirements for the resulting mesh or its purpose, so I decided to provide geometry only because of a possible mesh tweaks. Also I am not sure if it should be sculpted, for example skull definitely should be, since its details forms the most recognisable part of a skull, but bones… I don’t know, aren’t they nice enough to be kept like that?
Just FYI, IMHO the LP_Stylized_Female and LP_Stylized_Male (bodies & heads) should have the same basic topology (as much as feasible), with the realistic models reasonably congruent. You seem to be working in that direction already, I just wanted to weigh in that I think it’s a good idea.
Wow, I’ve never UV mapped a skeleton before! I’d love to give it a try . . .
. . . if it’s really ready. @1D_Inc , does this mean you think it needs more work before getting UV mapped?
Yes, the goal of ongoing research is to discover possible greatest common denominator (GCD) solution for any bipedal humanoid pedestrian, independent from the style.
The skeleton is ready, but there was an idea to replace realistic male basemesh with another one by its author, this is why the skeleton does not fit as tightly as it should (for example, ribs).
So its mesh is ready but its shape is under question.
I keep trying to analyse the sculpting version of a face.
Second, it required so dense mouth topology, that oral cavity from the original stylized female head fit just perfectly (15 to 15 vertices), so I just borrowed this part from it. It also allowed to eliminate an ngon in the nostril.
Third, it still directly connectible with LP body since topological changes didn’t influenced the neck loop somehow (it is still 6 to 6 vertices).
Here is the file (Bundle Skeleton+Blockouts+Head+LP_v09.blend)
I also kept a couple of heads from my topology research in case if they could be interesting.
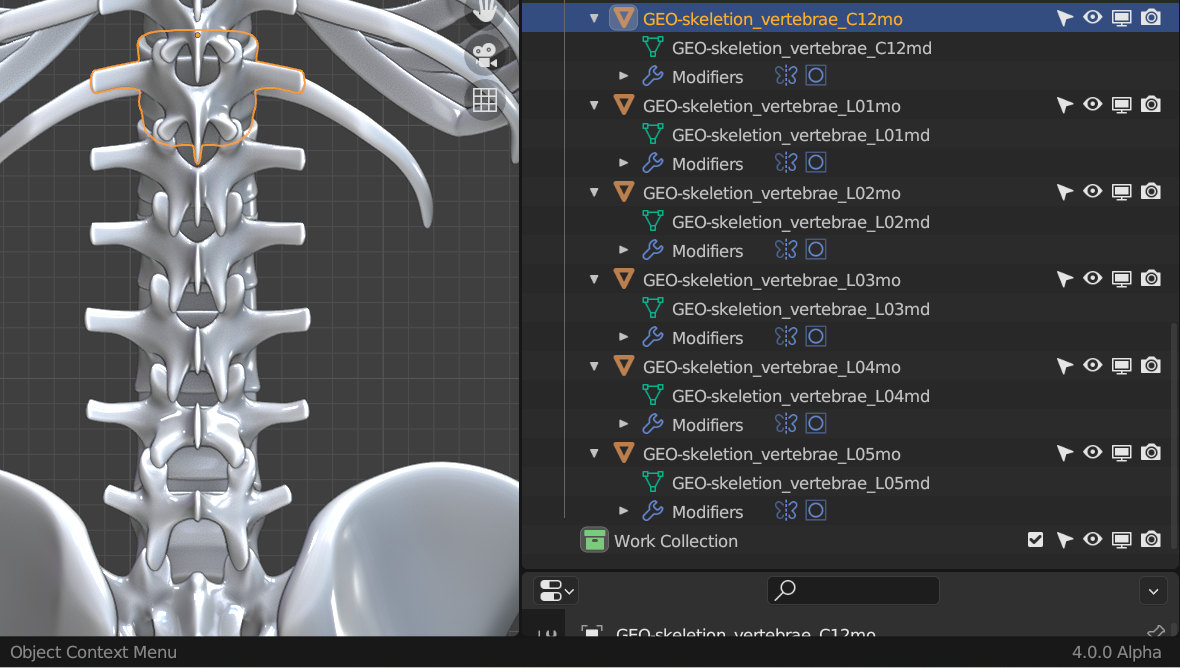
On that, anybody mind if I rename the vertabras GEO-skeletion.vertebrae.L05 etc, like on
The current GEO-skeletion.vertebrae.000 is bouncing up’n’down the thing, and it’s messing with my head a bit.
Edited to add: There’s an issue: GEO-skeletion.vertebrae.020, GEO-skeletion.vertebrae.021, and GEO-skeletion.vertebrae.022 all have GEO-skeletion.vertebrae.022’s mesh data. Some others are sharing mesh data as well, haven’t gotten thru them all. When I try “Make Single User” I’m getting a “Not Yet Implemented” message – this happens in both 4.0 alpha and 3.6.3 rc.
This is causing problems with the UV mapping – for example, I can’t apply the Mirror modifier (even when I’m gonna delete-and-mirrormod afterwards, some UV tools work a lot better on a whole mesh).
You can try to copy them into new file, unwrap and paste back deleting the original.
Sounds weird though, make single user is pretty much essential operator.
At the time we made a special “filter instances” function which allow to detect what is instanced in the selection by filtering out all the unique objects from it, but yes, by default they has to be searched manually. We also made instancer - a function for analysing the selection and autoinstancing objects that has matching geometry.
But such kind of a functions was designed mostly for architecture (tens of thousands of objects), I think that something like skeleton is affordable to proceed manually.
I think renaming spinal cord will be useful.
But I would recommend to replace .dots with _underscores in names for compatibility with the other software which has sensitive object naming, like maya.
Renaming the objects sounds good! Making all objects single user in the end is fine by me. I kept the object data linked for now to reduce work for marking seams and doing the first pass on unwrapping.
Turns out that’s just when I right-click from the outliner – doing it from the top-menu works fine. I selected the whole thing, Object > Relations > Make Single User > Object & Data (if that last isn’t the option I should be using for this pls speak up!).
Much as I’d like these to be as versitile as feasable, I’m leary of feature-creep (no pun intended) – these are Blender assets. But for this I don’t see any reason not to, either:
The initials on the end are to discourage Blender from incrementing L05 into L06 etc, they’re mo for mesh object and md for mesh data (I know Blender’s supposed to be okay with them having the same name, but it’s sometimes been incrementing them, and differencing is keeping that from happening while I’m renaming the spine). If I see no objections I’ll keep on with this.
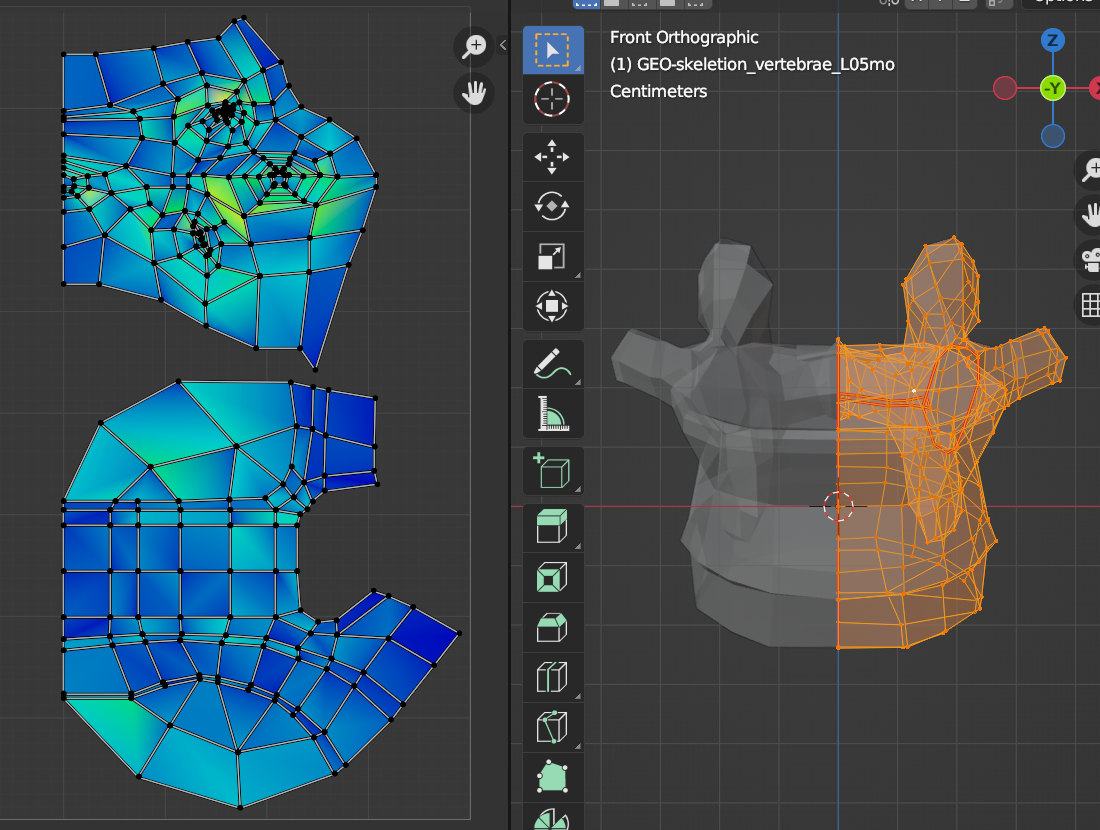
That’s a single-vertebrae breakout, current version of the UV unwrap that I intend to use for all the vertebrae (scaled down, of course). Are we using UDIMs on the skeleton? If so, how many? Go nuts? One for the body & one for the skull/teeth? Somewhere in between?
Looks good, much more readable. Underscore delimits words almost as nice as spaces, but space symbol is also prohibited and better be avoided.
Are there cases when Blender increments the initial number without adding numeric suffix?
It is a widespread maya system design error, as far as I remember Blender’s numeration always has been bulletproof in this area. If it is not, we has got an else one issue to worry about.
Skull has been taken from the bundle, it is ready made. I pasted its initial form to shape the spinal cord more properly.
Meanwhile I’ve joined the head to the LP body and tried to shape the resulting mesh.
The result is… achievable
No idea, I just know that when renaming both the mesh object and the mesh data the same ending-in-a-number name, sometimes one of them gets incremented (like one of the GEO-skeletion_vertebrae_C12 becomes GEO-skeletion_vertebrae_C13). Intermittent, when it happens doesn’t seem to matter which I renamed first, can’t be typos (I’m pasting from a text file in Notepad++ ), but using suffixes to both prevent ending in a number and prevent identical mesh object / mesh data renames keeps it from happening.
If it gets found/fixed before 4.0 goes main then I’ll try to clean out the suffixes before this version of the assets are released.
Ah, I didn’t realize! So I’m not UV mapping the skull yet. No problem, there’s plenty to do on the rest of the skeleton! Still need to know (eventually, I can get pretty much all of the mapping done before getting into organization) 'bout UDIM usage on this, whoever’s call that is.