Hi! I’ve made a proposal for a new sculpt brush, a generalization of the existing Flatten, Scrape and Fill brushes. It has parameters to control height and depth, and stabilizers for the plane of the brush. Any feedback is very welcome!
I tested it with a subdivided Suzanne and didn’t find much difference, but today, when testing it with a subdivided cube preserving the corners, I have been able to verify that the parameters are better understood, are more versatile, and work better (except when the plane is stabilized and the normal is not, which affects it in a strange way).
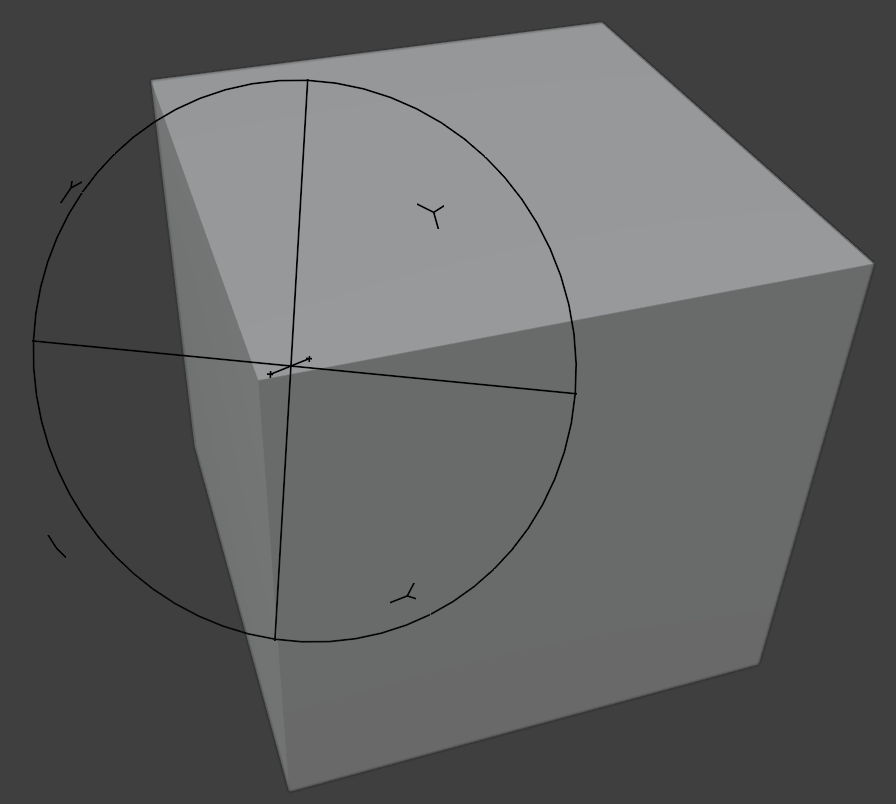
I think that it would improve the understanding of these attributes if they could be displayed on the cursor. The double circle indicates that the fade is spherical, which is difficult to reference, however, the Plane Offset is not indicated, nor does the circular cursor even move when the Plane Offset has a value. A cross and a couple of lines would be enough for the plane and distances, and the spherical Falloff could be indicated with Y-shaped corners, as I show in the figure.
I’ve been playing with the build a bit more today and I really like the new brushes that use this plane brush, especially Fill/Deepen, Scrape/Fill and Trim.
The Flatten/Contrast should have a depth of 0.5 instead of 1 IMO, when both Height and Depth are at 1 it can deform the mesh pretty bad in some cases.
The Plateau Brush, though, it seems to have either no effect at all or a weird effect, pretty much as @LeonardSiebeneicher mentioned above. I can’t get it to have the same effect as the Plateau Brush on 4.3.2
Thank you all for the feedback! There was a bug with Stabilize Plane that should be fixed now. I’ve also removed Original Normal/Plane from the UI and added versioning to replace them with Stabilize Normal/Plane set to 1.
(except when the plane is stabilized and the normal is not, which affects it in a strange way).
Yes this is expected, if you stabilize the plane without stabilizing its normal the results are going to be weird. This is also how it works in 4.3 when you set Original Plane on but Original Normal off.
I think that it would improve the understanding of these attributes if they could be displayed on the cursor. The double circle indicates that the fade is spherical, which is difficult to reference, however, the Plane Offset is not indicated, nor does the circular cursor even move when the Plane Offset has a value. A cross and a couple of lines would be enough for the plane and distances, and the spherical Falloff could be indicated with Y-shaped corners, as I show in the figure.
I agree that having a better visual understanding of what’s going on would be nice, but I guess the general approach with cursors has been to make them as minimal as possible with very few exceptions. Even the Clay Strips brush, which has a squared shape, is still shown as a circle! Maybe it could be optional?
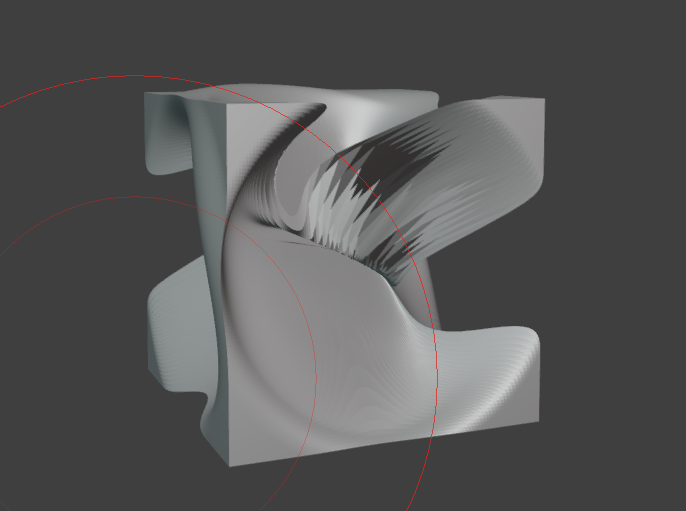
Strange behavior on the plateau brush.
It does not deform the mesh below the cursor, but it seems fixed to the origin.
It should be fixed now. Though this brush highlights the main difference between the old version in how the distance is calculated: from the center of the plane instead of the position of the cursor. (This difference in almost negligible with more “normal” settings.)
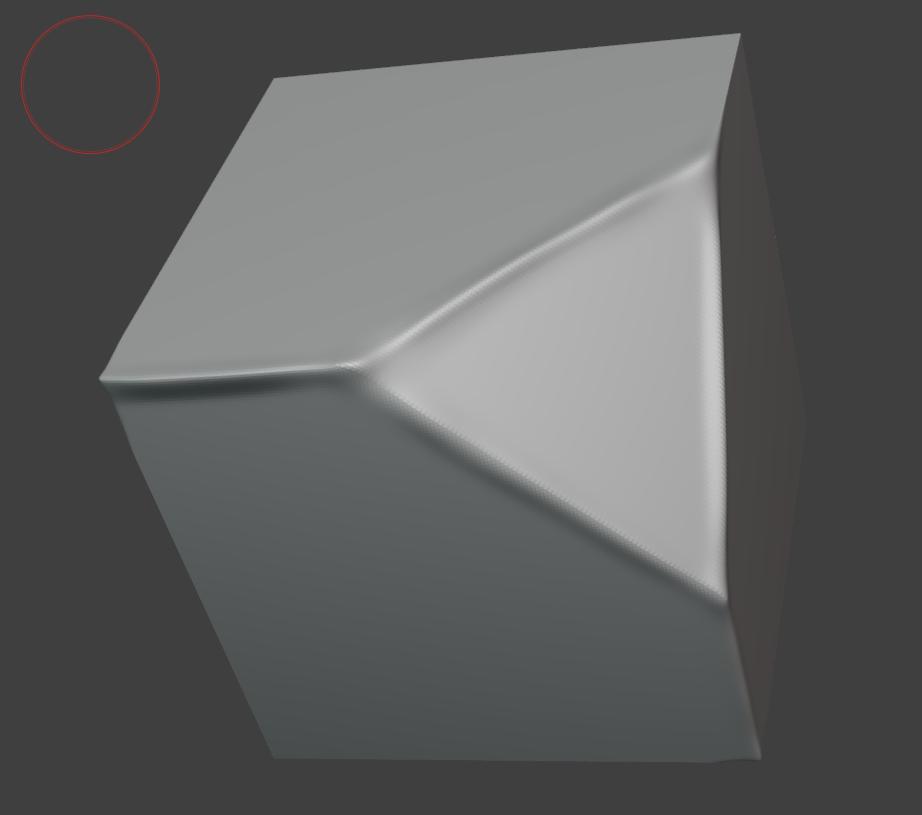
Somewhat of an extreme example: in main the vertices still get attracted to the plane even if it’s totally out of range. First part is main, second is new version:
I’ve been playing with the build a bit more today and I really like the new brushes that use this plane brush, especially Fill/Deepen, Scrape/Fill and Trim.
The Flatten/Contrast should have a depth of 0.5 instead of 1 IMO, when both Height and Depth are at 1 it can deform the mesh pretty bad in some cases.
Thanks! An example of a brush you could try: start from the Scrape brush and set height = 0.5, stabilize normal = 0.4, stabilize plane = 0.25. This should give a more stabilized version of Scrape (without being as extreme as Trim) that could be useful for hard-surface sculpting.
Hey, I really like the brush. It’s remarkable how many previous brushes it can replace. I also think it would be great if the normal and plane stabilizers were implemented for other brush types.
What I don’t fully understand is the Inversion Mode. It means what the brush is supposed to do when ctrl is being held, right?
But I made myself this brush that works like the “Peaks” part of the old Scrape/Peaks brush. It raises the corners of the mesh:
The problem is that when I change the inversion mode, the brush behaves differently now, and I’m not holding ctrl. Do I just not understand whan inversion mode does?
Your brush is inverted because its direction is set to Subtract. In general, whether a brush is inverted depends on the following factors:
The direction is set to Subtract
The ctrl key is held down
Some pens have buttons that can be used to invert the brush
In your case, since the direction is set to Subtract, the brush is always inverted by default. These factors also cancel each other out; for example, if you set the direction to Subtract but also hold ctrl, the brush will not be inverted.
What’s not possible to do currently is mix the two modes together, for example having it behave as a peak brush by default and a Fill brush (or swap Height and Depth in general) when inverted. But that’s also how it worked in 4.3 as far as I can see, so hopefully it’s not a regression! Though it could be supported if it’s something that people would find useful to have.
What I wanted to make is a Peaks brush that switches to Deepen (height/depth swapped) when Ctrl is held, but from what you’re saying it’s not possible right now. It would definitely be useful, although not exactly critical, I can just have separate Peaks and Deepen brushes.
In the grand scheme of things, if there’s ever a big rework of how brush configuration is done, I think the better way (as opposed to having hardcoded switches like “Invert to Scrape/Fill/etc”) would be to just have the user specify a completely separate brush for when Ctrl or Shift or Alt is held during sculpting. It’s already being done with Shift, it just redirects to the Smooth brush in Essentials.