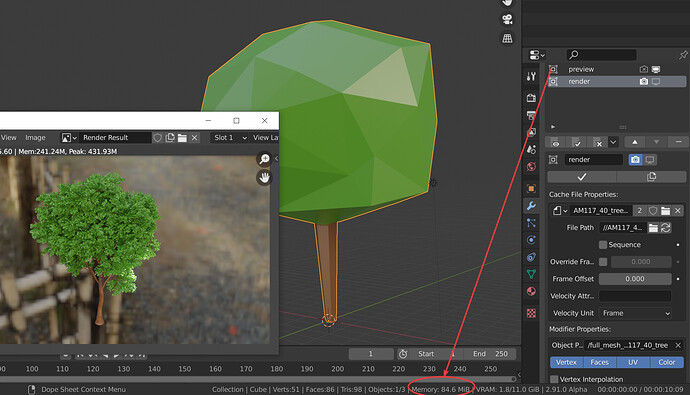
Am I really don’t get you, or I see different numbers? – https://drive.google.com/file/d/1bALCwbTy7IujkREL4BESFc1e5QEUCxpA/view?usp=sharing
Oh! That’s interesting! I tried to turn off the visibility and it didn’t flush the memory but disabling does. Nice. But if you disable, you don’t see anything at all. I still need to see something, a bounding box or a point cloud.
Turning off visibility equals hide object. Just editorial tool. Disabling in viewport different thing. In production when you assemble large scenes, like cities or vast indoors, you always use layout as guidance. Our studio uses different software but principal is common for any software.
Anyway you have to approve basic shapes and concept with client, which requires layout and concept art. So there is always layout. And, more important, layout just a low-poly version of the scene and it’s much better than wireframe boundaries or point cloud.
Also, you can do two versions of layout – basic shapes (for start) and more detailed layout assembled with links. That way you can create props and just re-link it to layout. And it will be placed exactly in right place. Which is convenient because you don’t have to search in scene exact place for each props. And when some parts of your scene is done – just disable them for viewport.
You can see approximate pipeline in my work, to which was link in my first post.
P.S. And, of course, you can assemble props or parts of a scene with linked data, and then link them to layout.
P.S.S. Also, you can disable for viewport all details that not important in prop file. After linking they won’t be loaded for viewport. So, for example, building with sculpted decor that has over 10 million polys will be just basic shapes. But all details will be loaded for render. That way you really can go to trillions in polycount.
And related to your question
So, is it possible to switch a geometry for another one only at render time without affecting the currently opened file?
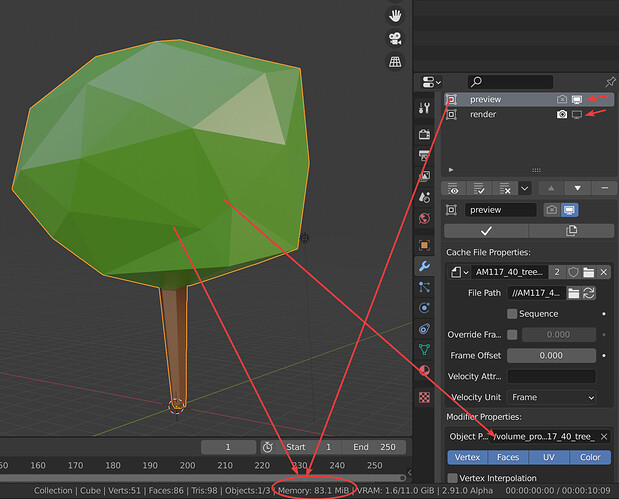
Yes. You just have to create viewport geometry in addition. Then you need to disable original geometry for viewport, and low-poly geometry for render. That way when you link your prop into scene it will consume memory only for low-poly basic shapes. That’s it. You have low-poly viewport model to operate, and when you start render blender will use hi-poly models.
And there is an easy way to do low-poly – decimate modifier. Just duplicate complex parts of a model, decimate them to low-poly (simple collapse will do). Then use ALT+C (convert to), choose Mesh - this will apply modifier for each model without joining them. You even can link hi-poly models to low poly and turn them off in viewport and just operate with low-poly.
Note that for disabled objects, the original mesh data is still always loaded into memory. Where you save memory is by avoiding modifier evaluation. For example when most memory comes from a subdivision surface modifier or a modifier that loads the mesh from an Alembic file. if you have a high poly mesh without modifiers, it won’t help as much.
Yep. I tried with my 27M poly model. It takes 9gig or memory. If I disable the visibility it still takes 2.9 gig.
@brecht meshSequenceCache modifier with viewport turn off is fine to offloading meshes… ![]()
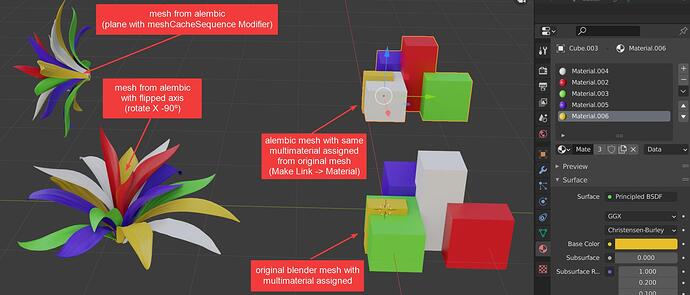
can you add some option to flip axis ?? (for alembic exported from other softwares)
and… seem material ids assign has some problem:
my solution… really working well. ![]()
![]()
Yes, you have a light display on screen but you are still taking 11 gig of memory. That’s what it’s all about. If you look at my clip, the Arnold demonstration, when you see the bounding box or the point cloud, it take little to no memory because the geometry is not loaded in Blender itself, only at render time.
no… try youself…
in video blender using 185mb… in render 500+ mb… finishing render… blender memoria return to 185mb
with a heavier mesh memoria use in blender was 85mb… 1.4gb in render and back to 85mb after render finish.
this is working with particle scatter and geometry nodes. 
before render / fullmesh hide → mem use 83mb
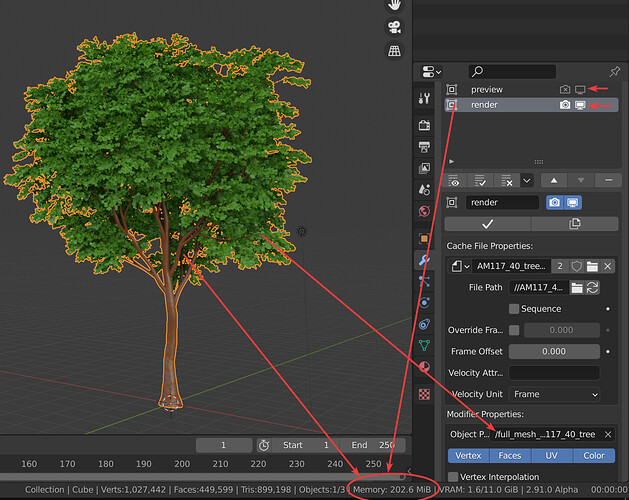
fullmesh on → mem use 200mb
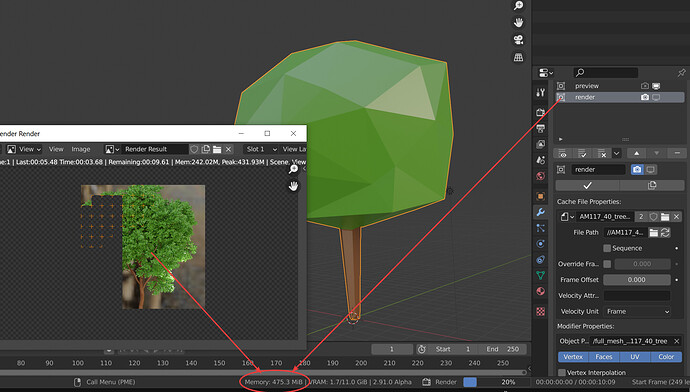
in render time → mem use up to 475mb
after render finished → mem use back to 84mb
But I dont know if we have 2 fullmesh copy in memory… 1 for blender (loaded from disk and sent to cycles) and another for cycles (sent from blender)
And here is where the problem is, those 475Mb are not for Cycles, but for Blender itself (kind of) that means, as a general explanation, that if you have 1Gb or RAM, and a hi-res model of 700Mb, no matter if your Blender while working takes 50Mb for the Low-Res model, Blender will need those 700Mb to load up the model to the scene and Cycles will require another 700Mb for rendering, so you will end up being unable to render it because Blender is eating the memory required for the render.
With a proper implementation of this Blender would never need those 700Mb since they will be used only at TRUE render time, so you will have 50Mb for Blender and 700Mb for Cycles, not 700Mb for Blender and 700Mb for Cycles.
If course I hope you understand this is just a generic example to illustrate the problem, no one has 1Gb of Ram these days 
This is exactly what I was trying to explain. This is how Katana, Arnold, Renderman and many other renderers work. This is how we manage gigantic scenes in the film industry. And where I work, we decided to ditch Maya/Arnold for Blender but we need to be able to handle these huge scenes.
My temporary solution would be to use the proxy tool addon just to generate the point cloud. Then in my layout scene, I would link only the point cloud. At rendering time, a script would go through the scene and and replace all the “(object name) lo” for “(object name) hi”.
So, first, need to identify all objects with “ lo” at the end of the name and their original location then switch them for the objects with the same name but ending with “ hi”. (This is how the addon names the geometry once converted).
That would be a temporary work around solution I just don’t have the programming knowledge to to that.
The best thing would have new options in the object’s property to switch dynamically to origin, bounding box, point cloud or full geometry.
It’s more a cycles thing than a Blender thing I think, it’s cycles the one who should allow for rendertime only geometries that are proceduraly replaced by it, and not by Blender, as soon as Blender has to do that replacement it needs to load the hi res version into Blender’s memory and that kills the optimization.
Maybe @brecht can tell us something about this, or @StefanW since he works with Cycles and big feature film scenes.
pretty sure this is a feature of USD/Hydra that hopefully will be coming to blender at some point down the line via work done by @bsavery
tl;dr it’s basically referencing with rendertime override for the reference, so the reference applicable to viewport display in blender is separate from the rendertime reference supplied to cycles or any other hydra integrator/renderer for rendering the object.
Looking at all the replies on your YT video, a -LOT- of Blender users don’t really understand what you’re trying to achieve. Even one that called bull** on you saying ‘network’… Really???
And you’re right, as long as things like these are not implemented, it will take a longer time for studios to implement Blender.
Being able to use proxies for scene layout & rendering is something nobody thinks twice about in VFX. Having used Arnold, V-Ray & Redshift over the years, proxies came to the rescue a lot of times.
Huge thanks for looking into this, and getting some more ‘VFX industry’ related discussions going. 
Thanks for the nice comments. As for the guy who called bill**** on my clip, I guess you read my response. It’s obviously someone who doesn’t work as a professional in the CG world, when he says that everything should be on my local drive. My channel is all about working in the film industry and many people commented that my stuff is too advanced for them, like the one about lighting in compositing. My goal is to show that world that Blender is an awesome tool for the VFX world, even if it still has a lot of places that needs improvement to play in the big leagues. But it’s getting there at an amazing speed. It all depends on the size of your studio and the kind of jobs you are getting.
I understand fully, and I also saw that you discarded RightClick as a useful channel to post things.
Be aware that change is hard here, although it is getting better slowly. Interop with other programs can still be a bit painful, especially on datalevel (e.g. Houdini data).
Will be following all this closely, as it also answers some of our own ‘windmills’ 
I publish my clips on RightClick but yeah, for suggestions, it’s an ocean of suggestions and since it seems to be prioritized by “likes”, very good ideas could be ignored because people don’t see the need for them or they simply don’t understand them. I though I could write a document of suggestions to help better integrate Blender in a big VFX pipeline but I thought I would probably be told to use right click to make my suggestions.  I’d prefer to bypass that. I’d love to fly to Amsterdam and meet the developers. I’d love to be part of the annual Blender conference to talk about how we use Blender on feature films (Even for Warner/Disney!). But with Covid… If somebody from the institute gives me the go, I’ll write the paper and I’ll be glad to send it. That’s my way of contributing to Blender
And if you wonder “Who the hell are you? What are your qualifications?” like I got a few times with Blender Bob, well, look me up on IMDB (Robert Rioux). I think I qualify. 
