Hello @nacioss,
Thank you very much for your awesome work once again!
I’m a long time “Real Sky” user and the only thing that becomes a bit confusing to manage, are the negative exposure values (I’ve noted that you have a -2 value in the last screen), for two reasons and this is from my experience:
Emission materials need to be set real high to have any effect on the scene, which makes them look over bright on the texture preview mode, specially when using Bloom;
On the Compositor, the color curves and some color operation nodes get flipped. For example, brightening an image is a downwards curve and darkening an image is a upward curve ( due the exponential nature of them ) and, in the color corrector, if you set it to blue you actually tint the image of red or something similar .
I understand that this gives the most realistic results and mimics real life behavior… but ain’t there any way to go around this so that, at least the compositor color corrector nodes, don’t go counter intuitive?
Thanks for the Linux build @LazyDodo! It works here just perfect.
Anything related to compositing is not my fault.
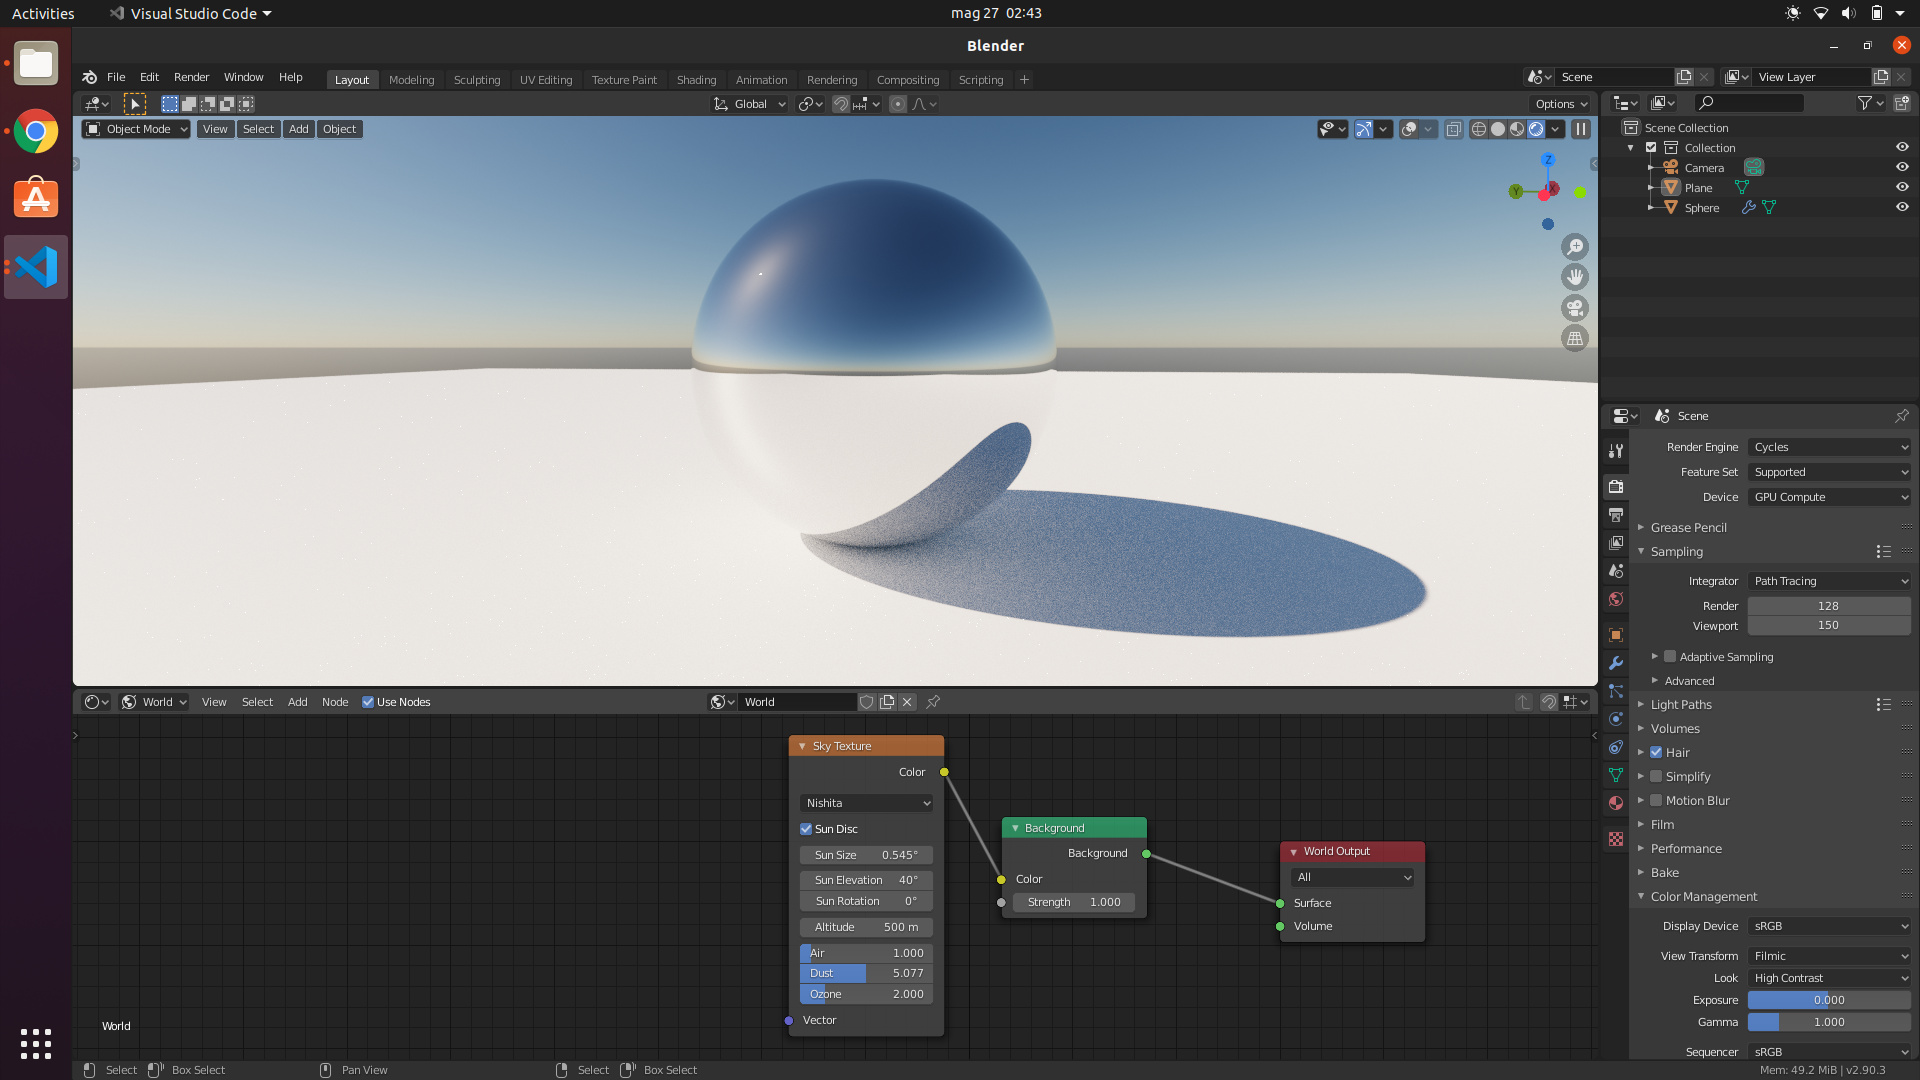
Anyway, with just an exposure value of 0 you will get acceptable results with this sky texture, so i think you should have no worries about that, we will see how it will evolve.
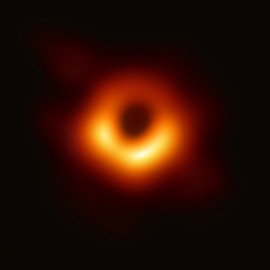
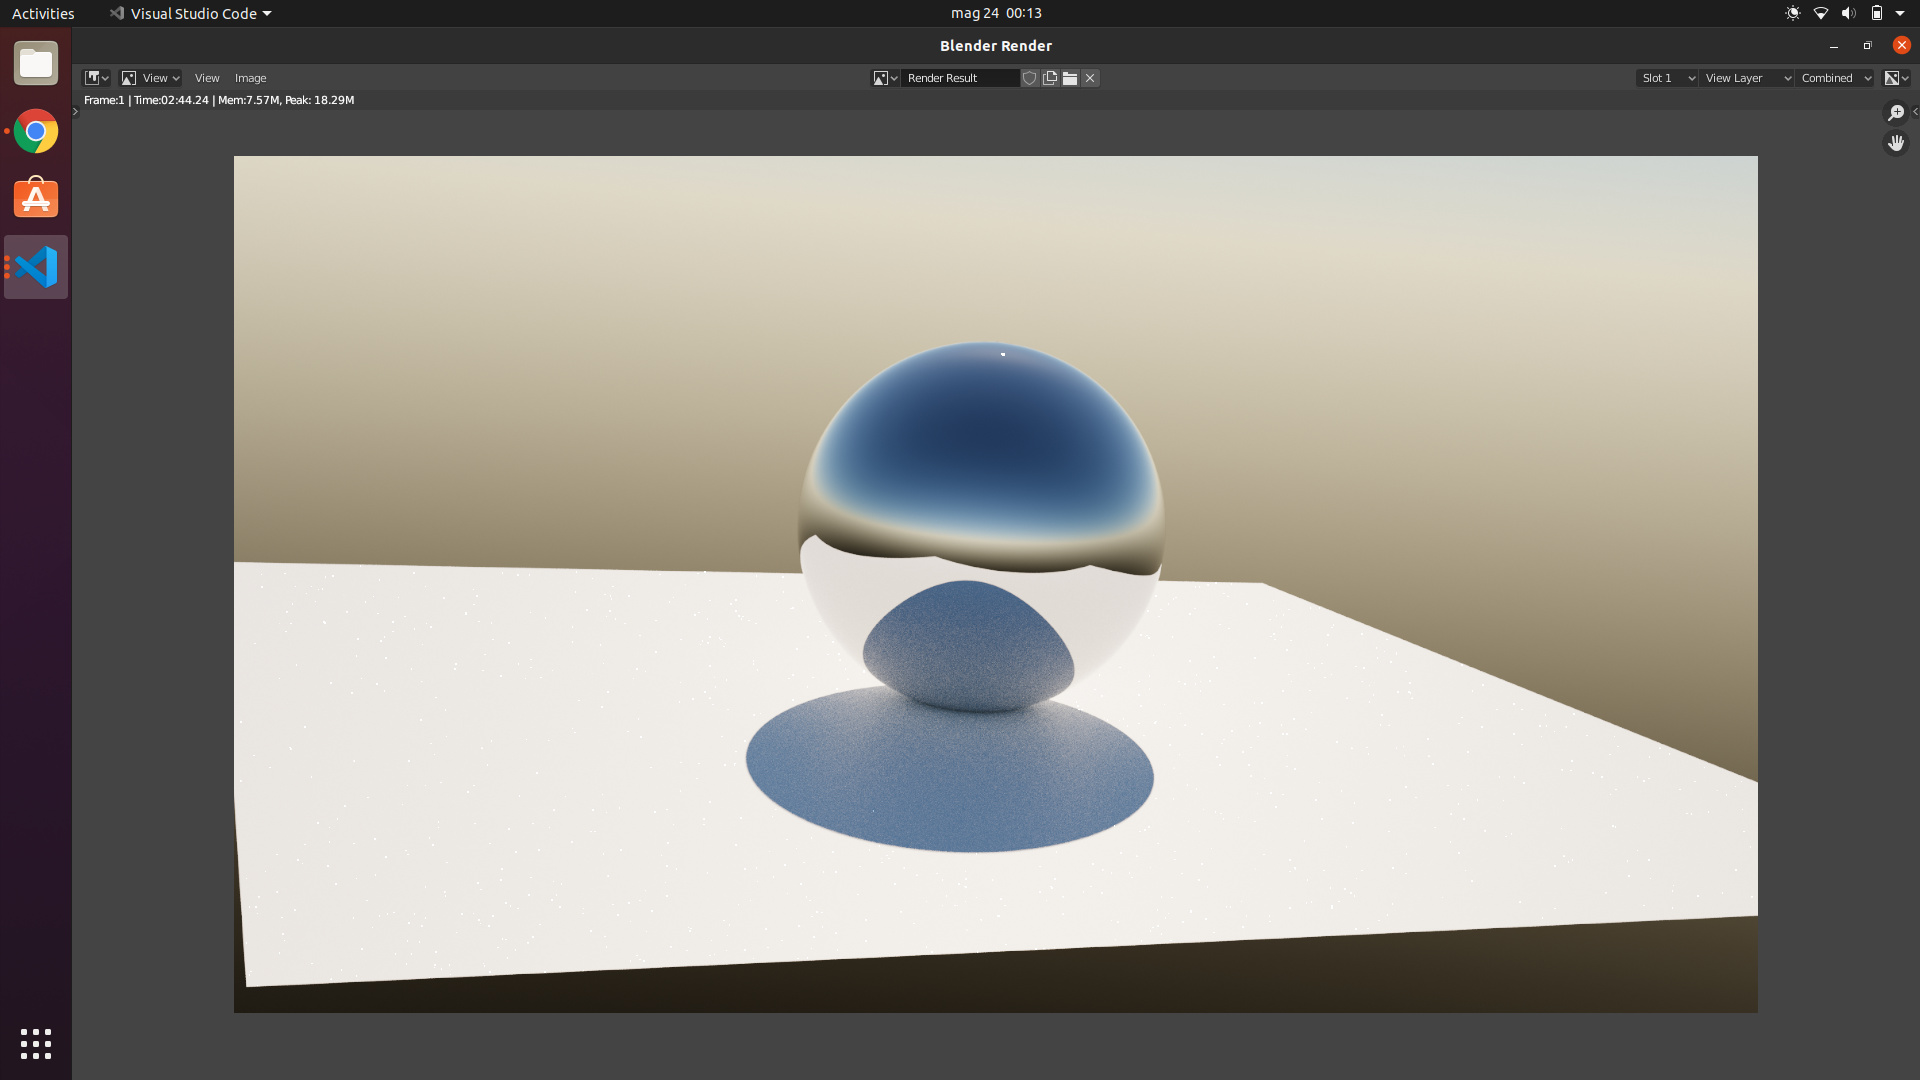
Look at these results:
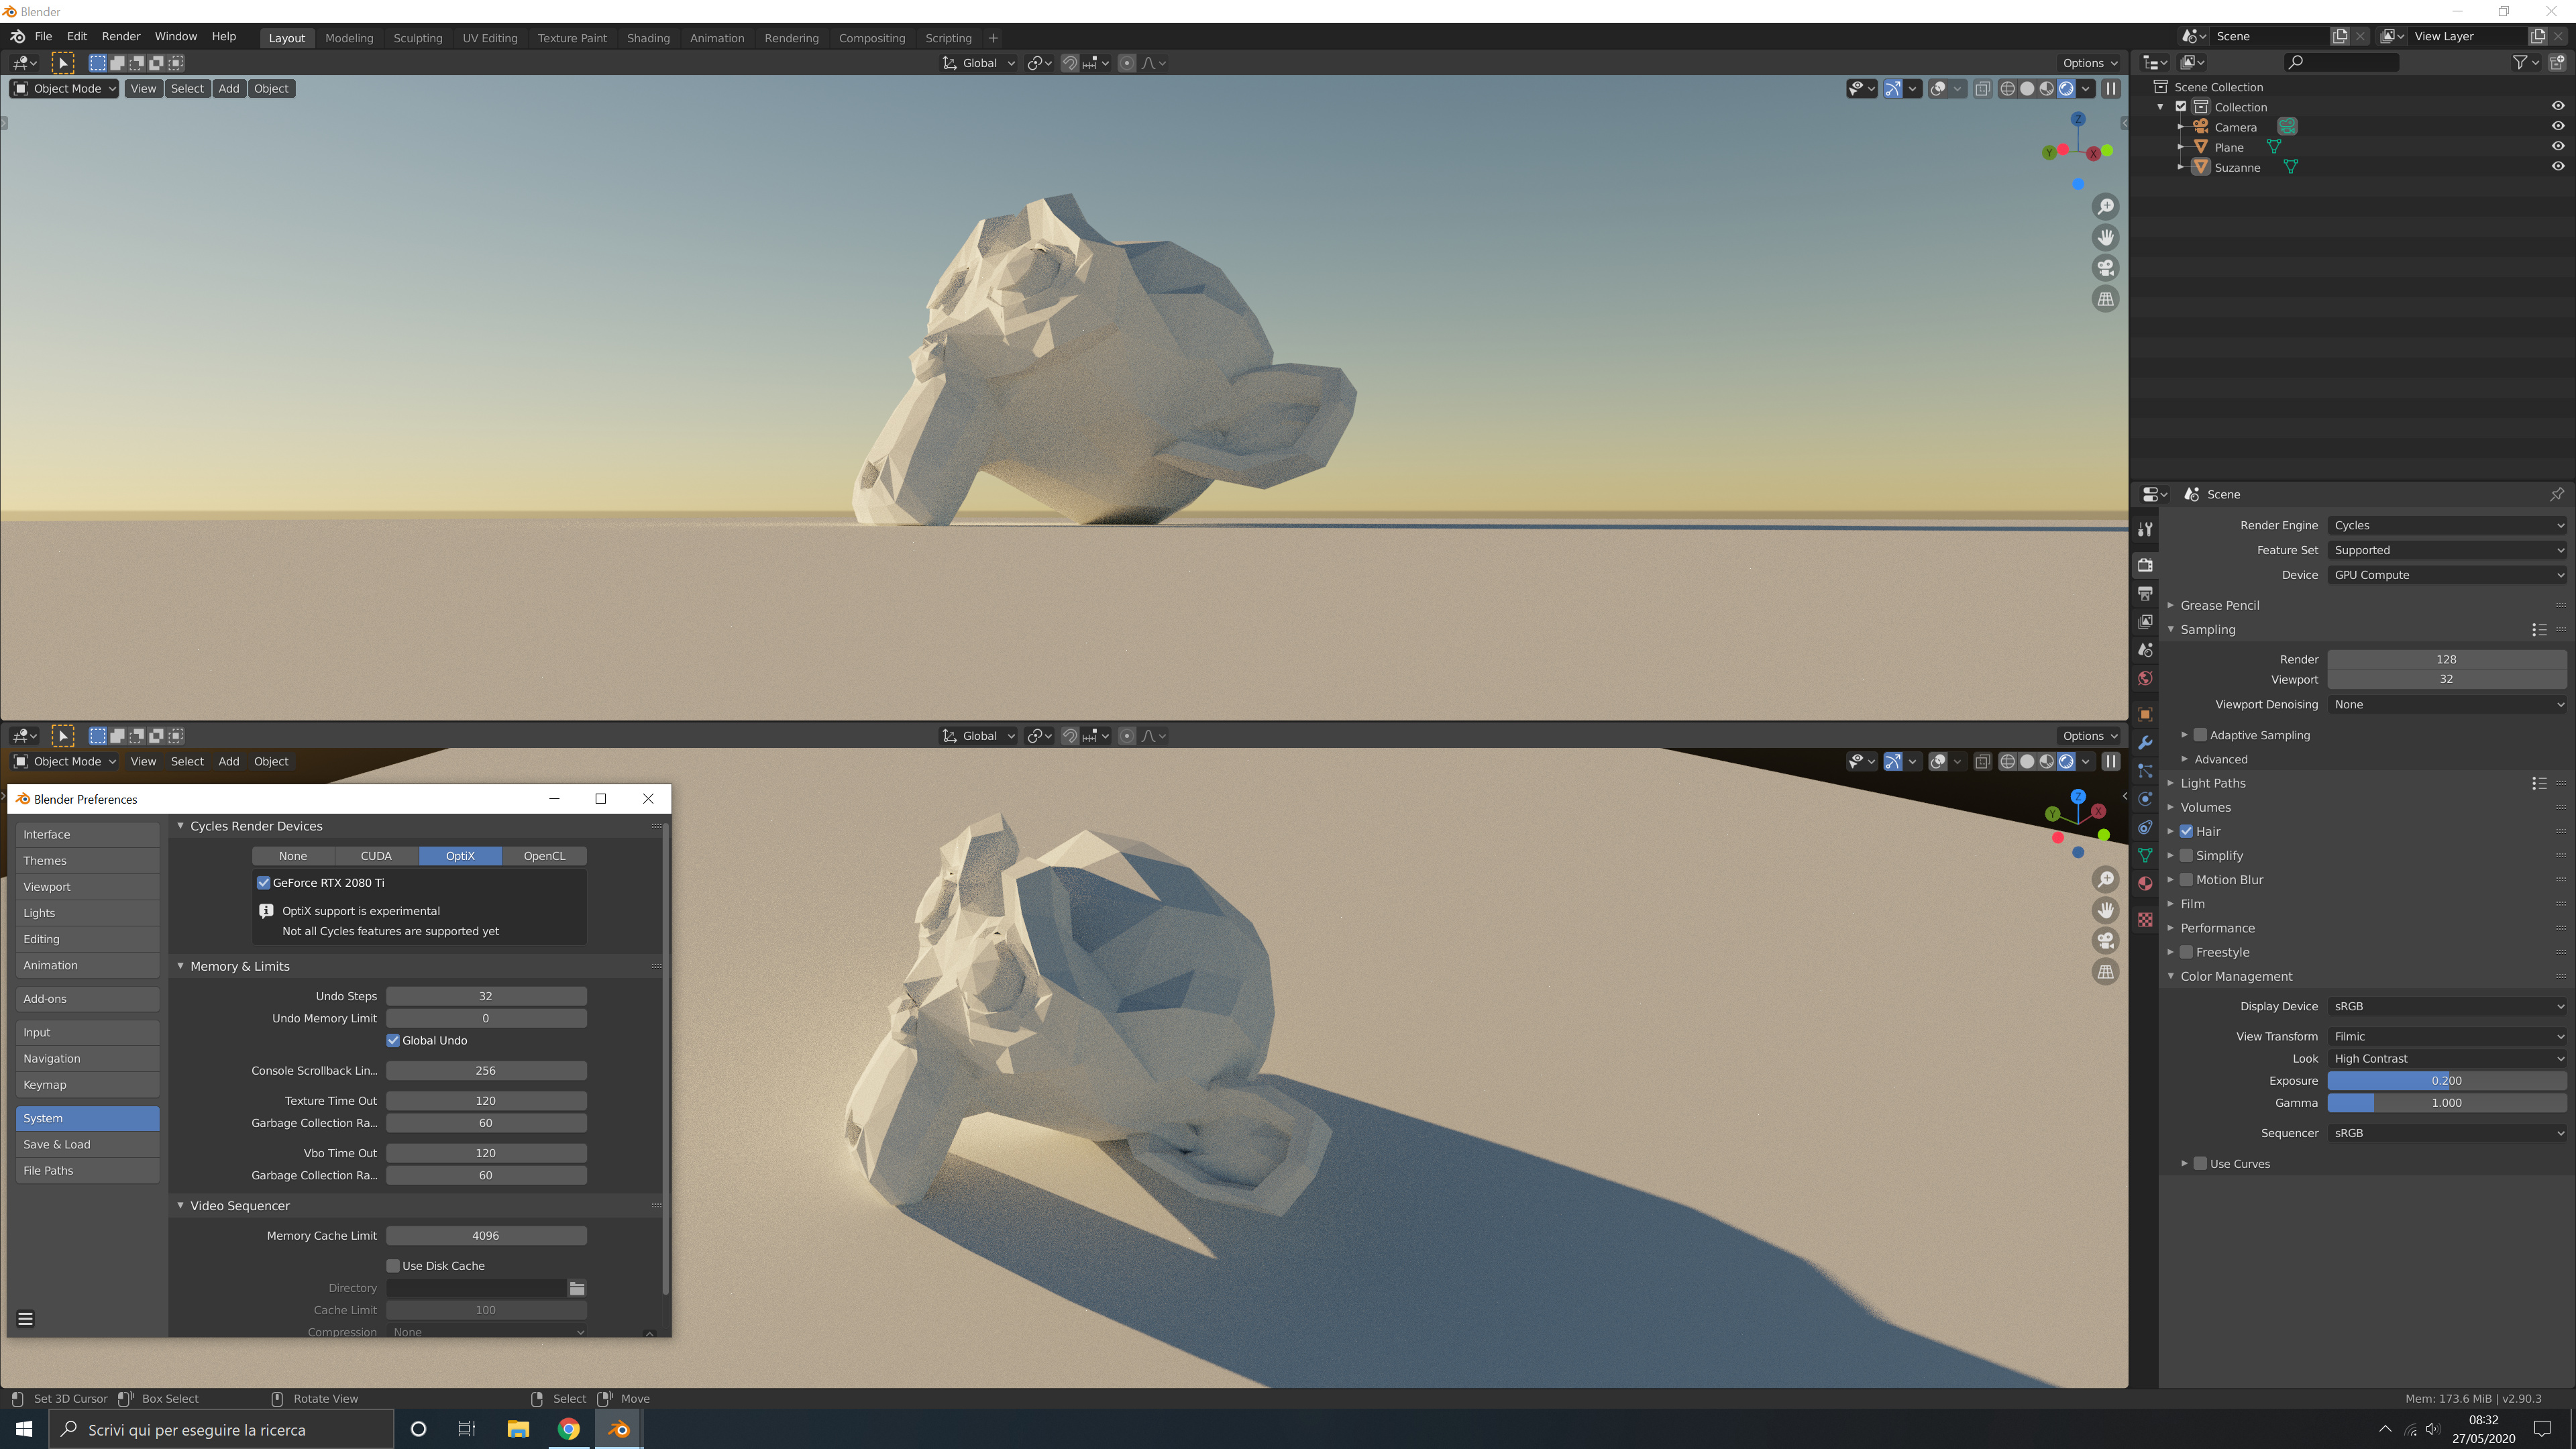
I see you are using CPU with OSL enabled. Disable it and it should work. Don’t try everything else other than the Ske Texture, it’s still in development stage so we are aware of that issue you mentioned
Damn, I forgot to change settings from production, thanks for pointing out.
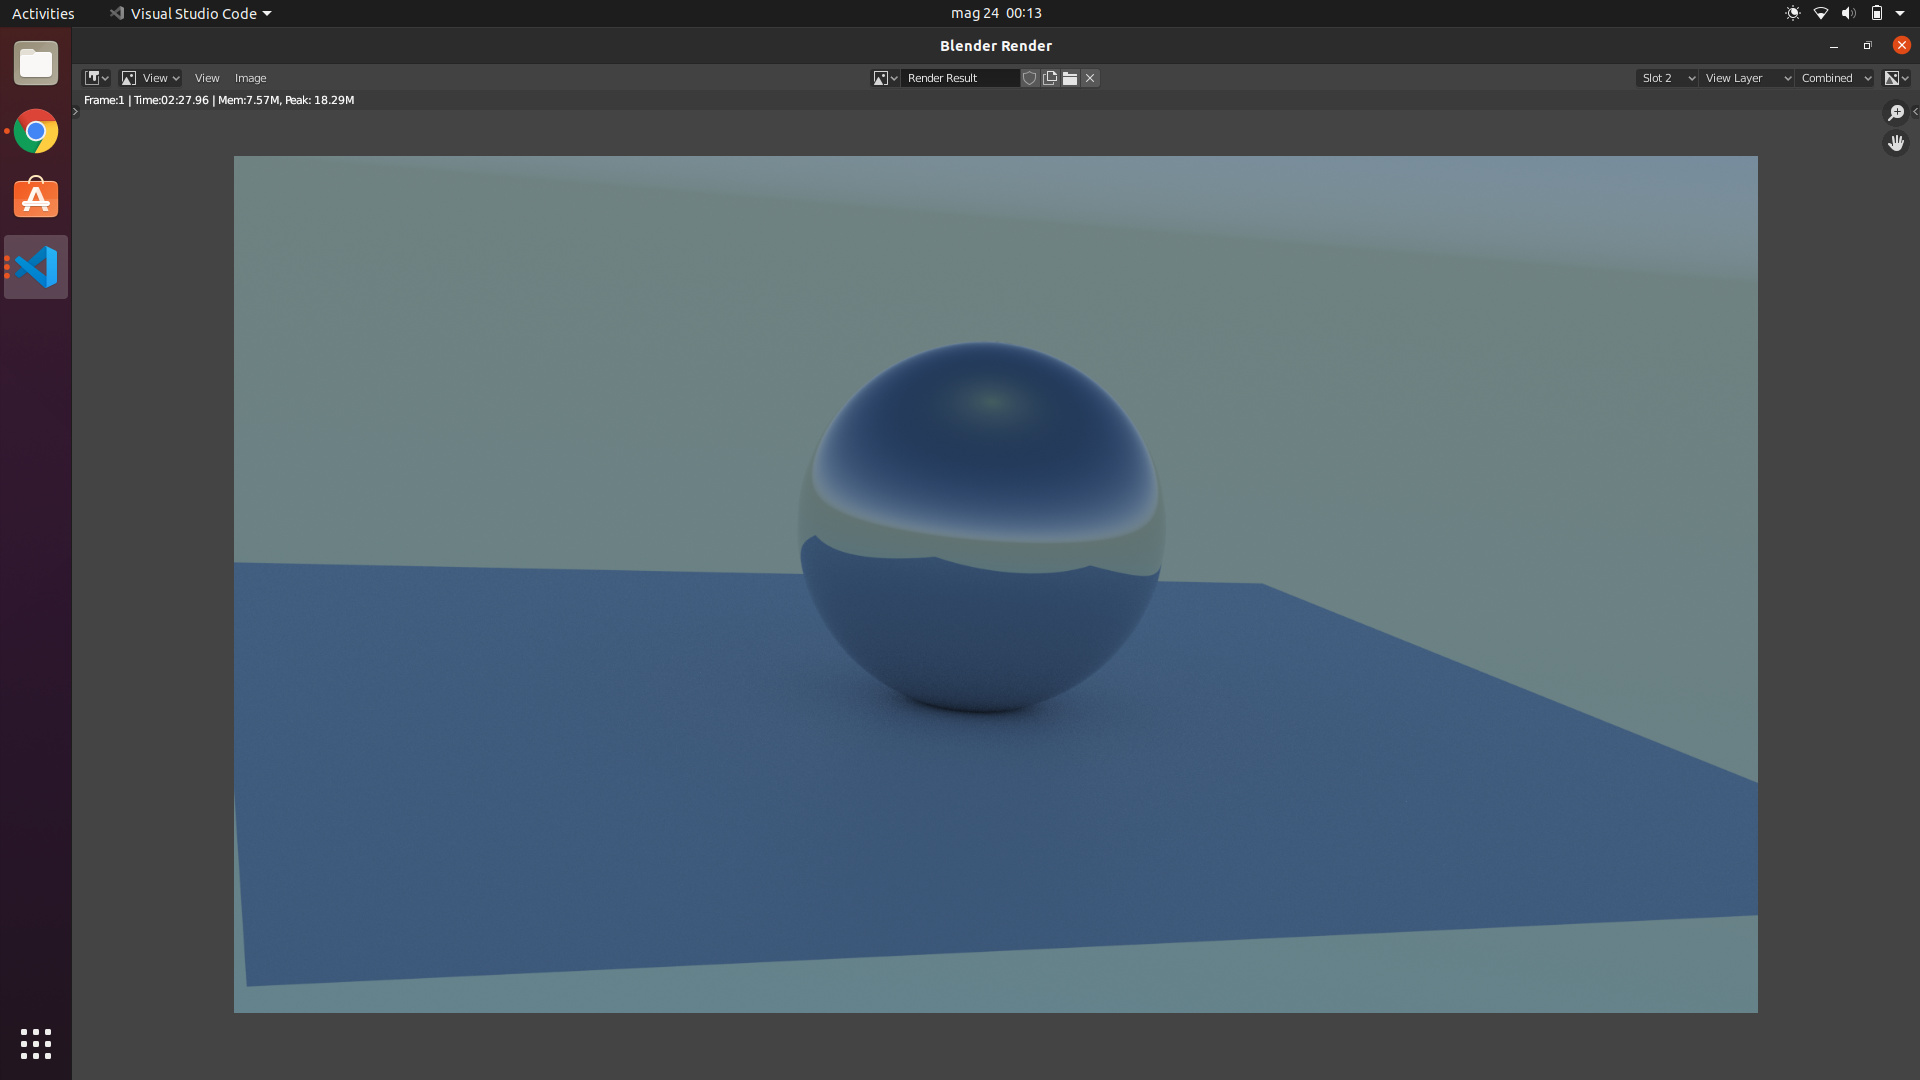
Anyway - little, to no progress. After disabling OSL, and with Cycles at ‘supported’ feature set most things are working correctly. The issue is that there are no gradients in the viewport:
Emission materials need to be set real high to have any effect on the scene, which makes them look over bright on the texture preview mode, specially when using Bloom;
On the Compositor, the color curves and some color operation nodes get flipped. For example, brightening an image is a downwards curve and darkening an image is a upward curve ( due the exponential nature of them ) and, in the color corrector, if you set it to blue you actually tint the image of red or something similar .
Shaders shouldn’t give non-physical output just to work around the fact that texture-preview mode doesn’t have an exposure control. The “flipping” you see in the compositor is a result of having display-referred tools despite only working in scene-referred space. You really should just avoid the nodes that can cause those issues, they’re simply not designed for the way the rest of the compositor works. Keeping this distinction and letting pixels over 1.0 stay as they are is very important for things like Filmic or ACES to work the way they’re supposed to. ESPECIALLY if you’re making footage that’s destined for HDR10/Dolby Vision where a lot of those >1 values still won’t be clipped in the final deliverable.
I could see MAYBE doing this by just a simple gain change (ex, multiply the entire shader output by 0.25 or something) but even that seems unnecessary. And you can do it yourself in the shader if you really want it anyway. The way it works now is the correct way for more modern workflows, it should stay that way IMO.
P.S. thank you for the sun disk size, @nacioss! It’s perfect!
Thanks for your time and the clear explanation @jason_C!
Sure, I was just mentioning some facts from the end user perspective, shader wise I now understand that everything is correct and working as it should when pixels get brighter than 1.0.
Even so, when the time comes to make the feature presentation, I think that this should be mentioned on the text.
After we know how the compositor works it is just like playing the Poisonous Pipeline level of Donkey Kong 3 ( controls are inverse ), we get used to it
Really nice work! I love that your repo also (still) contains the Python implementation you prototyped with, which is a good learning resource.
I was wondering if this sky model and implementation also supports sun positions below the horizon? Sky coloring in reality can be beautiful after the sun has (just) set and there’s some clouds around to reflect the light off.
It does for sun elevation down to like -3 degrees, lower would make black pixels, and that’s one of the limitations of single scattering (which this model is based on). Multiple scattering would produce better and more realistic results, but it would take too much time to implement correctly.
Or is it only possible to do this in post processing in compositing? In this case, it is in the plans to have isolated Sun Disc on a separate pass for compositing?
that phenomena is because of air refraction, we avoid air refraction because it is a subtle effect and not worth the rendering time.
You better have to do that in compositing and no, there are no plans to make it as a separate pass in compositing because it isn’t and shouldn’t be.
Wow I didn’t know this thread, yet I’m interested on the matter, since I periodically make production work that involves big open seas renders that include sky texture and some hdri. Yeah, hosek-wilkie sucks and needs a lot of tweaking to look good.
Nice job here, I really like the sun disc, and the overall intensities. Also those dust and ozone look awesome. Hope it makes into 2.90.
Is there any chance you can make it less fireflies-prone? (apart messing with clamp)
And …just to know: is there a realistic clouds texture node on the horizon?
no clouds plans… and for fireflies you can disable the sun disc and use a sun lamp instead in any time.
If all goes well it can make it for 2.90.
GPU rendering support coming soon!
 .
.

