Goal
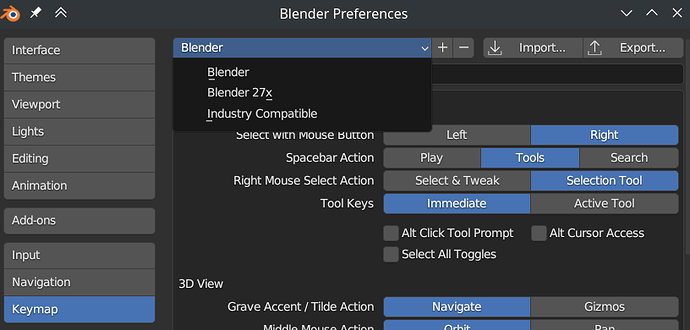
This thread is to show and discuss all planned changes to the Industry Compatible keymap for Blender 4.0.
Draw, Paint and Sculpt modes are the main target (Any mode with brushes)
The improvements can be summarized as:
- Mode switching and selection/mask type switching is more accessible via number keys
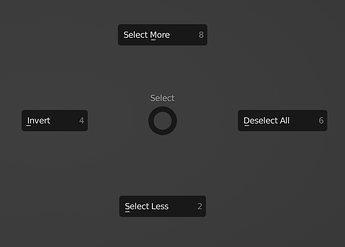
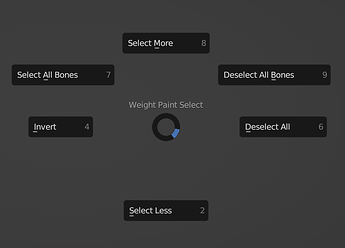
- Select & Mask pie menus in all Paint & Sculpt modes
- Missing vital operators have been added
- Existing shortcuts have been standardized across all related modes
- Shortcut conflicts were solved
New features and design decisions will be kept to an absolute minimum.
Feedback wanted!
Feel free to leave any feedback or suggestions in this thread!
Below you can download pre-made keymap to test the changes (Although some shortcuts are not fully supported yet).
Prototype Keymaps for Testing
Download and use these prototype keymap here:
https://projects.blender.org/attachments/df0c79ef-cc03-44ee-9100-e44a981a1192
How to use the keymap
- Duplicate your Blender
.configfolder for safe keeping - Copy & paste the contents of one of the keymap folders into your
.configfolder - Start Blender
Overview of Changes
This is an overview of all changes.
Expand for the full list
All Modes
General
- All brush shortcuts have been removed for free custom mapping
- Redundant shortcuts have been removed such as
- Line Session drawing (In GP Draw Tool)
- Select Alternate in GP
- Shortcuts standards are now consitent across all modes (Like
S&Ufor Brush size & strength) - MMB = Additional shortcut for panning in the User Interface (popular request)
Mode Switching (Affects entire keymap)
- 1 - 3 = Switch selection/mask modes for the current mode (Previously this would always switch to edit mode)
- 1 - 3 = From Object mode will still always switch to Edit mode to the correct selection type
- 4 = Mode switching pie menu (previously
4-7for individual modes) - ` = Transfer Mode (Previously not mapped. Useful for instant object switching while keeping the current mode)
- 5 - 0 = Unassigned
Brush vs Selection
- Shift LMB= Smooth Brush / Stabilzed Stroke in GP Draw Mode / Toggle-Extend Selection on selection tools
- Ctrl LMB = Inverted Brush
- Shift Alt LMB = Set Selection
- Shift Alt Ctrl LMB = Toggle-Extend Selection
- Shift RMB = Set Cursor / Set Transform Pivot in Sculpt Mode
Stencil Controls
These have been remapped to avoid conflicts with vital navigation shortcuts.
(Shortcuts are reminiscent of Zbrush)
- Z Shift LMB = Rotate Stencil 1
- Z Shift MMB = Move Stencil 1
- Z Shift RMB = Scale Stencil 1
- Z Shift Alt LMB = Rotate Stencil 2
- Z Shift Alt MMB = Move Stencil 2
- Z Shift Alt RMB = Scale Stencil 2
Brush Size vs Select Linked
These were previously in direct conflict. Now they are both distinct and based on other DCC software.
- [ = Decrease Brush Size (Previously missing from many modes)
- ] = Increase Brush Size (Previously missing from many modes)
- Alt LMB double click = Select Linked Pick (Not in direct conflict with navigation)
- Shift Alt LMB double click = Deselect Linked Pick
- Ctrl L = Select Linked
Select & Mask
- Q = Cycle Masking/Selection Tools
- Shift Q = Toggle Mask Overlay in Sculpt Mode
- Alt A = Auto-Masking Pie Menu
- Shift A = Expand Mask by Topology / Grow Selection in Curve Sculpt Mode
- Shift Alt A = Expand Mask by Normals
- Ctrl A= Mask/Select Pie Menu in all Paint & Mask modes
Face Sets & Visibility
- Shift W = Face Set Expand
- Shift Alt W = Active Face Set Expand
- Ctrl W = Face Set Edit Pie Menu
- Ctrl H = Hide Active Face Set
- Shift H = Hide Inactive Face Sets / Toggle Visibility
- Page Up = Grow Active Face Set
- Page Down = Shrink Active Face Set
Transforming
For Sculpt and Weight Painting modes
- W = Move Tool
- E = Rotate Tool
- R = Scale Tool
- T = Transform Tool
Sculpting
- Shift D = Subdivsion level Down
- Shift Alt D = Subdivsion level Up
- Ctrl Shift D = Voxel Remesh / Dyntopo Flood Fill (Context dependent)
- Ctrl D Set Voxel/Dyntopo detail size (Context dependent)
Painting
- Backspace = Set Color/Weight
- I = Sample Color/Weight
- Alt I = Sample Vertex Group
- X = Swap Colors
Grease Pencil
- Shift S = Animation Menu
- Shift Alt S = Insert Blank Keyframe
- Alt H = Unhide Layers
- Ctrl H = Hide Active Layer
- Shift H = Hide Inactive Layers
- T = Active Layer Menu
- Alt Y = Material Menu
- Alt Backspace/Delete = Delete Active Keyframe
Other
- F = Center View to Mouse (Overrides ‘Frame Selected’ in Draw, Paint & Sculpt modes)
- D = Annotate Tool
- L = Toggle Stabilize Stroke
More Info
For more detailed information, read the design task and the included spreadsheets:


