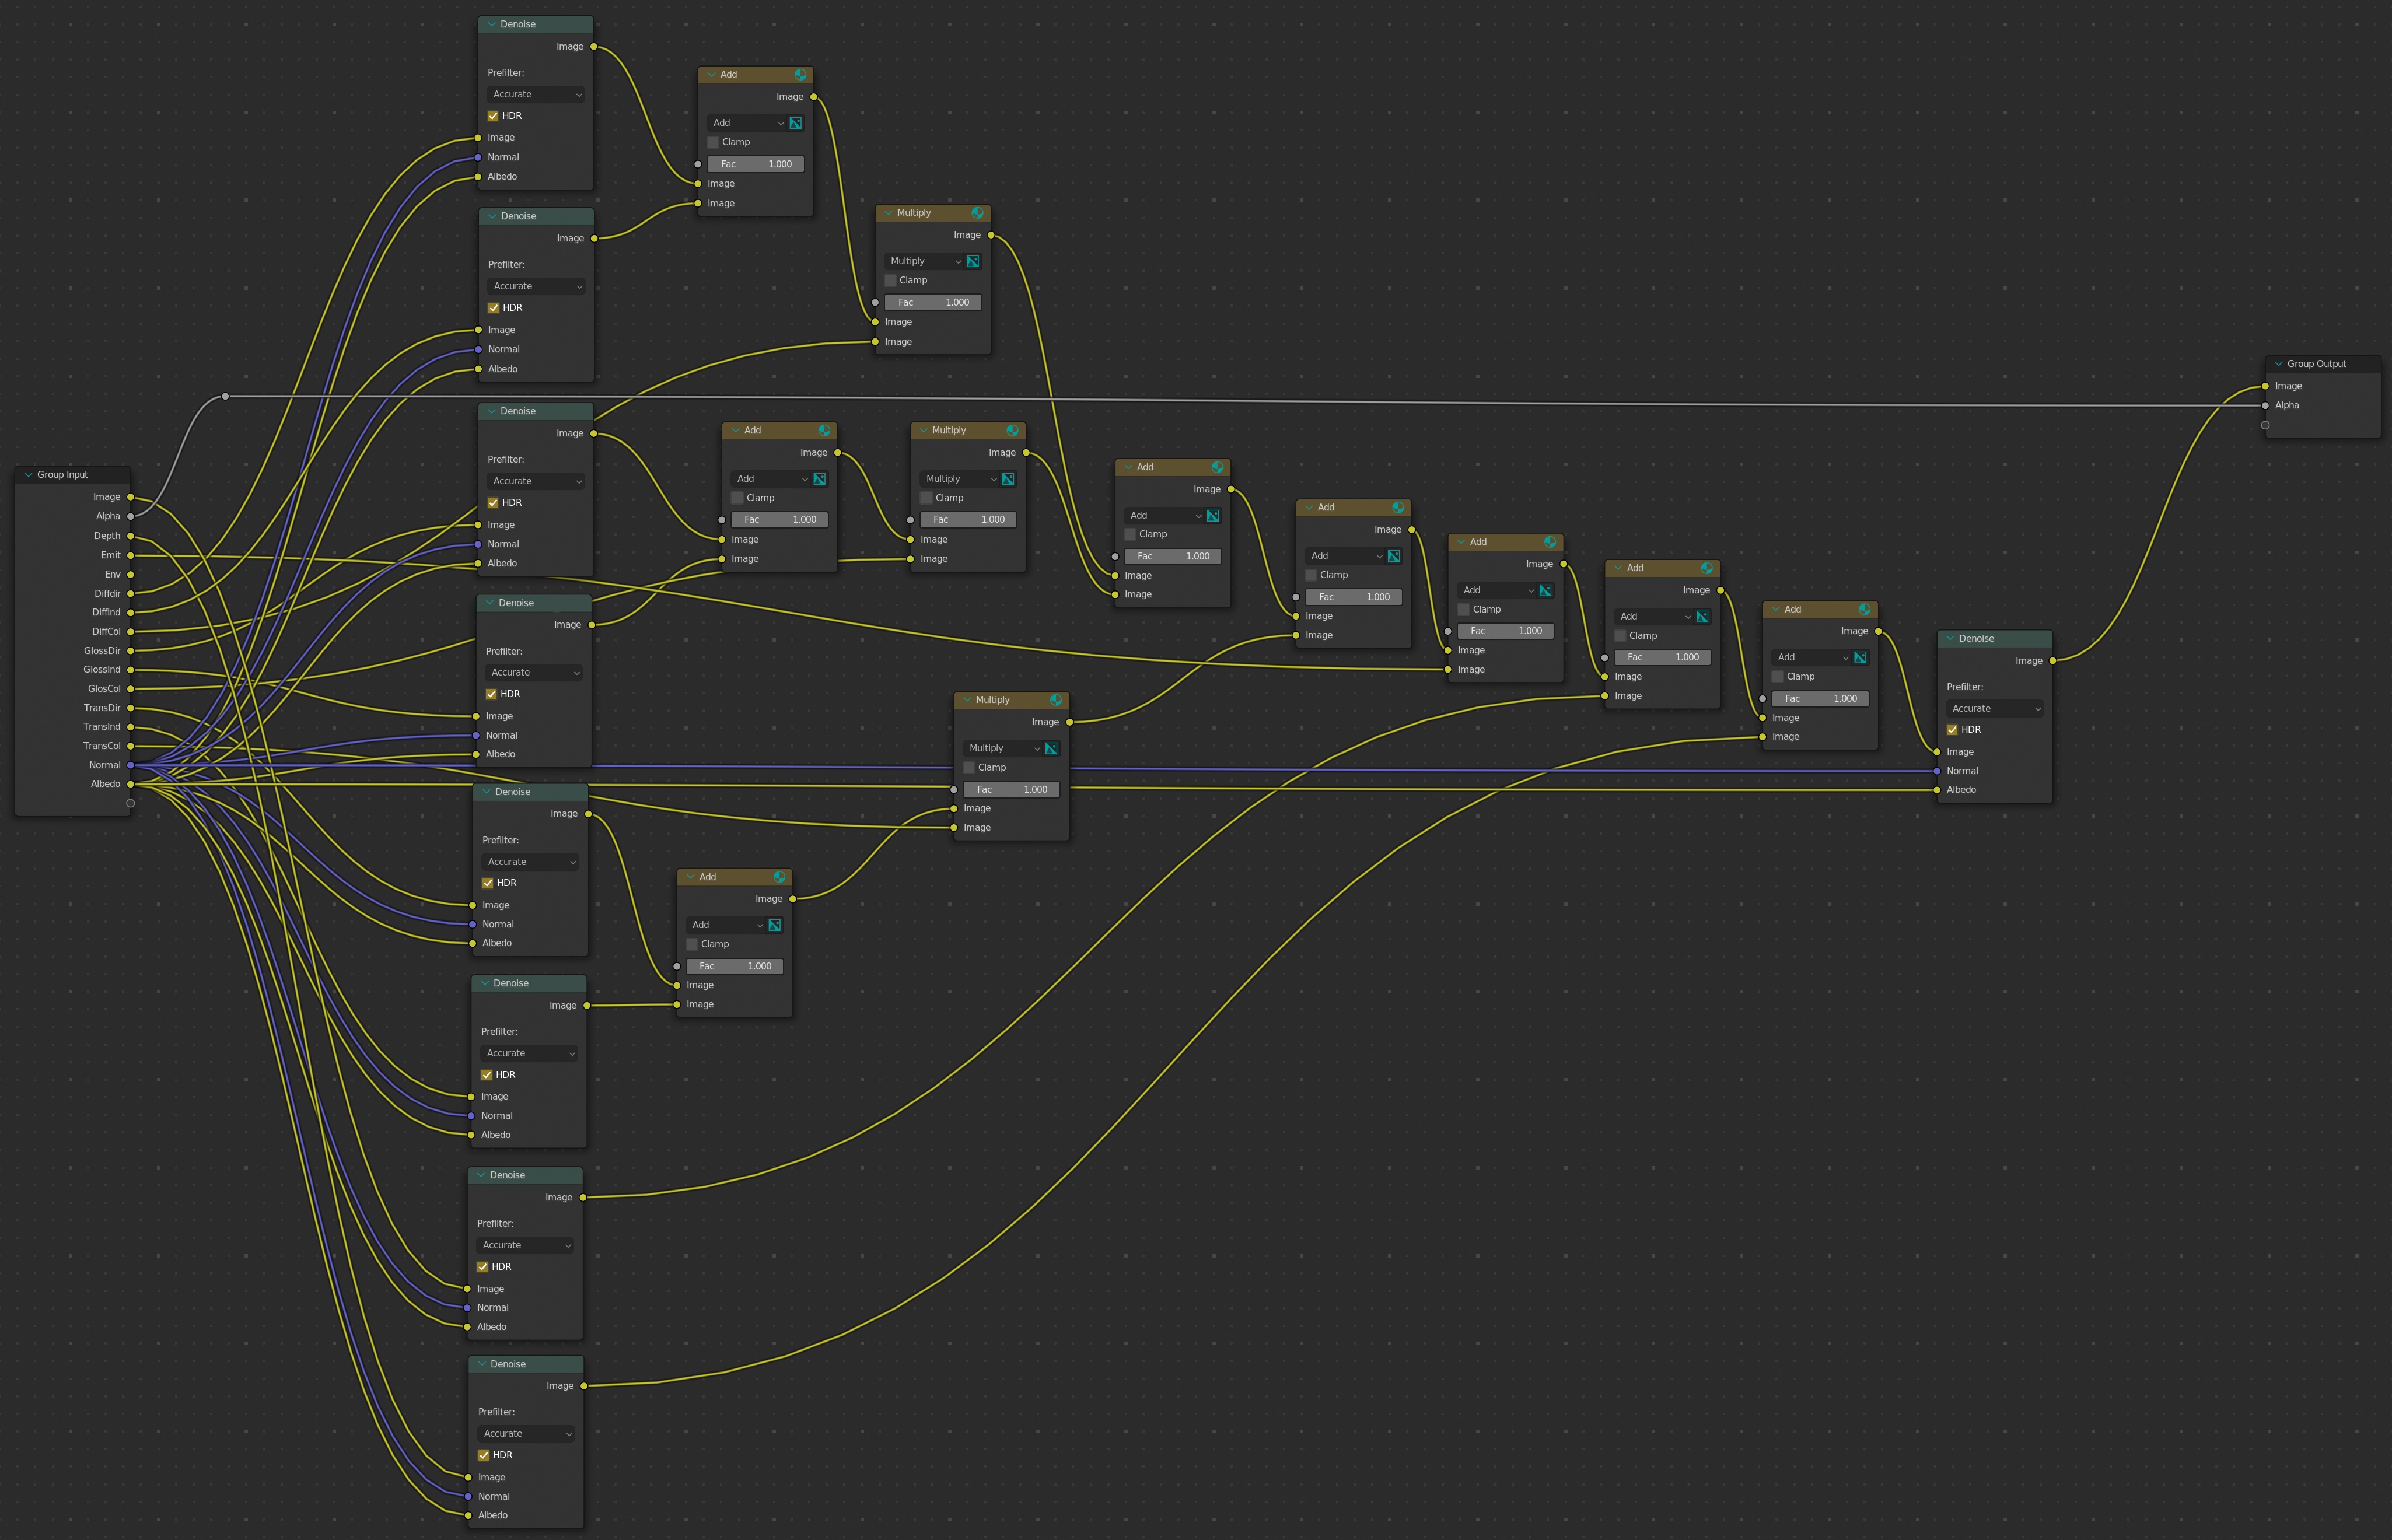
Hello everyone I want to share with you my revision of the improved noise reduction in Cycles. I would really like the Blender developers to notice this method and improve it even more! My article is written in Russian, but you can understand everything from the screenshots without translation. I wish you all the best and great creative success! Thanks to the Blender developers for creating such a cool product!
1 Like
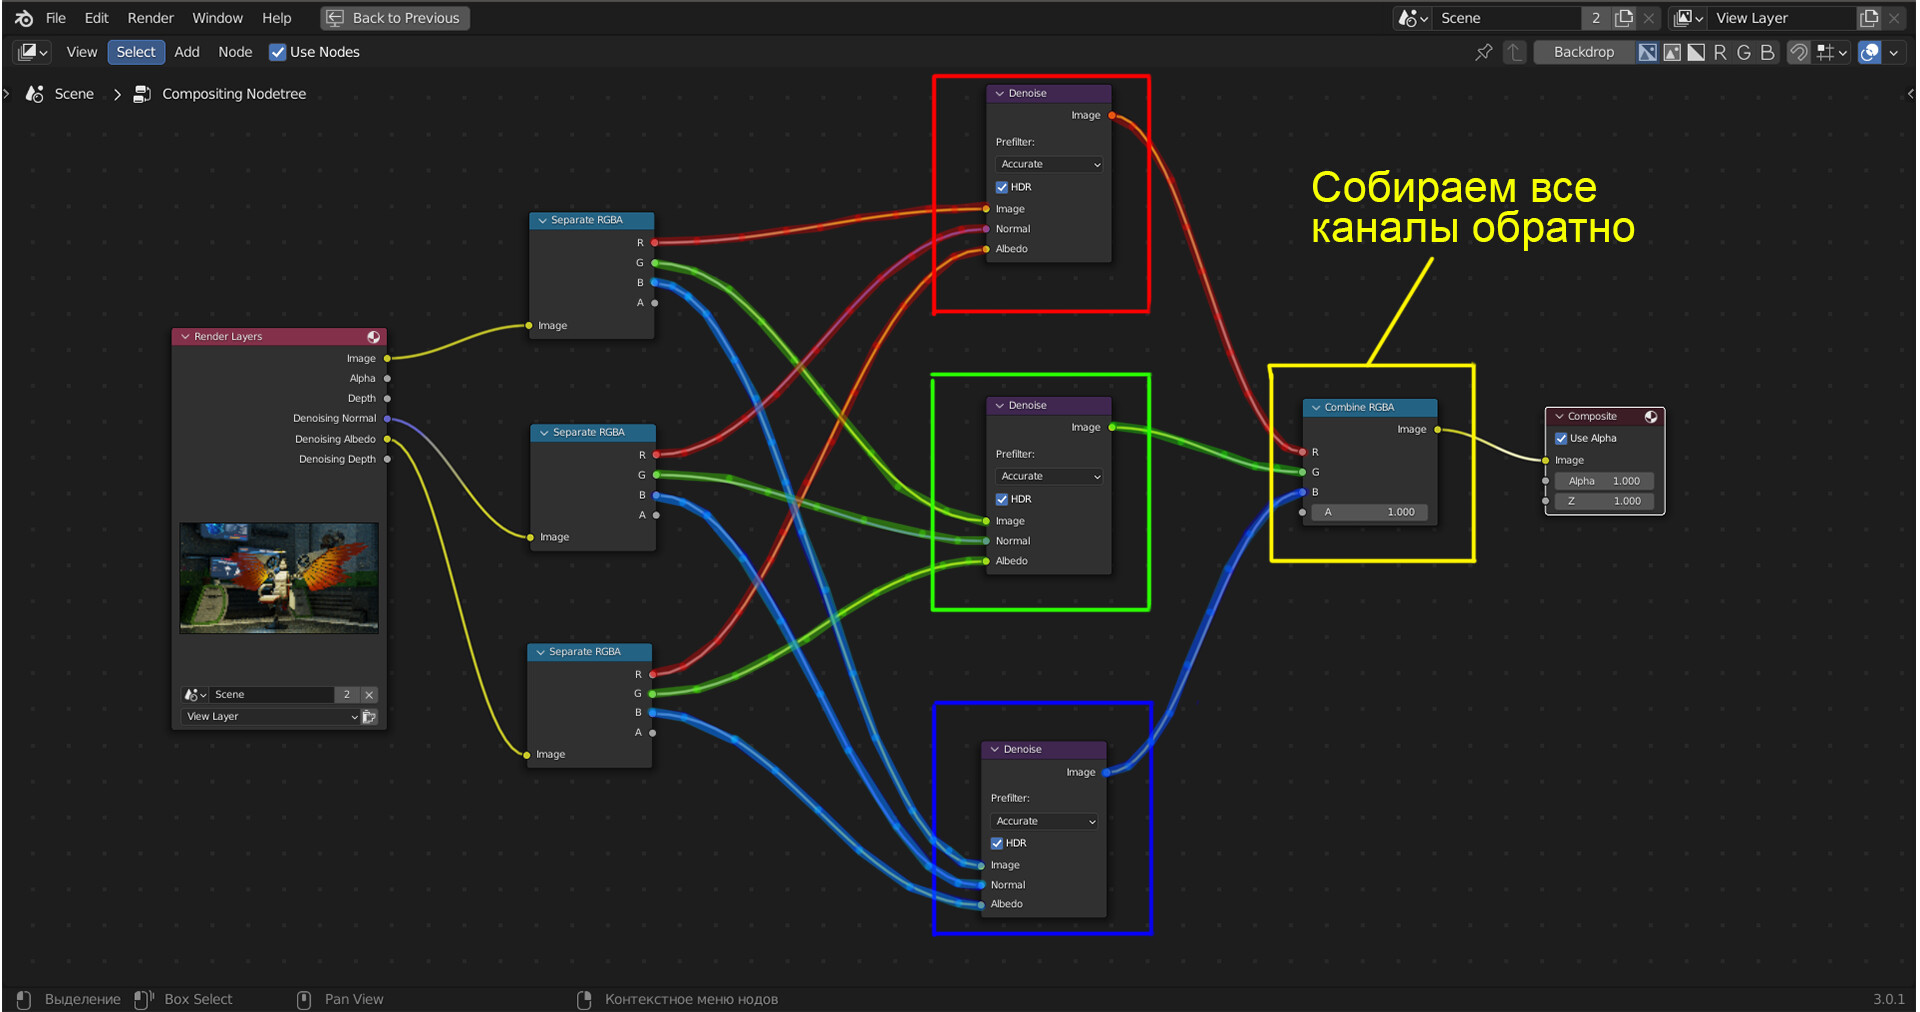
Note: You will probably get better results if you don’t use a Separate RGB node on the Denoising Normal pass.
1 Like
so far, all my tests show very good results when using this method. But I’ll try, thanks for the advice!
I made a test render in which I did not connect the “normal” output to the “Separate RGBA” node, the output result turned out worse. So far, my method works better! 
That doesn’t make logical sense to me. And I can not reproduce your claims (using the Separate RGBA node of the Denoising Normal pass results in extra colour fringing on fine details. While skipping the Separate RGBA node resolves that issue).
Have you considered investigating “Multi-pass” denoising? The process where you denoise each pass that makes up an image separately? For example, denoising the diffuse pass separate from the glossy pass separate from the transmission pass, etc. Then adding them all together to create the final image. Many people have had success with that. But, it can sometimes introduce “false details” similar to how your method introduces “false colours” on fine details when using the Separate RGBA node on the Denoising Normal pass
I’m not really an expert on denoising, but splitting that normal seems nonsensical to me? The normal isn’t ‘a normal for red, a normal for green, normal for blue’ I think. It’s just the normal vector associated with that pixel. By splitting you are now sending very strange normals to the red/green/blue denoising steps. You are sending the x coordinate of the normal vector to the red channel (repeated, as (x,x,x) ) , the y coordinate to green and the z coordinate to blue.
Or I have completely misunderstood what ‘denoising normal’ stood for, that’s possible as well ;-).
As far as I understand it myself, it turns out that each channel is processed not as a color image, but as black and white. Images don’t turn only red, only blue, or only green. Each of them is black and white.
Yes of course. That’s just how 3 channel images work. Each channel is a grayscale image representing the intensities in that channel.
Only a normal image is different. There the 3 channels are the x and y and z coordinate of the normal vector. So it’s meaningless to split the normal image and use only the x coordinate for red, only the y coordinate for blue and only the z coordinate for green.
512 spp without denoise ( ref )

9spp regular denoise

9spp treezod denoise

32spp regular denoise

32spp treezod denoise


Conclusion : Regular denoise is better AND faster
I tested this yesterday on this scene file and as you said it gives " false details " and it’s not worth the added time.
I think that nowadays cycles is fast enough to clean up the noise, if you’re in a situation where you need to have less than 10sec per frame you better use EEVEE or invest lots of time optimizing your scene
Where and what are the false details? In these small images, nothing can be understood without bringing them closer. They are no different from each other at such a low resolution. What can you see there with such detail?
Take two images into a pixel app like PS,Affinity…
change the blend mode from the top image to difference.
If everything is black, nothing has changed.
But if something changed, you will see bright spots, where something changed…
comparison, done !!
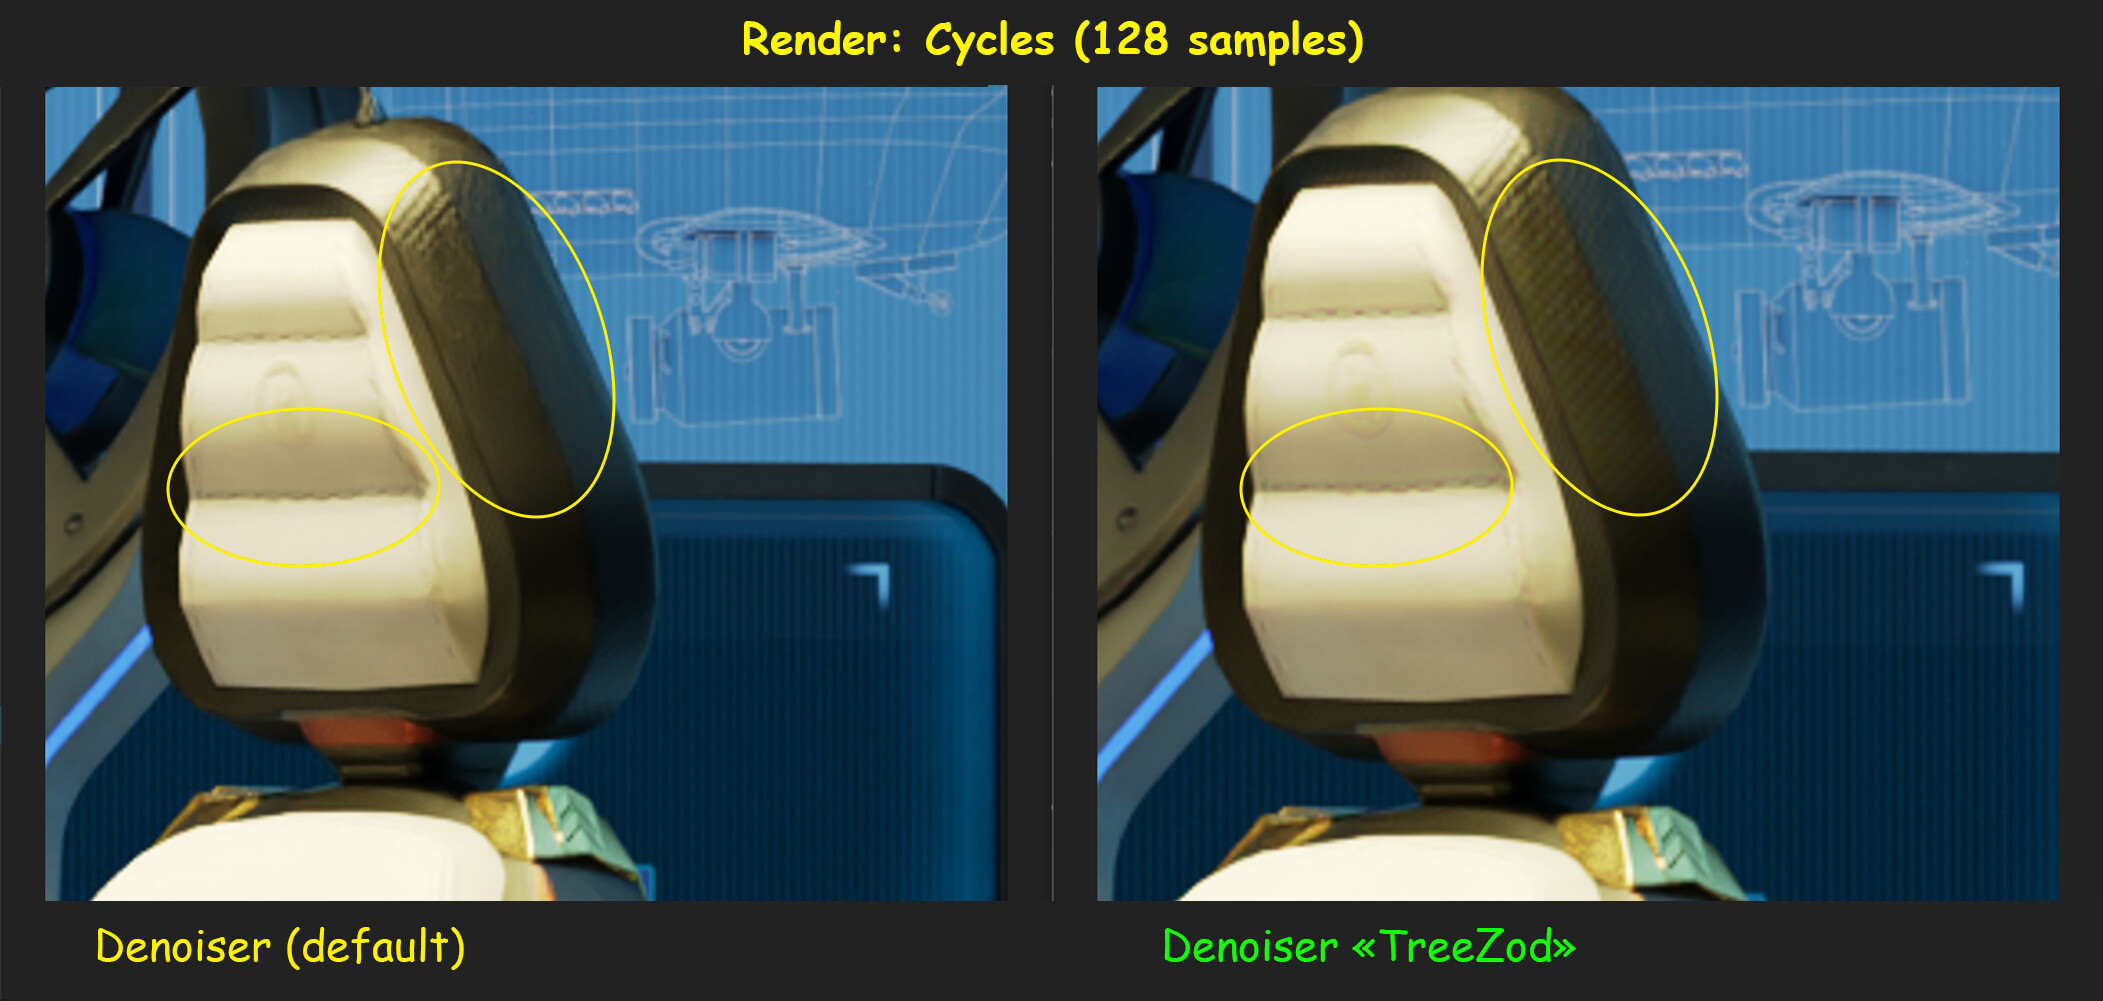
I constantly use my own noise reduction method, and I have never had any problems with distorting the final picture! This method works best on fabric, wool and hair!
Well, I’m glad you like it. And by all means go on using it. But splitting the normal and using the x-component to filter red, the y component to filter green and the z component to filter blue is a nonsensical operation which can only accidentally look better. I think the result of that operation is what people might call ‘false details’.
1 Like
you can open them on your browser tabs and switch between them with ’ Ctrl + page down/up Arrow ’
You’ll see the difference between them