Blender is a very powerful tool to manipulate the virtual world of film and videos. It excels in the field of VFX whereas the field of SFX and the manipulation of the physical set is left to proprietary solutions.
Having such a solution designed, built, gotten the TÜV approval, it has been used on a number of A-movies. I would now like to invoke the Open Source approach that has Blender thriving, hoping other users are going to be as fascinated as I am myself in getting Blender to interact with the power SFX (MOCO) Stunts and Shows need.
At
you can find a working sketch of the proposed Add-on.
As this approach was sparked during a discussion in mid August – I’m still trying to find my ‘Blender legs’ – there is a lot of room to improve.
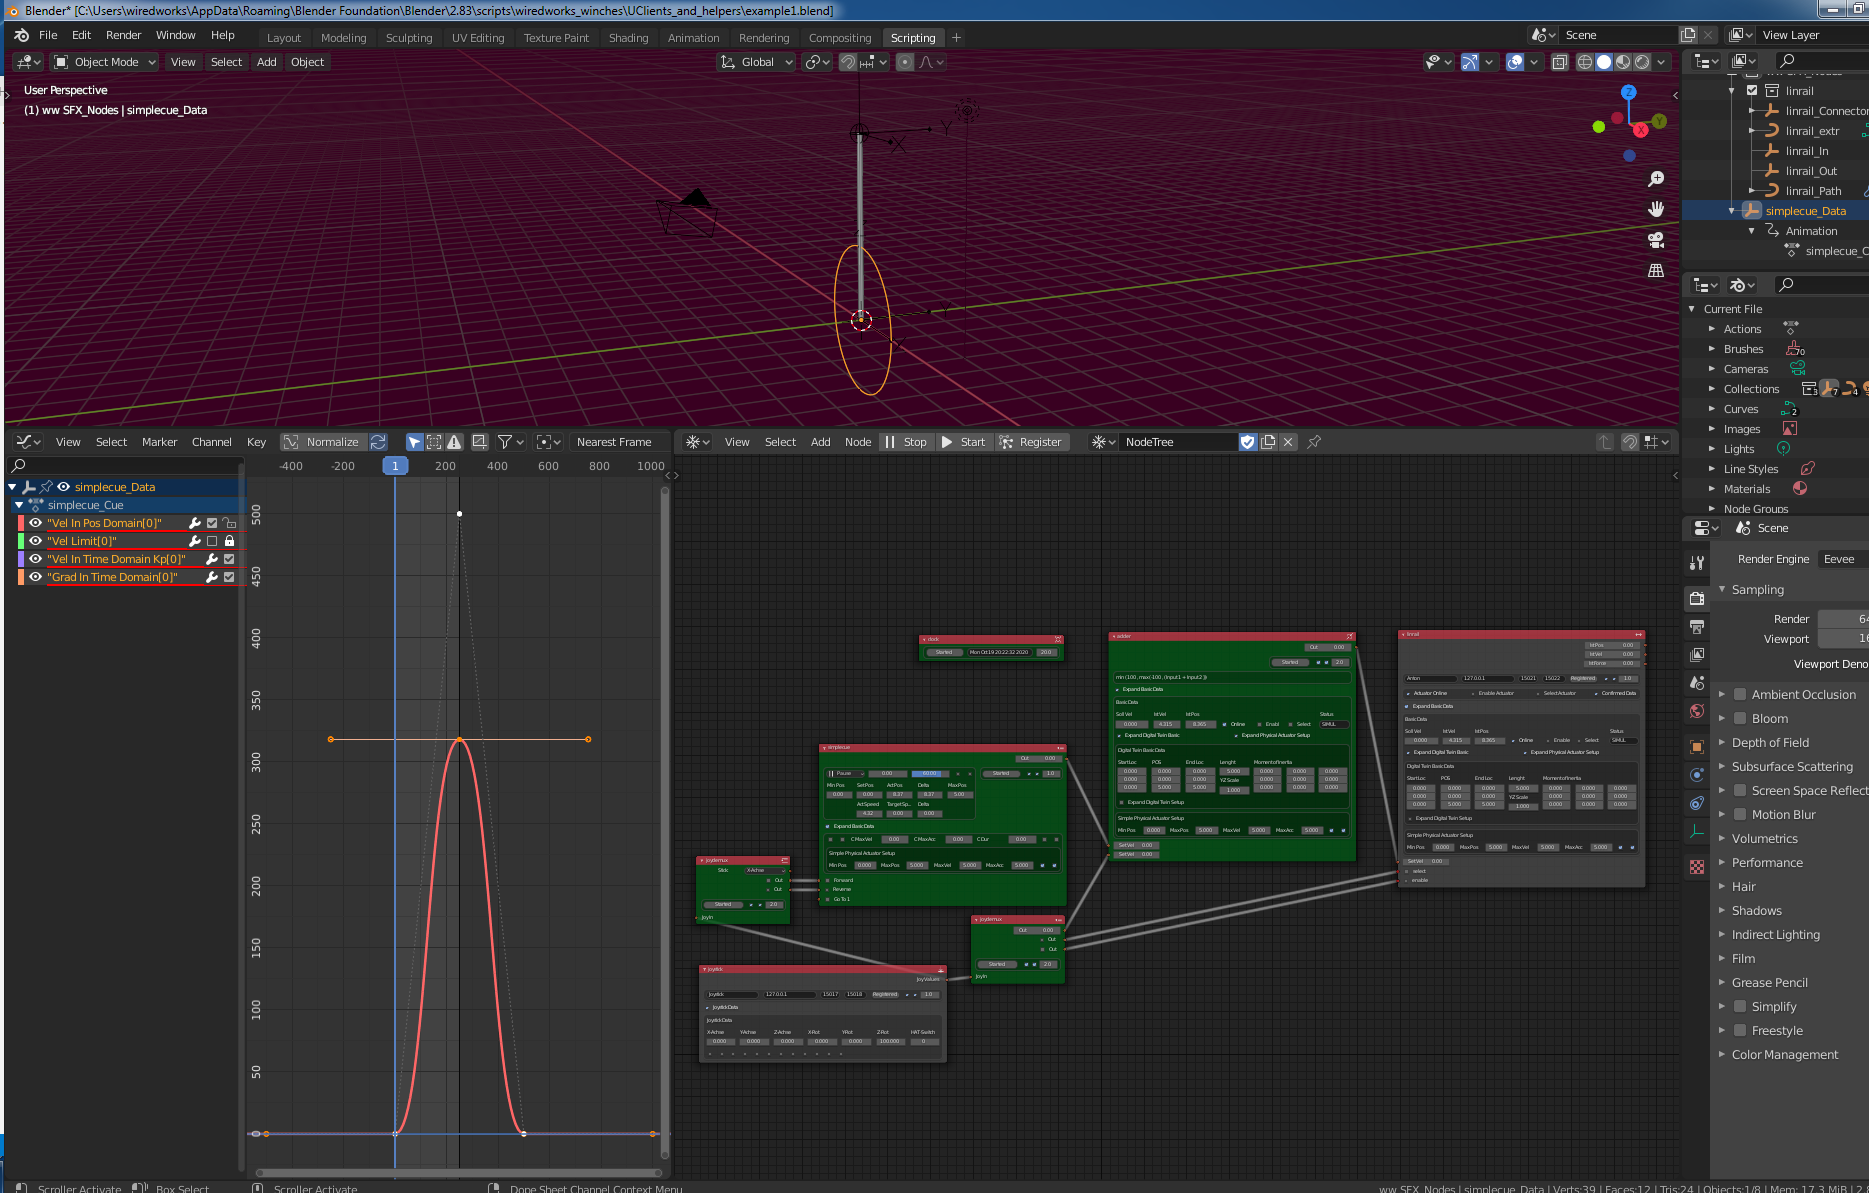
Blender ingests Joystick Data over UDP
this Data is Demuxed to feed a simpleCue Node and an adder Node, the clock is used to drive the Operators. The adder fed by the simpleCue and the Joystick passes the signal to the LinRail Node – and the operator of that node uses UDP-Nodes to activate the physical axis.
What’s missing – some rotational actuators some linear actuators some kinematics — that’s the stuff I can manage on my own.
The real deficits are beta-testers and co-dev’s.
Beta-Testers to find the bugs and use cases I missed.
Co-dev’s to discuss the implementation - as my blender knowledge is still very limited and I presume there is a better way to structure the data
in the UClients and Helpers you find a Joystick to UDP python script ready to run out of this folder
the python Axis- Clients are also included.
I have added an example1.blend to the same folder.
change the original the space.node.py node editor to the one supplied in this folder
this exposes 3 operators SFX_MN_Register, SFX_MN_Start and SFX_Stop to the user
invoke the Start Operator —>
The clock Node, The Demuxers, the Cue Node and The adder should change their color to green, their Start Button should switch to Started, 2 check boxes should become checked, (the first is checked when the Operator associated with the node is started the second gets checked when the operator is running modal) and the text-property to the right of those check boxes should start to ‘flicker’ ( this text-prop is updated by the associated Operator (cycle time).
— Confirm IP-Adress and Port Numbers of joystick and LinRail Node when correct either push the register Button of the node editor or the respective buttons in each node.
Register opens the UnixSockets the checkbox to the right starts the communication and the next checkbox gets set by the operator once the connection is started.
Once you have started the communication you see the Values of the joystik in the jopystick node.
Some experimenting with witch button has to be pressed when should get you to move the axis in its Python process (also included in the folder (Client at 15021)) and the linrail-Connector in the 3DView follows the ‘real - simulated’ axis.
I will try to assemble all that information in an Overview a tutorial will take a little bit longer as in such a tutorial some safety approaches and procedures have to be included (not as long as we play with simulated axis but the real motors I’m using have ~30kW.
When downloading the Zip from Github, it needs to be unzipped and this part of the name ‘-master’ needs to be removed before zipping it again and then installed.
When enabling the add-on, you’re informed that scipy is missing.
@tintwotin THX - I put the installing instructions in to the read-me of the repo.
@tintwotin Sorry, the app relies, as at least one button is used as a dead-man switch that has to be kept pushed to enable / select the axis while a cue or a joystick-move is executed, on the input having some digital inputs.
The Protocol for reading the joystick is a simple one and can be found in the exchange_data(self,context) method of the SFX_Joystick_Op Operator.
The add-on is intended to work both ways
– the first part is to control the Moco’ (the 4-wire rig (in this case)) X,Y,Z-coordinates and the Motion of the camera head (Pan-Tilt-Roll ; Focus,Iris,Zoom) and
— the second is getting the real world positions of those Parameters into Blender