While in Weight Paint mode, I noticed that the Gradient tool was producing unexpected results. I expected a mathematically linear gradient, but after some testing, I confirmed that there’s some strong easing being applied.
PROBLEM
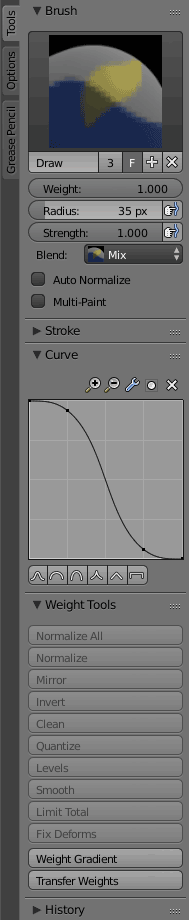
After further digging, I finally realized that it’s using the Falloff setting from the other Weight Paint tools. The Draw, Blur, Average, and Smear tools all have Falloff settings. The Gradient tool seems to use the Falloff curve of whichever tool was last selected. In fact, this is also true for the Blend setting. For instance:
- Let’s assume that the Draw tool is currently using the default (smoothed) Falloff curve and the Blur tool is using a Linear falloff curve.
- I select the Draw tool and then switch to the Gradient tool.
- The Gradient tool produces a smoothed/eased gradient.
- I select the Blur tool and then switch to the Gradient tool.
- The Gradient tool now produces a fully linear gradient.
The Gradient tool also uses the Blend setting from the Draw tool. For instance, if the Draw tool is set to Subtract, then the Gradient tool will also subtract weight.
SOLUTION
Simply, Falloff, Blend, and any other settings that are used by the Gradient tool should be shown when the Gradient tool is active.
As an FYI, prior to 2.8, all tool settings were always shown, so it was much more intuitive that the Gradient was applied according to a curve.