There’s a difference between unit conventions and being physically based. HDRs that I’ve seen look approximately as intended at exposure 0, and require scaling to bring it to a typical physical unit. I’m not sure that I’ve come across HDRs that have values in the same physical unit as is being proposed for the sky texture node here.
The issue is one of usability. It will not be obvious at all to the user that they need to change the exposure. And not the exposure in the color management panel, because then your pixel values will be too dark for compositing and export of EXR to other applications, but the one in the Film panel.
So if you don’t have a proper design here you are just letting users end up with other non-obvious problems.
As a developer you have to start somewhere, but it doesn’t mean we should release a halfway solution to the user before the full design is worked out.
What I proposed to @nacioss is to add a Strength parameter on the Sky texture. If set to 1.0 it would use the physical units, but until that design is worked out we would set it to a lower value so it looks ok with the default exposure at 0.0.
And i replied that it would add extra visual not needed UI mess. At this point i would prefer to add the hack internally.
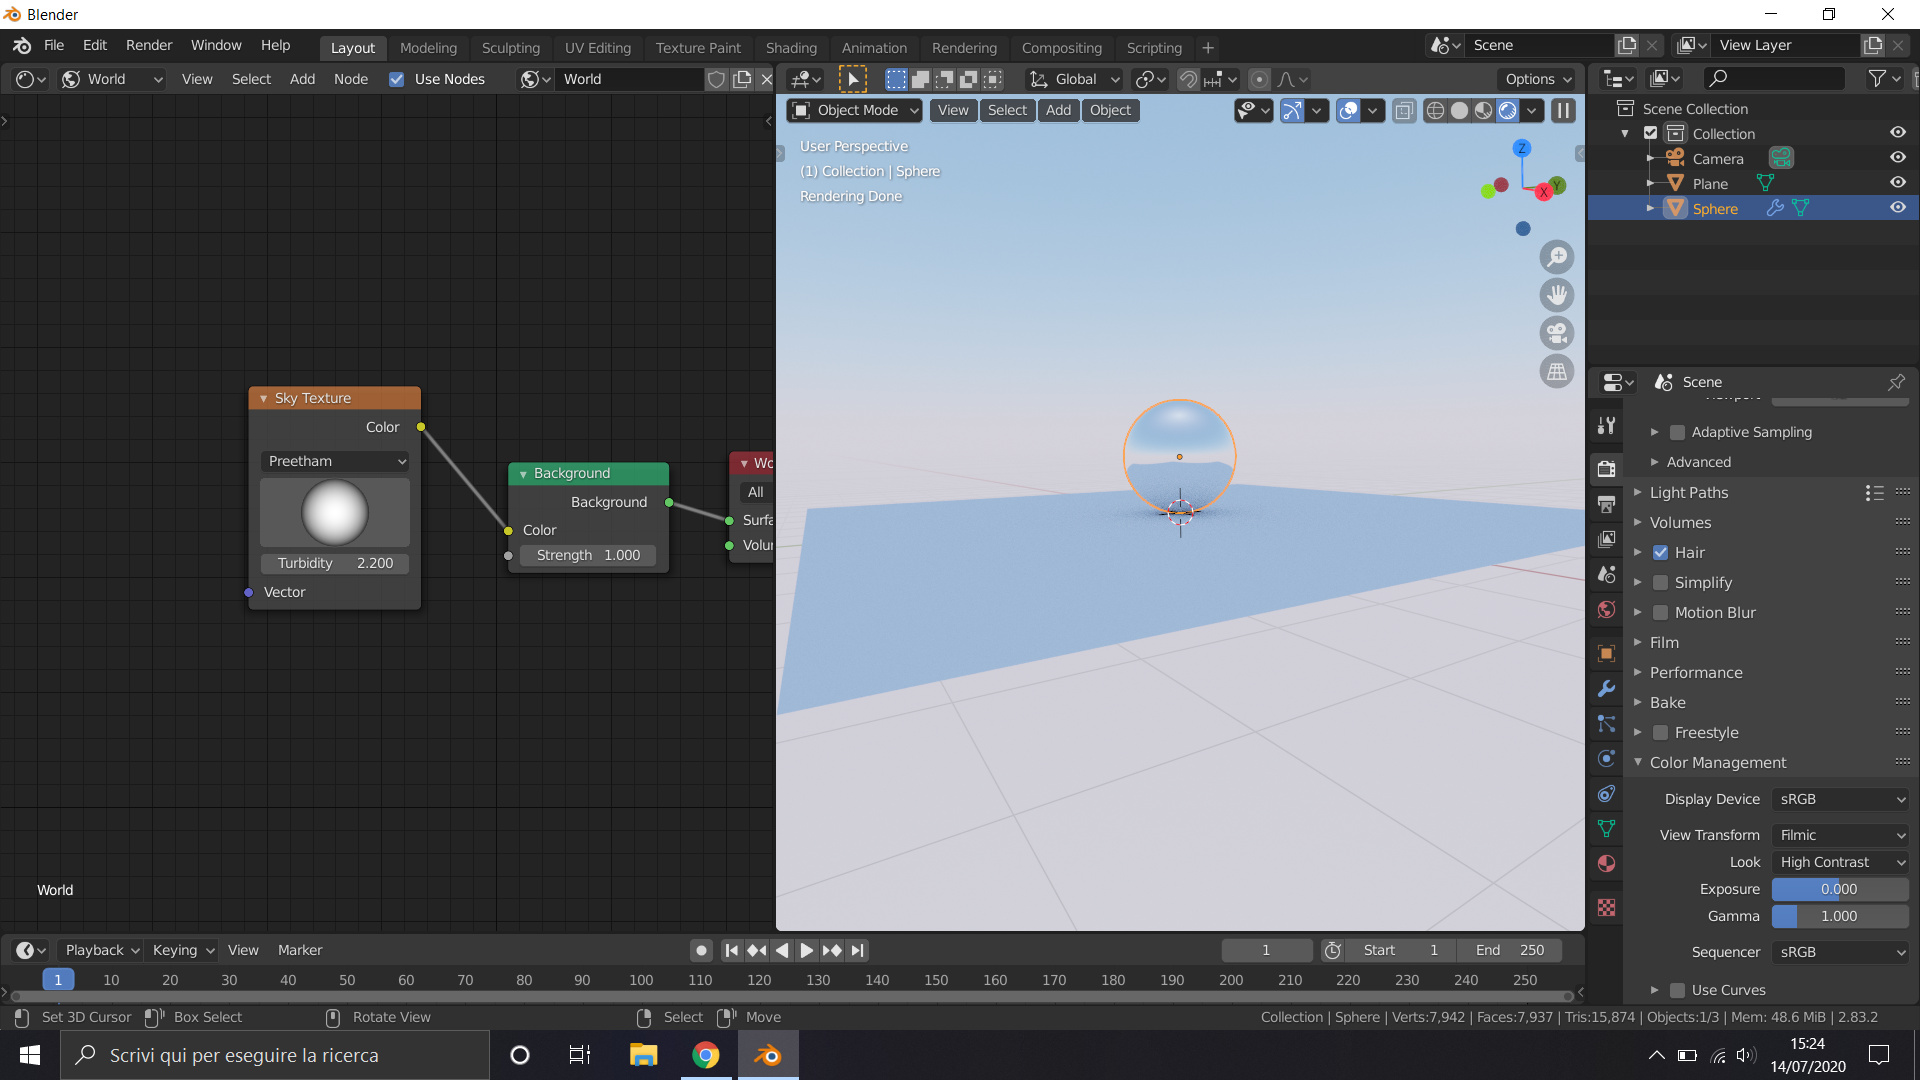
Point is, i like the sunset compromise, setting Sun Elevation at 0 makes the blue of the sky visible at default.
Now a curious note, have you ever seen how Preetham looks at default?
I’m not so convinced there really is. The current system is already capable of physical units, it is just hidden by layers of complexity and poor defaults. There’s nothing fundamentally different about having units represent physical values, in fact the current values can already be considered physically accurate, it’s just that the current defaults are not relatable which leads to poor intuition about the system.
You’re right, most HDRs out there are white balanced and look approximately right at default settings. This is a good thing and we definitely want to be able to keep this. That being said, right now the difference between default values and physical, absolute light values is so dramatic that it makes using physical data much more difficult than it should be.
This is a good example of absolute light values and how they impact a workflow, along with his Photographer addon (which is immensely popular due to solving this issue in Blender) highlight that there’s real demand for this - it’s not just a few purists trying to force physically based lighting down everyone’s throats. He has expressed interest in getting the work he’s done on this into Master, and I think this would be a really good starting point.
I feel this would be significantly clarified with some physical camera controls such as the addon mentioned above. A virtual camera which allows for more intuitive and visible control of the ‘film’ exposure would make this process a lot simpler.
I agree with this. I think a lot of this could be resolved quite easily, though, with a few changes to defaults and maybe some slightly better control over ‘camera exposure’ which is currently not at all clear - I doubt many users know the difference between the two seemingly identical exposure sliders in Blender. This would help that IMO.
This seems like a reasonable compromise. That being said, is there not already going to be a strength slider on the Background node that this texture is plugged into? It seems like we could achieve the same outcome without need for the extra slider.
@brecht why do you think more people are using “physically based” add-ons? Look at this at that minute, this is how bright a sun is and should be, there is no compromise, so instead of having people to ask “why isn’t it accurate?” it makes more sense to start implementing some changes now. Starting with a sky texture, as pointed by @smilebags could be a good opportunity and a not super intrusive thing to do. Consistency is what we need after all.
People want to be educated, they want to discover what physical values are things made of, and Blender i think is the best way to share knowledge.
Is there any reason to keep the preetham implementation? It was never finished and never in any usable state. The only purpose it will serve alongside the new model is confusing new user by being presented with two choices, the right one and the wrong one.
This feels like inventing a problem to be honest. For example UE4 is increasingly more popular for rendering motion graphics, yet UE4 went as far as implementing filmic tonemapper that can’t even be turned off. Which means that plugging any simple texture into emissive slot never turns out 1:1, yet people just don’t mind, as long as the results are visually pleasing.
Not saying Blender should go as far, just that not having 1 to 1 pixel values out of the box is not a dealbreaker.
Next thing, related both to exposure issue and the 1 to 1 pixel intensity issue is that the features should not be designed by the lowest common denominator in terms of user skill. Blender is already full of way less intuitive and more complicated features than these two would be. If we assume that every feature has to be designed to be usable by a person who is unable to figure out how exposure works or how to turn off tone mapping, then it’s borderline impossible to make any progress.
Introduction of physically based camera system will not result in any gain of physical accuracy at all, of course. It won’t make renders suddenly more realistic. But what it allows is easier modeling of real world lighting and photometry. For example matching lighting conditions of shot footage when integrating CG elements onto it. Then this would go a very long way, if you had a footage of sunny day shoot along with information about time of day and camera settings (ISO, Fstop and shutter). Right now, in Blender, it’s a guesswork.
I have another proposal, bcon2 ends the 22nd of July according to this.
My proposal is to make the sky physically accurate until that date to give time for testing and to see people’s reactions about it.
After that, we could make a final decision and even revert the commit, really there shouldn’t be any rush to take such a radical decision.
What do you think?
I just checked in UE4. If I add a default scene with Sky light, and then an object with emission 1,1,1. The cube looks light gray and the Sky texture intensity looks correct as well, similar to Blender with Filmic now. So, at least in that sense Cycles and UE4 seem to work the same.
If we change the sky texture to output the specific units as proposed, then we are actually deviating from UE4. Then with exposure lowered for the sky texture, that object with emission 1,1,1 would be dark gray. Note we are not talking about a small multiplier here, but on the order of 100x darker.
And I want to repeat that I’m all for making things physically based. But if you actually want to do the industry standard thing, you have to check what they are doing rather than assume that whatever is being proposed here actually matches that.
This is not necessarily the case. It could simply be that the default emission+exposure combination gives you that light grey, but in relation to the sky things might not need to be adjusted at all. It’d be interesting to look into how that’s handled. AKA, maybe the default emission in UE is much brighter and the default exposure much darker, meaning it can actually contribute some light in mid-day lighting and both look ‘normal’ by default.
But then if you were to do the same thing in Cycles, that would be done by making the emission from the Background shader node brighter? And using a fixed color, HDRI or Sky texture would continue to work more or less like now and colors manipulated in shader nodes would continue to be approximately white balanced. Which also simplifies shader node setups.
Also, part of the reason this gets more complex in Cycles is that you have the ability to take the output of the Sky texture and pass that through arbitrary shader nodes. As far as I know in many other renderers that’s not possible, the light values go directly to the integrator so what units they are in is more an implementation detail.
Yes, it could be as simple as changing the default emission strength to 100/1,000/10,000 times what it is now. I’m not sure of what exact value would work best but the entire workflow would be exactly as it is now, things would look the same.
Film exposure would pull things back into the regular range for colour grading (so that we’re not having to deal with extremely bright values which wouldn’t play well with current compositing tools). Right now film exposure is likely vastly under-used and instead people go around brightening or darkening individual lights or the sky. Better control of camera settings will make this process much more intuitive and simple to learn and use.
This is a good point. Is it up to the colour texture being passed into the Background node to be in physically meaningful units, or should 1,1,1 map to something quite bright (comparable to the daylight sky). I’m not sure of an answer to this, though I’m sure with some looking around, one would come up.