Also, I notice that the character is CC-BY, not CC0 – should assets that require additional attributions in the notes/manual be used when CCO could serve?
1 Like
It’s a nice looking render, but it doesn’t make it obvious to the viewer how light-linking is the factor here. One could look at that, and not even realize why linking was used vs using the old light system.
It should be kept in mind that the manual is not an art gallery.
3 Likes
I noticed that you edited the post to include more images, likely in response to the comment from @josephhansen
I personally think you can get away with fewer images and clearer labels. Here’s some examples using a really simple scene:
Rim light in impossible situation example
Explain what you’re trying to do and why light/shadow linking is useful/essential for your scene:
Description of scene and why light/shadow linking helps:
I have a character posed close to a wall. I wish to give it a “rim light”. However due to it being too close to the wall, there’s not enough room for me to add a rim light. I can use light linking and shadow linking to resolve this issue. Here’s how:
By using shadow linking, I can place a rim light behind the wall, but still allow the light to pass through the wall and reach the character (this scene is so simple you can use other techniques, but this is just an example).
However, after doing that, the scene looks a bit weird because my rim light is lighting up the ground, which doesn’t look right. So I can use light linking to limit the direct light influence to my character, so the ground isn’t lit up. This effect would be impossible or annoying to do in a more complex scene.
Show your scene without light/shadow linking and explain the issue:
Here is the scene rendered without any shadow or light linking. My character has no rim light because the wall is in the way of my rim light:

Maybe include major steps as part of your lighting setup? May be too much for the release notes.
Here is the scene with only shadow linking. The character now has a rim light because the light is passing through the wall due to my shadow linking settings. But the ground is lit up by the rim light and looks a bit weird. Along with that, my character is casting a shadow on the ground from the rim light. This doesn’t look good.

Show your scene with light/shadow linking. Explain the benefit:
Here is the scene with both shadow and light linking, allowing the light to pass through the wall and reach the character, while not directly lighting up the ground. Now my character, and only my character, has a rim light.

8 Likes
Here’s mediocre example of light linking:
Description of scene and why light linking helps:
The scene I am using is a modified version of the Tree Creature scene from here: Demo Files — blender.org
The modifications I applied were adding a three point lighting setup to the scene, and subtly adjusting some shaders/lights. Also switched to Cycles.
When adding the three point lighting setup to the character, I noticed two issues:
- The main light in the front (and parts of the some other lights) could be clearly seen in the reflection of the eyes of the creature. I find this distracting.
- There were two possible fixes for this:
- Make the lights invisible to glossy materials.
- Use light linking so the eye doesn’t get lit up. I opted for this approach since I was already using light linking for other purposes, and making the light invisible to glossy materials would negatively impact the reflections on certain plant pieces.
- There were two possible fixes for this:
- The main light in the front would light up the underside of the branch in the scene. This reduced the contrast in the scene making the image look worse overall.
- The simplest fix for this issue was to use light linking to ensure this main light ONLY lights up the creature.
Along with this, I also added a second sun light to light up the leaves in the background. Light linking was used to avoid lighting up the creature because it was already artistically lit up with my three point lighting system and I did not want to interfere with that. A “light blocker” could be added to replicate this effect. But there are various issues with that approach that make it hard to generalize to some scenes.
Summary of light linking setup:
There are three lights in the scene setup to artistically light up the creature. They’re “Front” and “Back 1” and “Back 2”. All three lights have light linking setup so they don’t reflect in the eye of the creature because it’s distracting. And the “Front” light of the creature has light linking setup so it ONLY lights up the creature, this is to improve the contrast in the scene. Both “Back 1” and “Back 2” only had light linking setup to stop them from reflecting in the eye because I felt the rim lighting they added to the branch was quite nice, unlike the fill lighting that “Front” added to the branch.
A extra sun light is added to brighten up the leaves. Light linking is used so it doesn’t light up the creature. This is to avoid it interfering with my artistic lighting setup.
Here is the scene without light linking. You can see the reflection of the light in the eyes of the creature, there is a harsh shadow on the creatures shoulder from the extra sun light (could be partially fix by adjusting sun angle), and the contrast is relatively low because the branch is lit up by the main front light.

Here is the scene with light linking. All the issues described above are gone.

8 Likes
I think this is a perfect example scene - the image shows only what is necessary to demonstrate the feature… not a multitude of lights and reflection planes and other stuff, which make the reader to have study it and start looking for “one of these things is not like the other” differences.
I think of it like this - if the feature was showing “different alcoholic beverages”, it’s better to show a glass of wine and a mug of beer. Not a glass of fino and a glass of amontillado .
1 Like
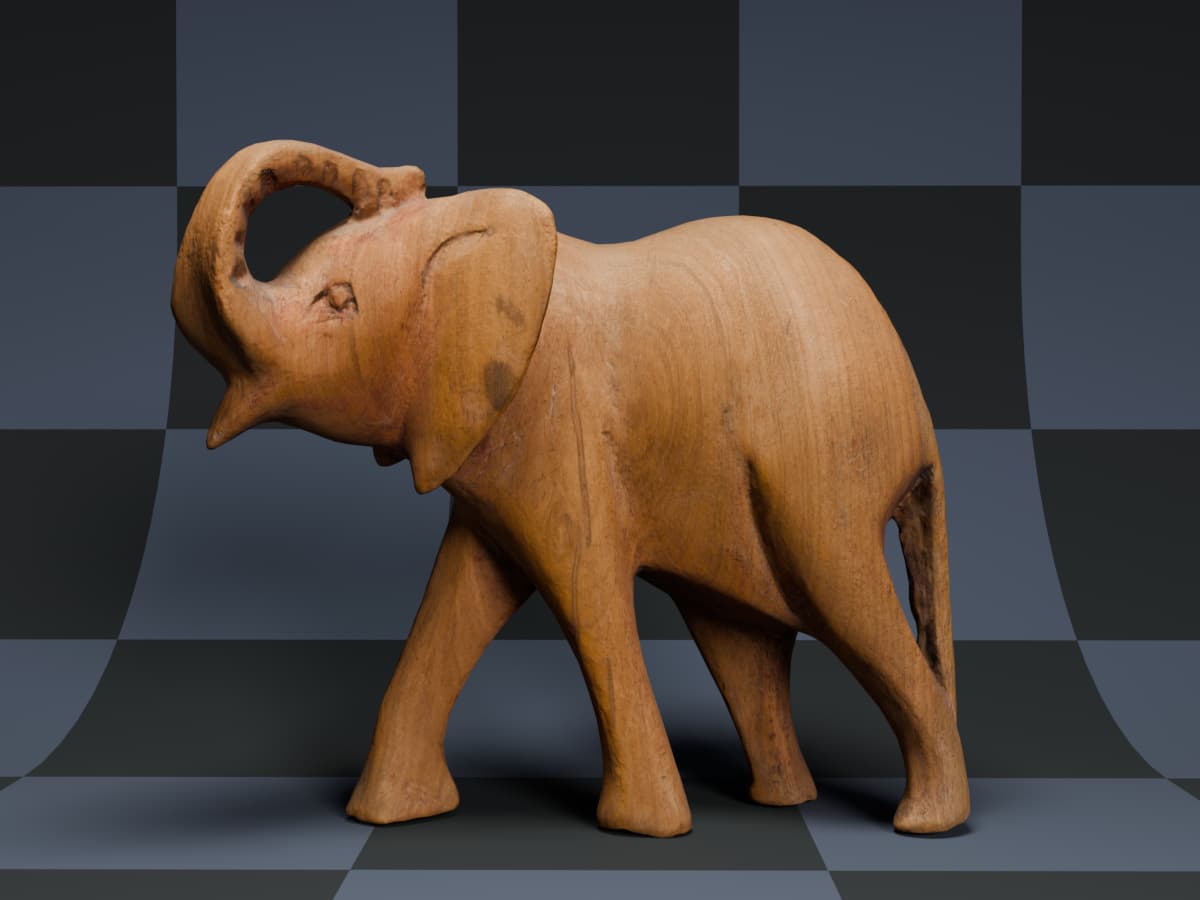
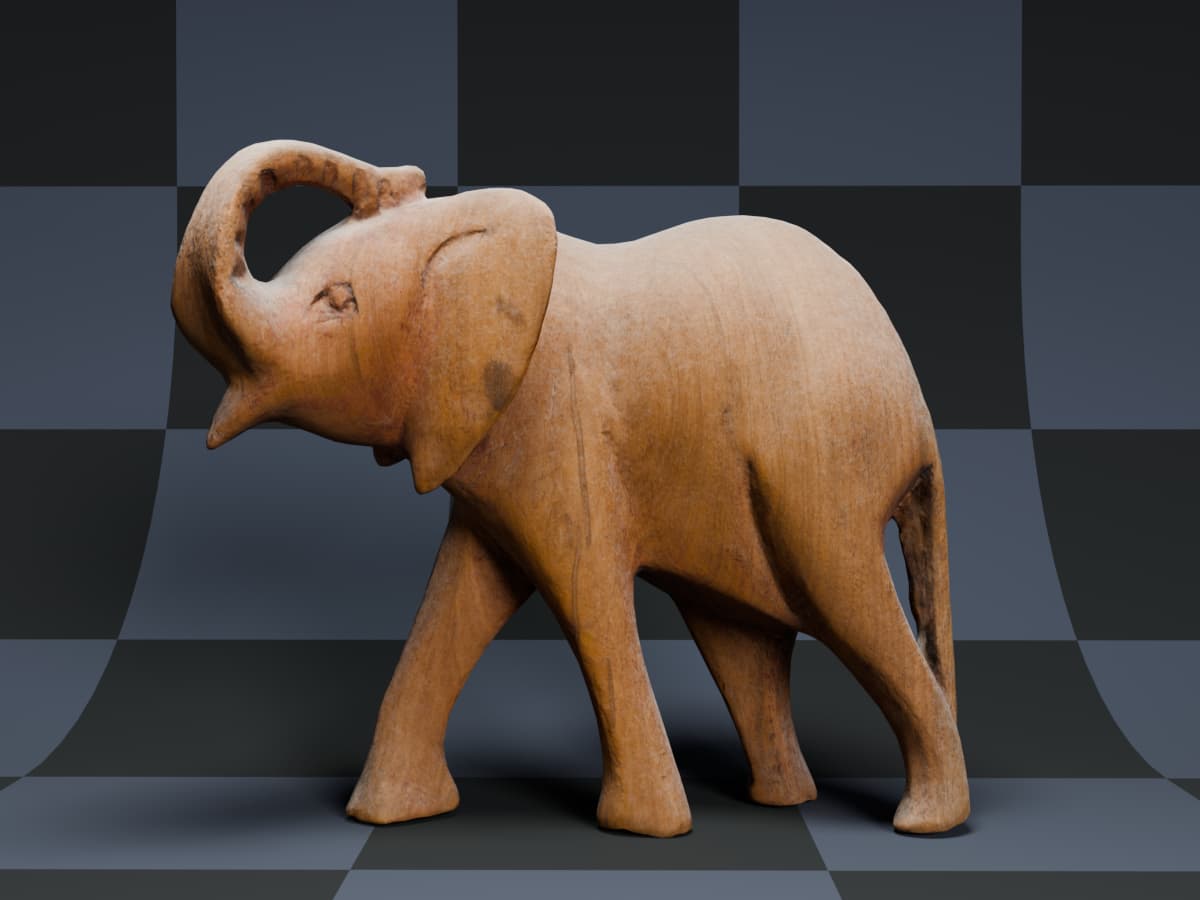
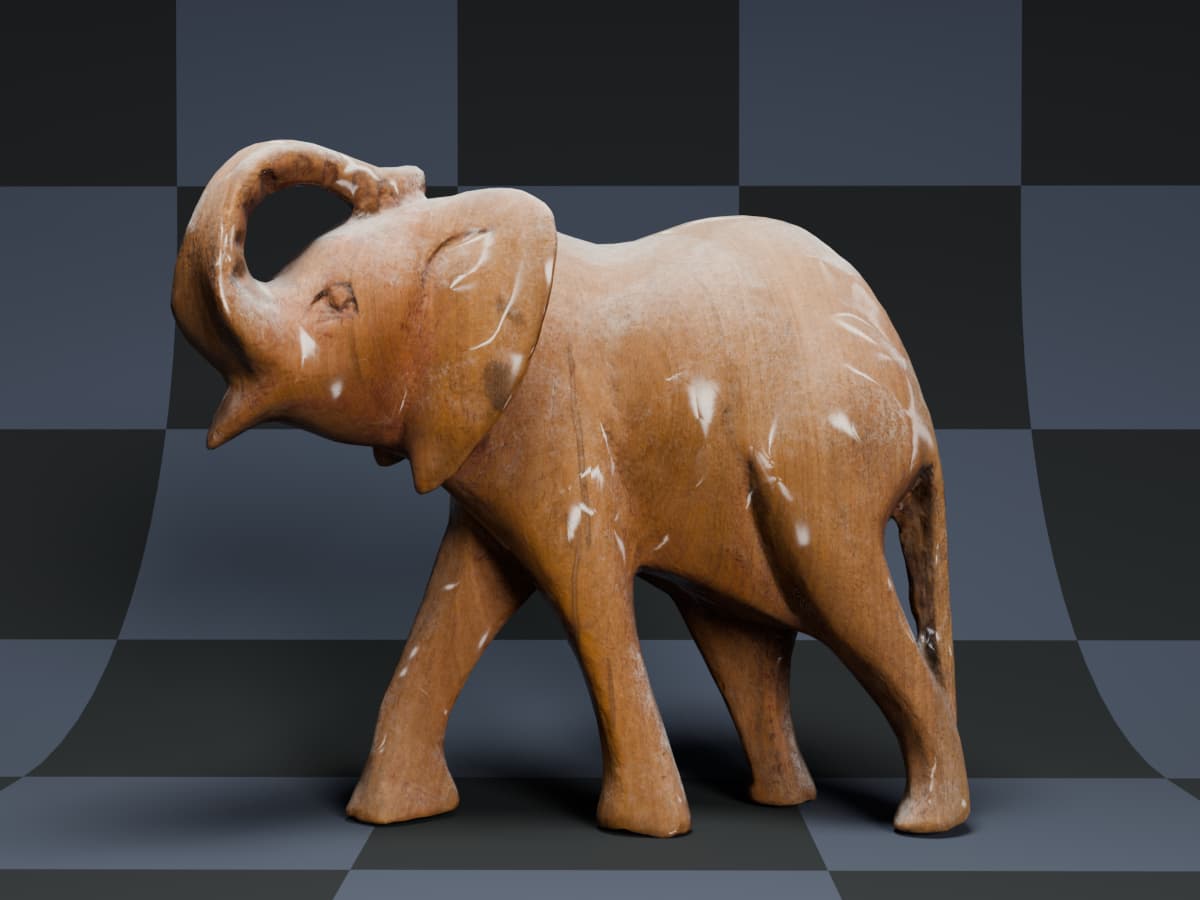
This is what I took while playing with the new Principled BSDF, using Carved Wooden Elephant from Poly Haven.
edit: some scene adjustments, rendered in AgX instead of Filmic, added masked Coat variation
Base layer only:
Sheen as dust (using a mix of normal direction and procedural textures as mask):
Sheen + Coat (with its own normal using voronoi texture):
Sheen + Coat + Emission:
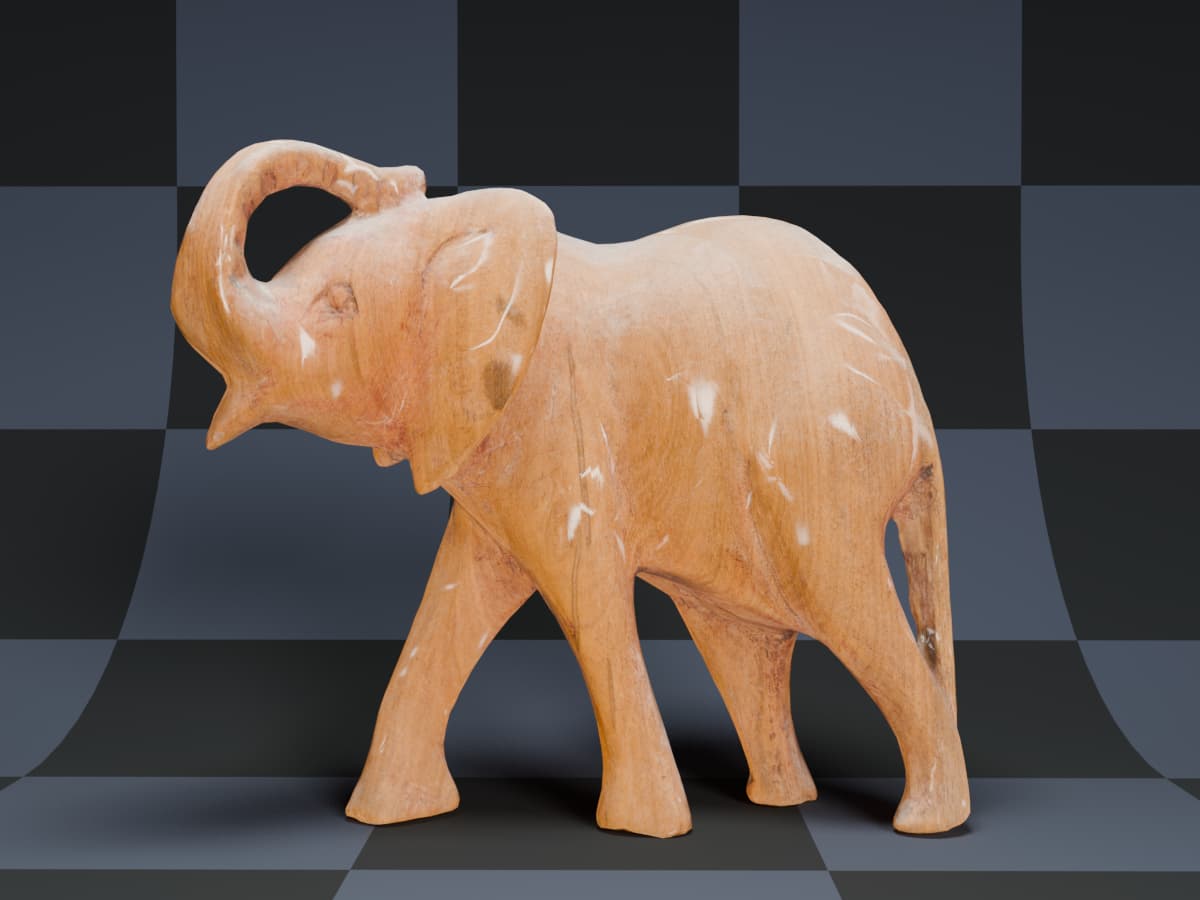
Sheen + Tinted Coat:
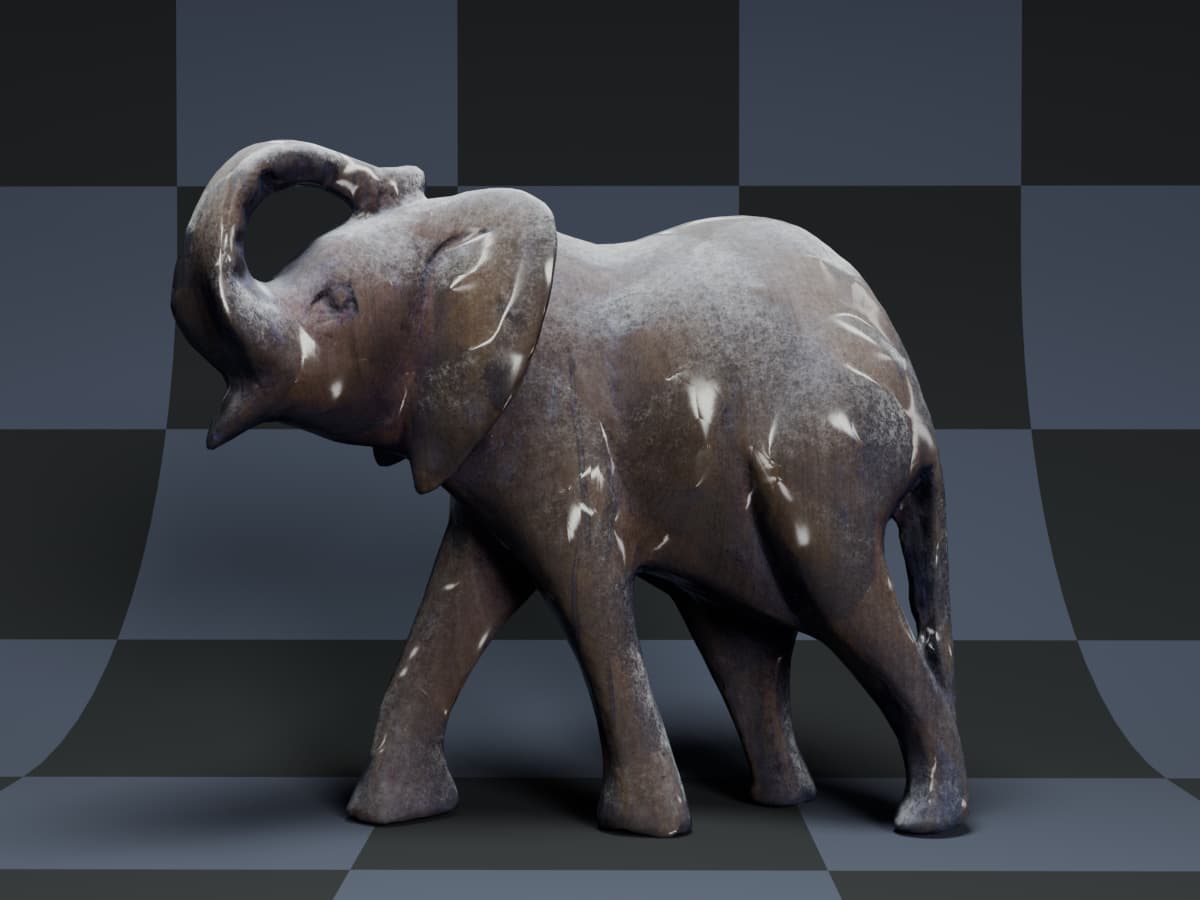
Sheen + Tinted Coat with mask and border normal by noise texture:

2 Likes
Just simply put Einar character from this file on the boat from this file and changed the lighting a bit. Rendering working space is Linear Rec.2020, but the EXR file is re-encoded to Linear Rec.709.
Einar_Rec2020_Purple_Blue_Lights_on_Boat_Lin709.exr.txt (950.8 KB)
Delete the .txt at the end, this forum doesn’t allow .exr upload.
Filmic:
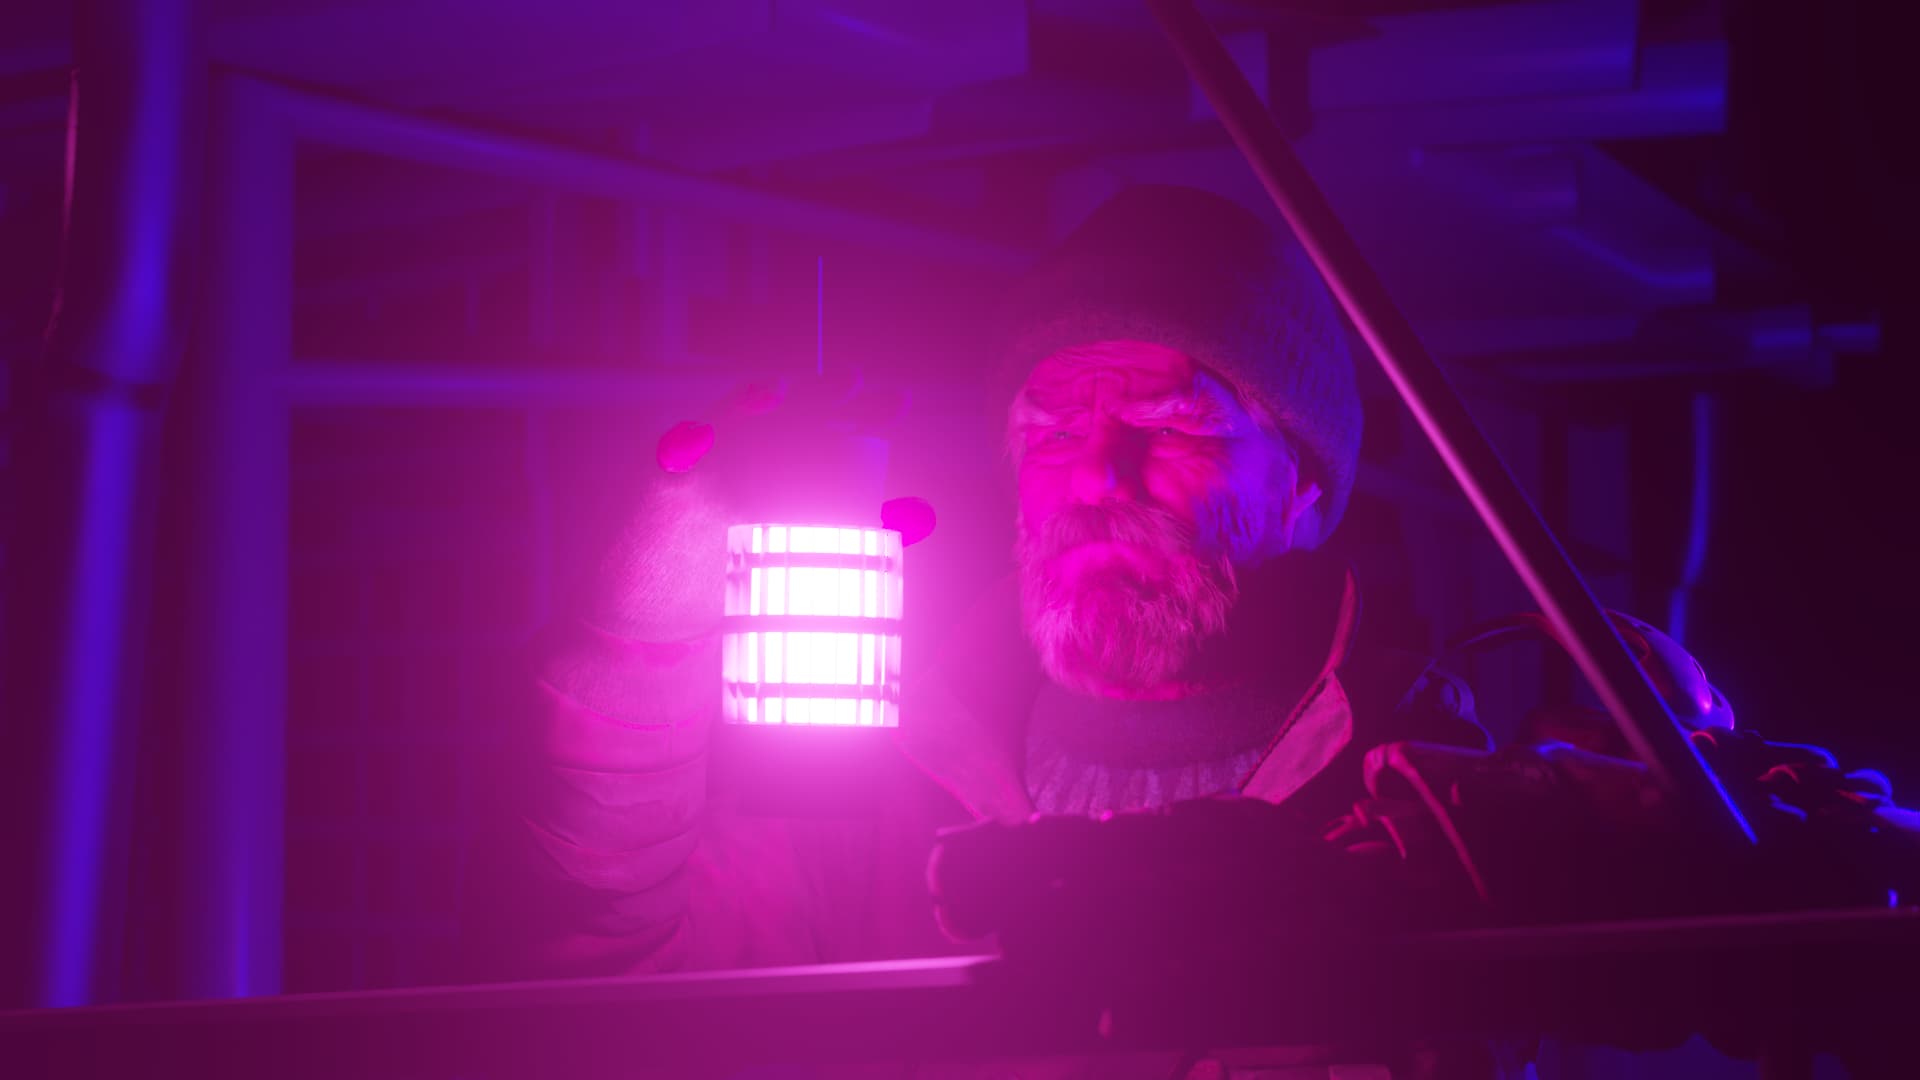
AgX:

22 Likes
I’ve updated the release notes to use these images now.
I’ve included all these in the release notes now.
https://wiki.blender.org/wiki/Reference/Release_Notes/4.0/Cycles#Light_and_Shadow_Linking
Thanks, but for me this didn’t really clearly show the new features better than the images we have in the manual. I added those instead to demonstrate the metallic tint and coat tint.
https://wiki.blender.org/wiki/Reference/Release_Notes/4.0/Shading
Thanks, added to the release notes.
6 Likes
Thanks all for the help. The rendering release notes are complete now, so we’re no longer looking for more images.
9 Likes