For anyone wondering, performance with Many Lights Sampling seems to have improved drastically in a recent commit. Or maybe it was just a bug in a previous build on my system.
3 Likes
can you kindly share your build?
thanks
EDIT: THIS BUILD OF BLENDER IS NOW OUT OF DATE AND HAS SOME BUGS THAT HAS NOW BEEN FIXED. PLEASE DO NOT REPORT BUGS FOUND IN THIS BUILD AS SOME OF THEM HAVE PROBABLY ALREADY BEEN FIXED.
Here is a short list of bugs that have been fixed:
- Instanced lights would have the incorrect brightness.
- Translucent materials would not render properly.
- The glossy component of certain materials would render incorrectly at high sample counts.
- Others?
Here is my build of the Many Lights Sampling branch.
Some notes about it:
- This is a Linux build of the Many Lights Sampling Branch.
- I built Blender without GPU support in Cycles. I also believe Many Lights Sampling isn’t supported on the GPU yet so this doesn’t make a difference?
- I’m not sure if this build of Blender is portable (transferable to a computer that isn’t mine). I personally don’t know enough about this area to know if the build is portable or not.
Disclaimer: I will not provide support for this build of Blender, and presumably Jebbly willl not accept reports for issues with Many Lights Sampling from this build as time goes on and more and more changes are made the the Many Lights Sampling branch.
I will also not provide updated builds on a regular basis. Instead I recommend people try compiling Blender for their self.
If you would like to build your own version of Blender with Many Lights Sampling, I recommend checking out this guide on how to compile Blender (Building Blender - Blender Developer Wiki) then checkout the Many Lights Sampling Branch with the command git checkout soc-2022-many-lights-sampling and make a clean build of Blender after that.
If you experience any issues while building your own version of Blender, users in this chat room might be able to help. blender.chat
2 Likes
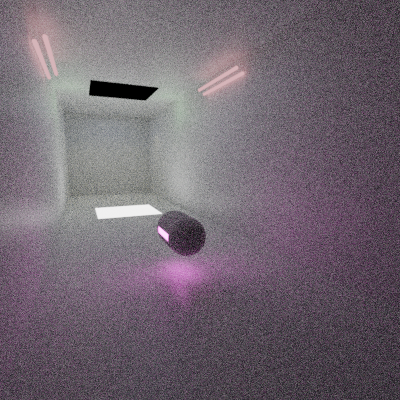
Hey, thanks so much for such a thorough analysis. Could I ask how the windows are being lit?
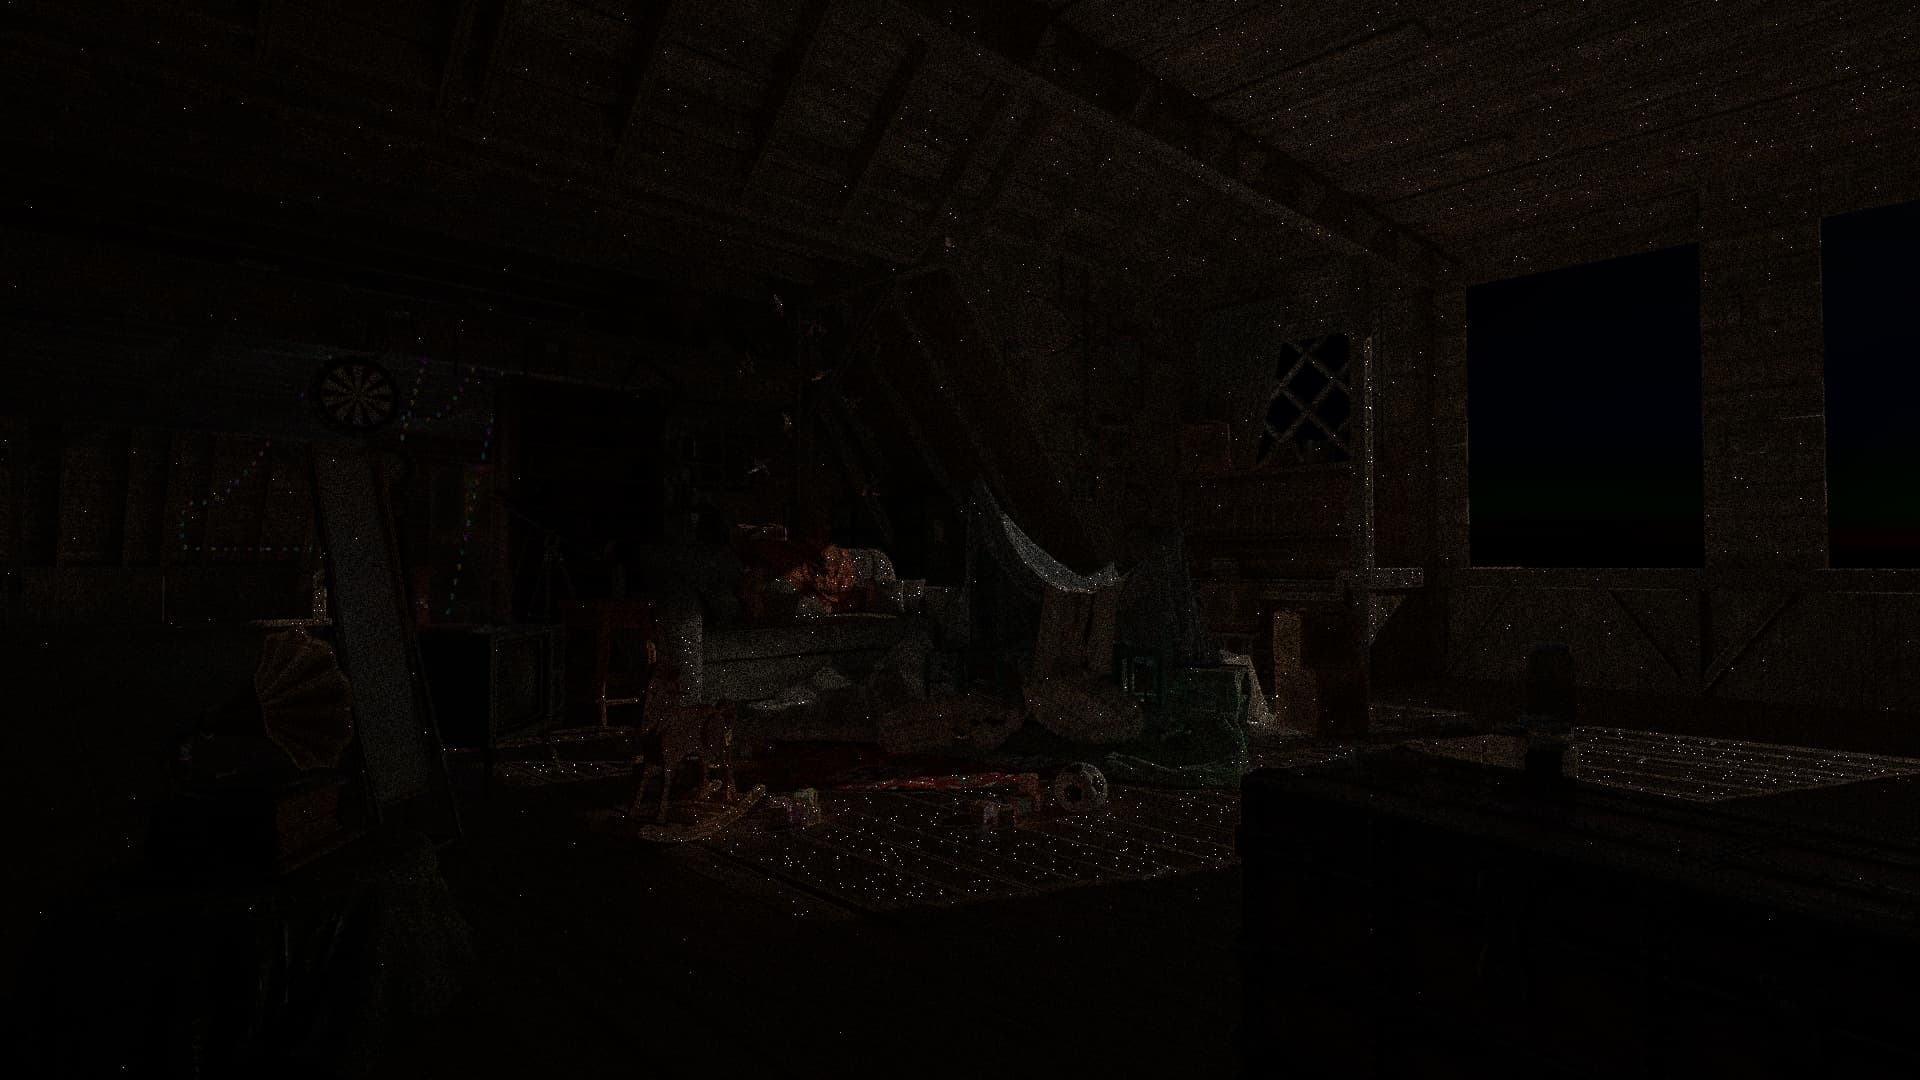
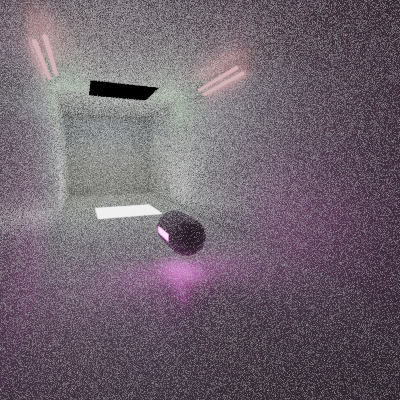
Assuming that a sun or background light is being used: from my understanding, you’re encountering some of the same visibility issues I described earlier. In the scenes with increased noise, it seems like there’s an intense environment shining through the window. The current importance heuristics are helpful for the areas that are lit up by the window. However, other areas of the floor are also going to be sampling the environment light at a high probability, even though the wall actually occludes the light, hence the noise that you’re seeing.
The problem of balancing the distant light sampling along with the other lights is pretty tricky for exactly this reason. If we don’t sample the distant lights enough, the areas that are directly lit are going to suffer. On the other hand, if we sample them too much, then the occluded areas suffer instead. As I’ve discussed with Brecht, we are considering implementing a user-defined threshold for now (e.g. set a higher value for scenes with more exposure to the sun, and a lower value for scenes that are more occluded). However, a better solution would be to implement something learning-based, which seems to be the current research on solving visibility issues.
4 Likes
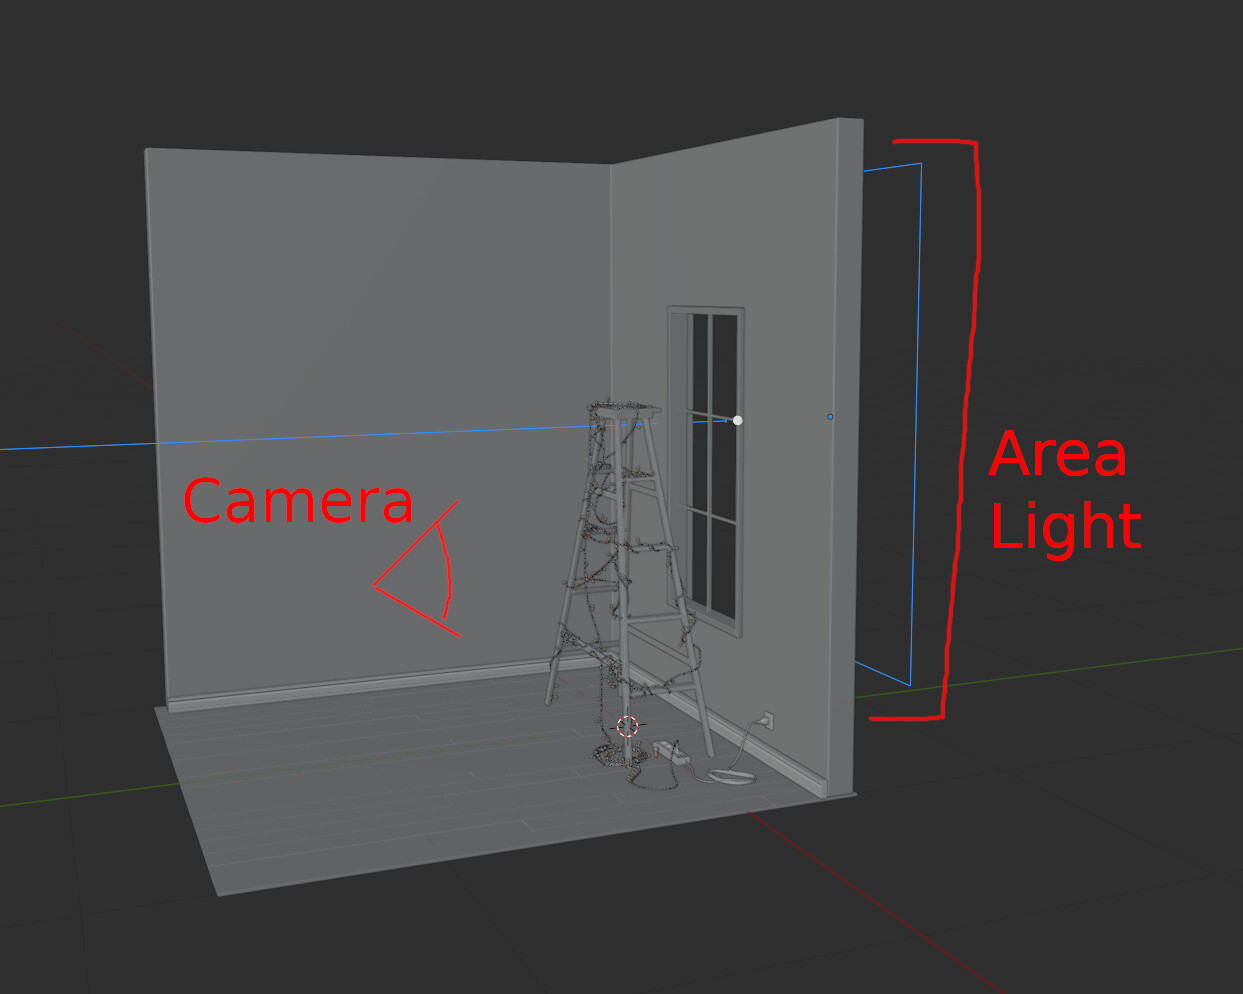
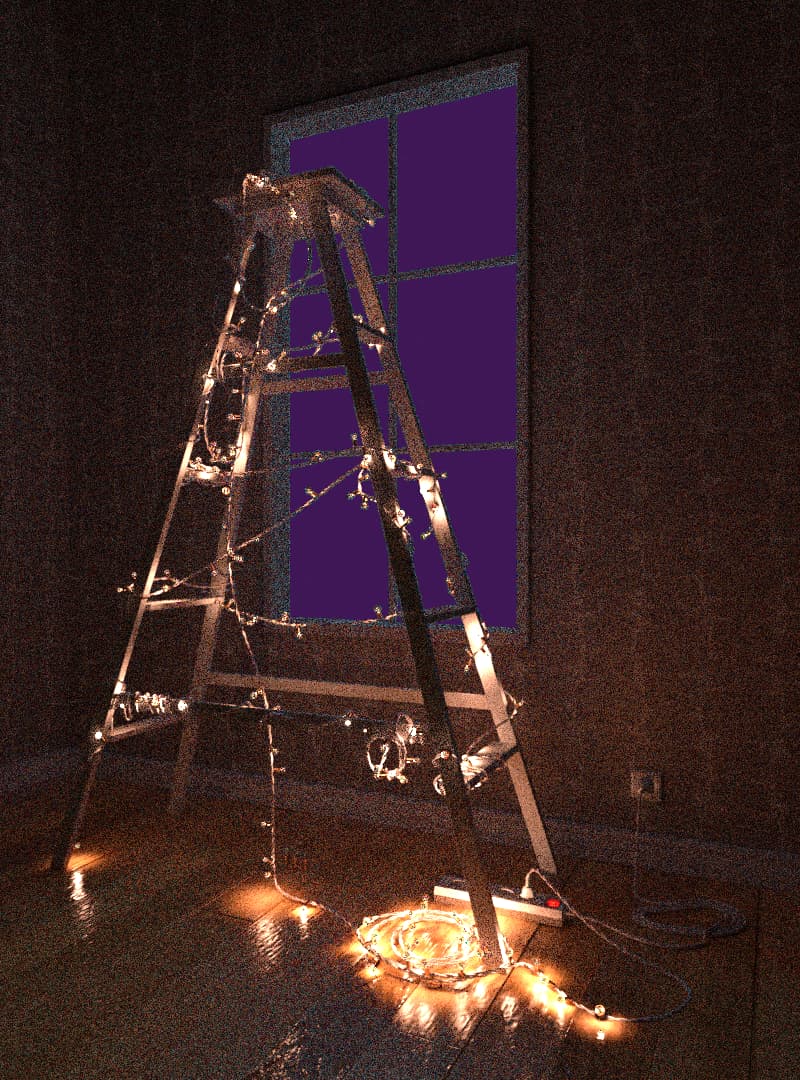
In the scene with the ladder?
The blue light in the windows is an area light place about a meter outside the window.
I do have a world shader enabled in that scene, but it’s just a simple grey.
Here’s an image of the scene.
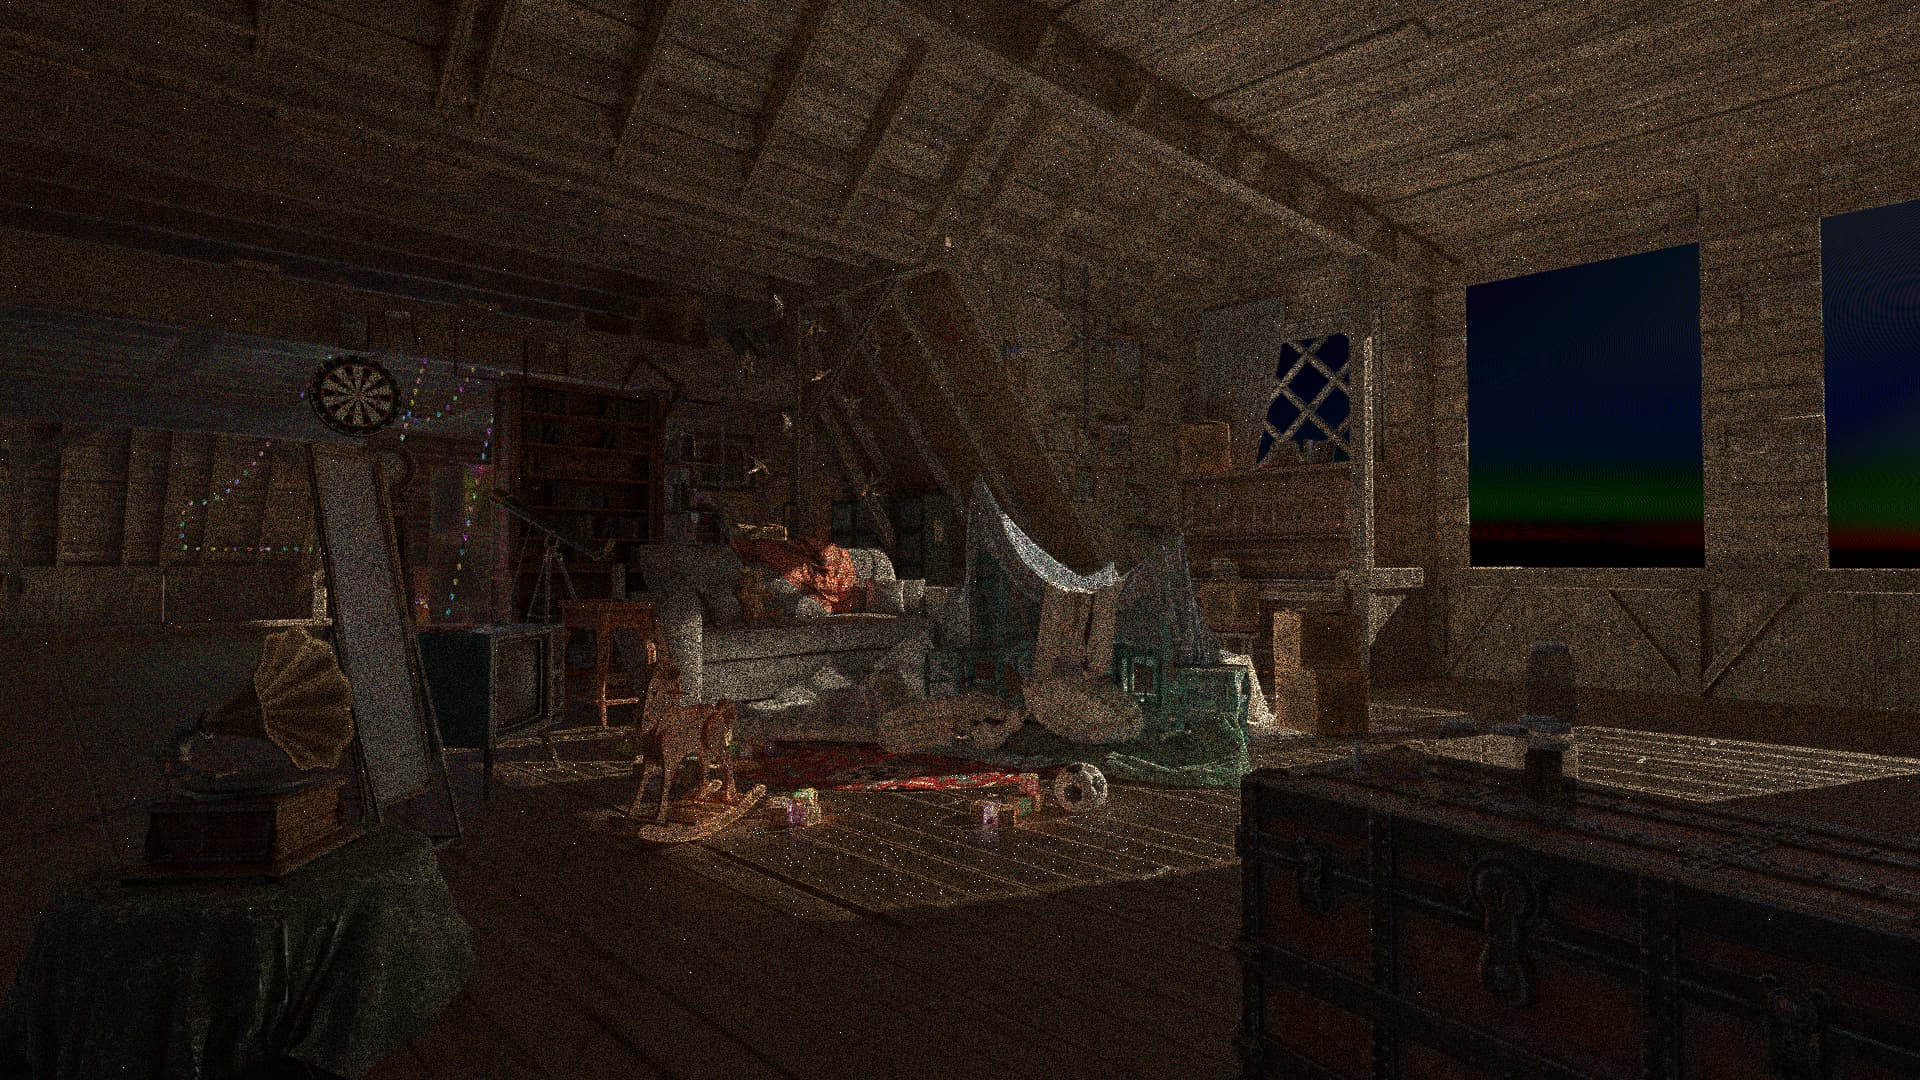
As for the Attic scene. The lighting coming through the windows comes from a world shader with a Nishita Sky Texture.
3 Likes
Hm okay, the noise in the ladder scene may have a different cause then. I’ll try to check it out when I get the chance. As for the attic scene, I would probably say it’s related to the visibility.
3 Likes
@Alaska for future you could use the [details="Tittle"] Content inside dropdown [/details]
syntax to create dropdown boxes to segregate and shorten the individual test cases. This is available from the cogwheel
![]()
Nvidia Attic Details
1 Like
When making comparisons, it can help to disable sample clamping as otherwise it might not converge to the same result. That may explain intensity differences in the ladder scene, but it might also be something else. Also useful can be to look at direct and indirect light passes separately.
In this scene the direct lighting from the christmas lights is much less noisy. That could actually make indirect lighting noisier, by adding more fireflies. The reason being that the glossy reflections of those small lights are effectively a small light that we can’t sample directly. Finding those is hard without many lights sampling and causes few fireflies, while many light sampling would find them often and cause more fireflies.
I think balancing between the big area light and smaller christmas lights is probably also a factor though. I’d actually expect many light sampling to assign more samples to the big area lights than before, due to its large area. But from the noise on the floor it seems that may not be the case?
4 Likes
I’d actually expect many light sampling to assign more samples to the big area lights than before, due to its large area.
This is a good point to note - right now, light source energy is only roughly calculated based on their shader emission, while area is not accounted for. Right now, area actually only comes into play in relation to the bounding boxes, but I have been considering adjusting that energy calculation to account for area too (although, I still need to investigate how this works with other light types like point lights).
I did notice this from earlier testing and have disabled sample clamping in all of the scenes I tested.
Thanks for the suggestion, I will take a look at this later.
I wonder if that could be done somehow alongside the path guiding branch. Not sure that’s completely related but that is about learning the structure of paths to guide towards more important/better ones, right?
I suspect I’m not telling you anything new here but afaik, basically, that’s typically handled with regular multiple importance sampling, where you can sample a light source either by area or by angle, and in case of a point light, the entire sampling is angle-based (as the area is zero), whereas very large area lights are best sampled based on area. Multiple Importance is a way to kinda do both and then pick what’s more important (contributes more)
I’d imagine Many Lights Sampling has an equivalent for this?
I have finished the tests, however I’m concerned I didn’t go to a high enough sample count in some scenes.
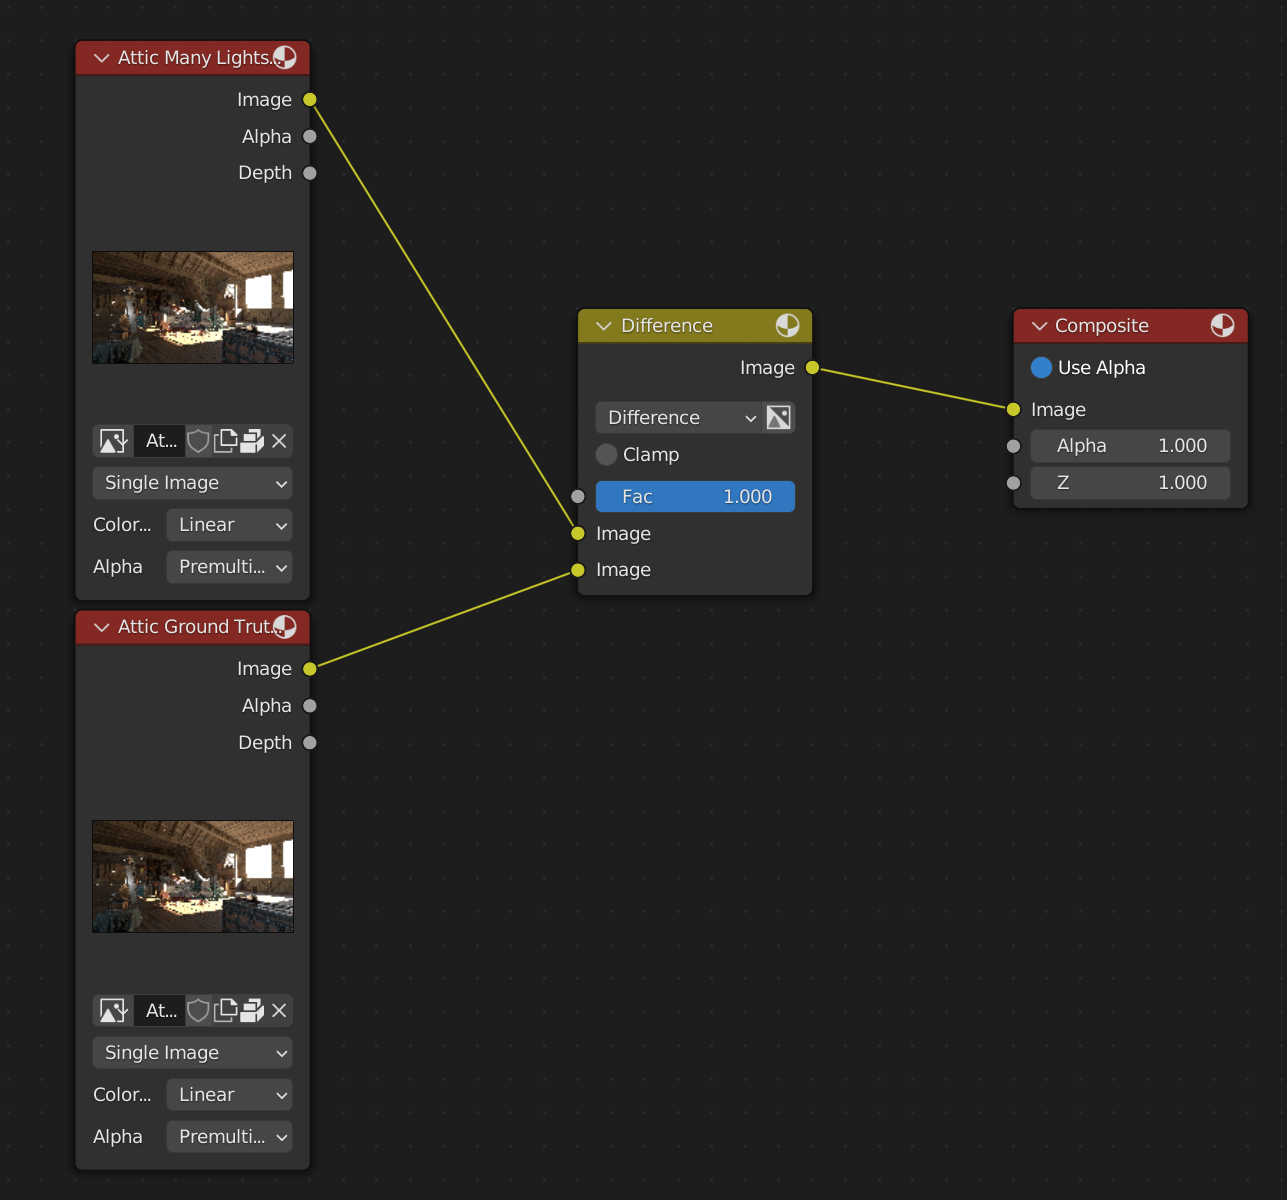
For anyone wondering, this is how I created the difference images:
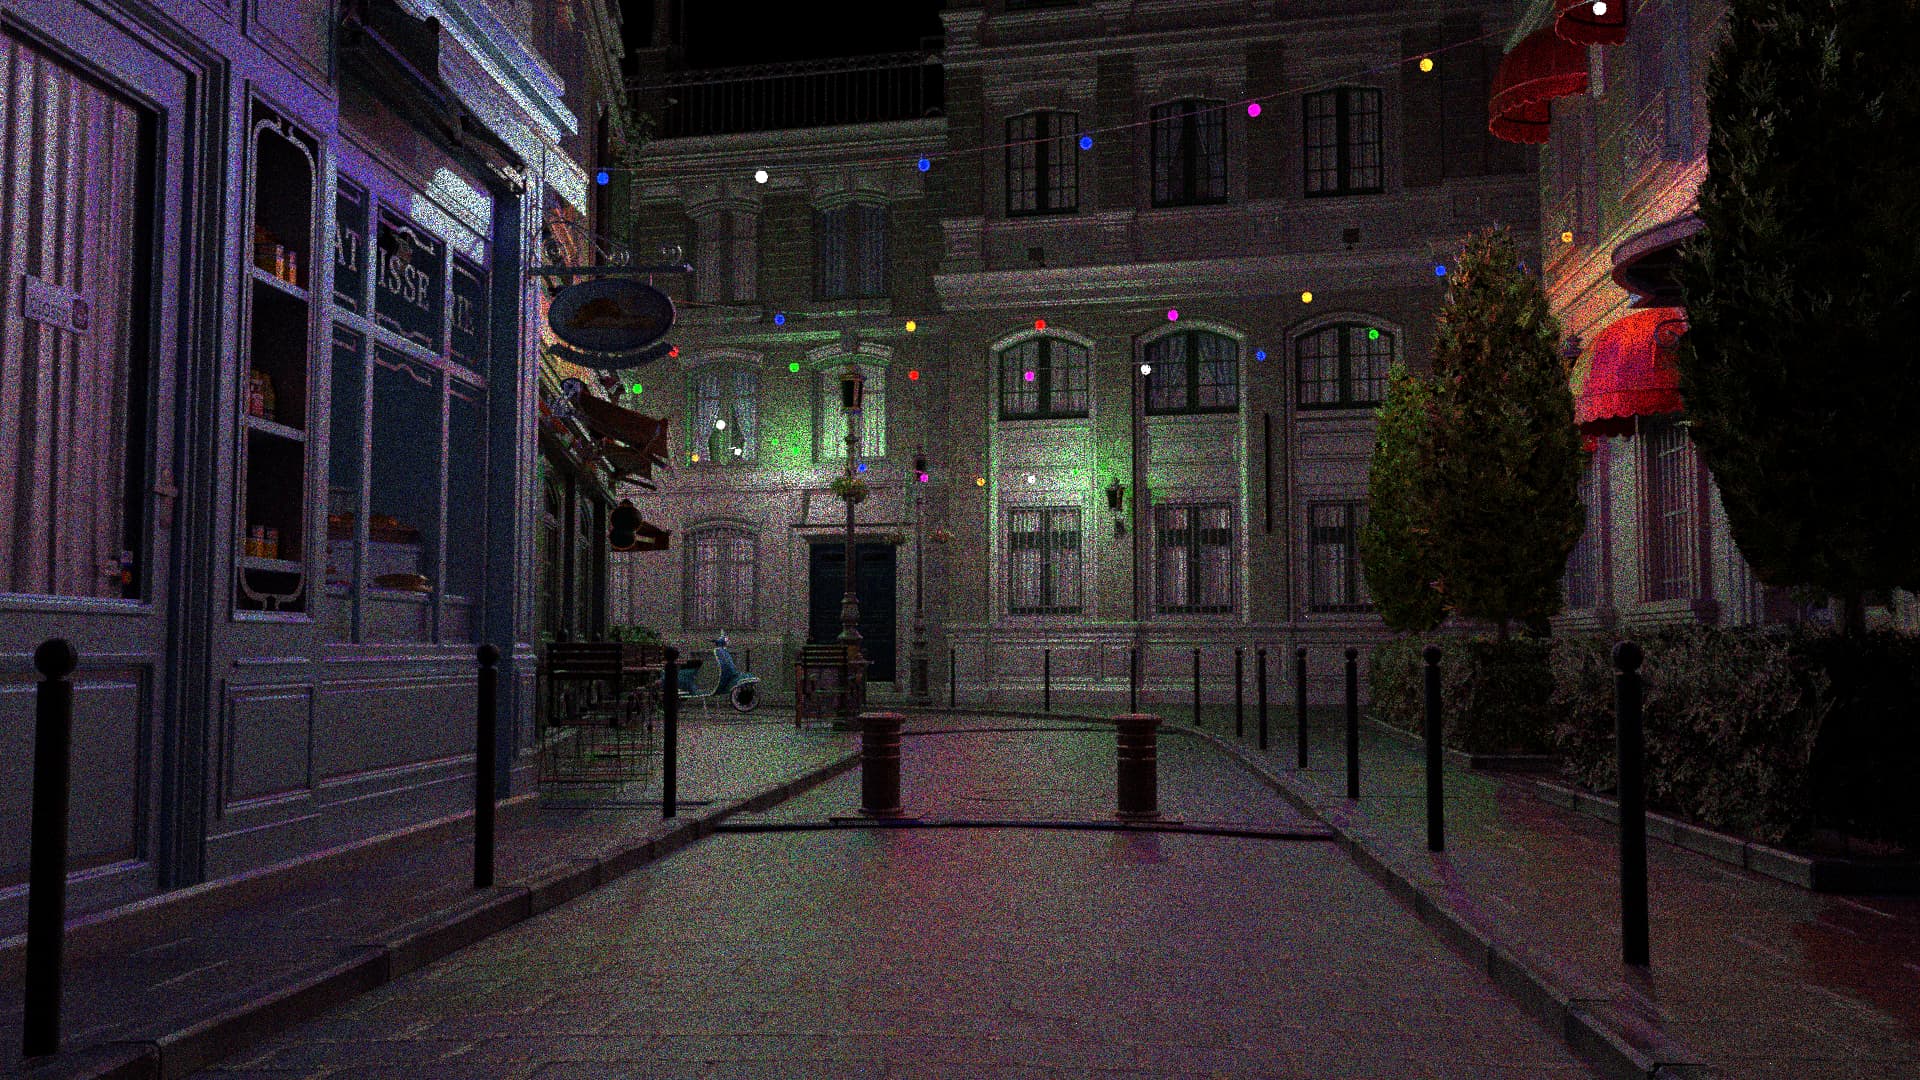
Bistro
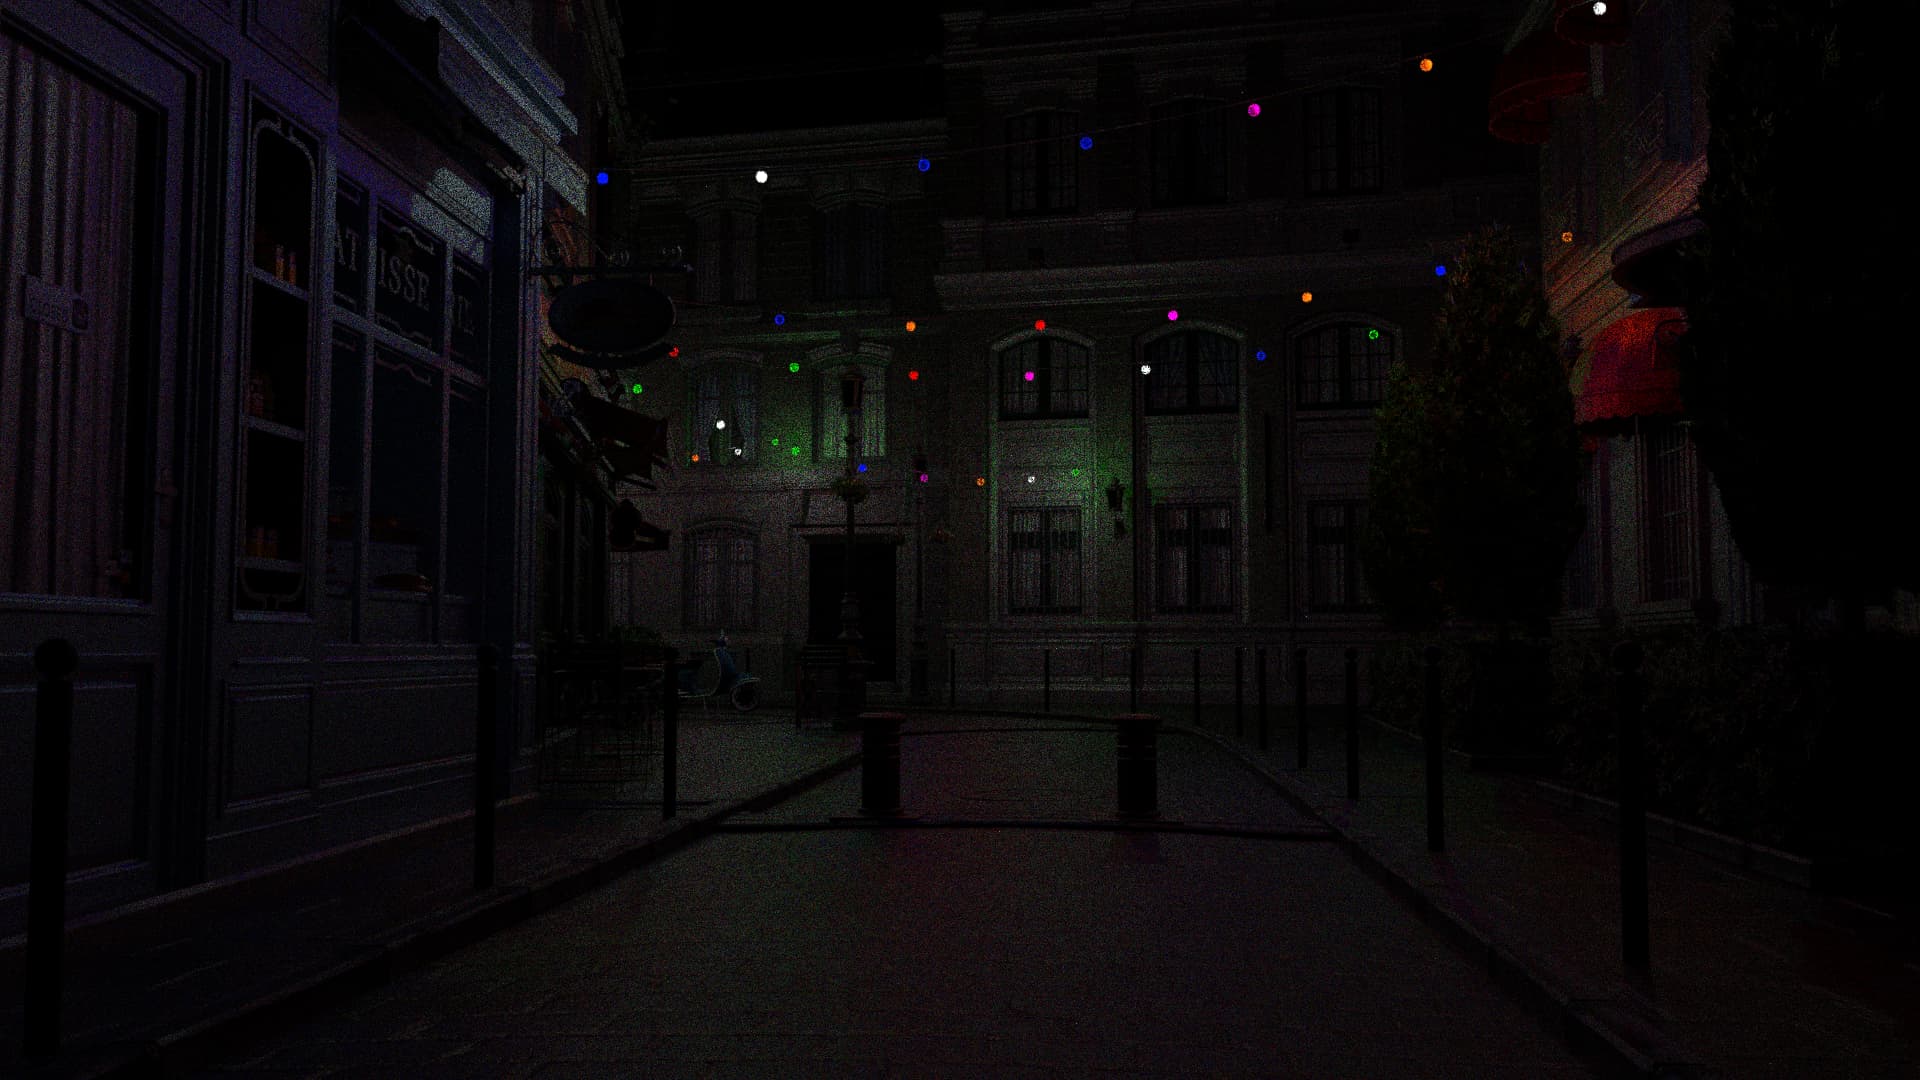
As can be seen in the difference image, there is a general difference in noise in some areas and brightness of certain lights in other areas. The difference in noise comes from the fact the non-many lights sampling image still had a bit of noise in it. The difference in brightness might come from a bug in the Many Lights Samping algorythm or it might be due to the noise. I’m not sure. I personally could not see the brightness difference myself when switching between the two images.
Notes:
Many Lights Sampling render was done at roughly 10,000 samples.
The non-Many Lights Sampling render was done at roughly 30,000 samples.
Here is the difference image from above, but multiplied by 10 to make the differences more noticable:
Attic
As can be seen in the difference images, there are some noise differences (and firefly differences) between the Many Lights Sampling on vs off images. Nothing to be concerned of. However, there is a subtle brightness difference in some areas. And I’m not sure if that’s just noise or an actual difference. I personally could not see the difference myself when switching between the two renders.
Notes:
I actually can’t remember the sample count the relevant renders were at. I’m sorry.
Here is the difference image from above, but multiplied by 10 to make the differences more noticable:
Ladder

In the difference image you can easily tell the brightness of the lights on the ladder are different between the two results. However, it’s not consistent. At least one light has almost identical brightness between the two images.
The differences in brightness of the lights is visible outside of a difference image, this file will need further investigation.
Notes:
Many Lights Sampling render was done at roughly 30,000 samples.
The non-Many Lights Sampling render was done at roughly 40,000 samples.
Here is the difference image from above, but multiplied by 10 to make the differences more noticable:
3 Likes
I wonder if that could be done somehow alongside the path guiding branch.
Alaska had a similar idea about the path guiding branch. For now, a user-defined value is going to be used, but I also have high hopes.
I’d imagine Many Lights Sampling has an equivalent for this?
So right now in Cycles, the triangle is indeed sampled by its relative area. However, when choosing which light source to sample, this probability is uniform (but sampling a point on the light source itself is based off of area/angle/etc). As for many lights sampling, you have a good point that some area/angle will be contributing light, so it would be good to consider that in the importance heuristics.
1 Like
Thanks again for the thorough testing. I’m actually not too familiar with that difference node for compositing - do you know if that’s the absolute difference, or if it’s just many lights - ground truth? If it’s absolute value, it’s possible that some of the different brightnesses are just differences in noise. Otherwise, given that so many samples were taken, there may be some issues with the PDF calculations.
By the way, if you’re still holding on to those renders, could you send them to me through here or the Blender chat? I would like to run idiff as well just to get some more stats on the differences.
I’ll send them through to you on Blender chat
It seems to be absolute difference.
1 Like
For anyone keeping up with development and testing the Many Lights Sampling branch for yourself, I just wanted to let you know something.
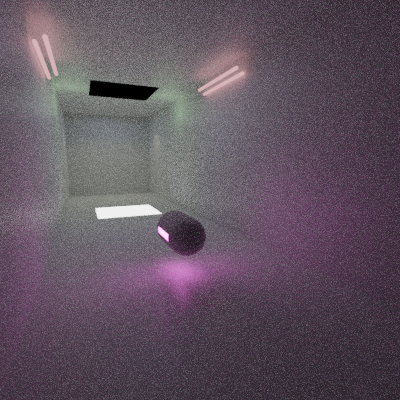
The brightness difference seen in the “Ladder” scene (see attached quote below) is primarily caused by a bug related to instanced light emitting objects. Here is a simple scene where you can easily toggle between instanced meshes or real meshes to see the issue.
3 Likes
Again for posterity, Brecht investigated the issue and discovered that I was overwriting the same entries of the triangle lookup table into the light tree. The latest commit should resolve this issue, but the solution did require some structural changes, so for anyone testing scenes, please let me know if anything working before is now broken.
3 Likes
There might still be a brightness issue at play. It’s almost as if the “Indirect Light” clamping value is not being respected.
Master with Indirect Light clamp = 10:
Many lights with Indirect Light clamp = 10:
Master with Indirect Light clamp = 0:
You can use the scene I provided from last time (make sure to enable LGT_Sun if it’s not already).
1 Like
It is expected for there to be intensity differences when clamping is used. If there is less noise due to improved sampling, less light will be clamped away.
In your example the many lights result has similar intensity as the unclamped result, and similar noise to the clamped result, which is what you’d want to see.
3 Likes
That’s what I thought, too.
No longer needing to clamp light to get noise free results with fewer samples is actually a good thing.
1 Like