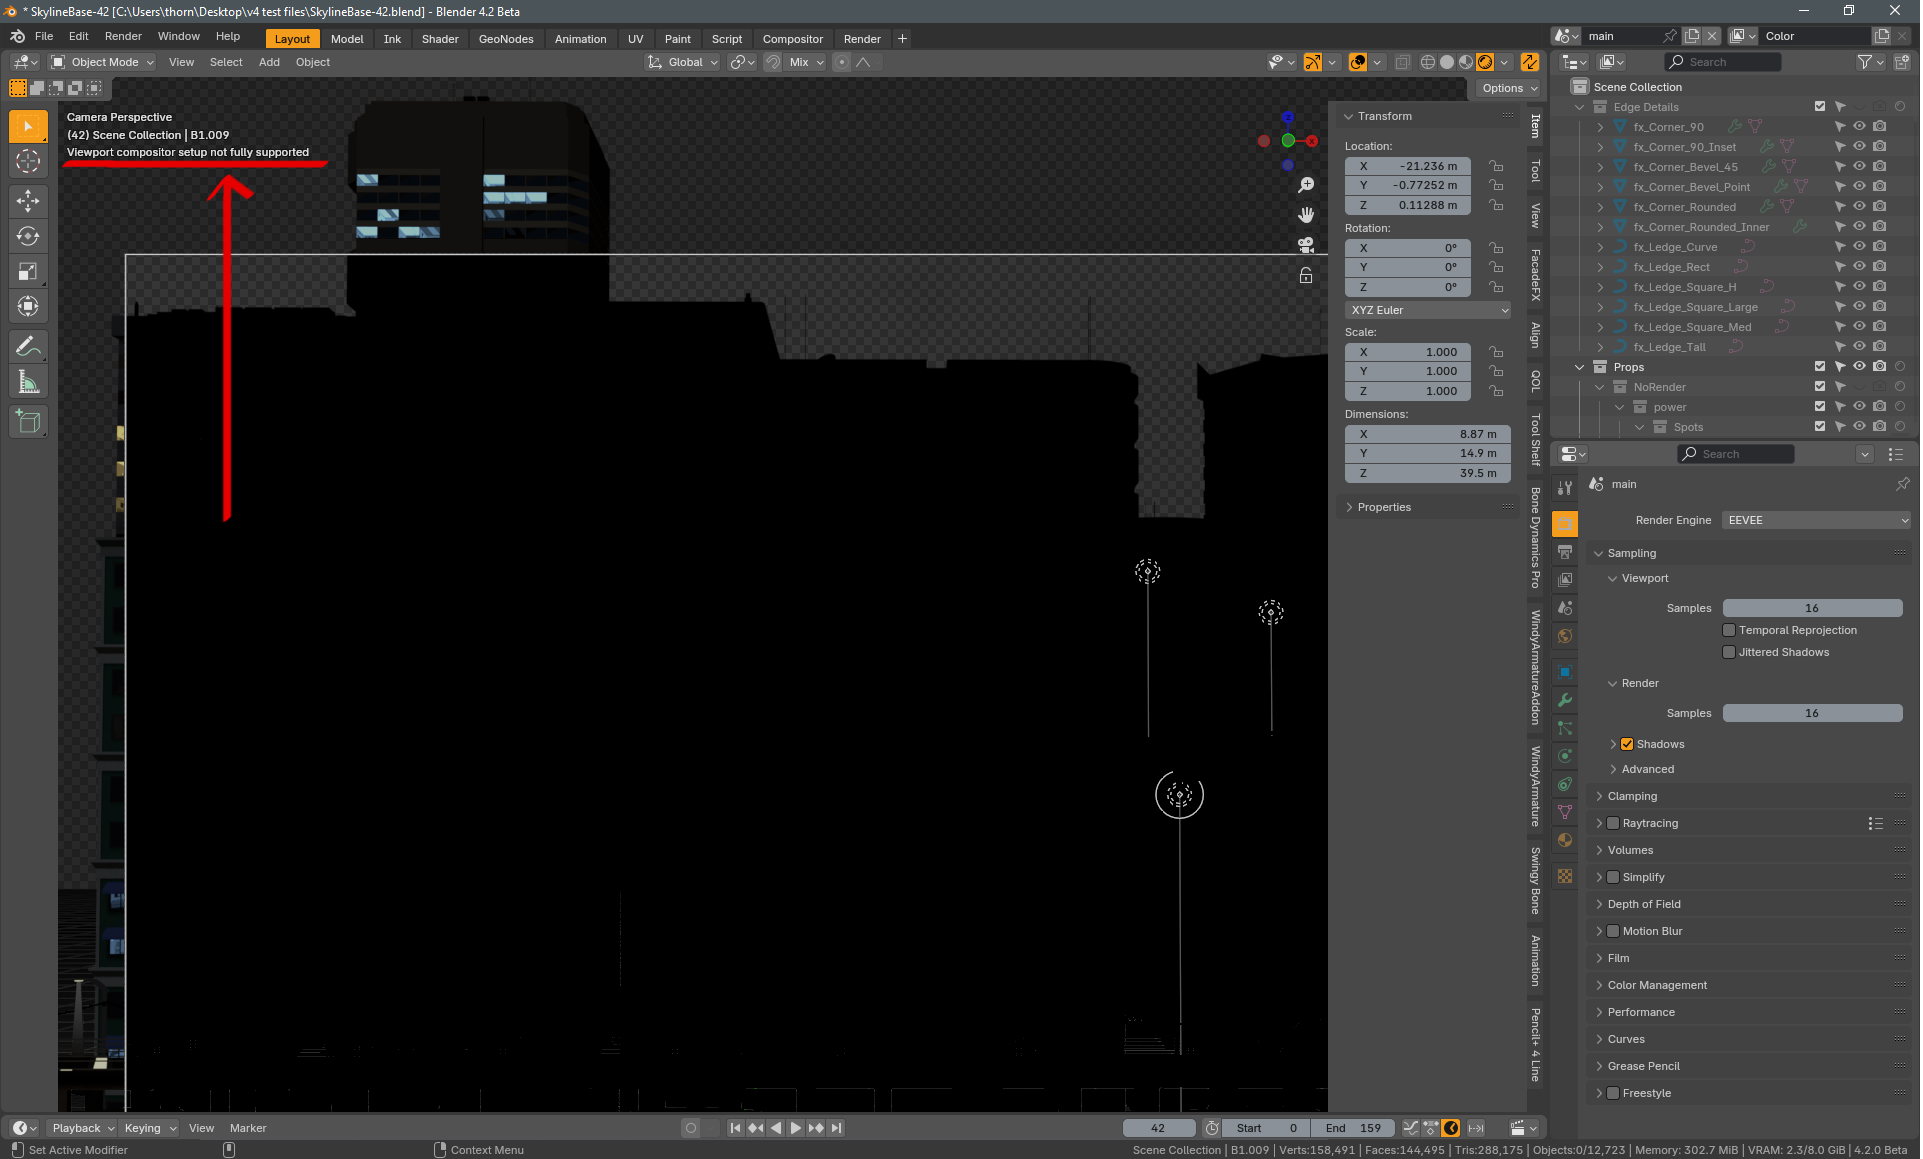
I just made a test render… and shadows just go completely crazy… different shadows for each frame…
… back to Legacy again …This one also no dice on Next.
It’s nothing that special, it’s just a 40Km scenery… 4 million polygons mostly cubes from GIS add-on of New York city… not that many lamps, there’s about 20 in a small location (with distance limited to 10 meters)… maybe they are filling the buffer… but it’s nothing special.
The flickering mostly happen on a shot that the camera dives from sky to street level.
In legacy renders fine even if I set the Sun lamp shadow distance to 10Km.
I think thats because it does not work with temporal denoising, and its a fairly straight foward thing to do on the realtime compositor.
If your pc can handle OIDN well with the gpu compositor, you can just enable that.
I guess that more advanced stuff like AI denoising will come after vulkan is fully implemented, I am pretty sure the devs are trying their best to make all the features bug free for now.
thanks. It might even work with a Filter Size between 0 and 0.9 (it was mentioned to keep it below 1).
Unfortunately it’s not a solution in my case; the price for removing small noise is the rest being pixelated. Will find other ways.
I see it works interestingly well with your volumetrics.
Since it’s expected behavior, it’s not considered a bug.
As far as I know it has always been like this, even in eevee legacy. It’s because sss is a screen space effect and shader to RGB does the bake before that.
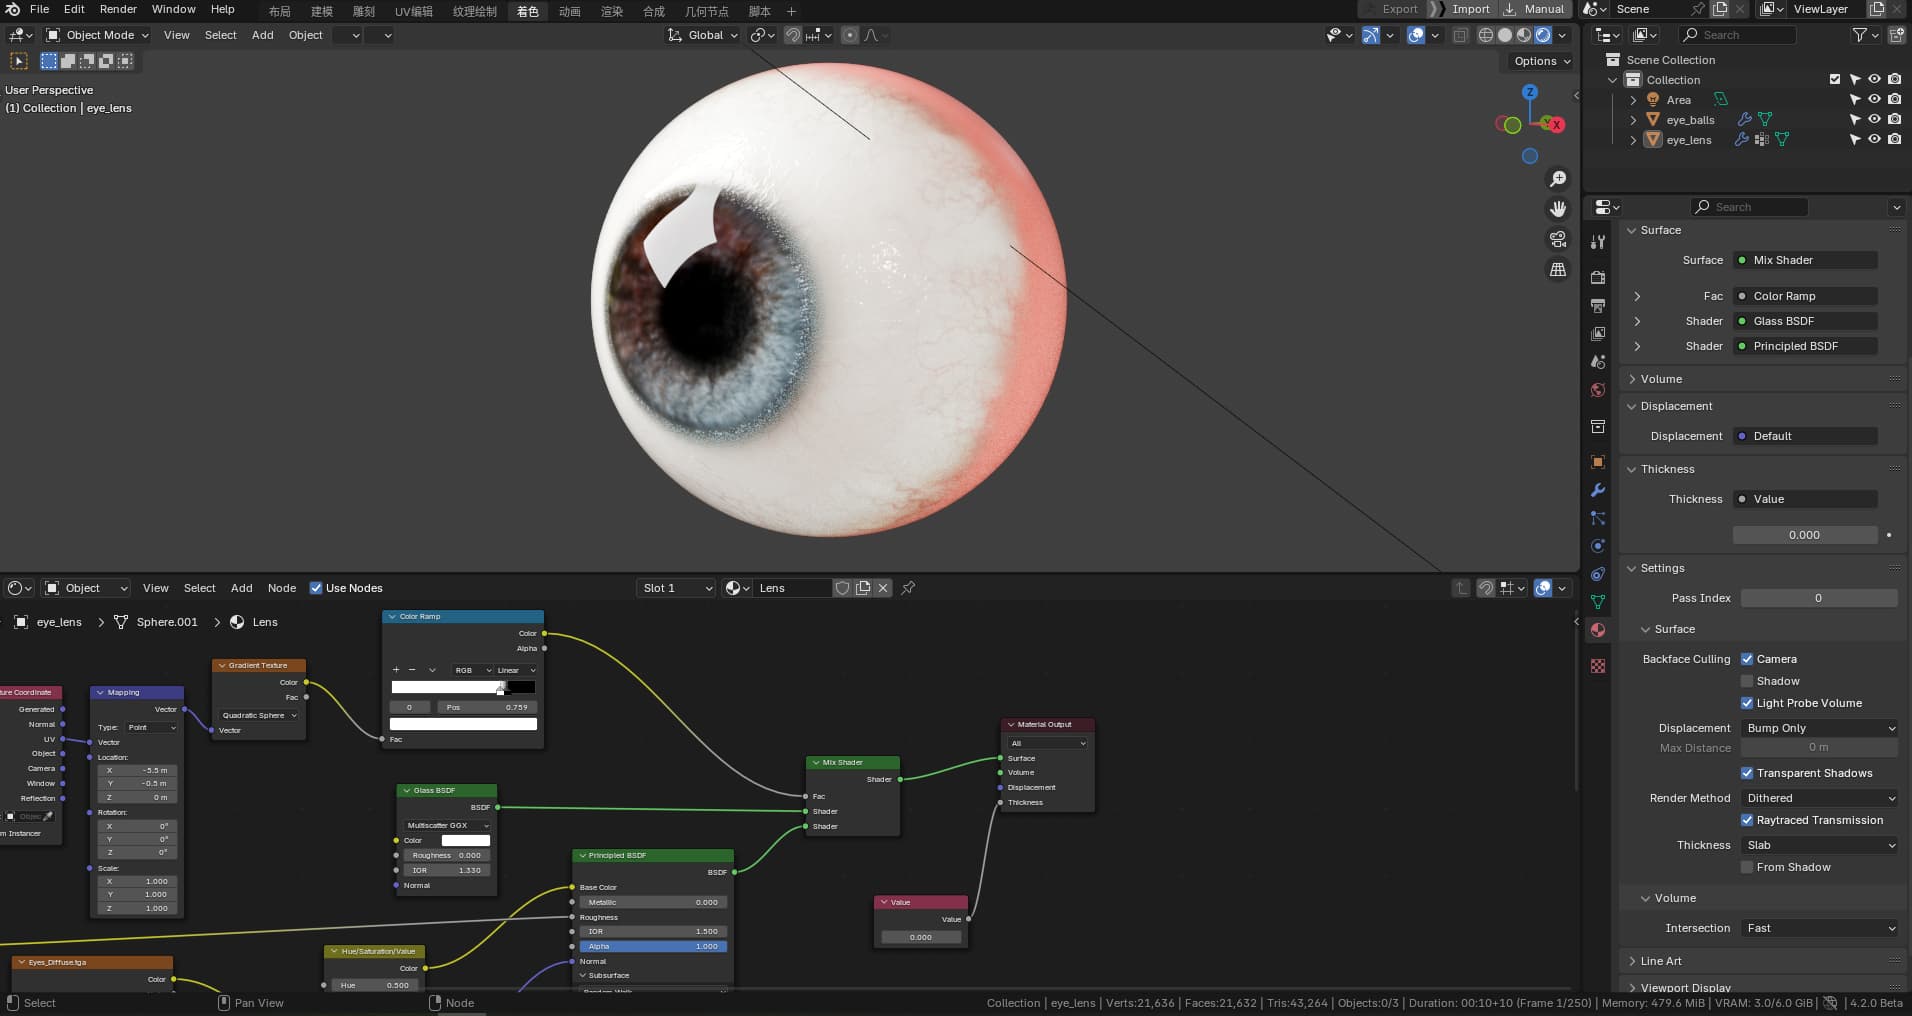
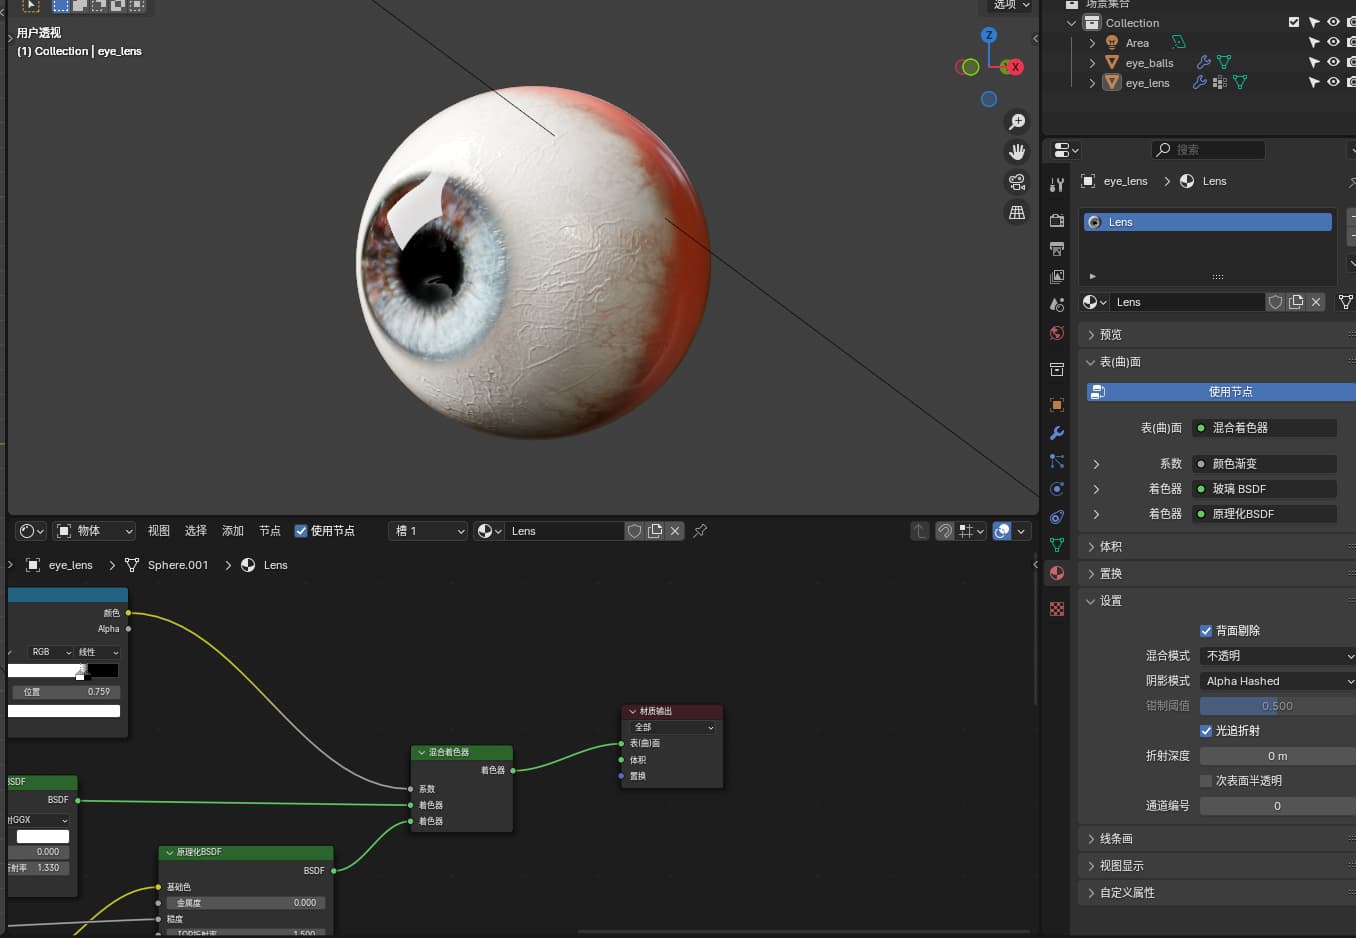
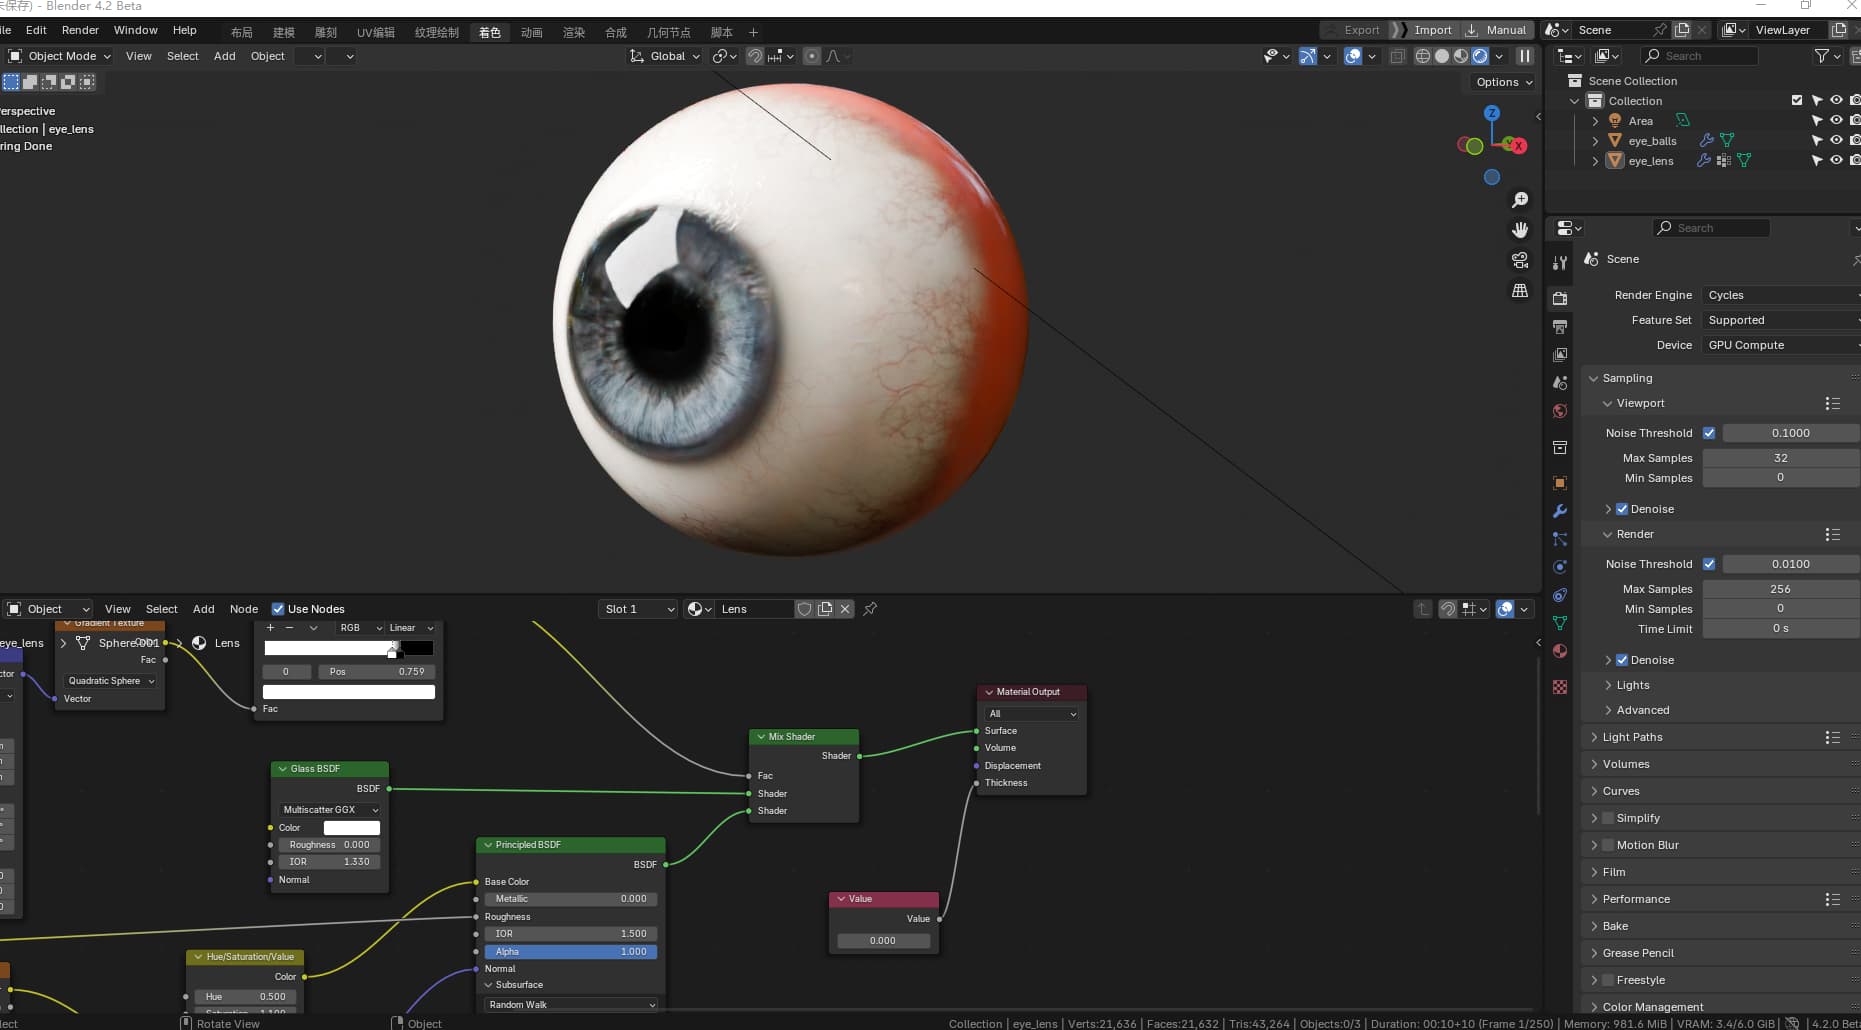
My eyeball material is a mix shader of eyeball and cornea. Eyeball material has subsurface effects.When it is converted to 4.2, a thickness node will be automatically added, resulting in incorrect shadows. Deleting the node can fix shadow,but it cause the transmission effect to disappear.
The hdri light extraction shadow is inverted in 4.2 beta. Also changing light probe resolution in a world settings (next to the sun parameters for hdri shadow extraction) changes intensity of a hdri lighting which i suppose shoulndt happen?
I’ve been actively testing Next, daily in all kind of possible shots used in production.
For me, Next is better in every single thing except:
Shadows that run out of buffer way too fast… it’s like having a Ferrari engine limited to 50Km/h so it doesn’t consume fuel
Bloom… it just ain’t the same thing no matter what one does one never achieves the same easy of use and the same feeling… looks and feels like the flare, not the bloom. Bloom was one key aspect of Legacy…
Next is for sure the way of going forward, everything looks much nicer and feels like it’s competing with UE5! Thanks for the outstanding work!
Question:
Is there anyway on Next to have shadows appearing just at, let’s say, up to 1000 meters from camera and then fade to none!?
We just had a discussion about the Bloom current status.
It was decided we will include a Bloom operator in the Add Node > Filter menu of the compositor. It will create an equivalent of the old EEVEE bloom using multiple compositor nodes. This is the best we can do in the short time we have before release.
In the future, we will provide a all more self contained solution without having to deal with many nodes.
The radius cap on the surface seems like it’d be as easy as changing the min-max value, though since it hasn’t been done already I imagine there’s some issue with it.
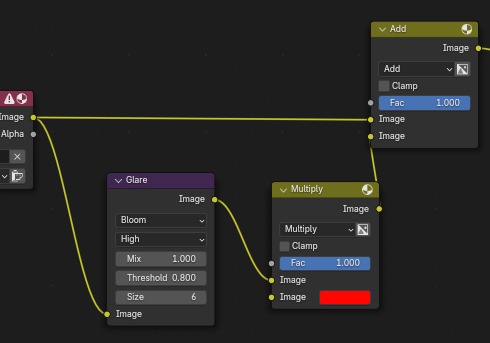
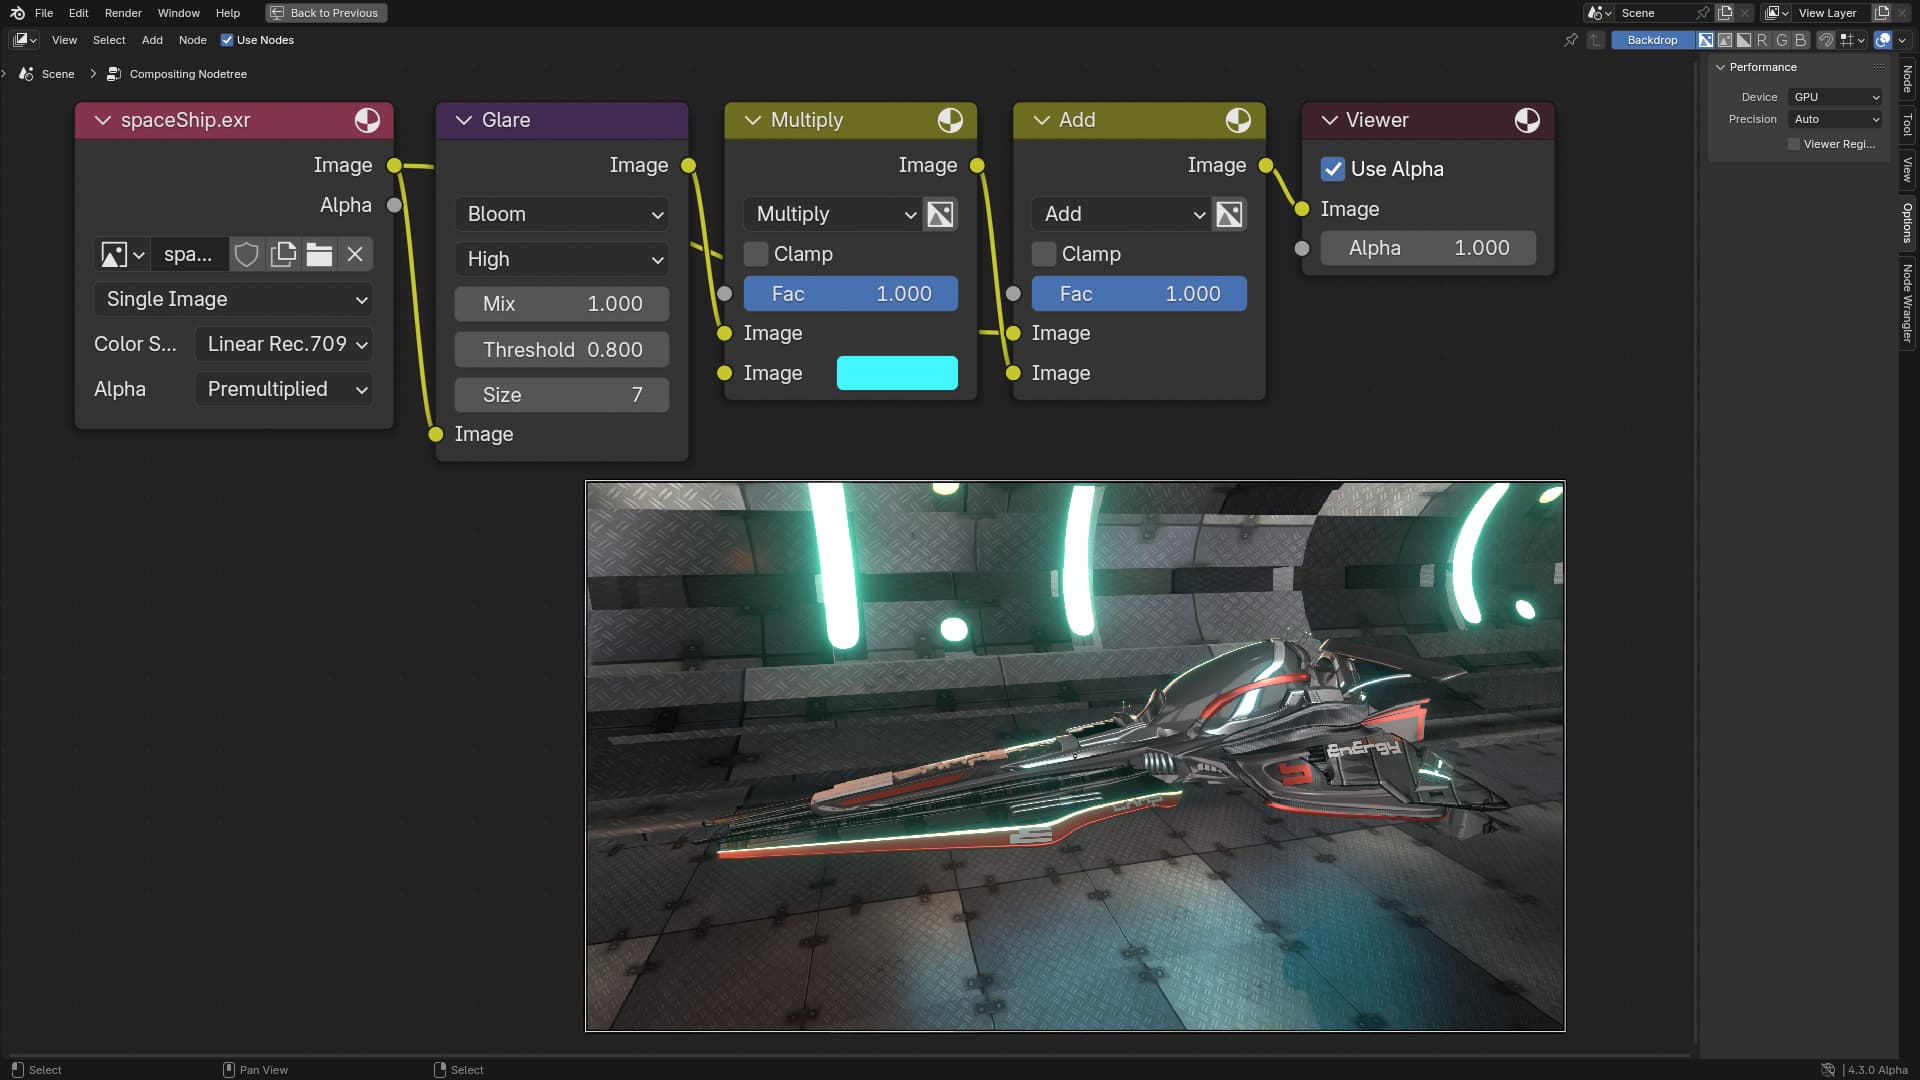
The Color parameter from Legacy bloom can be easily replicated by just multiplying the Bloom before adding it onto the image.
Though I am not sure if the Clamp parameter is possible to replicate too, since currently compositor seemingly doesn’t have a clamp node.
Also a common pain point I’ve been seeing is slow compositor setups (for example using nodes like denoise), so I think a simple solution for it would be adding a Realtime check above every node similar to modifiers, which just mutes them in the viewport but still uses them when rendering.
As you may know, the new EEVEE will not feature the Bloom effect that was previously available in old EEVEE. This is the case because since the introduction of the viewport compositor, it seemed like a more fitting place for post processing effects, allowing greater flexibility and better integration with the rendering pipeline.
To enable that, we implemented a new Glare mode for Bloom. The new implementation is better in quality and more temporally stable than old EEVEE. But it is more limited and less intuitive to control because it was bound by what is already possible by the aging Glare node, a node which we intent to improve in the future as part of the ongoing compositor improvements.
We understand that this change was not easy for you, primarily for two reasons:
The old Bloom was quick to enable as part of EEVEE settings and its parameters were also more quickly accessible.
You can’t get the same results you used to get with old bloom.
For the first reason, we are unfortunately not going to restore Bloom’s old place as part of rendering. Post processing now has a new home, the compositor. This is more robust from the render pipeline point of view, more flexible, and more consistent in design. We understand that it is not as quick to enable or adjust, but hey, maybe while you are visiting the compositor editor to add a bloom node, sprinkle in some sharpening, lens effects, or some color grading to spice up your viewport.
For the the second reason. You do have good points about some of the lost functionalities in the new Bloom node. But it is probably not as bad as you think. You can get very close results to what you are used to with the existing node, as I shall show shortly. We recognize that those functionalities are better as built-in parameters, but the fact of the matter is, it is too late to add that for the 4.2 release.
This is partially my fault, it was my intention to add some of those functionalities for 4.2, like the Knee parameter, but I was apparently deceived by a bux fix that seems to alleviate the need for such a parameter. See:
Anyhow, let us not dwell in the past. For now, I will try to demonstrate the differences between the old and new bloom in a series of examples. If you have some concrete feedback about some limitation of the new bloom, please share them with us, perhaps in the compositor feedback thread. The previous post by @etti is a good example that shows one limitation of the new bloom.
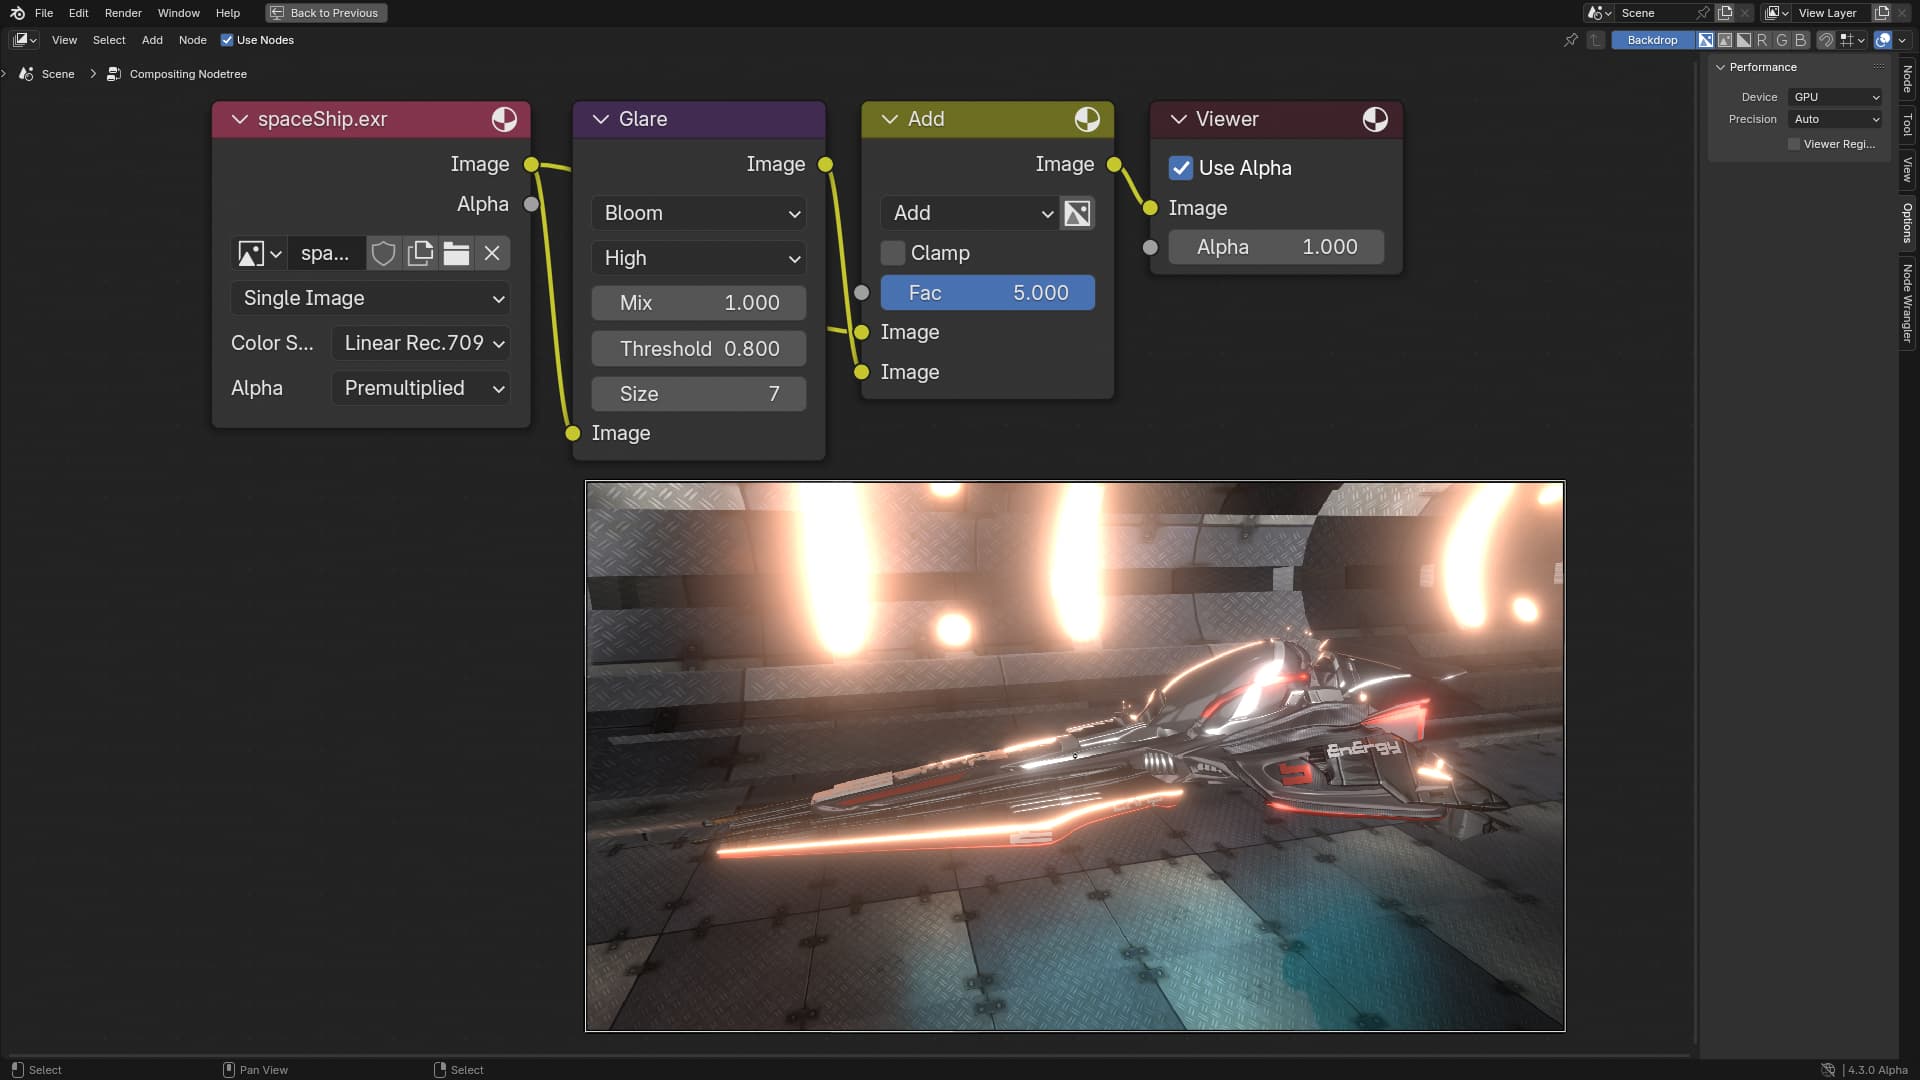
In a lot of cases, the new Bloom will be a drop-in replacement. Just tune the parameters a bit. For instance, here is a side-by-size comparison between old bloom and new bloom for the race spaceship demo scene. The difference is probably not all that noticeable.
The Mix factor in the Bloom node is the same as the Intensity of the old Bloom. They just have a different range. Intensity is between [0, ∞] while Mix is between [-1, 0]. I know, I know, stupid range. In other words: Mix = -1 + Intensity
So if you want to reduce the strength of the bloom, remember to go negative, towards negative 1. If you want to increase the strength of the bloom, go toward zero, don’t go positive. If you want a stronger effect than 0 (Again, I know, I know, ), you will have to add the highlights yourself. Do that by setting Mix to 1, and adding the output to the input manually. In that case, the Fac of the Add node is the Intensity.
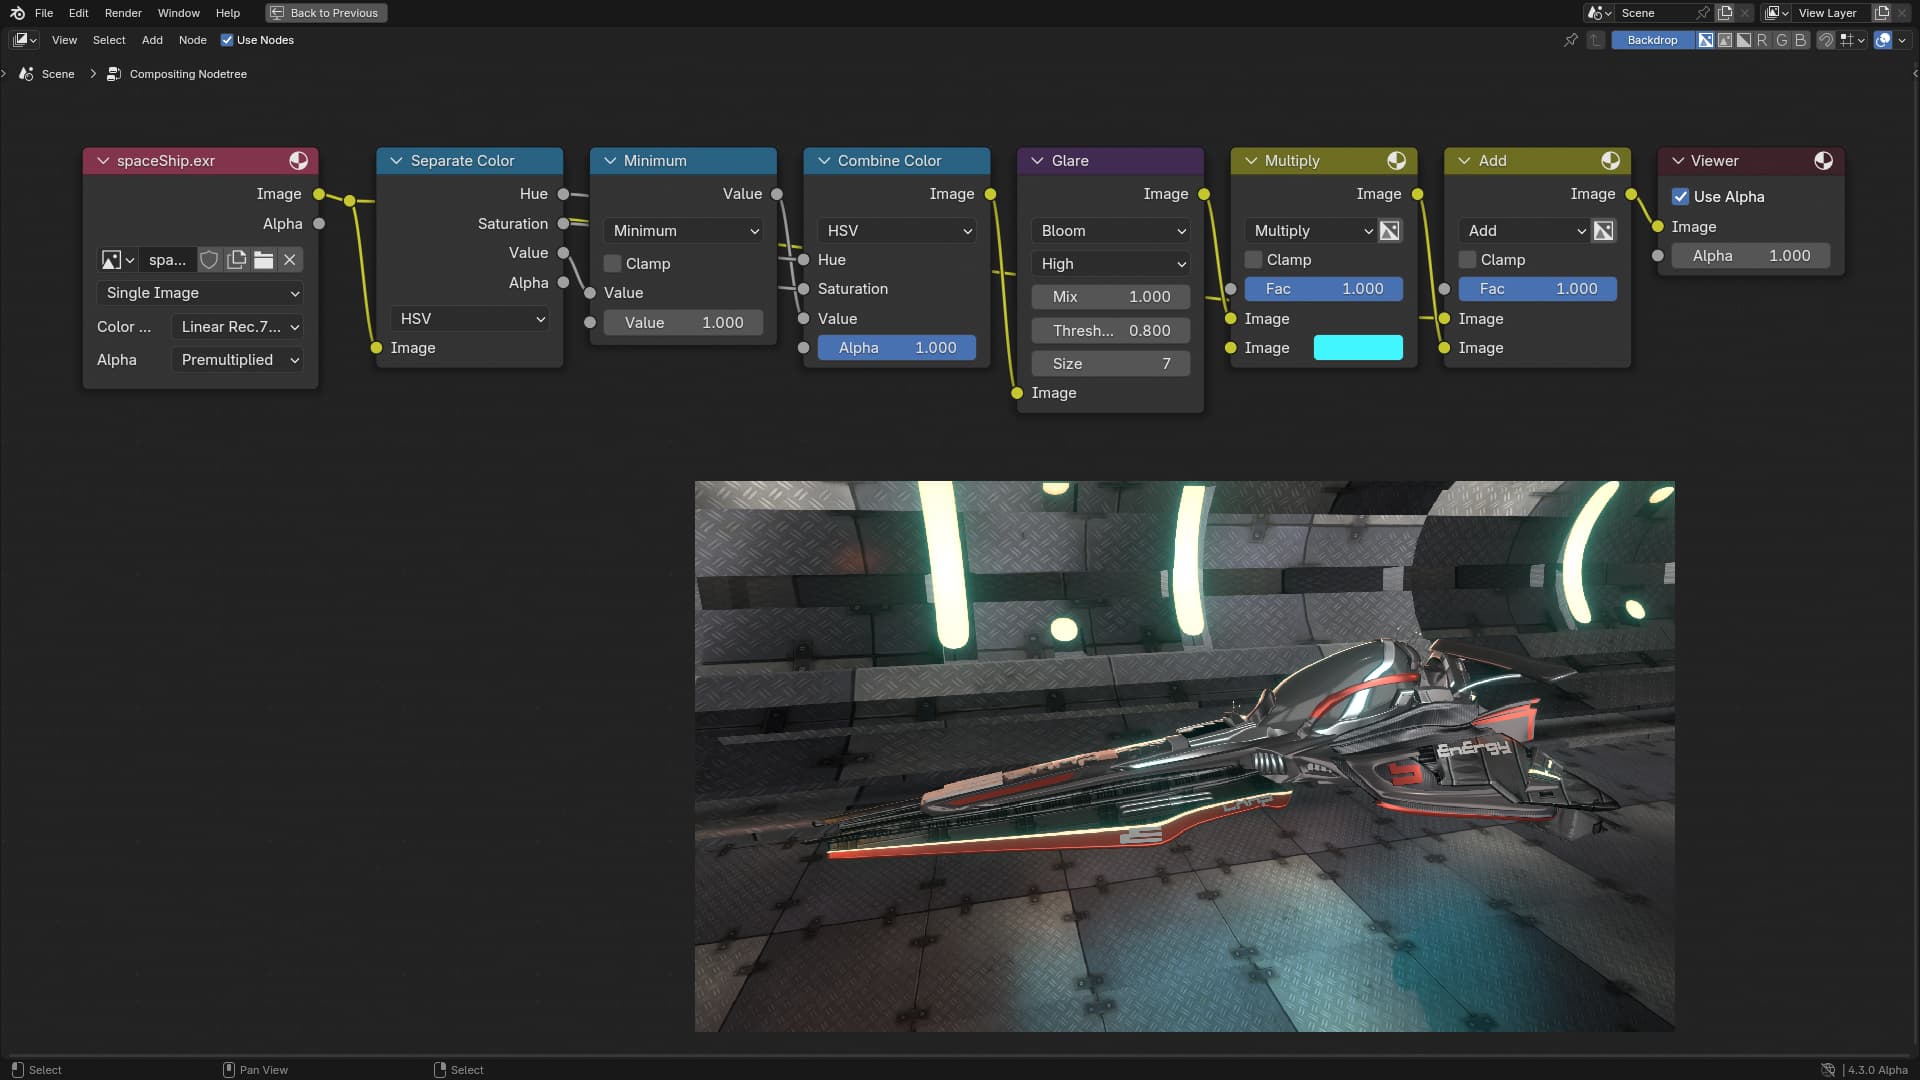
Clamping can be used to limit the effect of very bright highlights. This is not built-in in the glare node. But can be replicated using a minimum node for the Value channel in HSV representation. For instance, here is clamping by 1.
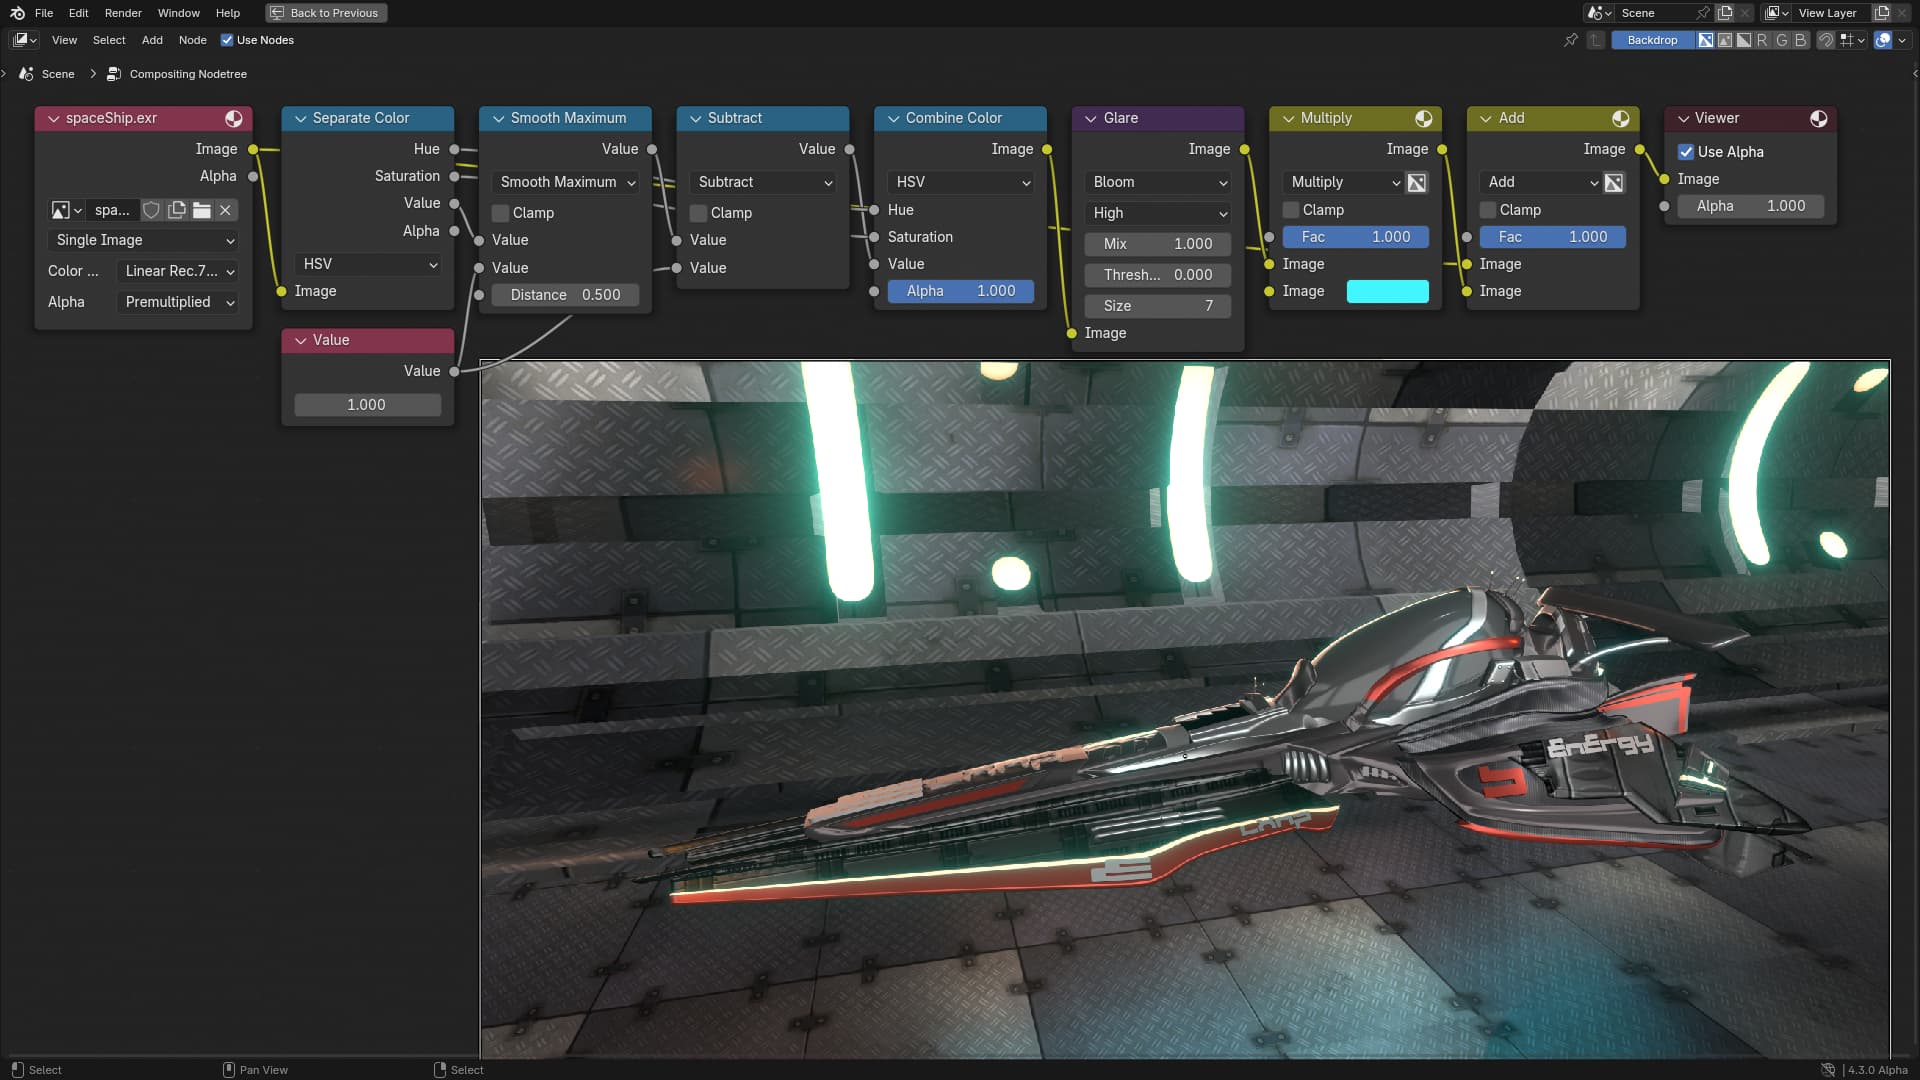
As I mentioned, Knee or Threshold Smoothing is not yet implemented. But can be simulated using a smooth maximum with the threshold followed a subtract by the threshold, also on the V in HSV representation. The threshold in the node should be set to 0. In that case, the smoothing Distance is similar to the Knee parameter:
Threshold is the same between both implementations. But the luminance is computed a bit differently, so you will have to tune the parameters a bit to get a similar result.
Bloom Size
Size is the same between both implementation. But EEVEE allowed fractional sizing. However, you will notice that it is not very smooth or continuous, it suddenly jumps when you change the size. This is a consequence of how bloom is implemented. So you can achieved somewhat similar results to fractional sizing by changing the threshold and mix factors.
As I said, if you have some concrete feedback, please bring it up so that we can help you and so that you can help us improve bloom for future releases.